Also known as sea stars, the starfish is a marine animal that can be seen in shallow and deep waters. The starfish is not a fish but resembles the shape of a star. It has many arms and comes in different colors, sizes, and shapes.
Here is a list of ten beautiful starfish crafts that go with the ocean theme.
Great Starfish Crafts for Preschoolers
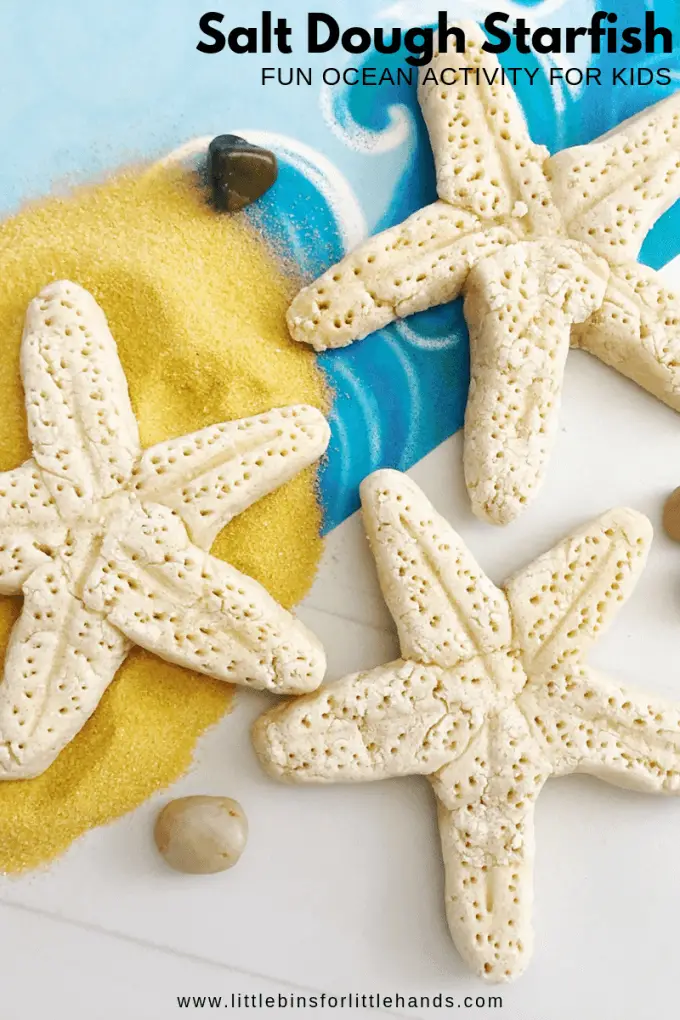
A realistic starfish craft that can double as decor is a perfect activity for the little ones to make. The dough-making activity improves sensory motor skills among children.
This activity is perfect for strengthening those little hands. Strong hands are needed for complicated tasks such as cutting and writing.
In a bowl, combine the salt, flour, and water. Mix very well until it forms a ball of dough. The site suggests using a hand or a stand mixer to make this step easier.
Next, take a small amount of dough and form it into the size of a golf ball. Divide this into five parts, rolling each to create a log shape. Attach each piece to form the starfish. See the detailed pictures on the site for this step.
Smoothen the starfish using the fingers and press a toothpick on each arm to form an indent. Poke holes around the indent to make it look natural. Repeat this process until all dough is used up.
Bake these in a 250-degree preheated oven for two hours. Let them cool and air dry before using.
For this activity, you will need:
- Two cups of flour
- One cup of salt
- One cup of water
- Bowl
- A baking pan
- Toothpick
For more information on this activity, go to LittleBinsForLittleHands.com.

The detailed markings on this starfish are enviable. The rows of dots in varying sizes make this craft resemble the real thing.
Help children improve their fine motor skills and concentration as they make this intricate on their five-armed sea animals.
Mark the center of the paper plate with a dot using a pencil. From there, draw five lines to divide the plate equally. Create an outline of the starfish, with each line in the middle of the arms. This step will create similarly shaped arms.
Refer to the pictures showing the step-by-step process for this part.
Cut out the starfish and paint it red. Allow the paint to dry before adding the white dots. Start with marking the center once again. Place a dot of white paint using a cotton swab. Add four dots around the first one.
Make a row of dots from the center to the end of each arm. Have the children add the varying size of dots to complete the design.
For this activity, you will need:
- Paper plate
- Paint
- Paintbrush
- Cotton swab
- Scissors
- Pencil
For more information on this activity, go to FirstPalette.com.
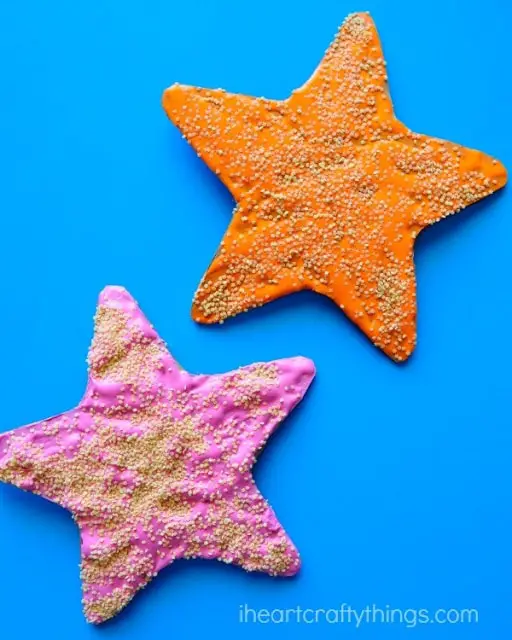
Puffy paint starfish craft is a sensory-filled activity that even young children can easily make with minimal assistance from adults. This craft has a unique texture that children will find interesting to touch and explore.
The finished project looks like colorful stars covered with sand. An appearance that is a common sighting in seashores, especially during low tides.
Make the puff paint by mixing equal parts of shaving cream and white glue. Estimate the amount of paint needed based on the number of starfish that will be made and adjust them accordingly.
The site recommends using a quarter cup each of shaving cream and glue for two starfish crafts.
Once the mixture is combined well, add the paint for color. The mixture can be divided into small containers before adding paint to create more than one color. The puffy paint is now ready to use.
Next, cut out a starfish shape from cardboard and place them on the paint tray to catch the mess during painting. Let the children apply a generous coat of puffy paint to cover the whole starfish.
Sprinkle the pastina pasta while the paint is still wet, and allow this to dry.
For this activity, you will need:
- Cardboard
- Shaving cream
- Glue
- Paint
- paintbrush
- Paper bowls
- Plastic spoons
- Scissors
- Pastina pasta
- Paint tray
For more information on this activity, go to IHeartCraftyThings.com.
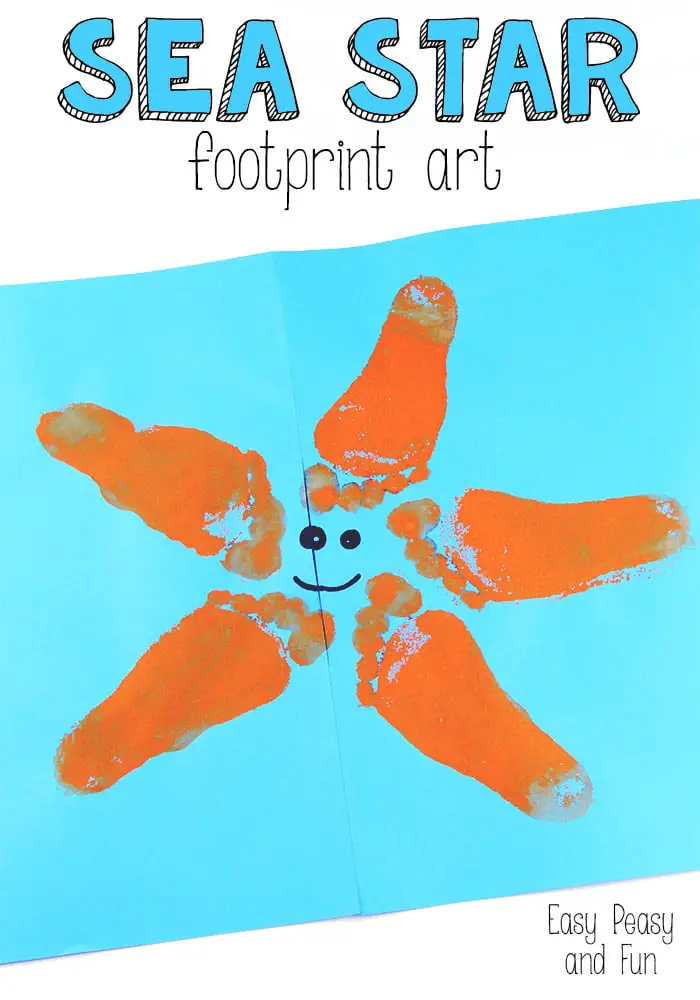
Step up to make a cute and easy-footprint sea animal. Five footprints will make one adorable starfish. This activity will teach children counting and colors while providing an enjoyable sensory experience.
Let children count their footprints and toeprints, identify the color used in this activity, and talk about the sea animal they are making.
Stick two sheets of blue paper together using sticky tape to make it big enough for the five footprints to fit. Next, use a paintbrush or paint sponge to cover the child’s foot with orange paint.
Carefully press the child’s foot on the paper to create the first footprint. Repeat this process four times, ensuring that each footprint has a space between the other and that the toeprints are barely touching.
Make this step easier by tracing a circle in the middle of the two sheets of paper to create a guide. Remind children that they cannot step inside the circle, but the footprints will need to go around it.
Other colors can be used for this activity. Refer to pictures of real starfish when children are hesitant to choose colors.
For this activity, you will need:
- Two sheets of blue paper
- Paints
- Paintbrush or paint sponge
- Black marker
- Sticky tape
For more information on this activity, go to EasyPeasyAndFun.com.
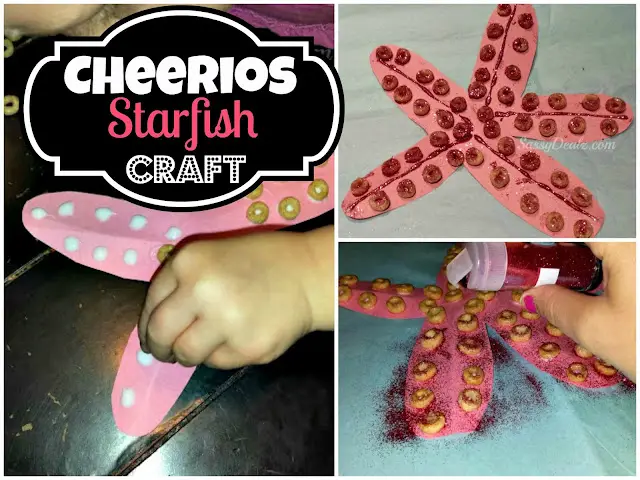
Find a use for the boxes of cereals that have been forgotten in the back part of the cupboard. In this case, use your stale Cheerios to make a starfish that will delight every child.
This craft is simple so that even little children can complete this project from start to finish.
Use this craft to teach numbers and counting. Have them count the number of arms, the number of cheerios in each arm, and the total number of cereals for the starfish. This task will help children practice counting bigger numbers.
Outline a starfish on pink craft paper. Have the child cut this out. Fold each arm in the middle to create two sections. Add small amounts of glue in each section and have the child place a cheerio on each glue dot.
Repeat the process until all arms have Cheerios. Next, add a thin layer of glue to the folds. Have the children sprinkle glitter on it. This step will create a line between the sections. Let this dry completely.
For this activity, you will need:
- Glitter
- Cheerios
- Pink craft paper
- Glue
- Scissors
For more information on this activity, go to CraftyMorning.com.

This craft shows a 3D version of the colorful sea stars nestled closely in the sea. Children will find this highly interesting because of the art technique called frottage.
This technique will require children to create impressions by carefully rubbing the crayons on the paper placed on top of a chosen texture plate or surface. The visible markings will create unique prints on paper.
Encourage children to make these starfish as they learn more about this art technique while improving their fine motor skills.
Download and print the starfish template on the site. Cut out the pieces and trace them onto white cardstock. Next, find textured surfaces to use. The site recommends Lego plates, terrarium lids, window screens, baskets, tiles, and others.
Place the cardstock on the textured surface and lightly rub the crayon. Ensure that the whole starfish is covered with textured print. Repeat the process with the other starfish using other surfaces.
Cut out the starfish and fold the legs to create dimension. Cut out seaweeds from green paper and a sandy landscape from beige paper. Glue these on blue paper and add the colorful starfish.
For this activity, you will need:
- Printed starfish template
- White cardstock
- Colored construction papers
- Crayons
- Textured surfaces
- Scissors
For more information on this activity, go to FirefliesAndMudpies.com.
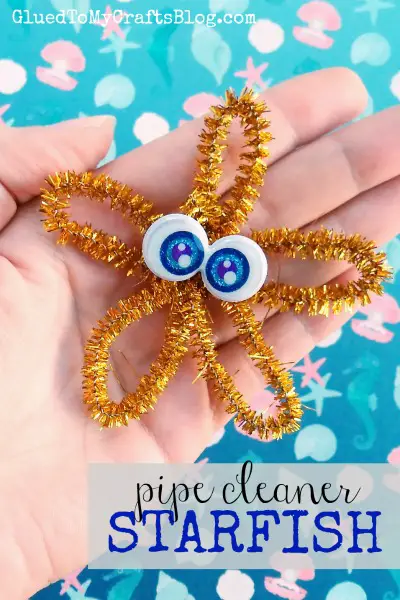
Create an easy starfish by just using a pipe cleaner. Teach children to fold and bend the pipe cleaner to make the starfish’s arms. Doing this will make their finger muscles stronger and more coordinated.
Strong finger muscles are necessary for writing and cutting activities. This craft is simple to make but needs to be accurate to create the arms so that an adult may assist children on this step.
Have the children bend the pipe cleaner in a five-point zigzag pattern. Let them think of five letters Vs that are interconnected as they fold. For younger children, mark the parts on the pipe cleaner that will be bent as a guide.
Next, join the ends of the pipe cleaner by twisting them so they will stay in place. Use craft glue to add the googly eyes.
Use different colors of pipe cleaners to make a galaxy of starfish. Let them count the sea stars, arrange them according to colors, or use them in centers or discovery bins for play.
For this activity, you will need:
- Pipe cleaners
- Googly eyes
- Craft glue
For more information on this activity, go to GluedToMyCraftsBlog.com.
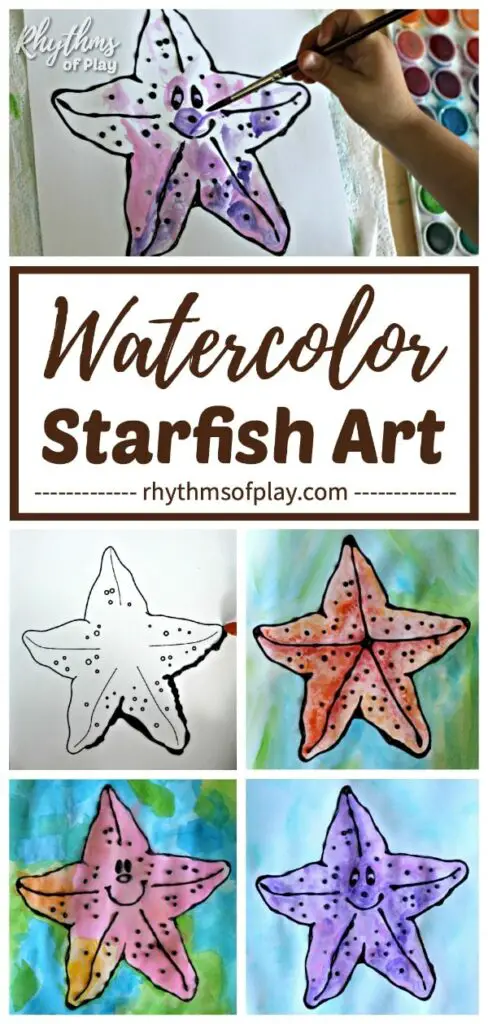
This watercolor resists art and is easy to make, even for young children, but it may require some preparation. Let children practice their painting skills as they create colorful starfish that can be displayed at home or in class for everyone to admire.
Start with drawing a starfish on watercolor paper. Another option is to use a template. The site provides downloadable templates of starfish that come with different designs to choose from.
Outline the starfish with a paint-resist agent such as black glue, black oil pastel, or crayon.
The black glue needs to be prepared in advance by mixing some black acrylic paint in the glue bottle and mixing it well. Ensure that the glue is completely dry before painting. The glue will create a bumpy texture on the starfish.
The black oil pastel or crayon are also options. These require no drying time, and the starfish can be painted immediately after outlining.
Let the children paint the starfish. Focus on adding colors and blending to create their desired look.
For this activity, you will need:
- Printed starfish template
- Glue
- Black acrylic paint
- Watercolor
- Paintbrush
For more information on this activity, go to RhythmsOfPlay.com.

The sandpaper in this craft provides a unique texture to the finished project, so it is highly recommended that this be used. However, if sandpaper is unavailable, regular cardstock paper may be used as a substitute.
Children will improve their fine motor skills by cutting, folding, and coloring the starfish. Make several of these and use them to compare sizes, colors, and designs or markings.
Outline a starfish on the back of the sandpaper and cut. The site provides a free starfish template that can be used for this step. Just download, print, cut, and trace on the back of the sandpaper.
Fold each arm in half to create a 3D-looking starfish. Use paint or oil pastels to add colors and designs to the starfish. Let the paint dry before using.
Use this craft to go with the book “Starfish” by Edith Thacher Hurd. This book discusses all the scientific facts about starfish in the most straightforward manner for young children to understand easily.
For this activity, you will need:
- Printed starfish template
- Sandpaper (9-inch by 11-inch)
- Paint
- Paintbrush
- Pencil
- Scissors
For more information on this activity, go to ALittlePinchOfPerfect.com.
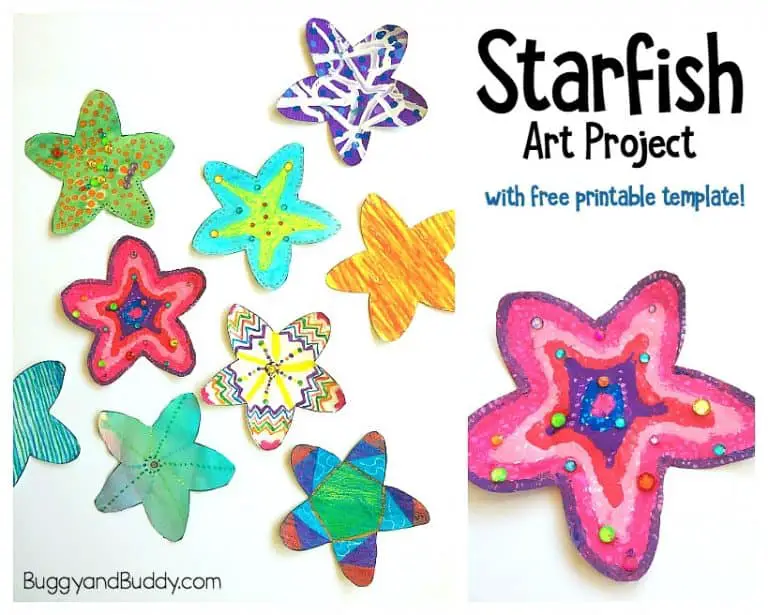
This process art starfish craft can be customized to suit the child’s preferences. Use this craft to teach colors by letting them use as many or as few colors as they want. They can also blend colors if desired.
Teach simple designs, such as making different lines curved, straight, wavy, diagonal, etc., to create a texture. Use decorative materials to create a textured craft that will provide a wonderful sensory experience for the young.
Start by downloading the free starfish template on the site. Print and use this to trace on the art paper or print the template directly on the paper. Cut out the starfish and let the children add their designs.
Let children explore the different techniques in making art. Each work will be a unique piece that will be a great piece for conversation. Discuss the art process with the children.
Ask them questions about their choice of colors, materials, and the added details. Encourage children to discover and express themselves about what part of their art reflects their personalities.
For this activity, you will need:
- Printed outline
- Scissors
- Glue
- Oil pastels or crayons
- Paints
- Paintbrush
- Decorative materials such as sequins, gems, etc.
For more information on this activity, go to BuggyAndBuddy.com.
Conclusion
Starfish are interesting and unique animals that children will love to re-create in their homes or classrooms. Making these crafts will help them improve different skills and learn about the animals and their life in the sea.
Consider using these crafts as part of your lessons. These activities can be tailored to the child’s ability and can be used to provide tons of fun for children. Thanks for reading!


