This eight-armed animal has fascinated experts for quite some time. They may have no spine and bones, but they make up for their nine brains and three hearts.
Help children explore the wonders these animals bring by making lessons engaging and fun through these ten striking octopus crafts.
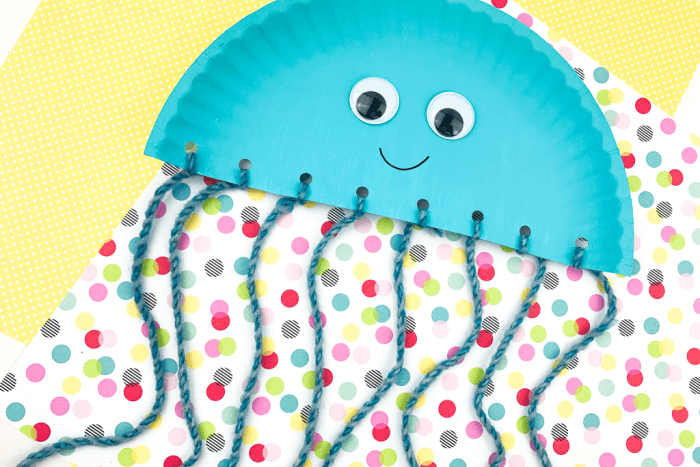
This blue octopus stands out because of its simplicity, yet it will provide a good amount of fun for children. Children will improve their fine motor skills by cutting, painting, and tying the yarn to assemble this wonderful craft.
Tying activity helps children improve their hand-eye coordination skills. However, for younger children, it is recommended that an adult assist since this step might be difficult for their tiny hands.
Start the craft by cutting the paper plate in half. Paint it blue and add a second coat if necessary. Let the paint dry.
Punch eight holes on the straight edge of the paper plate. Ensure that the holes are evenly spaced. Next, cut eight pieces of 12-inch yarn. Tie them in each of the holes to make the arms.
There are several ways that this craft can be modified, as recommended by the site. The first is to use ribbons instead of yarns. A ribbon with a bigger width may be easier for children to insert in the holes and tie.
The second suggestion is to use glitter or glitter glue to make the octopus craft sparkly. Lastly, use a different paper plate size to create octopuses that can be used for big and small or mother and baby lessons.
For this activity, you will need:
- Paper plate
- Paint
- Paintbrush
- Yarn
- Hole puncher
- Googly eyes
- Black marker
- Scissors
- Glue
For more information on this activity, go to LifeOverCs.com.
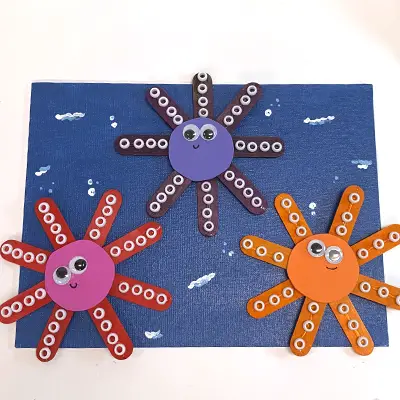
These adorable octopuses are presented on a blue backdrop to create a stunning ocean feel. This craft is simple and easy to make, even for young learners.
Children will improve their three-finger grasp as they pick up and glue the tiny beads on the craft sticks. They will also practice cutting and circles, which is more challenging than just cutting straight lines.
Use this craft to teach counting. Begin with smaller numbers as they count the number of the head and eyes. Next, have them count the arms and the beads on each arm.
Lastly, let the children count the total number of beads on all the arms to practice counting bigger numbers.
Start this craft by painting a small square of canvas with blue. While the paint dries, cut circles from craft foam. This part will become the head of the octopus. Use three different colors to make three unique octopuses.
Glue the craft sticks together in the middle to form an asterisk shape. Let this dry before attaching the head. Add the googly eyes and the ring beads on each of the sticks. Finally, stick these octopuses onto the blue canvas.
For this activity, you will need:
- Colored craft sticks
- White ring beads
- Googly eyes
- Craft foam
- Paint paintbrush
- Canvas
- Scissors
- Craft glue
For more information on this activity, go to CraftProjectIdeas.com.
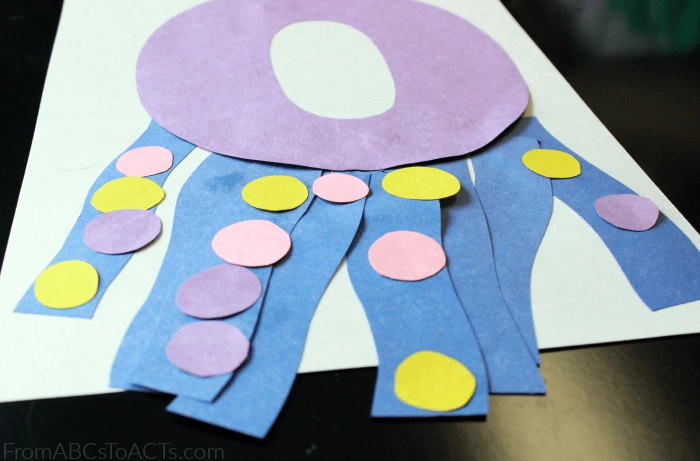
Here’s a great way to make an octopus craft while learning the letter O simultaneously.
This activity is also good practice for children to learn to decide as they choose their preferred color for the letter, the tentacles, and the circles for the suction cups on the tentacles.
Modify this craft by letting children practice writing the letter O. Instead of adding colorful circles for the suction cups, ask children to use different colors of markers to write as many letter O as they can on each tentacle.
Start this craft by cutting an outline of the uppercase O. Cut eight wavy paper strips to make arms. Cut two white circles for the eyes. Cut circles from different colors of construction paper or use a circle punch for this step. These are for the suction cups.
Ask children to glue the eight arms on the bottom part of the letter O. Next, let them glue the suction cups on each of the arms. Lastly, glue the white circles for the eyes. Use a black marker to add the pupils and to draw the mouth.
For this activity, you will need:
- White cardstock
- Scissors
- Glue
- Construction papers
- Black marker
For more information on this activity, go to FromABCsToACTs.com.
See also: Letter O Worksheets
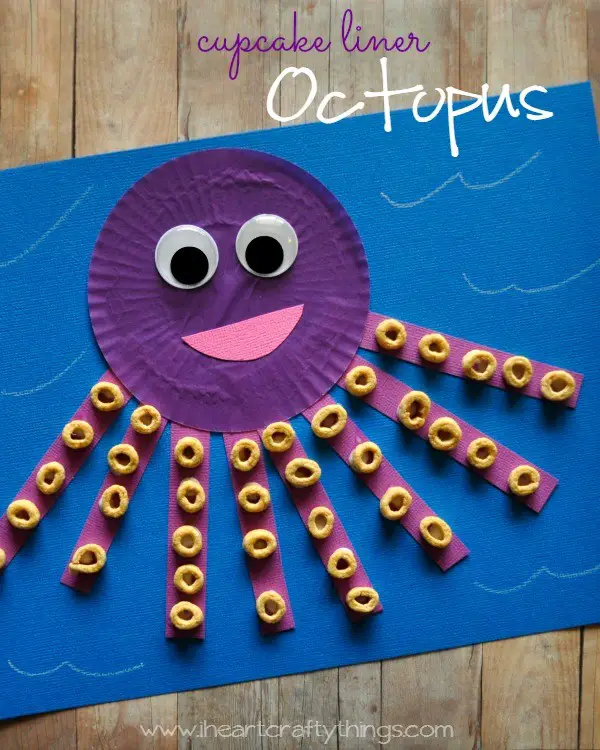
Make this adorable and round octopus that even young children will have fun with and can complete in such a short time. With this craft, children will strengthen their concept of the circle shape while learning more about this sea animal.
Use old or stale Cheerios or any round-shaped cereal for the suction cups on the octopus’s tentacles. This sensory activity will be a big hit among children.
Ask the young learners about the shape of the cupcake liner, the eyes, and the suction cups. Children should be able to connect these materials’ shapes with the circle.
As the site recommends, use this craft to go with the book “Tickly Octopus” by Ruth Galloway.
Cut eight paper strips from purple cardstock for the octopus’s tentacles. There is no exact measurement for the paper strips, but the site suggests using the cereal as a reference to estimate the width.
Next, flatten and glue the purple cupcake liner in the middle of the blue cardstock. Cut out a half-moon shape from the pink cardstock for the mouth. Glue this on the cupcake liner together with the googly eyes.
Next, attach the tentacles and the cheerios for the suction cups. Let this dry before using.
For this activity, you will need:
- Purple cupcake liner
- Cardstock paper
- Googly eyes
- Cheerios
- Crayons
- Scissors
- Glue
For more information on this activity, go to IHeartCraftyThings.com.
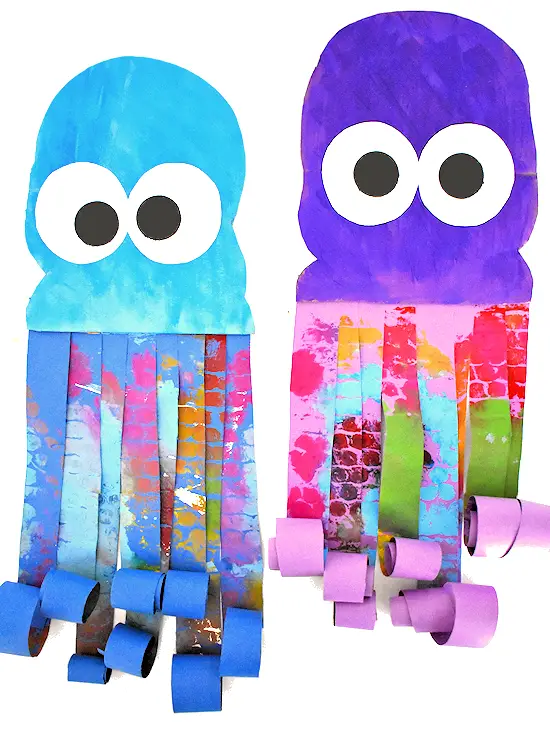
Make a textured octopus craft by recycling bubble wrap and cardboard from packages that will end up in the trash. Use this craft to teach art concepts such as color mixing and adding layers of colors for depth.
Use this craft to teach children one of the octopus’s unique characteristics. It can blend into its surroundings by changing its skin texture as a way to camouflage.
Start with cutting an oval shape for the head of the octopus. There is no template for the octopus head, so refer to the pictures on the site for this step. There is also no recommended size for the head of the octopus.
Paint the octopus head and allow it to dry completely. Next, lay out the bigger bubble wrap than the construction paper. Use the paintbrush to spread the different colors of paint on it.
However, ensure that there is just enough paint to make the print on paper. Too much, and the paint will run. Address this by using a paper towel to blot off the excess.
Press this firmly on the chosen color of cardstock and carefully lift it off. Let this dry completely before cutting.
Next, punch out two big circles from white construction paper for the eyes and two smaller circles for the pupils.
Assemble the octopus by gluing the tentacles on the back part of the head. Once dry, use a pencil to curl the ends. Attach the white circles and the pupils to complete the craft.
For this activity, you will need:
- Cardboard
- Bubble wrap
- Paints
- Construction paper
- Scissors
- Glue
- Circle punch
- Pencil
For more information on this activity, go to OurKidThings.com.
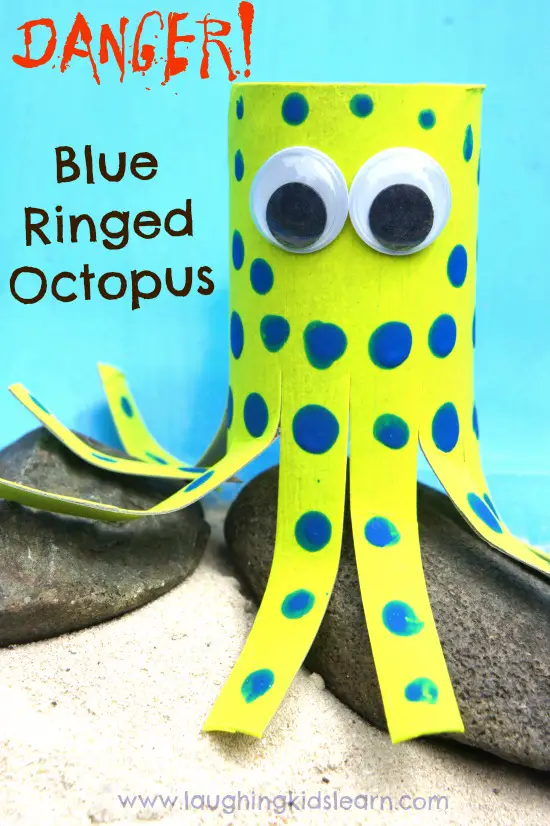
This octopus craft will open doors to discuss animals that may look harmless but are highly dangerous in real life. One of these is the blue-ringed octopus, which contains a deadly form of toxin that can kill humans.
Use this craft to have a Life Science discussion on this particular species of octopus. Talk about its habitat, location, food, and other unique characteristics.
Show videos and books to give children a good idea of the animal’s behavior and other features.
Compare this species with other octopuses’ physical characteristics, such as colors, markings, and size.
Make the octopus by painting the paper rolls yellow. Add another coat if necessary. Allow the paint to dry before snipping the ends to make the eight tentacles. Next, stick together the googly eyes right above the tentacles.
Finally, add the rings by using blue paint. Dip the end of the paintbrush to make the dots on the tentacles. Vary the size of the rings to make them more interesting to look at. Let the paint dry. Finally, curl the ends of the tentacles.
For this activity, you will need:
- Toilet paper roll
- Blue and yellow paints
- Scissors
- Googly eyes
- Glue
For more information on this activity, go to LaughingKidsLearn.com.
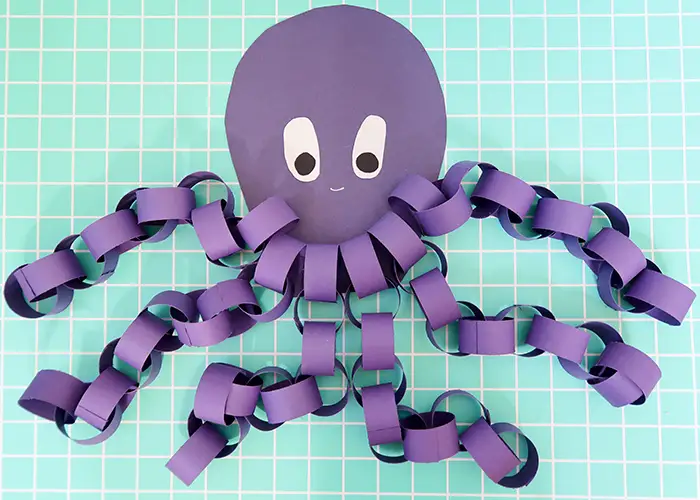
Paper rings are easy to make for young children. It will help them practice their cutting skills and improve their hand-eye coordination as they adhere to both ends of the paper strips.
Make this octopus craft with paper rings to display at parties or as decor for the ocean-themed lesson.
Cut paper strips from blue or purple paper. The size of the strips should be six inches long and an inch wide. It is advisable to mark the paper with lines to guide children when cutting.
Attach both ends using the hot glue gun to make the first ring. Insert the second paper strip through the ring to make them interconnected. Continue the process until the chain contains ten rings.
Each chain of rings represents one tentacle. There should be eight chains for a single octopus craft. Draw an oval shape from the same paper color to make the head. Cut this out.
Make the eyes by cutting two oval shapes from white scrap paper and two circle shapes from black scrap paper. Glue the black circles onto the white oval. Once the eyes are ready, stick them on the head.
Use the silver pen to draw the mouth. Attach the chains to complete the octopus.
For this activity, you will need:
- Purple or blue paper
- Black and white scrap papers
- Paper cutter
- Hot glue gun
- Silver pen
For more information on this activity, go to WooJr.com.
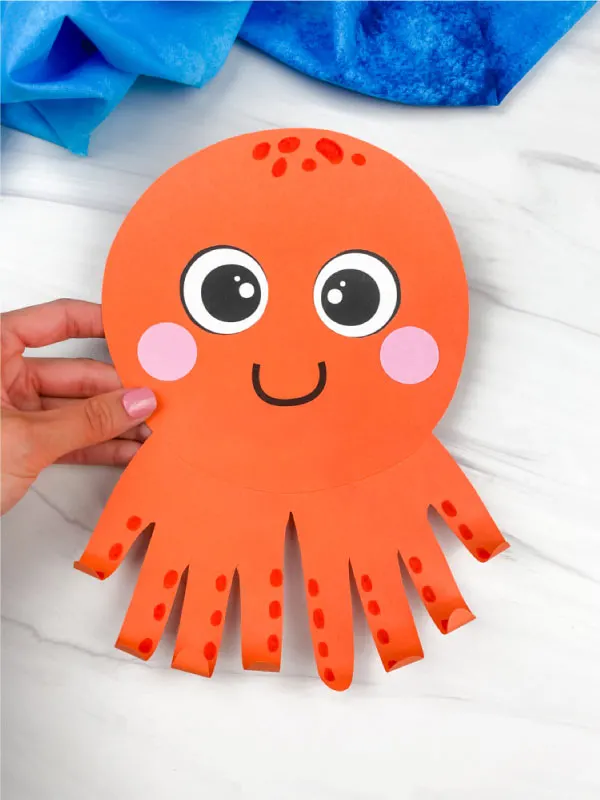
These handprint octopuses are adorable and easy to make using the free octopus template provided by the site.
Use this craft to go with the book “My Octopus Arms” by Keith Baker, which talks about the different things an octopus’s arms can do. This craft can be used to retell the story.
Make several of these in to teach counting, numbers, and colors. Change the shape of the mouth to teach children about different emotions.
Download and print the free octopus template from the site. Cut out the pieces. Trace and cut the head on different colored cardstock and the two circles on pink cardstock. Cut out the eyes and glue them later on the finished craft.
Trace and cut out the child’s handprint on the same colored cardstock as the head. Cut the thumb part on the handprint to make both hands equal to the number of tentacles.
Next, put together the head by attaching the eyes and the pink cheeks. Attach the handprint to the back of the head. Use the marker to add the suction cups on each of the tentacles.
Lastly, curl the ends of the tentacles using a pencil.
For this activity, you will need:
- Printed octopus template
- Colored cardstock
- Scissors
- Glue
- Pencil
- Purple marker
For more information on this activity, go to SimpleEverydayMom.com.
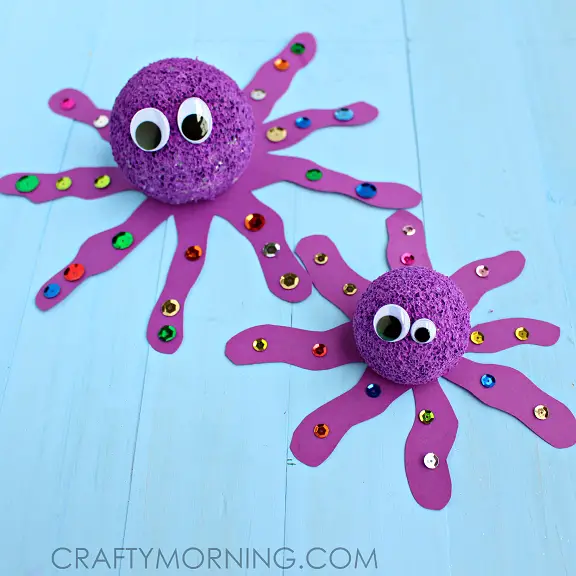
This 3D version of octopus is easy to make and looks silly enough for kids to enjoy and love. The tentacles can be designed using different embellishments to create fun and fantastic-looking arms.
Children will learn to cut a more challenging pattern with the wiggly arms of the octopus. Assist as they learn to coordinate their hands by holding the scissors in one hand and turning the paper with the other.
Start with painting the foam ball with the color purple. Allow the paint to dry. Next, place the ball in the center of the purple paper. Use this as a reference to draw the wiggly tentacles. Secure the ball with sticky tape to prevent it from moving.
Next, take out the ball and cut out the tentacles. Glue the foam ball in the middle. Add the googly eyes and decorate the tentacles with embellishments like sequins and jewels to make them look glammed. Lastly, add the googly eyes.
For this activity, you will need:
- Googly eyes
- Foam balls
- Purple paper
- Scissors
- Glue
- Sequins
- Purple paint
- Paintbrush
For more information on this activity, go to CraftyMorning.com.
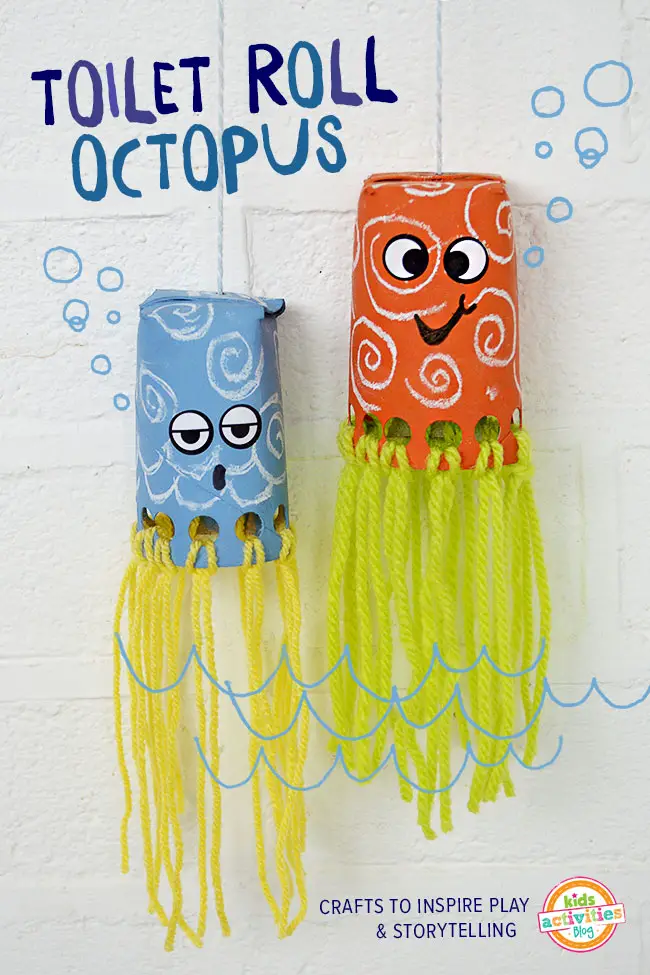
These toilet paper roll octopuses have the cutest faces and intricate markings that children can make using chalk. Hang these on walls as decors for the ocean-themed classroom.
Teach children the use of different lines to make designs. First, practice making the lines on clean paper using chalk before applying it to the toilet paper roll. Show children the different line designs that they could make.
Use simple lines such as interconnected scallops, zigzags, swirls, curlicues, spirals, straight lines such as vertical, horizontal, and diagonal, or make a combination of these.
Cut four slits on the toilet paper roll about an inch in length. Fold these to make four flaps like a box. Secure them with glue. This part will be the head of the octopus.
Next, use the hole punch to make eight holes on the other side. Paint it with bright color and let it dry. Draw the chosen line designs using chalk.
Cut several inches of yarn and tie it to each of the holes. Refer to the pictures on the site for this step. Finally, attach the googly eyes to complete the craft. Poke a hole in the head and insert a string to hang it.
For this activity, you will need:
- Toilet paper roll
- Yarn
- Googly eyes
- Chalk
- Paint
- Hole punch
- Scissors
- Glue
For more information on this activity, go to KidsActivitiesBlog.com.
Conclusion
These octopus crafts are fun and easy to make. Use these to teach children about the animal’s uniqueness and the need to care about the environment they live in.
These crafts can be tailored to fit every child’s skills and interests. Don’t hesitate to use these activities as part of the ocean-themed lesson in class. Thanks for stopping by! Hope to see you again soon.
Other preschool activities you might like:


