As the weather gets colder, many of us start spending more time indoors. If you’re looking for a fun indoor activity to do with your kids, why not try one of these cute and easy squirrel crafts? These projects are perfect for preschoolers, and they’ll love seeing their finished products on display. Plus, crafting is a great way to promote fine motor skills, creativity, and problem-solving.
Great Squirrel Crafts for Preschool
There are so many cute and easy squirrel crafts for preschoolers! These crafts are perfect for an autumn day or to go along with a lesson on animals. With just a few simple supplies, you can make paper bag squirrels, scaredy squirrel paper plates, toilet paper roll squirrels, easy printable squirrels, and dixie cup squirrels. So get out the glue and glitter, and let’s get started!
This craft is perfect for preschoolers as it helps them develop fine motor skills, practice following directions, and learn about squirrels. All you need for this craft are a few simple supplies:
- Squirrel Template
- Brown paper bag
- Construction paper (white, pink, and brown)
- Black marker
- Scissors
- Glue stick
Instructions:
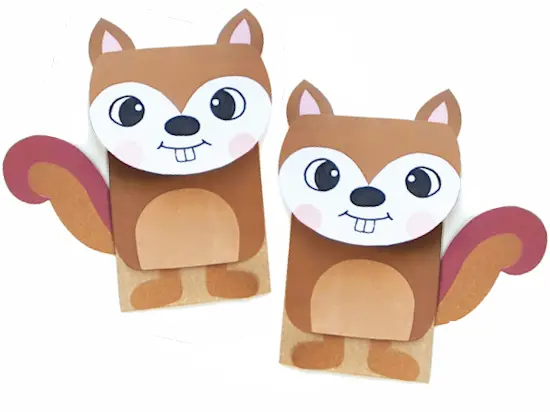
Make a squirrel pattern. Cut out the pieces and paste them together. Trace the tail, body base, head, ear outlining, and leg forms on medium brown paper. On dark brown paper, trace the bottom of the tail and the belly design. On light brown paper, trace the round blush shapes and inner ear designs. The face pattern and round blush shapes should also be traced on white paper; do not cut them out yet. Cut out the drawn patterns once they are traced.)
Glue the bottom strip of the tail pattern to the bottom side of the main tail pattern. Also, attach the face cutout on the bottom side of the head cutout. Attach the inner ear patterns in between each outer ear pattern. Then, glue on the ear patterns over the head pattern and attach pink blush cutouts to both cheeks of the papercraft squirrel’s head.
Draw the squirrel’s eyes, nose, and mouth with a black sharpie. Then glue the leg cutouts near the open side of the paper bag. Glue the body base cutout on the leg, covering up part of the paper bag’s outside surface. Attach both tail patterns to either side of the paper bag. Finally, apply glue to the back of the head cutout and attach it to the body.
Your paper bag squirrel craft is now complete! We hope you had fun following these instructions and crafting along with us.
You may check out more details about this craft at Our Kid Things.
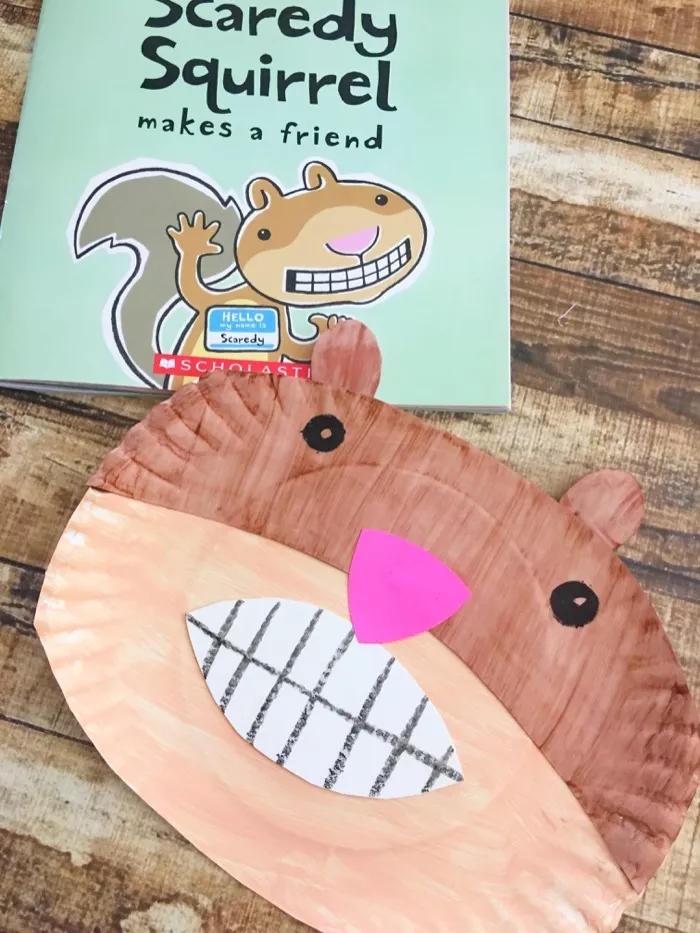
Are you reading the Scaredy Squirrel books by Melanie Watt with your child? This craft will provide a hands on activity to go along with the books. With this fun paper plate craft, preschoolers can learn about painting, cutting, and completing each piece while having a blast!
What supplies do you need?
- Paints (brown and tan)
- Paper plates
- Cardstock (pink)
- Crayon (black)
- Foam paint brush
- Scissors
- Glue
Directions:
1. Make an oval shape by cutting the top and bottom part of the first paper plate and paint it using a tan color. For the second paper plate, do the same but cut more on the bottom part and leave 2 1/2″ inches wide on the paper plate strip.
2. For the second paper plate strip, cut out a small nose hole at the bottom and paint it brown (this will be the top of the face). Cut out two small ears from your leftover paper plate scraps and paint them brown. Then use those same scraps to cut out a football shape for teeth. Finally, cut a small triangle out from pink paper for the nose.
3. After your pieces have dried, glue the top brown face first, then the ears. Draw the teeth onto the white football shape with a black crayon, and glue it on the bottom half of your mask. Positioning the nose so it is centered above the teeth, use a crayon to draw two small eyes onto the top brown face.
Your Scaredy Squirrel paper plate mask is now complete! Be sure to take a photo and share it on Facebook or Instagram.
Visit Celeb Baby Laundry for more ideas for this craft.
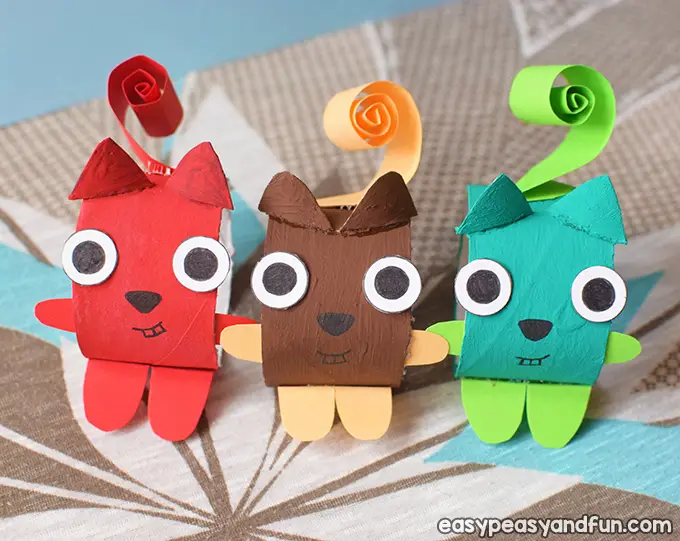
This Toilet Paper Roll Squirrel is a fun and easy craft that preschoolers can make with just a few supplies. With this project, they will learn how to cut, glue, and paint.
You will need:
- Toilet paper roll
- Glue
- Scissors
- Acrylic paint(any color)
- Cardstock (white)
- Colored Paper
- Black liner
- Paintbrush
- Ruler(with circle shapes)
Instructions:
- First, remove 1/3 of the toilet paper roll. Then cover the section with acrylic paint. Cut out a vivid color paper stripe. Starts rolling the stripe to create a curl.
- Make one long, flowing lock for each tiny hand and one small wooden leg for the heart-shaped structure that will serve as legs.
- Check the illustration closely before you make two big eyes and two little hands using a ruler with circle forms and black liner cuts. Use scissors to cut out the eye shapes.
- Glue the eyes on the toilet paper roll. Draw a little nose, a mouth, and two teeth sticking out on the face. Stick some glue on the hands and legs, then add them to the body.
- Cut out two ears and place them on top of the head. The tail will be folded like this (the end is curled up). Glue it to the body after painting it in your preferred hue of acrylic paint.
Your Toilet Paper Roll Squirrel is now complete! Enjoy! What other animals can your child make using toilet paper rolls? Have fun and be creative!
See more details at Easy Peasy and Fun.
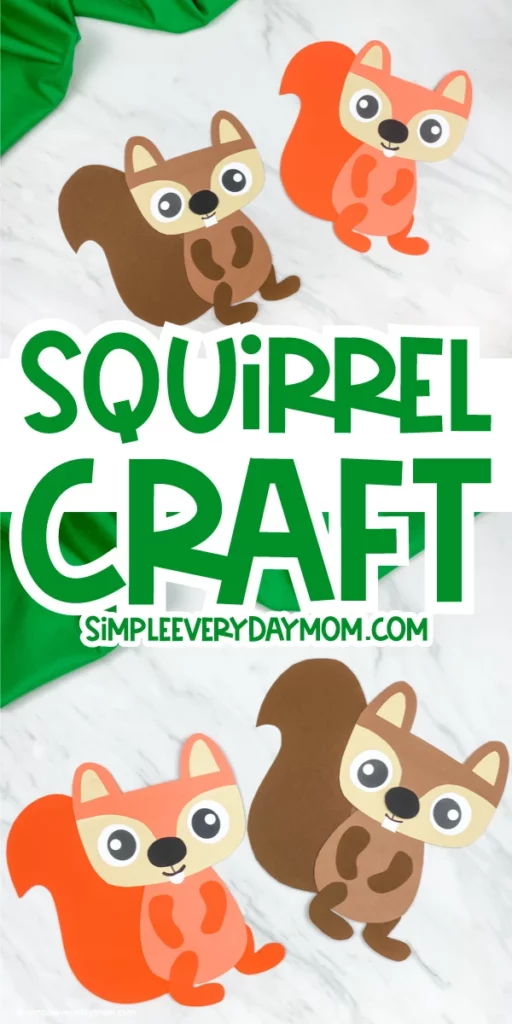
This easy printable squirrel is a cute and easy craft for preschoolers. It’s a great way to introduce the concept of patterning, and kids will love creating their own squirrel friend. Plus, it’s a perfect opportunity to practice those scissors skills!
You’ll need:
- A squirrel template
- Colored cardstock
- A glue stick
- Scissors
Here’s how to make it:
- Download, print, and cut out the squirrel template. Take the top part of the head and glue it to the base part of the head—glue the inner ears to the headpiece.
- Next, glue the eyes just below the squirrel’s face. Finish the face with the squirrel’s nose placed above the mouth line. Glue the completed head on top of the body and let it dry.
- Glue the tail of the squirrel to the left side of its body and head. Place the left leg in front of the body and the right leg behind.
- Glue the arms to the legs just above them, then glue them in place. Cut a tiny tooth from white paper and attach it beneath the mouth for a cute finishing touch.
- Now your squirrel is finished! You can make a whole family of them by printing out the template on different colored paper. Have fun!
You can now visit Simpleeverydaymom.com to print your cute squirrel template!

This Dixie cup squirrel craft is perfect for introducing autumn-themed crafts to your preschoolers! They will love learning how to make their own adorable squirrel friend, and you’ll love watching them explore their creativity. Plus, it’s a great way to teach them some essential skills like fine motor control and color recognition.
Here’s what you’ll need:
- A Dixie cup
- Construction paper
- Acrylic paint
- Googly eyes
- Pom pom (pink)
- Glue
- Sharpie
- Scotch tape
Instructions:
- Paint a Dixie cup white and allow it to dry. Over your white, paint another acrylic color, leaving a tiny strip of white unpainted for the squirrel’s face and chest. Make a tail out of construction paper. It should be approximately the width of your cup.
- Cut a strip of paper and roll it length-wise. Then, cut two ear-shaped triangles out of construction paper in the same color. To make the inner part of the ears, cut smaller white triangles and glue them inside the larger ones. Attach the completed ears to the top white section of your cup.
- Next, affix a set of googly eyes underneath. Cut out two feet from the construction paper and use a black Sharpie to draw in lines for claws. For the nose, glue a small pom pom onto the face. Also, with the Sharpie, draw on a mouth, then finally glue or tape on the tail. To let everything dry properly, stand your squirrel up by its tail.
There you have it! Your very own Dixie cup squirrel to take home and show off to your family.
For more detailed instructions, check it out at The Pinterested Parent.
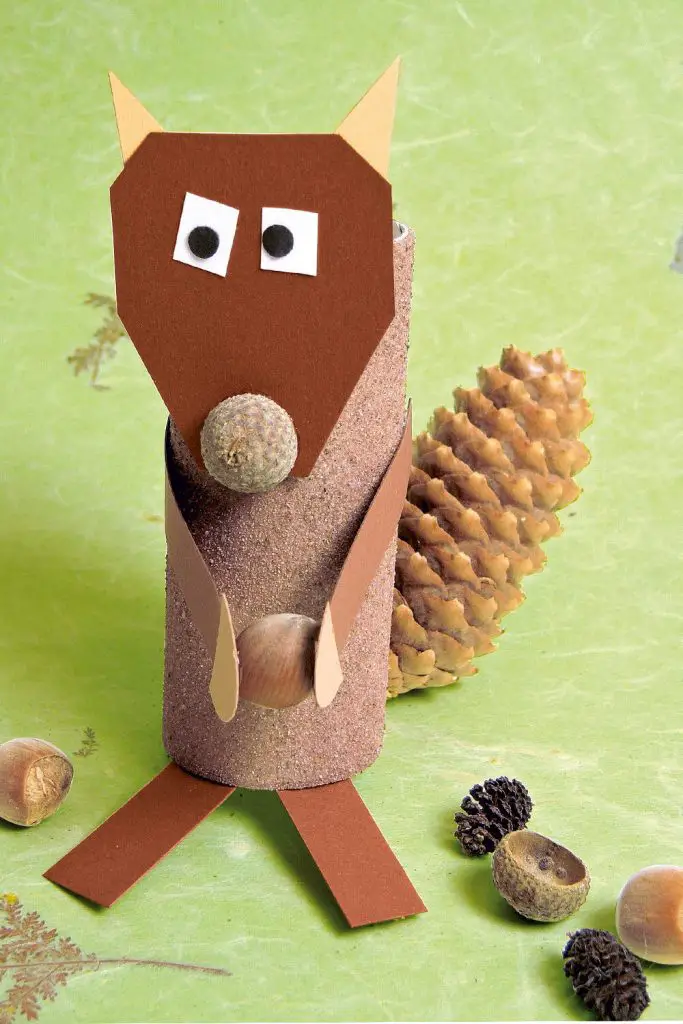
This toilet paper roll and pine cone squirrel are fun and easy crafts for preschoolers. It’s a great way to introduce them to some simple crafting skills like gluing and cutting. Plus, it’s a perfect activity for those cold winter days when they’re stuck indoors.
Here are the supplies you’ll need:
- Toilet paper roll
- Glue
- Sand
- Scissors
- Colored paper (white and dark brown)
- Pine cone
- Acorn
- Black marker
And here’s how to create it:
- To begin, cover a toilet paper roll with a light layer of glue. Roll the cylinder in the sand now. Allow the sand to adhere to it. Remove any excess sand from the surface of the toilet paper roll by shaking it gently.
- A dark brown colored sheet may be used to create the head, ears, arms, and feet of the squirrel. A pine cone should be cleaned thoroughly before being used as a bushy tail for the squirrel’s body.
- You will also need some acorns to affix the first one to the arms of the squirrel. Take another acorn and place it where the mouth would be on the brown piece of paper.
- Cut out two squares from a white sheet of paper. Stick two black circles in the middle of these squares to create eyes for your cute squirrel friend!
Your cute toilet paper roll and pine cone squirrel is ready! This is a great activity to do with your kids on a rainy day. It will help them learn how to use their imagination and be creative. And they will have a lot of fun too!
So what are you waiting for? Give it a try!
Drop by at K4 Craft for more information about this toilet paper roll and pine cone squirrel!
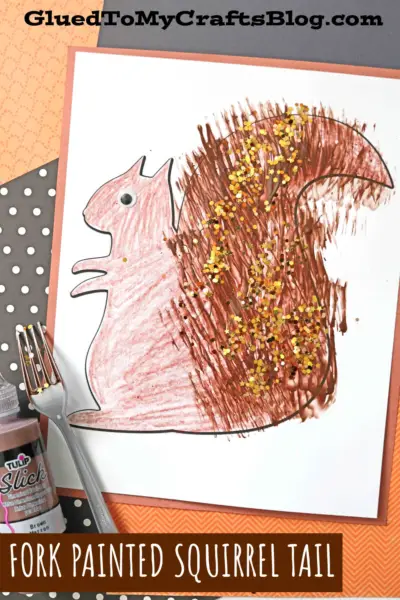
This fork painted squirrel tail is a craft that your preschooler will love! It’s a great way to introduce them to painting, and they’ll also learn how to follow instructions and use their imagination. Plus, it’s a perfect opportunity to get messy!
Supplies needed for this craft:
- Squirrel Printable
- Fork
- Paint (brown)
- Paper Plate (small)
- Cardstock (white)
- Crayon (brown)
- Wiggle Eye (small)
- Glue
- Glitters (orange)
Instructions:
- Print out the squirrel printable on white cardstock.
- Cut out the squirrel tail template.
- Place the paper plate in front of your child and let them color the design using the brown crayon.
- Now, help your child dip their fork into the brown paint and then stamp it like fur onto the squirrel tail template.
- Continue stamping until the entire tail is covered in paint.
- Let the paint dry.
- Once the paint is dry, glue on a wiggle eye and add some orange glitter for a fun touch!
There you have it! Your child’s very own fork-painted squirrel tail! This craft is sure to get their creativity flowing, and they’ll have a blast doing it. So get your supplies and let the fun begin!
For more detailed ideas about this craft, you may browse it at Gluedtomycraftsblog.com.
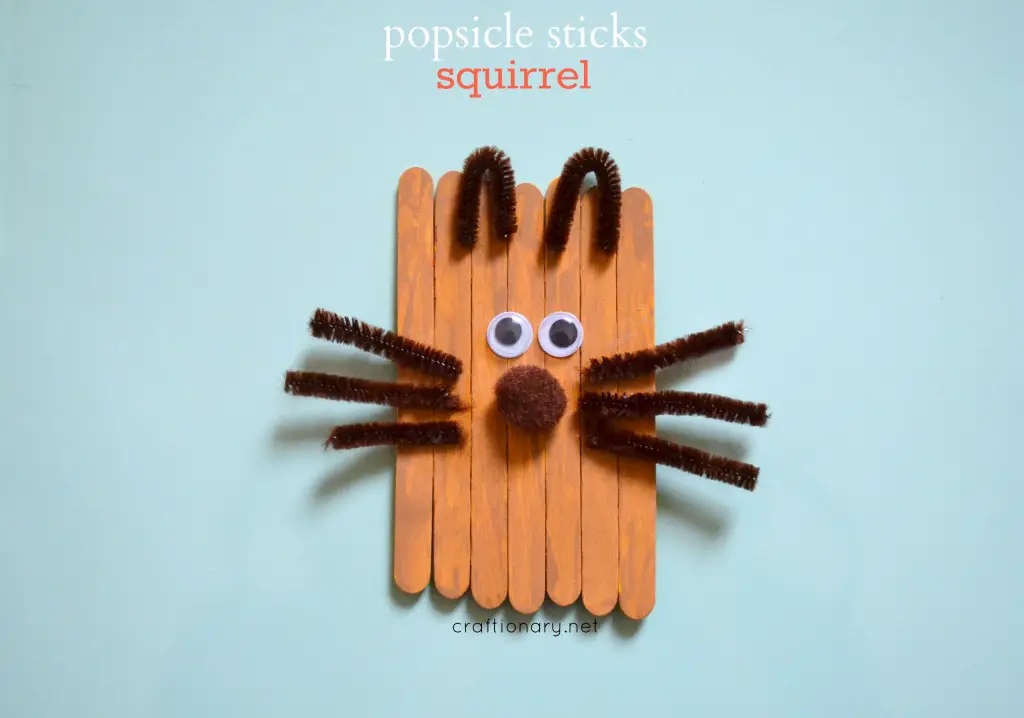
A popsicle stick squirrel is a fun and easy craft that your preschoolers can make. It’s a great way to introduce them to craft, and they’ll learn some new skills along the way.
Here are the supplies you’ll need:
- Glue gun
- Popsicle sticks
- Glue stick
- Paintbrush
- Acrylic paint
- Pom pom
- Pipe cleaners
- Googly eyes
Instructions:
- Begin by gluing the popsicle sticks together to form the body of the squirrel.
- Next, paint the squirrel with acrylic paint.
- Finally, add details like a pom pom nose, pipe cleaner whiskers and ears, and googly eyes.
Your preschoolers will love making their own Popsicle Stick Squirrels! And you’ll love how easy it is. So get crafting!
What do you think of Popsicle Stick Squirrels? Grab more of this craft at Craftionary.
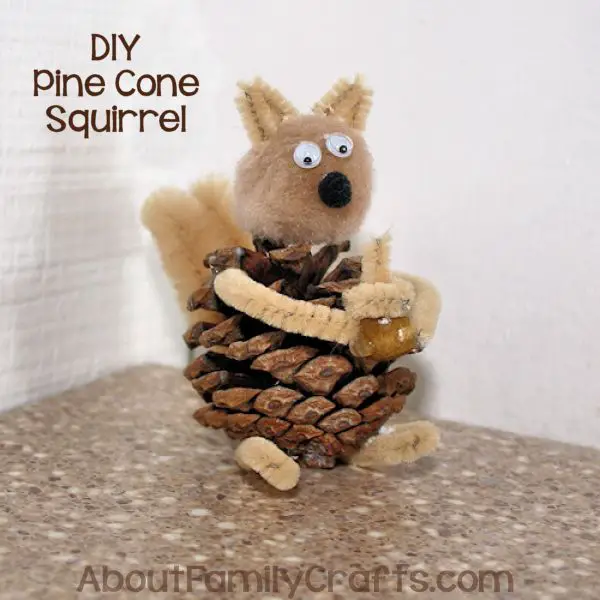
A Pine Cone Squirrel is a fun and easy craft that you can make with your kids. It’s perfect for preschoolers and only requires a few supplies. Here’s what you’ll need:
- Pine Cone
- Chenille Stem (tan)
- Pom-pom (tan and black)
- Bumpy Chenille Stem (tan)
- Wooden Bead
- Googly Eyes
- Glue Sticks
- Glue Gun
- Scissors
Here’s how to make your own Pine Cone Squirrel:
- Begin by putting a tan pom-pom on top of the pin cone. The squirrel’s head will be made out of this. Make the squirrel’s face by gluing the tiny, black pom-pom in the center of its head (as the nose). Glue two googly eyes right above the nose and one near each side of it. Cut two 1-inch pieces from the tan chenille stem.
- To look like ears, bend the chenille stems in half and glue them on top of the squirrel’s head. Cut the bumpy chenille stem into two pieces. One of the halves is bent to form the squirrel’s tail. After folding it, glue the open ends onto a pine cone. Four more tan chenille stem segments are required (2 inches long).
- Glue two of the felt pieces under the front of the pine cone squirrel to look like feet. For arms, glue the other two near its face. If you want your squirrel to have a snack, give it a wooden bead by gluing it between its hands. Lastly, top off the inequity with a short piece of chenille stem rolled into a circle that’s slightly elevated in the center and glued on top of the bead. This will be its acorn. And there you have it! Your very own Pine Cone Squirrel!
The full instructions are available at Aboutfamilycrafts.com.
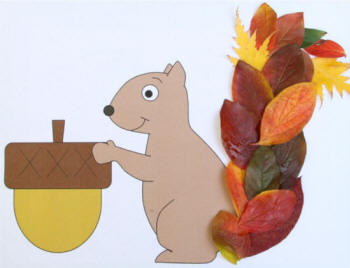
This craft is perfect for any animal lover and especially those who adore squirrels. It’s a great way to teach your little ones about different kinds of animals and their habitats. Plus, it’s just really cute. Here are the supplies you’ll need:
- A squirrel template
- Construction paper
- Scissors
- Glue
- Leaves (real or fake)
Instructions:
- First, print out the squirrel template or draw your own.
- Next, trace the template onto construction paper and cut it out.
- Now you’ll need to glue the leaves onto the squirrel’s back.
- You can use real leaves or fake ones, whichever you prefer.
- Once the glue is dry, your squirrel craft is finished! Hang it up and enjoy.
You may also visit Dltk-kids.com for the squirrel template.
Conclusion
These are just a few of the many cute and easy squirrel crafts for preschool that you can do with your kids. By using simple materials like paper bags, paper plates, toilet paper rolls, and printables, you can create these adorable little critters in no time. So get creative and have fun with your kids while making some memories and crafts this fall season. Thanks for reading!!
For more adorable animal theme crafts, check these out:


