There’s just something so magical about horses. Whether on pages of a storybook or at close hand, these galloping equestrians are plain majestic. And what better way to bring a little bit of that charm into your home or classroom than through these horse preschool crafts? So giddy up and add one or more of these horse craft ideas to your letter H activities, farm animal crafts, or wild west study unit!
Great Horse Preschool Crafts
If you’re on the hunt for horse crafts preschoolers will love, then you’ve come to the right place. Here you’ll find everything from paper plate horses to pool noodle horses— all of which are equally fun to do and will provide kids tremendous opportunities to strengthen various skills such as motor skills, creativity, and imagination.
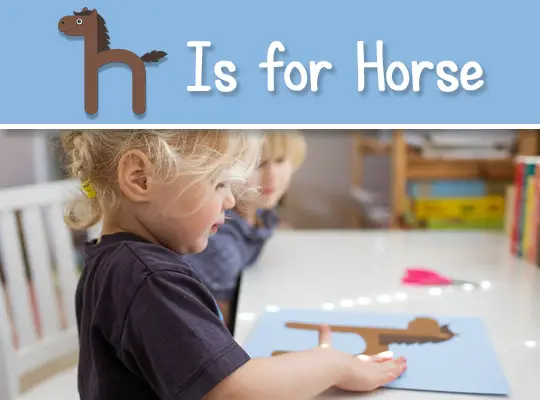
Doing letter crafts is one fun way to help preschoolers learn their ABCs— and this easy horse craft does a great job of teaching the lowercase letter H! The free printable the blog offers for free even makes it a breeze for your little ones to complete.
For this activity, you will only need:
- H Is for Horse Craft templates
- Printer paper
- Cardstock (brown, dark brown, and color of your choice for the background,)
- 1 googly eye
- Glue stick, black marker, and scissors
Simply print and cut out the templates, then trace them onto your brown cardstock. Cut the lowercase H outline, nose, ears, tail, and mane out of brown cardstock and have the kids assemble them onto a whole sheet of any color cardstock you like. As for the earmarks, mouth, and nostrils, just use a black marker to draw them on. Finish it off by affixing a googly eye.
In putting the horse together, you can either show your kids a picture to copy or challenge their visual perception by gluing only one part in place and letting them figure out where the rest goes.
For tips on extending learning with this craft, head over to AllAboutLearningPress!
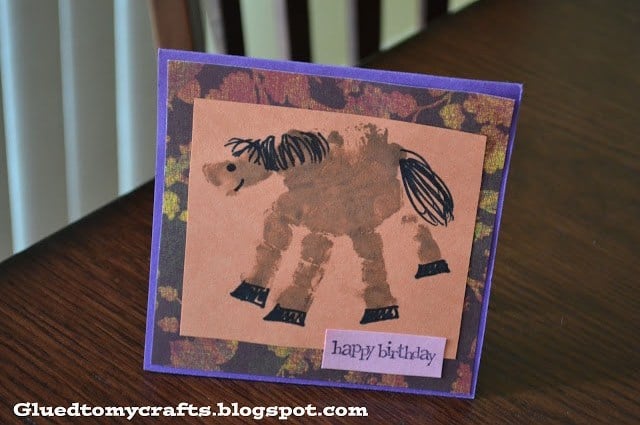
Is your little one growing up horse-crazy? There couldn’t be any better way to remember that phase of their life than making this handprint horse keepsake card! Crafting keepsakes are not only a great activity for kids’ fine motor improvement, but can also double as a growth chart, especially when recreated yearly.
For this horse craft, you will need the following materials:
- Brown and black paint
- White canvas
- Black marker
- Paintbrush
As few and basic as the required supplies are the steps involved in completing this handprint horse card. All you need to do is completely coat your child’s palm with brown paint, press it in the center of your white canvas, and draw on the rest of the features using a black marker.
Next, cut around and glue your finished art onto a piece of cardstock. You can, of course, finish it off by adding personal touches like attaching decorative items and/or a message. There you have it—something to look back to when your kiddo couldn’t get enough of ponies!
For a photo guide and helpful tips, check out GluedToMyCraftsBlog!
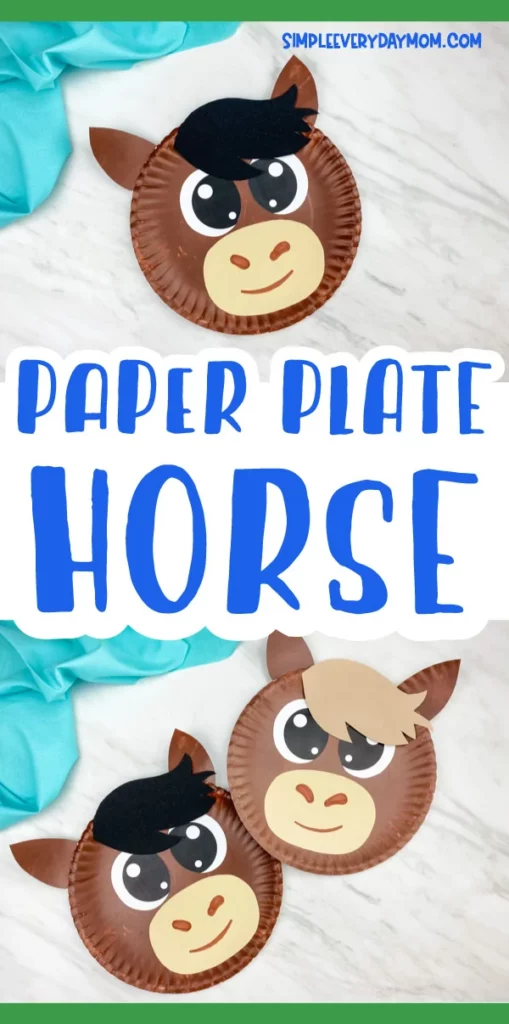
If you lack the time or artistic skills, or both, to make a farm animal craft for your preschoolers, then this quick and easy paper plate horse craft is here to save you! With the printable horse face template, all you need to do to put this together is to paint, cut, and paste. This makes it a project that children can finish themselves.
To get started, gather the following materials:
- Paper plates
- Brown paint
- Paintbrush
- White cardstock
- Colored cardstock (light brown and cream)
- Glue stick
- Brown marker
- Scissors
- Horse template
Paint your paper plate a thin coat of brown paint. This will be your horse’s head. While waiting for it to dry, print and cut the horse template out of colored cardstock. For preschoolers who have been practicing their scissors skills, allowing them to cut out the template pieces can help them improve in cutting curved lines. Otherwise, preparing the cutouts in advance is advisable.
Next, cut a pair of ears out of another paper plate (painted in brown as well) or brown cardstock. Once the parts are ready and the plate fully dries, simply glue all the pieces in place. Lastly, use the brown marker to draw on the horse’s nostrils and mouth on the cream muzzle.
That’s it! You now have a cute paper plate horse craft courtesy of SimpleEverydayMom. Visit them for some helpful crafting tips!
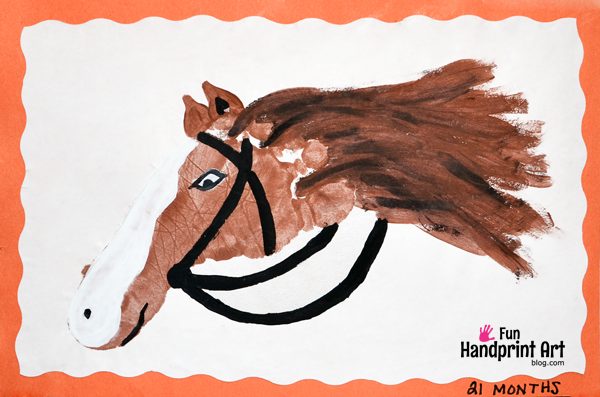
A footprint just makes a perfect horse head shape! This footprint horse craft works great for visual perception, creativity, and motor practice for your little cowpokes. Plus, you will both be amazed at the outcome of your masterpiece that is worth a space on your wall or in your keepsakes box.
Since the star of the show is your kid’s footprint, you will only need the following materials:
- Brown paint
- White canvas or cardstock
- Colored cardstock
Begin by pressing down your kid’s brown paint foot at a slight angle onto white cardstock. That will be your horse’s head. From there, all that’s left to do is paint on the details. Use brown paint for the ears and the mane. And if you’re feeling extra creative, you can add streaks of black paint to the mane. After the darker colors dry, paint the area along the horse’s forehead to the muzzle with white. Finally, draw on the mouth, eyes, and nostrils using your black marker.
You can choose to add reins to your horse, but it would also look good without them as per its creator from FunHandprintArtBlog. Visit them for more helpful tips and tricks!

The clothing pin and craft stick combo are not only for budding engineers to enjoy but also for little cowboys and cowgirls. Be sure to ready a bag of craft sticks and a basket of clothespins as these horses are simply fun to do that you wouldn’t mind making a herd.
For this activity, you will need the following materials:
- Clothespins (4 per horse)
- Craft stick (jumbo)
- Foam sheet
- Paint
- Yarn
- Googly eyes
- Cupcake liner (small)
- Tacky glue
- Printable template
The first step is to paint your clothespins and craft sticks brown or in any color of your choice. ThePinterestedParent suggests opening the clothespins a few times while they are drying to make sure that they do not dry shut.
For the horse’s head, print out the template and cut it out of a foam sheet. Glue on a googly eye to both sides and line the top of the head (both sides as well) with tacky glue to secure the strands of yarn wrapped around to form the mane. Cut another set of yarn strands and attach them to one end of the painted stick for the tail.
Next, assemble your horse by clipping the clothespins onto the craft stick, forming two upside-down letter Vs, then the head onto the body. For the final creative touch, fold and hang a small cupcake liner over the middle of the body for a colorful saddle addition. Your horse is now ready for use in pretend play!
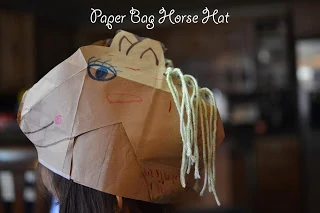
Feeling crafty but not having the energy to clean up after a mess? This cute paper bag horse hat requires you only a few materials and zero cleanups! What’s more delightful is that this project is simple enough for preschoolers to be involved from start to finish, providing them opportunities to strengthen their fine motor skills.
As promised, you will only need a few basic craft items to put this together:
- Paper bag
- Scissors
- Tape
- Markers and/or glitter glue pens for decorating
- Optional supplies: yarn and hole punch
Have kids prepare the paper bag by removing the handles and ripping the bottom open. Lay it flat and cut about a 3-inch strip across the top for the headband. Cut the strip apart, measure your child’s head, and tape the band closed.
Now for the horse’s head, have kids cut along one of the side creases on the paper bag. Then, fold the bag again along one of the original side creases. Next, trace the horse head printout with the ears at the top of the creased edge and cut it out. Open it up inside out and lastly, embellish your horse with a mane made out of paper bag strips or yarn.
For a step-by-step guide and helpful tips, head over to ALittlePinchOfPerfect.
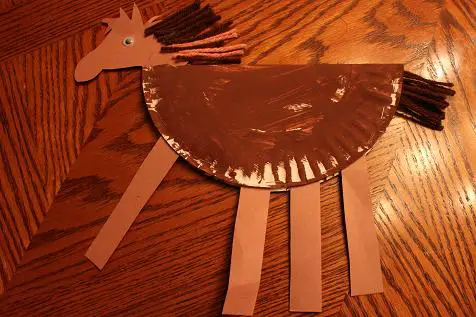
The addition of yarn makes this paper plate horse craft extra special and fun for preschoolers to do! Inexpensive and easy to follow, this also makes a fantastic whole class activity for a farm unit study, when learning about horses, or just for a quick craft session.
For this project, you will need:
- Paper plate
- Brown paint
- Brown cardstock or colored paper
- Googly eye
- Yarn
- Glue or tape
- Scissors
Kids start by painting the back side of their paper plates brown. While waiting for it to dry, cut four strips of brown colored paper or cardstock at least an inch wide for the legs. For the horse’s head, you can either draw or trace the printable template that OurCraftsNThings found online for free. Depending on the child’s age and skills, cutting the head shape may require a bit of adult help.
Next, once the paper plate dries, glue or tape the legs on the unpainted side and fold the plate in half, forming an inverted dome shape for the horse’s body. Finish your horse by gluing on the head, attaching one googly eye, and adding strands of brown yarn for the mane and tail. And there you have it, a simple paper plate horse craft with added tactile experience!
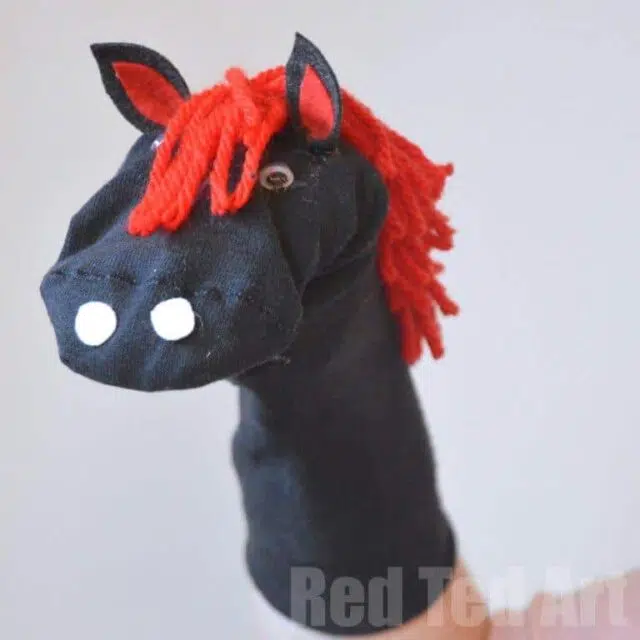
Giddy up your child’s creativity and imagination with this no-sew horse sock puppet craft! Although there isn’t much for little hands to do on this project, playing with the horse puppet afterward can have a profound effect on their development. It helps develop their motor skills, express their emotions, and improve their social interaction to name a few.
To make this adorable horse buddy, you will need these materials:
- Sock (1 for every project)
- Wool
- Googly eyes
- Felt (red, black, and white)
- Hot glue gun
- Small plate
Since there is no sewing involved, putting this together is pretty straightforward. All you need to do is cut the horse features out of felt sheets—two white circles for the nostrils, and a pair of ear shapes out of black and red felt. Insert a small plate inside the sock to prevent the sides from sticking together. From there, you can hot glue the googly eyes, the ears just above the eyes, and finally, some strands of wool for the mane.
Need some picture guides? Click over to RedTedArt for precise instructions and useful tips!
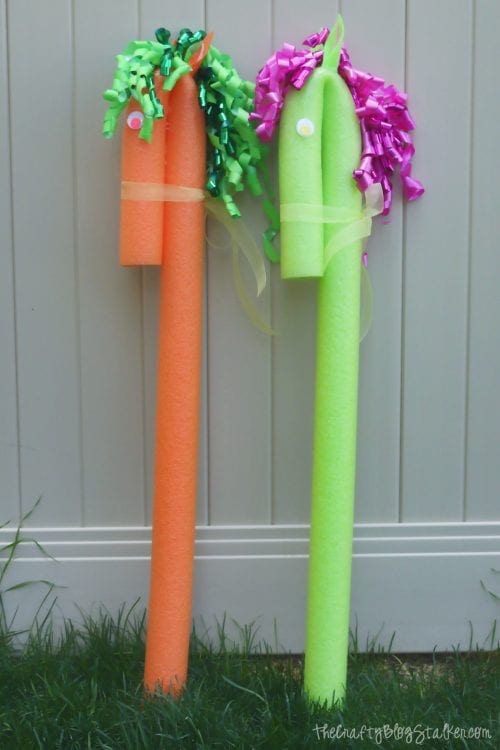
Kids will be prancing in joy with this cool pool noodle horse craft! In just a few simple steps and basic materials easily available from your local dollar stores, you will have a DIY toy that helps kids in gross motor development while allowing them to have fun.
For this project, you will need the following materials:
- Pool noodles
- Long ribbon and curled ribbon bow
- Felt sheets
- Large googly eyes
- Foam-safe glue gun
- Scissors
- Craft knife
Start by folding down at least 12-inch from the top of your pool noodle, and securing it by applying a good chunk of foam-safe hot glue. This will be your horse’s head. To add a bridle for tugging, tie a long piece of ribbon near the base of the head or folded-over area.
Next, give your horse a mane, simply cut two deep slits into the head portion—one at the top, and the other on the longer side of your pool noodle. Hot glue the edge of the cardboard base of your curled ribbon bow and slide it into the slits.
Make an ear template on scrap paper and trace it onto the felt sheets. Cut the outer and inner part of the ear out of two different (but coordinating) colors of felt. Then, to give it a shape, fold it in half and secure the bottom front with hot glue. Now, glue the pair of ears in place, then the large googly eyes, and you’re done!
For more detailed instructions and tips on this pool noodle horse craft, TheCraftyBlogStalker is your go-to!
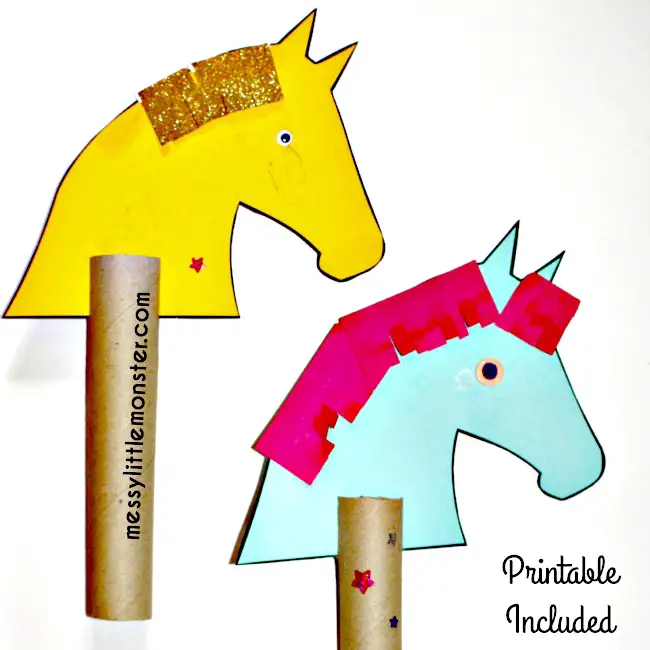
Here’s another awesome hobby horse craft that preschoolers will love using in imaginative plays! And this time, they will have more opportunities to participate in the process as this is very easy to do. They get to practice various skills through tracing, cutting, and simply letting the artist within them emerge.
To get started, you will need the following materials:
- Cardboard tube
- Colored paper
- Horsehead template
- Embellishments like googly eyes, stickers, pom poms, crayons, etc.
As far as the steps go, this kid-friendly activity just involves cutting out the horse head shape template, decorating it on both sides with your choice of materials, and slotting it into the slits at one end of your cardboard tube.
For younger or fine motor challenged kids though, cutting the head shape out may require help from grownups. Or, might as well prepare the horse head in advance and have kids pour their creativity into decorating their horses however they like.
Over at MessyLittleMonster, you can find the free printable horse head template. They also have some great ideas for bringing the hobby horses to life, so be sure to check them out for inspiration!
Conclusion
As enchanting as the real creature, these horse crafts are a fantastic way to get kids’ hearts prancing in enjoyment while learning about all things horses, ponies, or any related concepts. On top of that are the benefits they gain for cognitive, motor skills, and other main areas of child development.
With 10 awesome horse preschool crafts, we hope you find something to add to your curriculum! Thanks for stopping by!
Other preschool crafts and activities you might like:


