There’s no need to be bored with crafts for preschoolers! Imagery can transform even the simplest materials into something zingy and exciting. Zebras are one of the most popular animals with kids, so why not use them as inspiration for some fun and creative crafts?
There are plenty of ways to get those little ones to use their imaginations and express their creativity. And the best part is that most of these crafts can be made with items you probably already have around the house!
Great Zebra Crafts for Preschoolers
If you have a zany zebra lover in your house, these 10 Zingy Zebra Crafts for Preschool are sure to be a hit! There’s a craft for every skill level, from zebra masks to handprint zebras. All these crafts can be adapted to use materials you already have at home.

Making a paper plate zebra mask is a joy and a manageable way to learn about animals. This craft project is perfect for parents and teachers of preschoolers. It requires only a few supplies, and the result is a beautiful and unique mask.
To make your own paper plate zebra mask, you will need:
- One paper plate
- One sheet of black construction paper
- One sheet of white cardstock
- One black marker
- One black crayon
- Two pink buttons
- Tape
To make a zebra, begin by cutting two “eye holes” from the paper plate. Next, cut a strip of black construction paper for the mane and cut many slits down about 3/4 of the way down the paper. Make a round disk from black construction paper for the zebra’s snout. Attach the mane and snout to the paper plate using glue.
Now, cut some ears from white cardstock. Inside the ears, draw a pink line. Using the black marker, outline zebra patterns and color them with the black crayon. Attach two pink buttons to the snout using glue.
Allow all the glue to dry, and then tape a popsicle stick to the back of the mask. Your paper plate zebra mask is now complete! Wear it with pride, and show it to your friends and family.
You may check this out at East Coast Mommy.
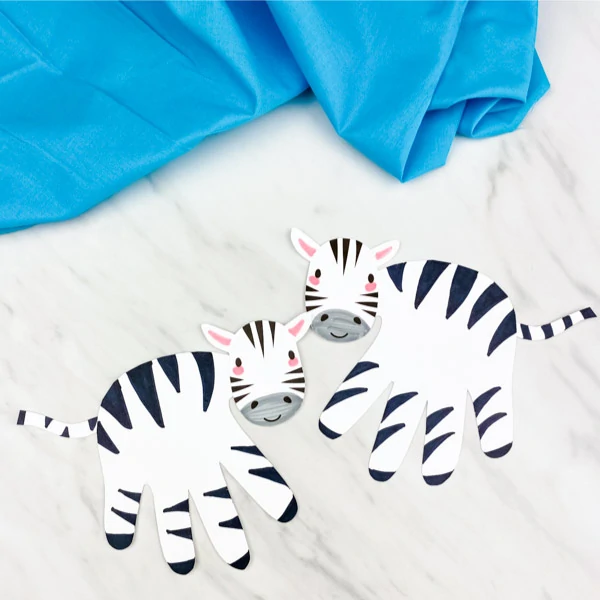
This is another project that is perfect for parents and teachers of preschoolers who want to have some fun while teaching their little ones about zebras. With just a few supplies and some simple steps, you’ll be able to create a cute zebra handprint that your child will love.
What You’ll Need:
- Zebra handprint template
- Construction paper (white)
- Pink, gray and black markers
- Glue stick
- Scissors
- Pencil
Instructions:
Download the zebra template, print it on paper, and cut it out. Using a pink marker, fill in the inner ear on the zebra’s head. Under the eyes, make two small cheeks with a pink marker. Fill in the muzzle region of the zebra’s face using a gray marker. Draw lines all over the zebra’s body using a black marker. Start at the top and work your way down to the tail. Draw solid stripes on one tail and pointed ones on another. Choose whichever you like better.
Now it’s time to add your child’s handprint! Teach them how to trace their hand onto a piece of white paper and then have them cut it out. Help them glue the handprint onto the zebra’s body, aligning the thumb with the zebra’s head and the pinky with the zebra’s tail. Allow enough drying time for finalization, and voila- their handprint zebra is complete!
We hope you enjoyed this tutorial. If you need more details about this craft, please visit Simpleeverydaymom.com.
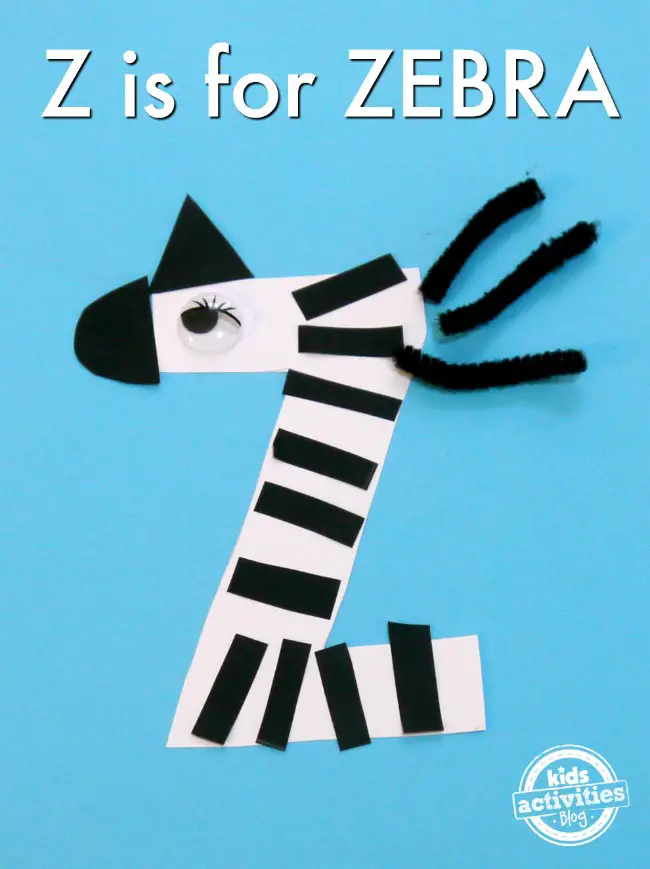
Making a Z for Zebra craft is a great way to introduce the letter Z to preschoolers. They will learn to trace and cut out the letter and add some amusing stripes to create their zebra. This letter Z craft is also an excellent opportunity to teach them about shapes and colors.
You will need:
- Construction paper (black and white)
- Pipe cleaner
- Glue
- Scissor
- Googly eye
- To create your zebra, trace and cut out the letter Z from white construction paper.
- Then, glue the letter onto a piece of colored paper.
- Next, cut black stripes out of additional black paper and glue them randomly all over the letter Z.
- Finally, to finish up the zebra’s hair, take one pipe cleaner and cut it into three pieces before gluing them onto the letter.
- Don’t forget to add details like the googly eye, semi-oval black paper for the mouth, and triangular black paper for the ear!
Do you like this simple and easy craft or want more fun ideas? Drop by at Craft Kids Activities Blog.
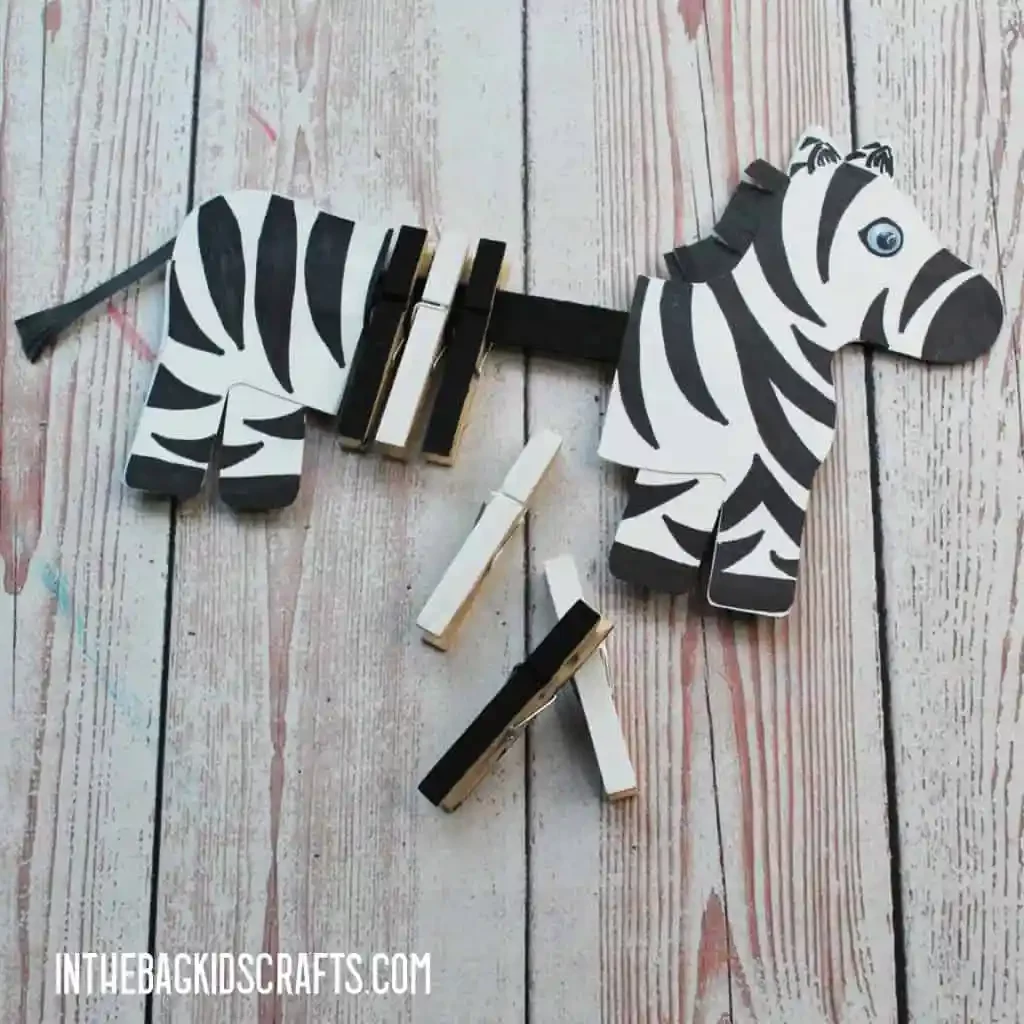
Do you want to make a zebra that’s entertaining and effortless to prepare? This clothespin zebra is perfect for parents and teachers of preschoolers! You only need a few supplies and some basic skills to get started.
What You’ll Need:
- 7 Clothespins
- 4 Paper plates
- Pencil
- Scissors
- Black Sharpie marker
- Paint (Black and White)
- Newspaper
- 2 Medium pompoms
- Glue stick
- Large popsicle stick
- 2 Small googly eyes
- Scraps of black construction paper
- Elmer’s glue
- Zebra craft template
Instructions:
- Paint three clothespins white and the other three black, including the big popsicle stick. Let them dry.
- Print out the zebra craft template. Next, trace one zebra cutout onto a paper plate, making sure to stay in the middle as much as possible. Cut it out and repeat these steps with another plate, so you have two mirror image cutouts.
- Create the back end of your zebra by tracing it on two more plates, keeping things in the middle, and using reverse-image pieces. Cut out the parts. Trace and cut out two additional legs and one ear from the template.
- Use the zebra stripes as a guide, then cut a black strip of paper to fit around the neck. Paste it on the back and snip it to stand like mane hair.
- At this stage, you should add the extra legs and ears to the back of one of the front or back pairs. Add stripes and other decorations.
- Cut a small strip of black paper and snip the end to give your zebra a tail. Attach it using glue.
- Approximately 1 to 1 ½ inches from the top of the zebra, place the end of the popsicle stick in between the two front pieces. The popsicle stick should not be centered vertically but slightly off to one side.
- Also, insert the extra leg between the layers. Now use the glue stick to fasten your sandwich.
- Do the same with your zebra’s back end by sandwiching the popsicle stick’s end and adding glue to the center. Then, leave enough room on the popsicle stick for your six clothespins without much extra space between each one.
- To add stripes to the zebra, attach clothespins to a popsicle stick. Finally, glue on googly eyes. If they are not self-adhesive, use Elmer’s glue.
- Let it dry before proceeding further. And that’s it! Your Clothespin Zebra is complete. Enjoy!
You may also see the full instructions at In the Bag Kids’ Crafts.
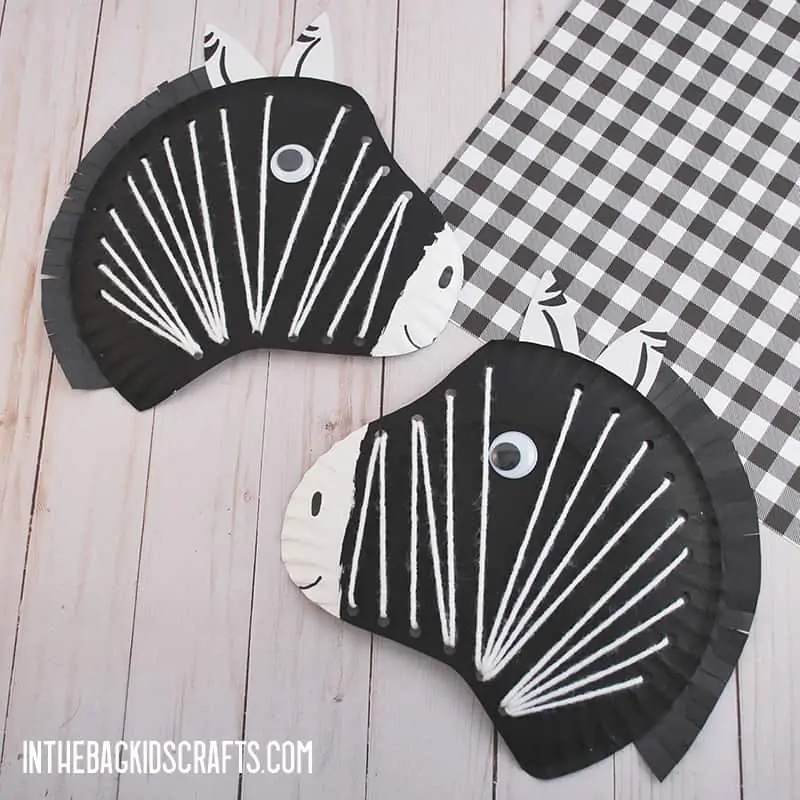
This Paper Plate Zebra Craft is a fun and uncomplicated project for parents and teachers of preschoolers. It’s a great way to introduce the concept of lacing and teaches fine motor skills and hand-eye coordination. Plus, it’s just entertaining to make!
Here’s what you’ll need:
- Zebra craft template
- Newspaper
- A paper plate
- A pencil
- A clothespin
- A medium pompom
- Black paint
- A single-hole punch
- Scissors
- A black sharpie marker
- Black construction paper
- A glue stick
- Scraps of white construction paper
- Tape
- White yarn
- A large googly eye
- Elmer’s glue (optional)
To make it:
- After you print and cut out the template, trace it onto the bottom paper plate. Make sure also to mark where you will be punching holes. Use a hole punch around the outside of your zebra craft.
- Place the newspaper on a flat surface and lay out your cut-out zebra craft. Place the squeezed black paint in the middle and squeeze out some more from the top of your painted zebra crafts. To make a paintbrush, pinch your pompom with a clothespin to form a brush. Then, except for his nose, paint all the paper plate zebra. Allow it to dry before proceeding.
- Cut out the ears of your zebra art and craft while you wait for the paint to dry. Place your zebra craft on top of black construction paper and trace around where his mane will be. Then cut a narrow strip along that line about 2 inches wide.
- Draw some detail onto the zebra’s ears with the black sharpie marker. Then use the glue stick to attach the ears and mane to your easy zebra craft. Be sure not to cover or obstruct the holes you made for lacing earlier.
- Use your scissors to cut along the black zebra mane to make the hair. Use the black sharpie marker to add a nostril and a smile. Then put Elmer’s glue on the back of the googly eye and place it where you want it on the face.
- The final touch is to give your easy zebra craft some stripes. To do this, cut a length of white yarn about a yard long. Place some tape on the end of the string to make it easier to feed through the holes.
- Begin by inserting a pin through the first hole (the nose is best) and tying some yarn around the back.
- Continue lacing the yarn around and through the gaps. When your yarn runs out, put a piece of tape in the back to secure it. Then use another length of thread to start again at where you left off until your zebra is completely stripped.
- And that’s it! Your Paper Plate Zebra Craft is now complete.
If you’re still unsure about the steps, visit In the Bag Kids’ Crafts for more details.
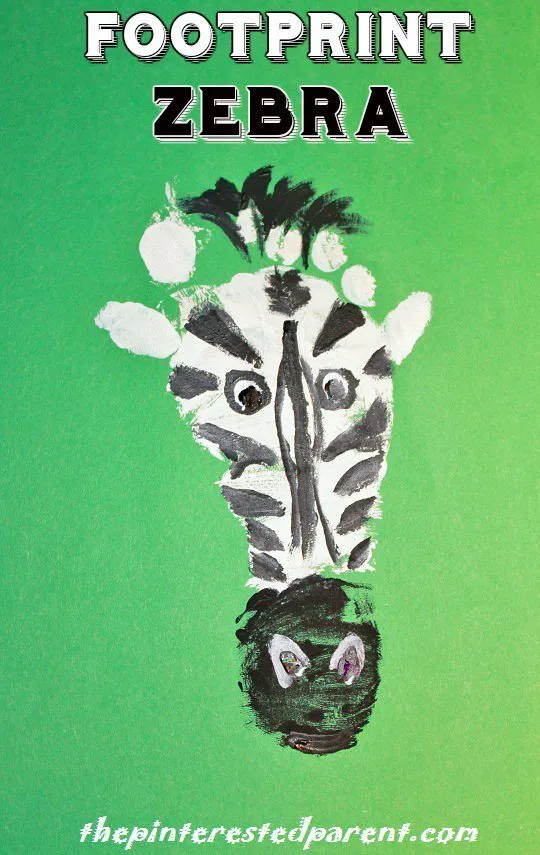
Are you looking for lightness and easy craft to do with your preschoolers? If so, why not try making a Footprint Zebra?
This simple craft is perfect for little ones and requires just a few supplies.
- Black and white paint
- Paper
- A few other household items
The easiest way to make a zebra is to start with the heel of the foot, which you should paint black. Then, finish off your zebra by painting the rest of the foot white. Paint the top of the zebra’s head with hair. After that, add ears and nostrils to the black area. To complete your zebra head, use watered-down black paint to draw in its eyes. Finally, add stripes to complete your zebra and other art materials you prefer to decor it!
Your preschoolers are sure to enjoy this fun and easy craft! And they’ll be proud to display their finished Footprint Zebras for all to see.
Do you want to try this at home or school? You may check out The Pinterested Parent.
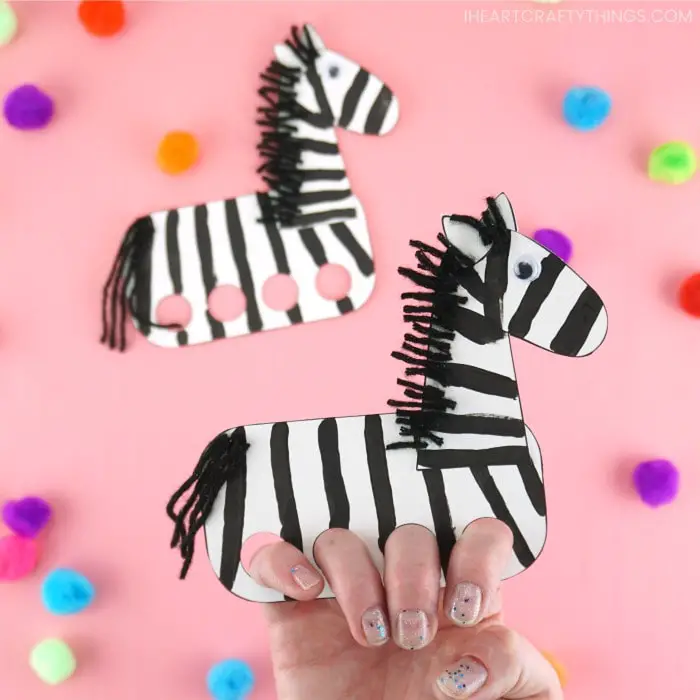
Do you want to make an adorable zebra finger puppet? With this easy-to-follow tutorial, you can create your own in no time!
You’ll need:
- A Zebra Printable Template
- 3/4″ circle hole punch
- White cardstock paper
- Black paint
- Black yarn
- A paintbrush
- Googly eyes
- A black marker
- Scissors
- Glue
Instructions:
1. Begin by printing out the zebra template onto heavy-weight white cardstock paper.
2. Use the 3/4″ circle hole punch to cut out four small circles at the bottom where you can insert your four fingers.
3. Next, paint the zebra’s body and head (stripes) black using the paintbrush. Allow the paint to dry completely. Then glue them together and add the ears from the template.
4. Cut a small piece of black yarn and glue it onto the back of the zebra’s head for the mane and its tail.
5. Glue on a googly eye.
6. Finally, use a black marker to add some details, such as nostrils and stripes.
Your zebra finger puppet is now complete!
For more cool and exciting details about this craft, visit I Heart Crafty Things.
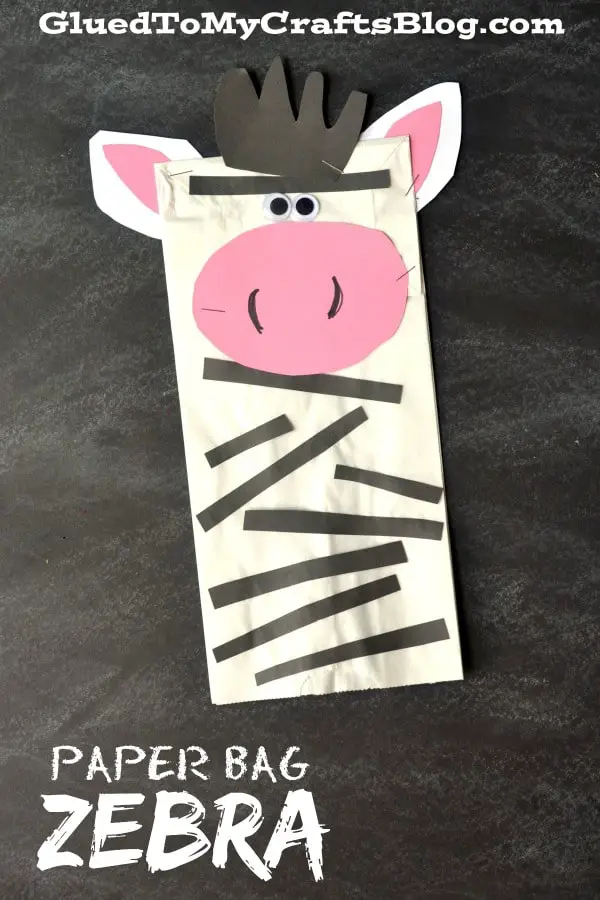
This Paper Bag Zebra is perfect! It’s a great way to introduce your child to basic crafting skills, like cutting and gluing. Plus, it’s super cute!
Here’s what you’ll need:
- One large white paper bag
- Black, white, and pink cardstock
- Glue
- Scissors
- Stapler
- Wiggle eyes
To make your zebra:
- Trim out some ears, a huge nose, and of course, numerous strips of black for the stripes from among the various sheets of cardstock paper. Also, cut out some “hair” from the remaining cardstock, if desired.
- Get your white paper bag. Lay it flat on the table with the bottom part, or lip, facing you but up on your work surface. Imagine the zebra’s head as the bottom section of the bag.
- Attach the school glue and hand-held commercial stapler to the white paper bag to make all your paper pieces adhere. The facial features should be placed towards the top of the paper bag, while the stripes may be attached anywhere on the remainder of it.
- Finally, apply wiggle eyes to bring everything to life as you add additional decorations for a unique appearance!
Now, it’s time to show off your Paper Bag Zebra to your family and friends!
Grab more details about this craft at Gluedtomycraftsblog.com.
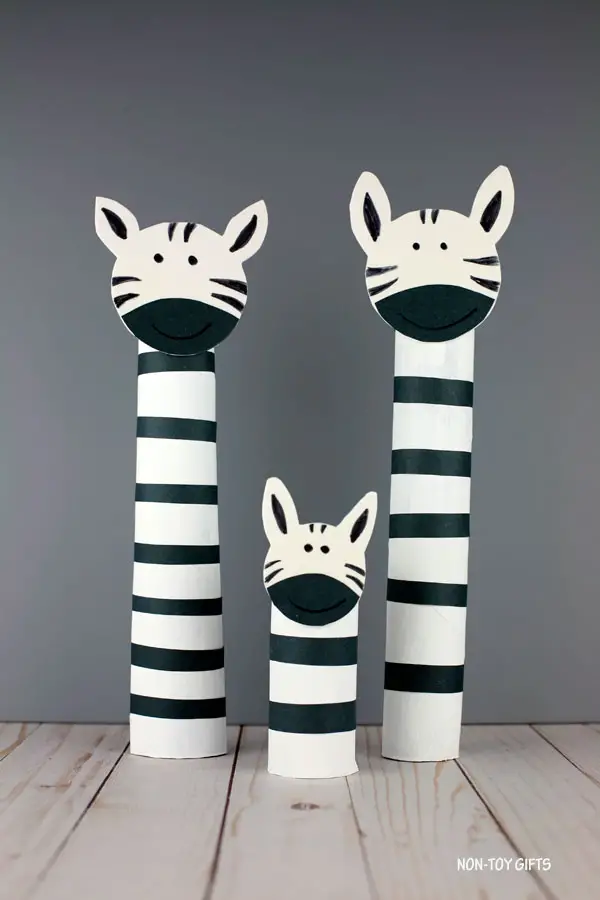
Making a Tall Paper Roll Zebra is a great way to teach your child or students some essential skills. They’ll learn how to paint striped paper rolls and turn them into fun family animals!
You’ll need:
- White craft paint
- Paper rolls
- Black and white craft paper
- Glue
- Black marker
- Pencil
- Paintbrush
- Scissors
- Round cup
Here’s how to make it:
1. Paint your paper roll white, and let it dry.
2. Once the paint is dry, use your black marker to draw stripes on the paper roll. You can make them as thick or thin as you like!
3. Cut out a circle using a round cup and draw two zebra ears from the white craft paper. You may trace and cut from black paper for the mouth, then draw some stripes on the face using black markers. Glue them onto the top of the paper roll.
4. Your zebra is now complete! You can display it on a shelf or use it as a puppet in a play. Either way, your child will be proud of their creation.
If you want your child or students to be proud, check this out at Nontoygifts.com.
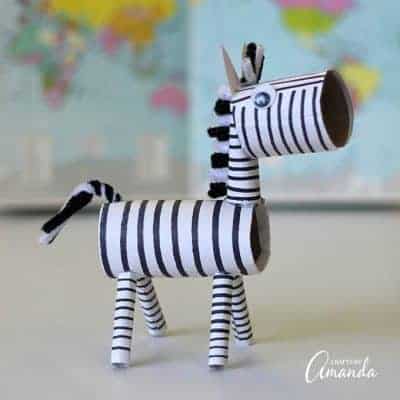
Make a Cardboard Tube Zebra! This craft is perfect for teaching your child about animals, colors, and shapes. Plus, it’s a great way to recycle paper towel tubes!
Here’s what you’ll need:
- Cardboard tube
- Pipe cleaner (white and black)
- Construction paper (white)
- Black marker
- Scissors
- Two large google eyes
- Pencil
- Glue gun
- Craft knife
- Tape
Instructions:
- One of these may be done in a snap. You need four pieces from your cardboard tube. First is a 4 inches body, a 3 inches neck, a 2 inches head, and 2 inches legs. Cut it lengthwise in half to make two long strips from the 2-inch half-leg piece. Roll the legs around a pencil to produce a tube. Repeat the process for the remaining leg parts.
- Next, you will need another four pieces from the card stock, each measuring 1.5 inches x 2.125 inches. Draw stripes across each piece’s short side (1.5″) with a black marker. Starting at one end, roll each cardboard tube inside the striped paper and tape it to secure. Do it again for the other (3) legs.
- Cut a 4-inch by 3-inch piece of white card stock and trace black lines on it with the marker. Wrap the striped paper to the body of the cardboard tube and tape it firmly shut. Cut the cardboard tube neck lengthwise into two pieces. Make a pipe out of one of the pieces and seal it closed using tape.
- Make a candy cane striped template on white card stock, measuring approximately 3″x2″. Draw stripes with the black marker on a piece of white card stock about 3-inches by 2-inches. Wrap the neck tube in paper and tape it shut. Using the picture as a guide, draw stripes on a piece of white card stock that is 5″x2″. Inside the card stock, you can glue the tube head and seal it. The neck tube’s end should be bent for about 1″ from the upper part and the end part should be flattened.
- Glue the flat portion of the neckpiece into one end of the headpiece. Bend the remaining part of the neck to lay flush, then glue it in place. Cut two white triangle shapes from white cardstock as the ears and attach them to the top of the head. 2 black pipe cleaner lengths and one white pipe cleaner length are needed for this step. This is where “forelock” comes from, similar to their bangs but between their zebra ears instead of on top like a pony’s mane does.
- Using the black and white pipe cleaner, you may cut four (1 inch) pieces each. Bend each mane piece in half, and then hot glue them to the back of the zebra’s neck. You also need to bend in half the forelock pieces and use a glue between the ears. Start to cut another two pieces (6-inch) from the remaining pipe cleaners.
- Twist the two sections together in the center. Fold the remaining pieces. Connect the pieces with a twist. Make a hole in the zebra’s rear end with your craft knife. Fill the opening with hot glue and then it’s time to insert your twisted pipe cleaners into it for the tail. Bend down both of the top sections to make the zebra’s hind legs. Finally, add google eyes and a nose with a black marker, and your zebra is complete!
It will be a sure hit in your class, so start by checking it out at Craftsbyamanda.com.
Conclusion
These zebra-themed crafts are perfect for anyone looking for some fun and easy activities to do with their preschoolers. With ten different crafts to choose from, there will surely be something for everyone. These crafts will surely be a hit with any preschooler who loves zebras.
So ditch the mundane and let your preschoolers run wild with these zingy zebra crafts. They’re sure to have a blast, and you’ll love seeing their finished products. Thanks for stopping by!
You might also find helpful:


