As any parent or teacher of young children knows, getting them to sit still and focus on one task can be a challenge. We’ve put together a list of 11 tiger crafts perfect for preschoolers. These crafts are fun and easy to do, but they’ll also help your little ones develop fine motor skills and learn about one of the world’s most fascinating animals.
Great Tiger Crafts for Preschoolers
There are so many great tiger crafts for preschoolers out there. We’ve compiled a list of our favorites for you to check out, from easy shape tigers, paper plate tiger masks, and more. Most of these crafts can be made with materials you probably already have around the house!
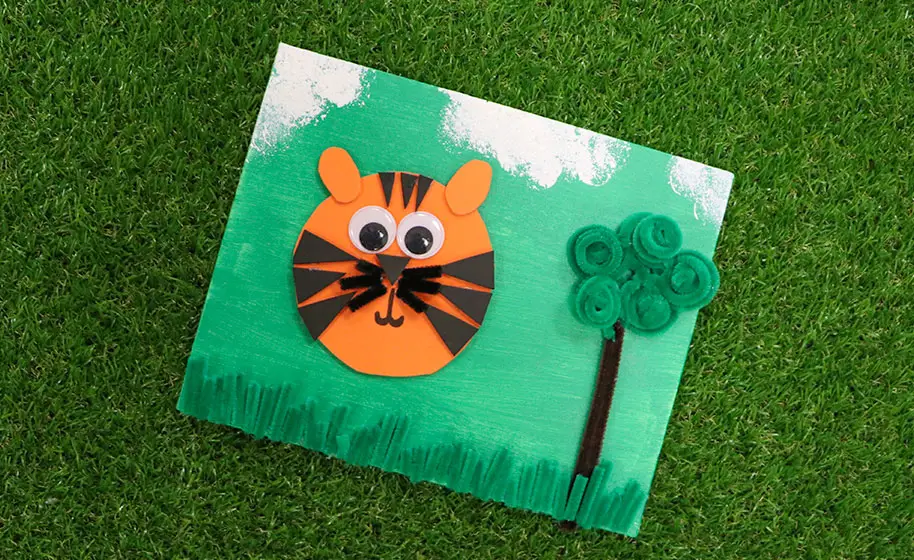
The Easy Shape Tiger is a simple and fun craft that your preschooler will love. It’s a great way to teach them about shapes and colors, and they’ll have a blast making their own tiger.
To make this craft, you’ll need:
- Black and orange foam
- Green, black, brown fuzzy fabric
- Paint
- Sticks
- Canvas
- Wiggly eyes
- Paint brushes
- Scissors
- Glue
Instructions:
- The downloadable template includes the shapes you will need to create your tiger. You can trace these onto foam sheets, cut them out of paper, and color your tiger. For example, trace the circle and ovals onto orange foam while tracing triangles onto the black foam.
- Cut the foam shapes out. To make the tiger’s ears, glue the two ovals to the top of the circle. One tiny black triangle should be glued to the center of your circle, followed by two wiggly eyes. For its stripes, glue six bigger black triangles on each side of the tiger’s face.
- Use a black pen to draw a grin on your tigress. Cut six black fuzzy strips with a black marker. For the whiskers, glue three of the tiny black triangles to each side of your tiger’s nose. Then apply three of the smallest black triangles on top of its head last. Paint your canvas green or any color you like!
- To make the top of a tree, take one brown fuzzy stick and bend it in half. Wrap a green fuzzy stick around your finger or a pencil, then attach it to the brown sticky. Repeat this by wrapping and attaching more green sticks until you’ve done it five times.
- To complete your tiger painting, glue your tree to the canvas. Cut small pieces of green fuzzy sticks and glue them to the bottom of the canvas as grass. Glue your tiger above the grass, and use a sponge dabber to create fluffy clouds in the sky.
Your preschooler will have so much fun making their own masterpiece. It’s a great way to teach them about shapes, colors, and painting; they’ll be proud of their finished tiger painting.
Visit Craft Project Ideas for more details about this easy craft.
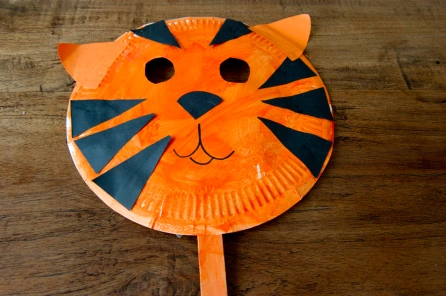
The Paper Plate Tiger Mask is a great craft for kids to learn new skills and have fun. Making this mask will teach them how to use scissors, glue, and paint. And the best part is that you probably already have all the necessary supplies!
Here’s what you’ll need:
- Penknife
- Paper plates
- Paintbrush
- Orange paint
- Craft sticks
- Black construction paper
- Scissors
- Orange construction paper
- Glue
- Black marker
- Clear tape
Instruction:
- Trace and cut two holes in the paper plate with a penknife. These are for the tiger’s eyes. Then, using an orange ice cream stick, paint the paper plate’s reverse side and let it dry completely.
- Draw two triangles on your orange construction paper (for the ears). They should be equal in size. Cut them out. Then, draw eight more triangles (for the tiger’s stripes) on black construction paper – again, ensure they’re all even in size before cutting them along the lines you just drew.
- On black construction paper, make a triangle. This is for the nose of the tiger. On one side, it should be curved on one side and just simply straight on the other two sides. Glue in the two orange triangles near the top of the plate after painting on the paper plate is dry; these are the tiger’s ears.
- In the center, glue two black triangles between the tiger’s ears to create stripes. On each side below the ears, add three more black triangles.
- The final touch is to glue the last triangle just below and between the previous two; this will be the tiger’s nose. Use a black marker pen to draw in the tiger’s mouth, as demonstrated in the picture. Lastly, tape ice cream sticks to the back of your paper plate so you can play with your new toy!
That’s it! Your very own Paper Plate Tiger Mask is now complete. We hope you had a bunch of fun making it.
You may see more details at Littlesingaporebook.com.
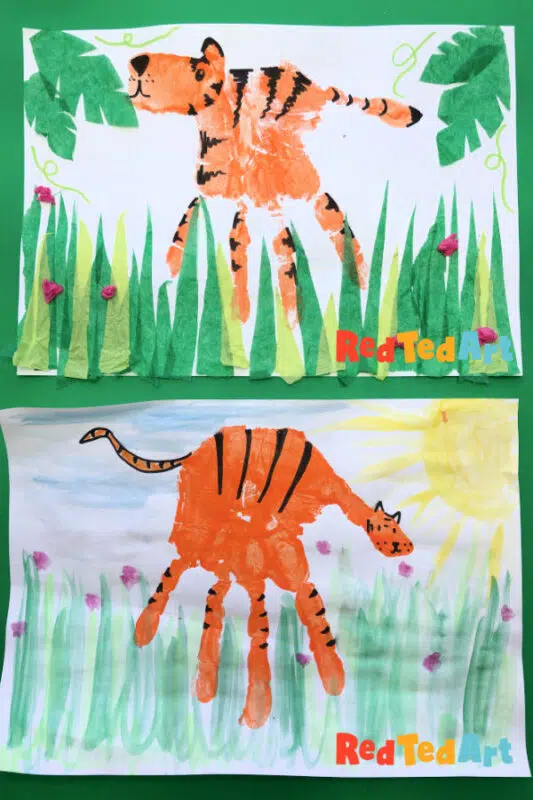
This Tiger Handprint Craft is perfect for kids passionate about animals, specifically tigers. It’s a fun way to learn about colors and painting techniques, allowing them to get creative with their design. Here are the supplies you’ll need:
- Paint (orange for the tiger and other colors for the background)
- Paint brushes
- Pens or other art supplies
Here’s how to do it:
There are two versions of this Tiger Handprint you can make:
- The handprint tiger
For the flat handprint tiger, have your child paint their entire palm orange. Once dry, they can add stripes with a black pen or other art supplies. For the background, they can paint whatever they like, such as the sun, grass, flowers, and clouds!
- The handprint and fist tiger
For the flat handprint + fist tiger, after adding the flat handprint, have your child make a fist and dip their knuckles in the paint. Press the side of your fist to the handprint on the opposite side as your thumb. Once dry, they can add stripes with a black pen or other art supplies. For the background, they can also paint or draw whatever they like!
Once you’re done, hang up your tigers for all to see! They make for incredible decorations and bring a smile to everyone’s face.
See more samples at Red Ted Art.
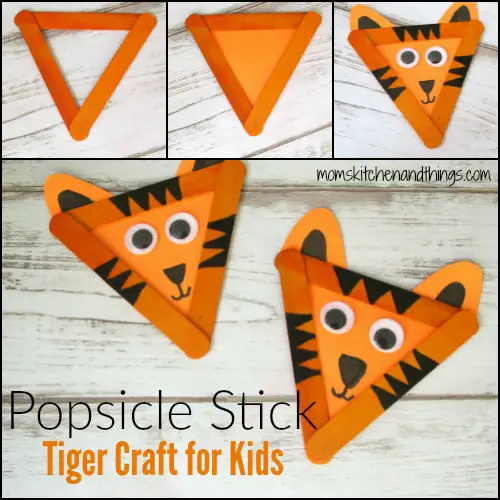
The Popsicle Sticks Tiger is a simple and fun craft that your preschooler can make. It’s a great way to learn about shapes, colors, and fine motor skills. Plus, it’s just plain cute!
Here’s what you’ll need:
- Orange Popsicle sticks
- Black marker
- Googly eyes
- Orange card stock
- Glue
- Scissors
Instructions:
To make a Popsicle Stick Tiger, have your preschooler glue three Popsicle sticks into a triangle. Then, they should glue an orange piece of cardstock onto the back. They can cut out and glue on the ear and the eyes. Help them draw on the nose, mouth, and stripes. And that’s it!
This craft is perfect for a rainy day or whenever your child wants to be creative. And it’s a great way to learn about tigers and how they look. So have fun and let your child’s imagination run wild!
Visit Crafty Morning for more details about this craft.
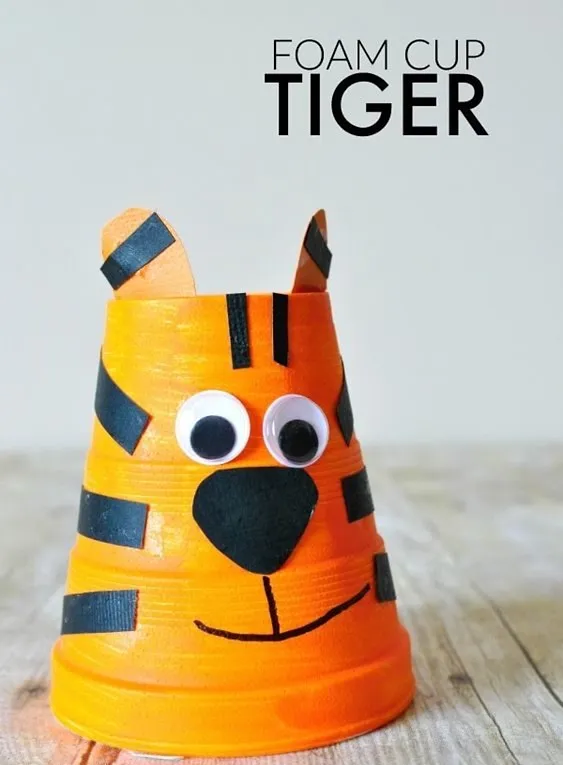
The Foam Cup Tiger is a simple and fun craft that kids will love. It’s a perfect way to introduce them to basic crafting skills like cutting, gluing, and painting. Plus, it’s a great opportunity to talk about tigers and their habitat!
Here are the supplies you’ll need:
- Foam cups
- A paintbrush
- Orange acrylic paints
- Orange and black cardstock
- Black markers
- Googly eyes
- Adhesives
- Scissors
Instructions:
- Give your foam cup a new lease on life with orange paint.
- You may cut a nose and tiger stripes out of black cardstock paper as the paint dries. You may also make tiger ears out of your orange cardboard by cutting off pieces of it.
- Glue your googly eyes to the foam cup’s middle part. Last, draw your tiger’s mouth and tongue.
- You may glue the fold at the bottom of the tiger’s earlobes, which is the bottom of the cup.
- Then apply the black stripes to the foam cup tiger’s ears, sides, and top. You may also add whiskers with the black marker.
There you have it! Your very own Foam Cup Tiger! What’s your favorite thing about this craft?
You will see more of the full instructions at Firstcry.com.
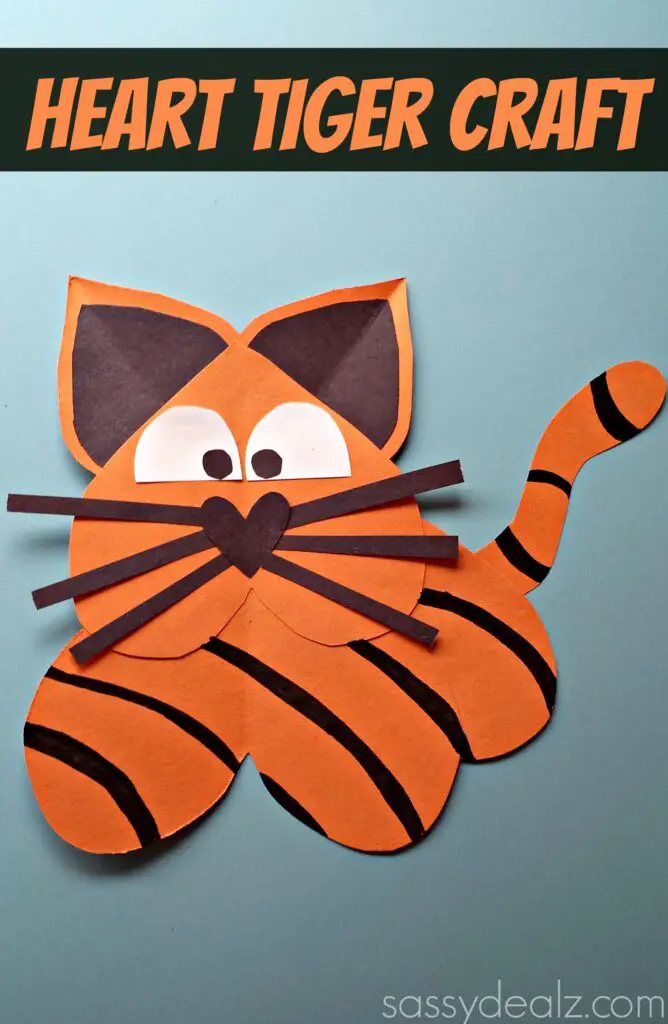
This is a fun and easy craft you can do with your preschooler. It’s a great way to teach them about shapes, colors, and patterns. Plus, it’s a perfect activity for Valentine’s Day!
Here’s what you’ll need:
- Black, orange, and white construction paper
- Scissors
- A black sharpie
- Glue
Begin by attaching the two larger orange hearts upside-down on top of one another. Then, place the half-cut heart piece behind on the right side to create the appearance of the tiger’s back leg. Next, glue together the ears—the black/orange hearts serve as ears. Finally, use a sharpie or black marker to add tiger stripes all over the hide.
There you have it! This is a simple and fun craft that your preschooler is sure to love. And they’ll be so proud of their creation that they’ll want to show it off to everyone!
Check out Crafty Morning for the complete instructions for this Heart Tiger Craft.
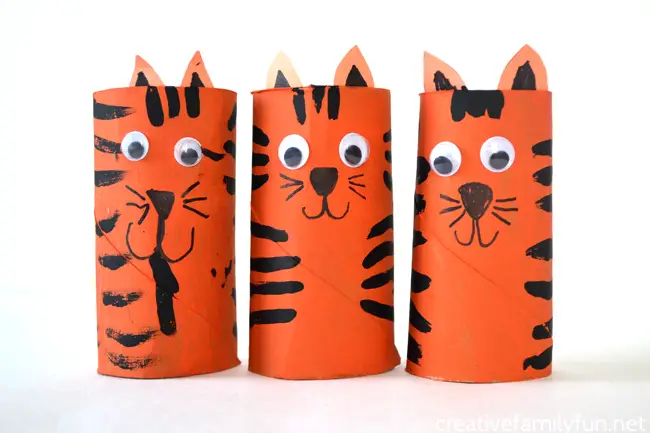
This TP Roll Tiger is a fantastic and simple craft that your preschooler will love! It’s a great way to introduce them to the crafting world, and they’ll learn some valuable skills along the way.
To make this craft, you’ll need the following supplies:
- Cardboard tube
- Orange construction paper
- Black and Orange paint
- Glue
- Google eyes
- Black marker
Instructions:
- To begin, use your orange crafting paint to paint your cardboard tube. While the paint is drying, construct your ears with some orange construction paper. Your ears are tiny, so you may utilize any piece of paper. Make two rounded triangles for the ears using a scrap of paper. For each ear, draw smaller triangles using a black marker.
- Glue your google eyes in the locations where you wish your face would be. While the glue is drying, make a nose, mouth, and whiskers with your black marker. Attach your ears to the interior of the top of your cardboard tube, so they protrude from the top. Align them directly above the eyes once they’re in position.
- Lastly, it’s time to add some stripes to your cardboard tube tiger. With your black craft paint, revamp your tiger by painting lines all around its body. We left an open space in the front since we realized that tigers don’t have stripped bellies from looking at photos of them. Once you’re happy with how many stripes you’ve added, let the paint dry.
Your TP Roll Tiger is now complete! We hope you and your little one had fun crafting together. Be sure to show your tiger on social media.
You may drop by Creative Family Fun for this easy-to-make craft.
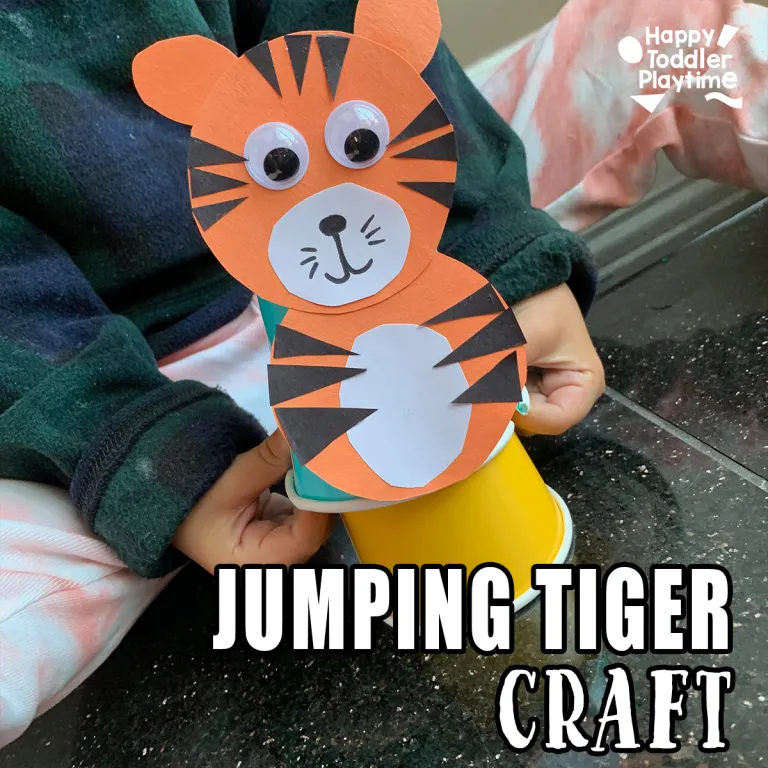
Do you have a young one at home who loves animals? If so, they will love this easy and fun Jumping Tiger Craft! Not only is it a great way to spend some time together, but it’s also a perfect opportunity to teach your little one about tigers and even help them develop some necessary fine motor skills.
To make this craft, you will need:
- Two paper cups
- Orange and black construction paper
- Glue
- Googly eyes (or black and white construction paper)
- Elastic band
- Scissors
Instructions:
- Cut two medium-sized circles from orange construction paper for the tiger’s body and glue them on top of each other. For the stripes, use black construction paper to cut out 6 large thin triangles and nine small thin triangles. Lastly, out of the white construction paper, cut out two ovals for the mouth and tummy and glue one onto the head and the other onto the tigers’ stomach.
- Glue the orange construction paper ears to the head of the tiger and cut out two more from white construction paper. To the head of a Bengal, glue one orange ear and one black mouth, nose, and whiskers. Glue on googly eyes after that.
- It’s time to recycle those paper cups! Make 2 one-inch long cuts on either side of one cup, creating two tabs. Grab a rubber band and slide one end into the two slits on one side of the cup. Twist the rubber band before sliding the other end around the other two slits. Push the rubber band down as far as it can go.
- Next, glue to the tiger to the side of the cup with the rubber band. The tiger will jump high, so be sure all its parts to stay in place before beginning.
- Put the tiger cup on top of the other cup, then close the elastic band around its interior. Close your hands and allow it to jump as high as you can!
Your child’s Jumping Tiger Craft is now complete! Let them show off their new creation to all their friends and family. And who knows, maybe they’ll inspire someone else to learn more about tigers!
You can start this craft quickly, so visit Happy Toddler Playtime.
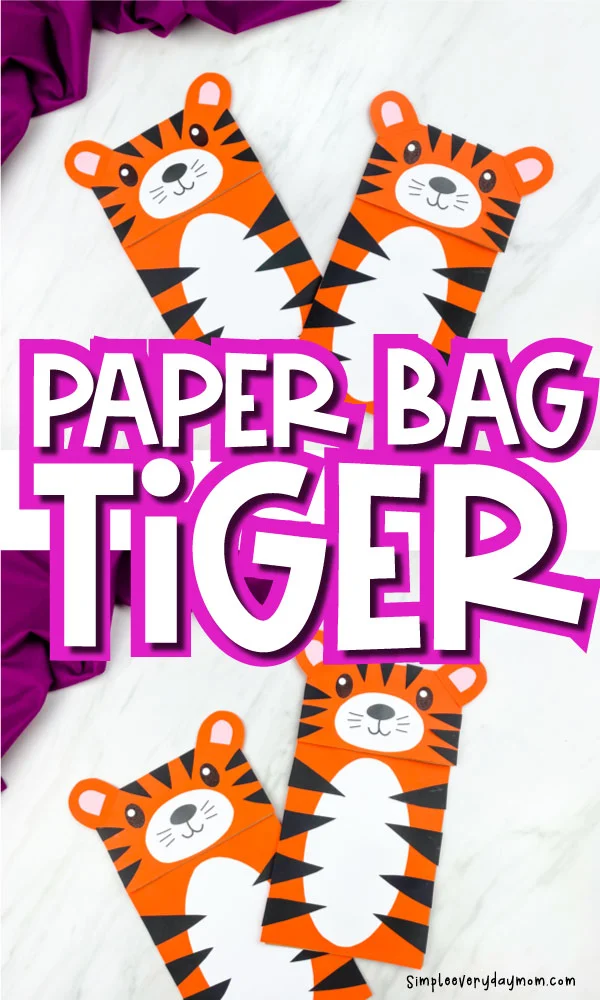
The Paper Bag Tiger is a super easy and fun craft for preschoolers! It’s a great way to teach them about following directions, using their imagination, and fine motor skills. Plus, it’s just really cute.
You’ll need:
- Tiger craft template
- Brown paper bag
- Pink, black, orange, and white colored paper
- Glue stick
- Scissors
- Hole punch
- Black marker
Instructions:
- Download the template, print it out, and cut the pieces out. Glue the headpiece of the tiger to the top of the brown paper bag flap. Gluing
- Glue the white tiger’s muzzle between its eyes. Use a hole punch to cut two circles from white paper and glue them over the tigers’ existing eyes. You can also use a white-out pen to draw in extra whites or leave them off altogether.
- Attach the tiger’s ears to the top corners of its face using glue. Using glue, attach the pink inner ears in the middle of the outer ears. Apply small tiger stripes around the top and both sides of the head. Trim any excess paper from the edges with scissors.
- Use a black pen to draw the stripes on the kids. Glue the white tiger’s belly to the center of the paper bag’s bottom half. On both sides of the tiger, glue the tiger’s body stripes. Trim any excess paper that falls off the sides with scissors.
Your paper bag tiger is now complete! Isn’t he just adorable? He’d make a great addition to any jungle-themed classroom or playroom. What do you think of this Paper Bag Tiger craft?
Download your template now at Simpleeverydaymom.com.
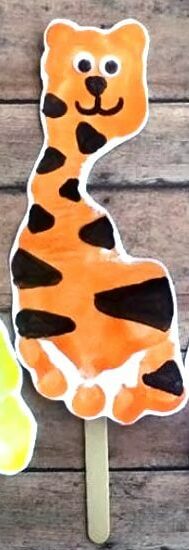
Footprint Tiger Puppet is a fun and easy way to make a tiger puppet using your child’s footprints. This project requires no sewing and can be done in an afternoon with just a few supplies.
To make this footprint tiger, you will need:
- Cardstock
- Black, Orange, Brown, and Yellow Paint
- Googly Eyes
- Wet Washcloth
- Scissors
- Paintbrushes
- Glue
- Popsicle Sticks
Directions:
To make this fun, you may use a card with your friends’ or family’s names printed on it and glue the characters around them. Start by laying out one sheet of white paper. Paint the foot yellow and press it on the paper to form the lion. Wipe away the yellow paint and repeat with brown and orange colors. Allow drying. Using glue, decorate each animal with eyes, stripes, ears, mane, and teeth. Then attach each creature to a popsicle stick using hot glue.
This is a perfect activity for a rainy day, birthday party, or sleepover. Your child will love seeing their very own creations come to life! And you’ll have some adorable puppets to show off afterward. So have fun and enjoy making some footprint tigers!
If you enjoyed this craft, you might also check out Funhandprintartblog.com for more samples.
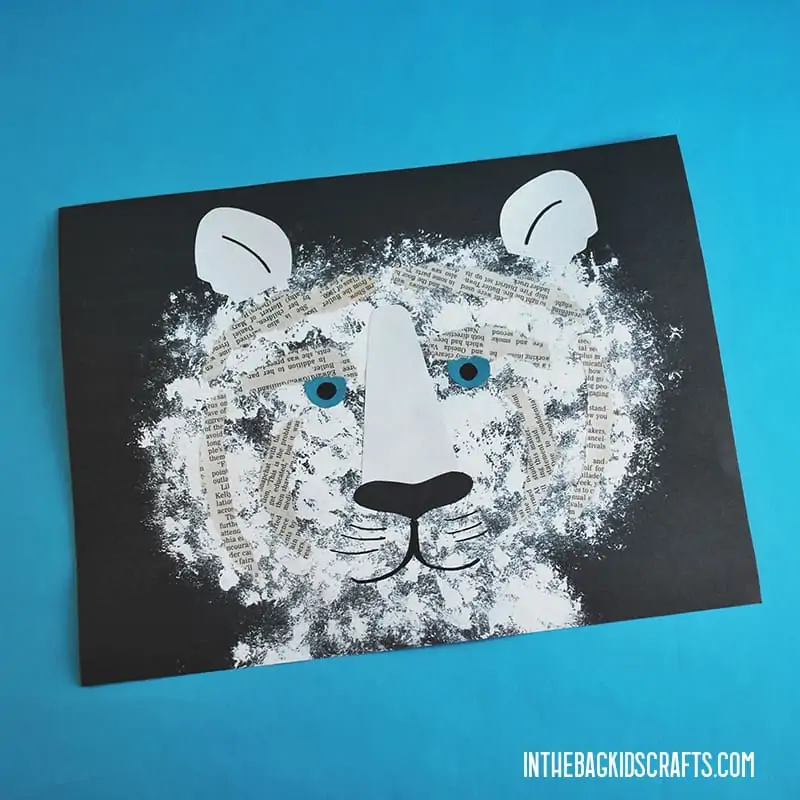
This White Tiger Craft is a great way to introduce the craft to your preschooler. It is simple and easy to follow. Plus, it only requires three skills: cutting, pasting, and painting. Here are the supplies you will need:
- Tiger craft template
- Black construction paper
- Pompom
- Scissors
- Newspaper
- Scraps of black, white, blue, and blue paper
- Pencil
- White paint
- Glue stick
- Black marker
Instructions:
- Put your black construction paper on a piece of newspaper. Next, take the white paint and make a circle or oval in the middle of your paper. Use the large pompom for this. After that, add a “body” to your tiger by making a triangle shape from the circle down to the bottom of the page. Let it dry.
- After you print out and cut the tiger craft template, trace its pieces onto brightly colored construction paper. Once you have all the pieces cut out, set them aside, so they don’t get lost. When the paint is dry, glue it on the tiger’s ears, nose, and eyes to finish it!
- To create this tiger, you’ll need some thin strips of newspaper. Be sure to use paper with words instead of pictures or comics unless you want a different look for your project. Once your strips are ready, glue them to the face craft template.
- Add some finishing touches to your tiger by using the black Sharpie marker to add features. Add a mouth, whiskers, ears, and eyeballs to your tiger as shown. This White Tiger Craft is quite magnificent already. However, you may make it more whimsical by adding a bow tie. Alternatively, you might add additional elements, such as a party whistle, polka dots, or whatever else comes to mind. Let your creativity flow!
If you want to get creative, you can make a whole family of tigers. Just use different colors of construction paper and add some stripes with a black Sharpie marker. These make great bulletin board decorations or classroom crafts projects. So have fun and let your imagination run wild!
You can find the template for this craft at Inthebagkidscrafts.com.
Conclusion
These majestic tiger crafts for preschoolers are perfect for any time of year. Each craft is easy to do and requires minimal materials. So get out your crafting supplies and let your little ones unleash their inner tiger with these fun crafts! Come back soon for more fun crafts and activities for other themes. Happy crafting!
Other crafts and activities you might like:


