It’s whale season! Time to break out the craft supplies and get creative. Here are ten amazing whale crafts that your kids will love. These crafts are perfect for preschoolers.
Whales are such fascinating creatures. They are huge yet graceful. They live in the ocean yet come up for air.
Craft time is an incredible opportunity to learn more about these gentle giants. Plus, it’s just plain fun! So break out the glue sticks and paper plates, and get ready to make some whale-y good crafts with your kids.
Great Whale Craft for Preschool
As the weather gets colder and the days get shorter, it can be hard to find ways to keep your little ones entertained. If you’re looking for a fun activity to do with your preschooler, why not try one of these whale-themed crafts?
Not only are they fun, but they’re also a great way to teach your child about these amazing creatures. So grab some glue, paper, and paint, and let’s start!
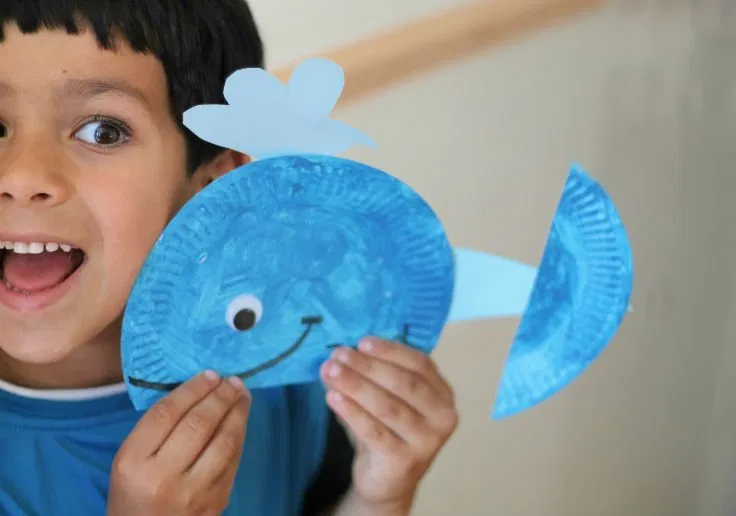
This is a fun craft for kids to make a paper plate whale. It’s a great way to learn how to use scissors, glue, and paint. You will need:
- Paper plates (one per whale)
- Blue paint
- Googly eyes (one per whale)
- A black marker
- Blue paper for the extra bits
- Scissors
- Glue
Paint the entire paper plate blue and set it aside to dry. Once dry, cut off a bottom quarter of the plate (as seen in the pictures). Next, draw and cut out shapes for water coming from the whale and a piece of paper for its tail. Use your blue paper for this step and attach the pieces together as shown. Finally, add a googly eye and a smile using your black marker.
Your paper plate whale is now complete! Enjoy!
Would you like to see a complete tutorial of this craft? Check out In The Playroom.
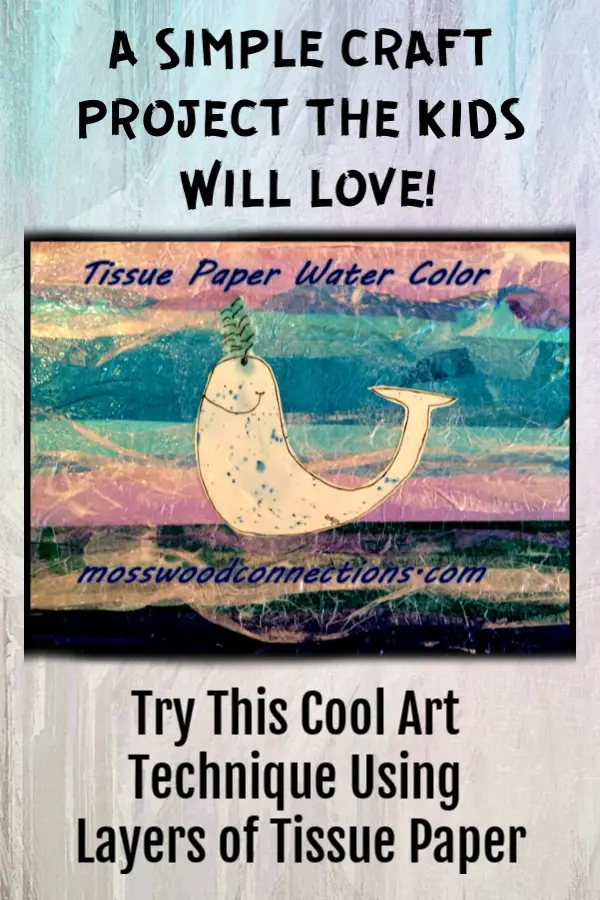
To make this whale craft, you will need to learn how to cut out shapes, glue them down and paint. These are all skills that preschoolers are just learning.
Begin with a clean canvas or heavy-duty paper. You’ll also need glue, a roller, watercolors, tissue paper, and plastic wrap.
To create this masterpiece, cut the tissue paper into strips. Next, layer those strips on top of the canvas or heavy-duty paper. Then, carefully spread mod podge or glue over the tissue paper strips. Once that is complete, cover the canvas with plastic wrap. Now it’s time to get creative! Draw a simple picture or have your young children use stencils or pre-cut shapes. Finally, watercolor the picture and let it dry before cutting it out and gluing it onto the layered background.
Paper mâché style art has never been so fun – or easy!
This is a great whale craft for kids to make! Do try it now and see it more at Mosswood Connections.
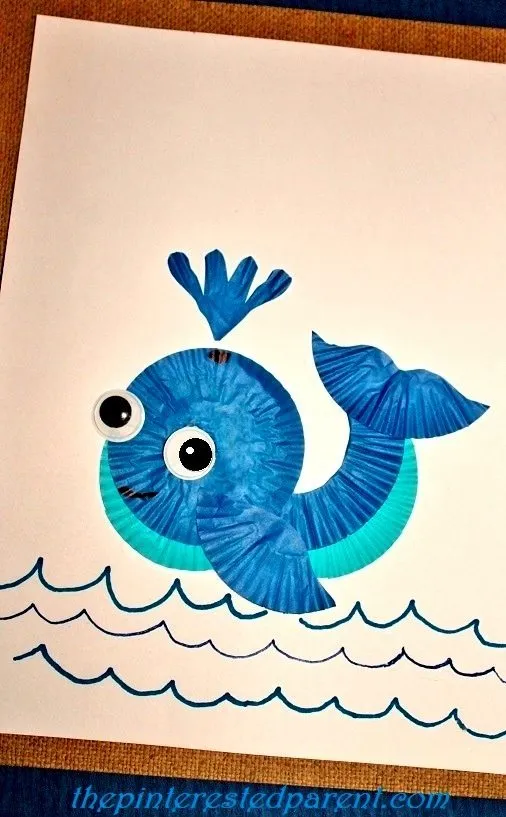
This fun and easy craft for preschoolers teaches them some important skills. You can make an adorable whale craft using cupcake liners with just a few supplies.
Your child will learn to use glue, cut with scissors, and follow directions. They will also practice fine motor skills as they manipulate the cupcake liners and glue.
This is a great project for parents or teachers to do with a group of preschoolers. It’s also a perfect activity for a rainy day.
Supplies:
- Two cupcake liners in different shades of blue
- Glue
- Scissors
- Googly eyes
- Permanent marker
Directions:
- Have your child start by gluing the two cupcake liners together. They can use a full liner or glue a squared-off crescent shape onto the full liner.
- Next, help them cut a tail out of the darker blue liner. Once the tail is cut out, they can glue it onto the whale.
- Finally, add googly eyes and a spout. Use the permanent marker to draw a smile on the whale’s face.
- Your child will be so proud of their finished whale craft! And you’ll be amazed at how much they learned while doing this simple activity.
That’s it! You’ve now made a whale craft using cupcake liners. This is a great activity for preschoolers and is perfect for parents or teachers to do with a group. It’s also a perfect activity for a rainy day.
Please share it with your friends and visit The Pinterested Parent.
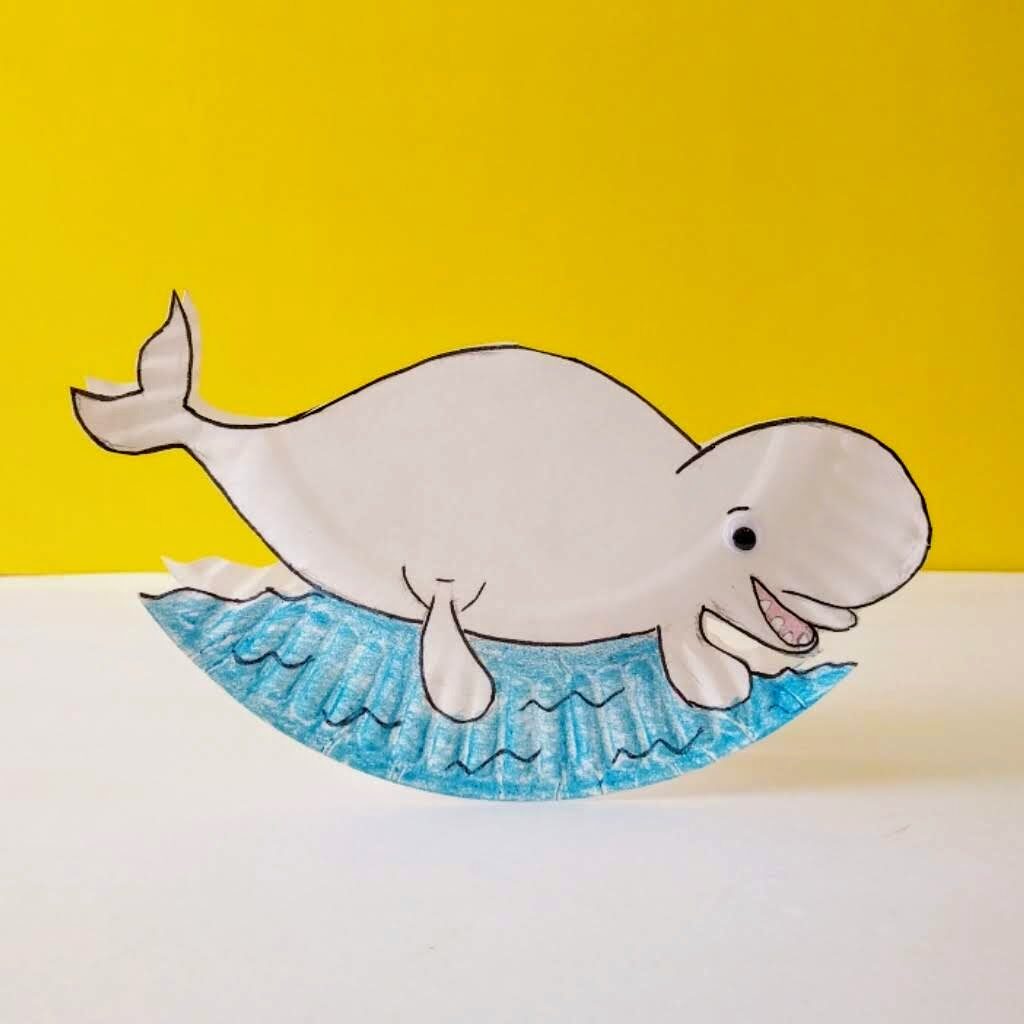
This is a fun and easy craft that only requires a few supplies. All you need is a paper plate, some googly eyes, crayons, and a black marker.
To start, fold your paper plate in half. Then, on one side of the plate, draw the whale. Once you have drawn the whale, cut out only the upper part of the whale. Leave the bottom middle part of the paper plate intact. This will be used as the base for your whale.
Next, stick on the googly eyes. Once the eyes are in place, begin coloring the ocean around your whale. Draw some waves and then outline the whale using a black marker.
And that’s it! Your very own rocking beluga whale. This craft is perfect for preschoolers and their parents or teachers. So have fun and enjoy!
It’s easy to follow instructions for a kids’ craft project. So check it out at The Joy of Sharing.
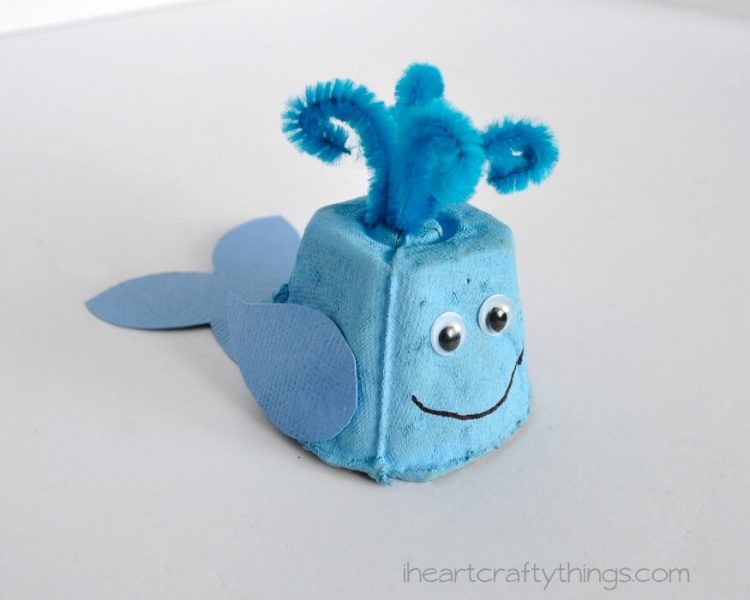
These egg carton whales are so cute and easy to make! They’re the perfect project for little ones to learn some new skills. Here are three things your child will practice while making these whales:
- Using scissors
- Painting
- Gluing
You’ll need:
- Egg carton
- Paintbrush
- Light blue paint
- Blue pipe cleaner
- Light Blue cardstock paper
- Googly eyes
- Tacky glue
- Black marker
- Scissors/Craft knife
- Whale craft template (you can find one online or make your own)
Here’s how to make it:
- Cut the egg carton into sections, painting each one blue. Wait for this to dry completely before moving on. To finish the craft, cut an X into the top of each carton–this will be the blowhole for your whale!
- Also, cut the blue pipe cleaner in half. Take the two short pipe cleaners and bend them in half. Twist them together at the center point where they’re both bent.
- To create the look of a whale spouting water, pinch the pipe cleaner ends together and push them through the X at the top of the blue egg carton. The twisted ends will stay inside so they won’t be seen. Finally, bend or curl pipe cleaners at the top so it looks like water is being blown out of a whale in an ocean.
- Using blue cardstock paper, cut out a whale tail and fins. Alternatively, the site features a whale craft pattern that you may download. Glue the fins and tail to the egg carton using tacky or an extra-strength glue stick. I inserted some glue inside the egg carton and tucked the tail inside it. As your visual aid, use the image.
- Add a mouth and eyes to your animal to finish your creation. You can use googly eyes or draw eyes and a mouth with a black marker. Your egg carton whale is complete!
These little ocean animals are perfect for summertime or under the sea-themed craft project. You can even turn it into a game by adding other paper cutouts to create an underwater scene! Let your child’s imagination run wild, and have fun with this one.
Wasn’t that easy and fun? See more details at I Heart Crafty Things.
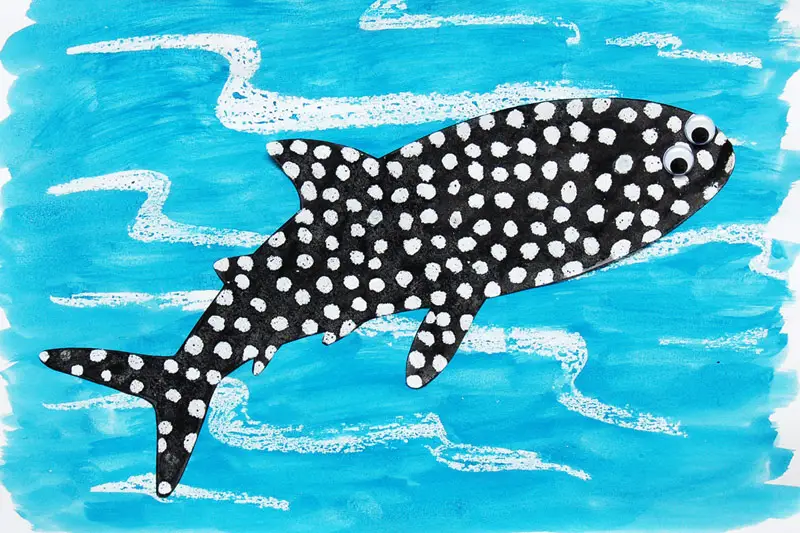
In this fun whale painting craft, your child will learn how to make dots, blend colors, and create a unique work of art! All you need are some simple supplies and a little bit of imagination. With a little help from an adult, even the youngest artists can create a beautiful invisible dot whale painting.
To get started, you will need:
- A piece of paper or cardstock
- A white crayon
- A pencil
- Glue
- Blue paint
- A black marker or pen
- Wiggle eyes
First, help your child draw or print out an outline of a whale shark on their paper. Then, using the white crayon, have them dot the whale with tiny dots. The more dots they make, the better!
Next, it’s time to paint. Using watered-down blue paint, help your child paint like an ocean over the entire paper. The dots with the wax crayon will resist the paint, creating a beautiful spotted effect. Once the paint is dry, cut out the whale shark shape.
To finish, glue on a pair of wiggle eyes and add a mouth with a black marker or pen. Then paste it into your ocean background. Your child’s invisible dot whale painting is now complete!
Visit FirstPalette.com to discover more about this art!
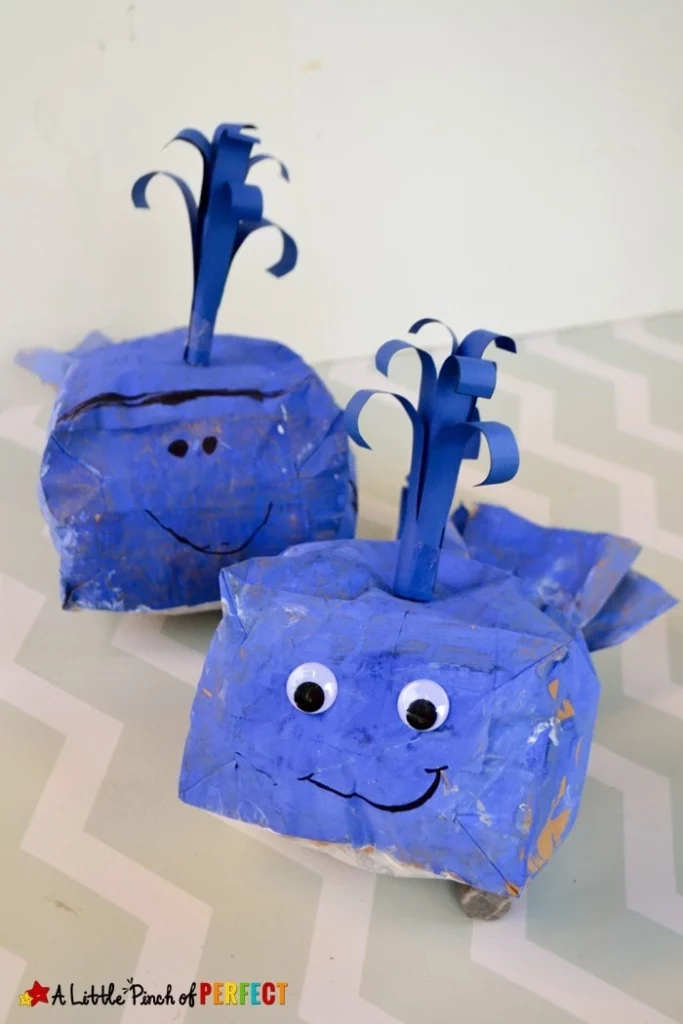
This is a really fun and easy whale craft that is perfect for kids in preschool! Not only is it a great way to learn about ocean animals, but it also helps develop fine motor skills.
To make this paper bag whale craft, you will need the following supplies:
- Paper Lunch Bags
- Water spout template
- Paintbrush
- Blue and white Paint
- Blue Craft Paper
- Scissors
- Tape
- Googly Eyes
- Glue
- String
- Black Marker
Instruction:
To begin, paint the blue paper lunch bags except for the rear, which should be white as the whale’s stomach, and allow it to dry. Once dry, open the bag and lay it on the table with the white side facing down; have your kid draw a face on the bag and attach googly eyes afterward. Stuff the bottom of the bag with old newspaper or other clutter you have lying around and tie it closed with thread.
To make the whale’s tail, fold the top of the paper bag up. If you want, you can trim it to look more like a real whale’s fluke. Then, print out the water spout template on blue paper and cut along the black lines. Roll it up like a scroll on a pencil and secure the bottom with tape. Use the pencil again to curl the top of the “water” down, then secure it to the top of the whale and withdraw, affixing it with transparent adhesive film.
Finally, take the string and make a loop at one end. Tape this to the back of the whale just below the “water spout,” and your paper bag whale is complete!
We hope you’ll have a lot of fun with whale craft! You can also start dropping by at Alittlepinchofperfect.com
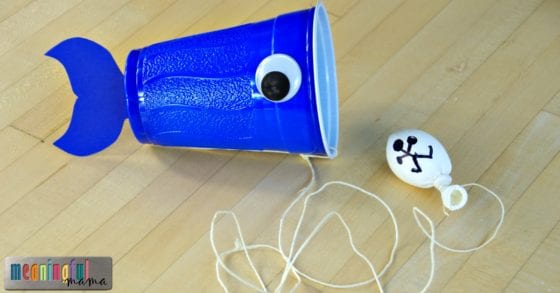
This is a great craft for kids to learn about the story of Jonah and the Whale. It’s also a great way to teach them some basic crafting skills. Here are the supplies you’ll need:
- Free Printable Whale Tale Outline
- Medium-Sized Craft Eyes 30mm
- Blue Solo Cup
- Medium-Sized Glue Dots
- Blue Construction Paper
- Sharpie
- String
Here’s how to put it all together:
Insert the stopper into the hole in the blue Solo cup. Cut a string to length. A yard is plenty long. Tie the string through the hole and around the other side of the cup. You’ll have a strand wrapped and tied around one edge of your cup. Cut out a tailpiece from the whale tail printable. Create a tailpiece by cutting out a shape from your paper. Depending on how old your kids are, they might be able to accomplish this on their own
To attach the eyes and tail, use glue dots instead of white glue. White glue takes forever to dry and is not very strong. Glue dots are perfect for this craft. Fill a white balloon with flour until it’s full, then tie it off. Have kids draw a person on the balloon with Sharpie, then tie your Jonah balloon to the end of the string.
Hold on tight and enjoy your own Jonah and the Whale cup craft! You can use this same process to create a variety of different animals. Have fun and be creative!
If you need more details, feel free to visit Meaningfulmama.com.
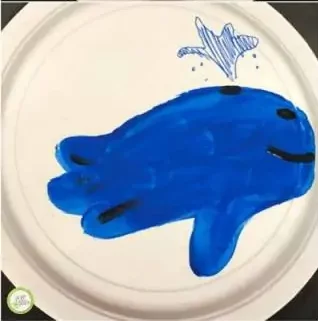
You can use this craft to teach your preschooler about different animals and the different colors they come in. This fun activity will also help your child learn new skills, like painting and tracing.
Supplies:
- Pencils
- Paper Plates
- Paints or Crayons (different colors)
Directions:
Take a paper plate and turn it upside down. Using a pencil, trace the handprint onto the back of the paper plate. Determine the direction of the handprint depending on the animal. For instance, for the whale, the handprint should be facing downwards.
After tracing the handprint, have your child paint or color it in. They can use different colors for the different parts of the animal. For example, they could use blue for the whale’s body and white for its belly. Let your child be creative and have fun with this activity!
This is a great activity for parents or teachers to do with their preschoolers. It’s a fun way to teach them about different animals and also helps them learn new skills like painting and tracing. Give it a try today!
You can get some ideas for different animals too at Green Kid Crafts.
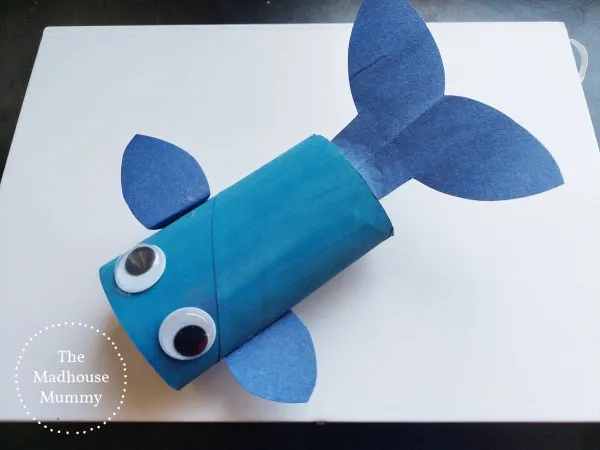
This is a fun and easy whale craft that can be made with supplies you probably already have at home! All you need is a toilet paper roll, some paint, colored paper, scissors, a paintbrush, a googly eye, and glue.
Your little ones will love painting the toilet paper roll blue (or any other color!) and then adding the white belly and pink mouth. Once the paint is dry, they can help to cut out the tail and flippers before gluing them onto the body.
Finally, add a googly eye, and your whale is ready to swim! This craft is perfect for preschoolers as it helps them to develop their fine motor skills, color recognition, and creativity. Plus, it’s a lot of fun!
Try it today. Take a closer look at Crafts for kids.
Conclusion
Whales are such majestic and exciting creatures – no wonder kids are fascinated by them! These ten whale crafts for preschoolers are fun and educational, teaching kids about the different features of these amazing animals. Whether you’re looking for a simple art project or a more complex craft, there’s something here for everyone. So grab your supplies and get crafting! Your little ones are sure to have a blast.
For more preschool animal-themed crafts, check these out:


