Chickens are one of the most recognizable animals at the preschool level. These are all familiar to children, from the rooster’s crowing to the hen’s clucking and chick’s cheeping.
Check our list of chicken crafts. Include them as you make fun and engaging lessons for children. You might find them useful for the farm theme or a storybook.
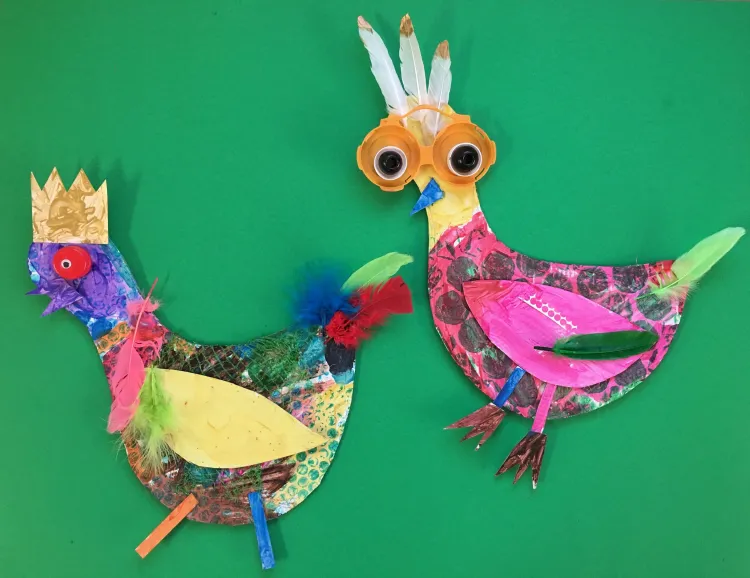
This chicken craft is a great process art activity for children to make. It teaches them to use materials that can be found everywhere, even those meant for trash.
Each chicken will come out unique and colorful and can be used to accompany the book “Blue Chicken” by Deborah Freedman.
Start with an outline of a chicken. Paint it white if using brown cardboard. Children may use a paintbrush to apply the different colors but let them use scrap materials to add texture and dimension to the chicken.
Next, use wine bottle corks, old toothbrushes, bottle caps, corrugated cardboard, leaves, shells, and others. The possibilities are endless. Let the children explore all of these.
Explain that depending on the materials used, the texture created changes. Allow children to find different materials to use for their masterpieces. Once finished, discuss the differences in the materials’ effects on paper.
Allow them to explore the different effects of the scrap materials on the surface of the cardboard. Let them customize the look of their chickens by experimenting with the materials to complete their project.
Sticks may be used for the legs, scraps of paper for the wings, and bottle caps for bigger eyes. They may add accessories like crowns and necklaces. Once finished, allow the craft to dry.
For this craft you will need:
- Cardboard or cardstock
- Paints
- Googly eyes
- Scraps of colored paper
- Scraps like plastic bottle caps, bubble wrap, yarn, etc.
- Scissors
- Glue
For more information on this craft, go to TheArtGardenBlog.com.
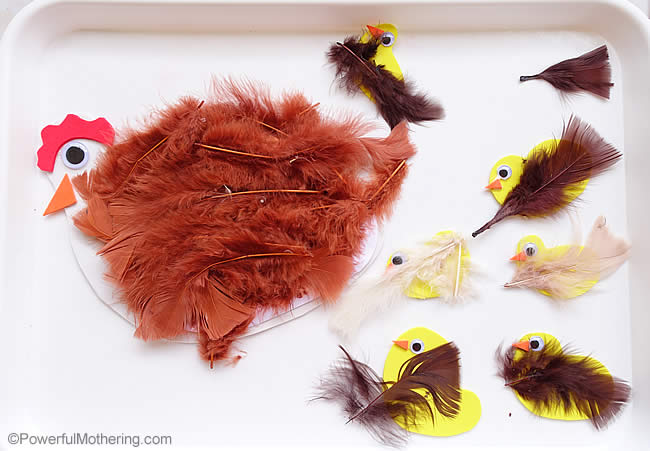
This feathery hen and chicks craft is ideal for teaching children the life cycle of chickens. Use this to go with the book “Mama Hen and her Baby Chicks 1, 2, 3” by Beck Ward.
Use white craft foam to outline the hen and yellow foam to do the same for the chicks. Cut small triangles for the chicks’ beaks and a bigger beak for the hen. For the hen’s comb, use red foam. Wattles can also be added using red foam.
Cut all the pieces and assemble them using glue. Stick the eye on the hen, the comb, and the beak. Stick the beaks and eyes on the chicks.
Using the white paper, cut a wing flap and stick it on the hen. Refer to the picture for this step. Stick the feathers on the hen, even on the wing flap. Stick the yellow feathers on the chicks.
Once dry, place the three chicks under the flap of the hen. It is now ready to use for the story and counting.
For this craft you will need:
- White, yellow, orange, and red craft foam
- Paper
- Googly eyes
- Glue
- Feathers
For more information on this craft, go to PowerfulMothering.com.
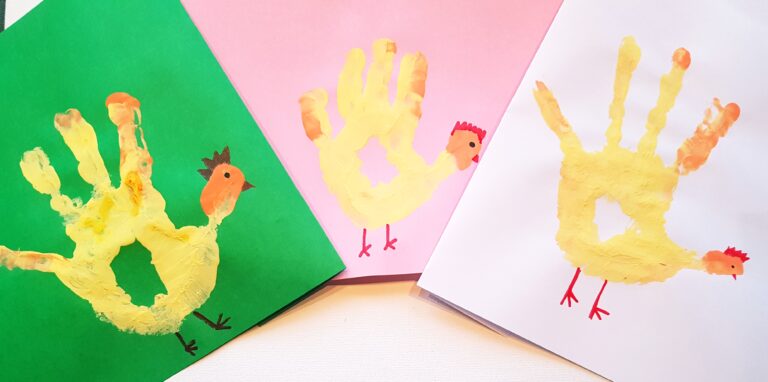
A simple activity that young children will enjoy making is this handprint craft. Have children dip their hands in paint or use a paintbrush to cover their palms with yellow. Add some orange paint to the child’s thumb and pinky.
Next, guide their hands as they press it on paper. Ensure that there is enough space for the hen’s feet. Make the baby chicks by creating a yellow dot using fingers. Let the paint dry.
Use red markers to add beaks and comb on the hen. Use a black marker for the feet. Add red beaks for the chicks.
Extend this activity by using it as a math mat to teach numbers and counting. Laminate the hen on the paper or place it in a transparent sleeve for file folders or any clear envelope.
Make more chicks and cut them out. Write the number in the middle where there is no paint. Ask the child to place the correct amount of chicks beside the hen based on the written number. Use erasable markers for this.
For this craft you will need:
- Construction paper
- Yellow and orange paint
- Red and black markers
For more information on this craft, go to LilTigers.net.
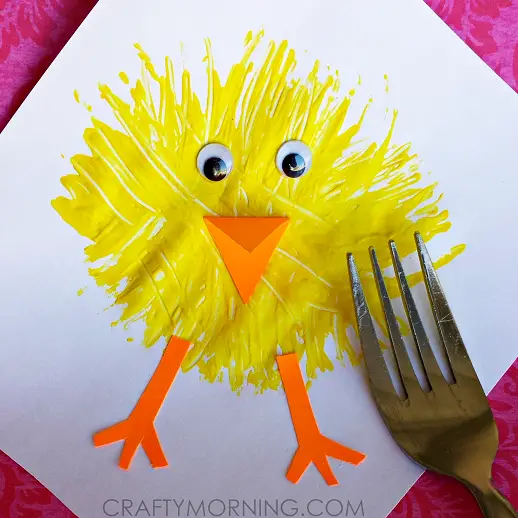
This little chick craft is an idea for an art lesson. Teach children different ways to create texture using various materials at home or in the environment.
To make the yellow chick, dip the fork in yellow paint. Press this on the white construction paper. The prongs on the fork will create yellow lines.
Move the fork slightly on the second time by gently pulling it outward. Do this repeatedly until a circle is formed.
Let the paint dry. Cut out the beak and feet from the orange construction paper. Stick them with glue. Add the eyes. The little yellow chick is now ready!
For this craft you will need:
- White and orange construction paper
- Yellow paint
- Fork
- Scissors
- Glue
- Googly eyes
For more information on this craft, go to CraftyMorning.com.
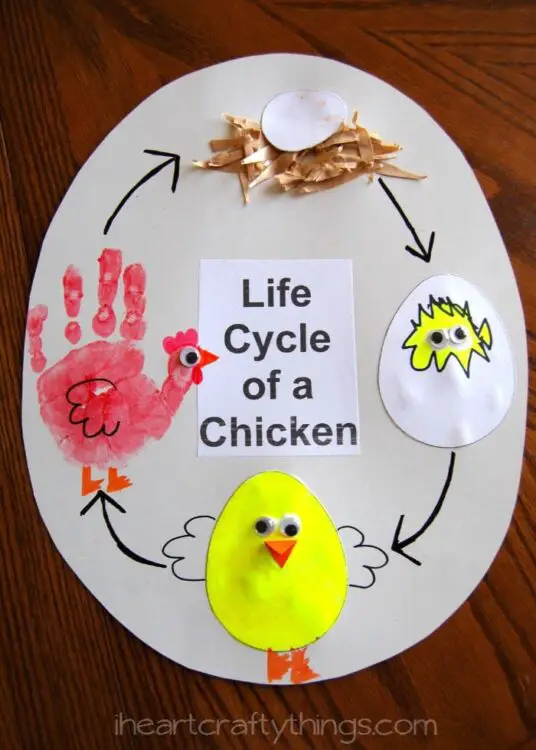
This life cycle craft is a beautiful way to introduce children to the process of an egg turning into an adult chicken. To make this craft, cut out an egg shape from the poster board.
Print out the label and paste or write “Life Cycle of a Chicken” in the center. Cut three egg shapes using white cardstock. Glue the shredded brown paper on the poster board to create a nest and add one of the eggs.
Draw a chick peeking from a broken egg. Add googly eyes. Glue this on the right side.
Color the third egg using a yellow marker. Draw wings using black and feet with the red marker. Attach the orange cardboard beak and add the eyes.
Use the child’s handprint for the adult chicken and add details using the black marker.
Extend the activity by making this into a series of posters on the chicken study. The second page may contain names related to chickens, such as hen for a mature female, a rooster for an adult male, and chicks for babies.
The third page may contain the different foods chickens can eat. These include vegetables and fruits, grains, insects, and other seeds.
For this craft you will need:
- Poster board
- White and orange cardstock
- Brown shredded paper
- Black, orange, red, and yellow markers
- Googly eyes
- Paint
- Glue
- Scissors
For more information on this craft, go to IHeartCraftyThings.com.
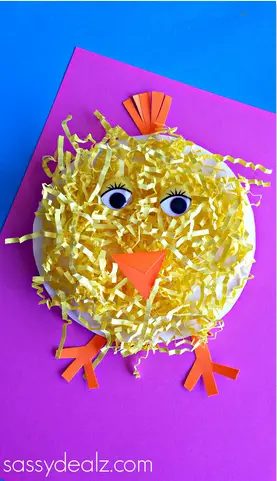
Here’s another easy-to-make chick craft that children will love. With some shredded yellow paper, this craft is as easy as pie.
Start with cutting the middle part of the paper plate. Discard the ribbed edge. Glue the yellow easter egg grass on the paper plate. Press hard for the paper to adhere well.
Next, use the orange construction paper, cut out feet, a beak, and feathers for the chick’s head. Attach these on the chick. Add the eyes.
Make four more of these adorable chicks for a total of five chicks. Use them to accompany the songs and chants such as “Five Little Chicks.”
This song comes in two versions. The first version is about bedtime, while the other is about wandering away.
To make this craft more challenging, ask children to cut strips of yellow paper and crumple them instead of using ready-made shredded paper. This task is ideal for children who are practicing their cutting skills.
For this craft you will need:
- Paper plate
- Orange construction paper
- Glue
- Scissors
- Yellow easter egg grass
- Googly eyes
For more information on this craft, go to CraftyMorning.com.
Inspired by the book “Barnyard Dance” by Sandra Boynton, this craft is an excellent tool to use when the line from the book says, “Spin with the chickens now! Cluck, cluck, cluck.”
This craft is excellent for children still learning to use scissors. They will learn to make small snips on the edge of the paper. They will also strengthen their hands by twisting the craft using their palms.
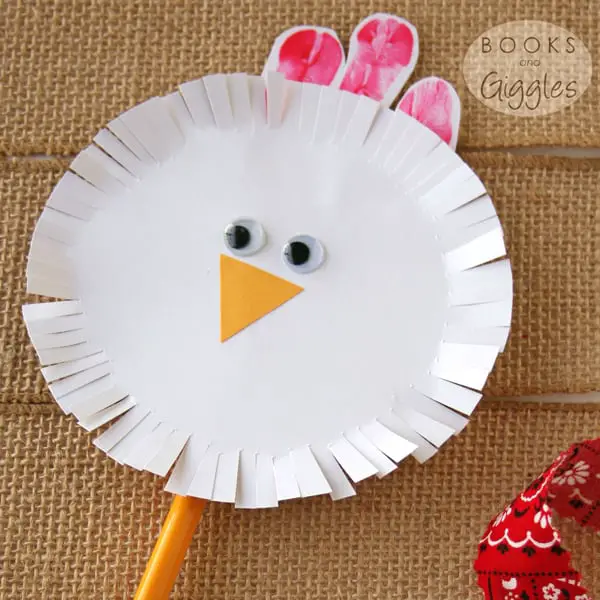
To make this craft, cut a piece of round, white cardstock. Use a pencil to draw an inner circle for children to use as a guide when cutting. Let the children know that they are not supposed to cut beyond the line.
Let children use the scissors to make a fringe on the edge of the paper. Paint the children’s three fingers and press them on a scrap of white cardstock to make the chicken’s comb. Cut this and attach it to the top of the chicken’s head.
Cut the beak using the yellow cardstock. Add the eyes. Let this craft dry. Attach the pencil using tape at the back of the chicken. If possible, use an unsharpened pencil or one with a blunt end to prevent accidents.
For this craft you will need:
- White and yellow cardstock
- Googly eyes
- Glue
- Scissors
- A pencil
- Red paint
- Stick tape
For more information on this craft, go to BooksAndGiggles.com.
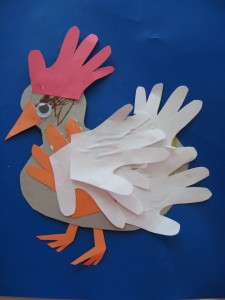
Hands-on Chicken is another craft inspired by the book. This time, its inspiration is “The Big Red Barn” by Margaret Wise Brown. Instead of feathers, this chicken is covered by a cut-out of hand prints.
This activity is a great craft for older children to practice their cutting skills. Let them learn how to turn the paper as they cut through the spaces between their fingers. For younger learners, provide a pre-cut handprint.
Use the cardboard to outline the chicken’s body. Cut and let the child color it.
Trace the child’s hands on the white paper, red, and orange construction paper. Note that four white handprints, one red, and one orange handprint are needed for this craft.
Using the remaining orange paper, cut out the beak and feet. Use the red paper to cut out the chicken’s comb. Now, assemble the chicken.
Stick the handprint on the body of the chicken. Next, glue the feet, beak, and comb. Lastly, add the eyes.
For this craft you will need:
- Cardboard
- Markers
- Two sheets of white paper
- Red and orange construction paper
- Googly eye
- Scissors
- Glue
For more information on this craft, head over to NoTimeForFlashcards.com.
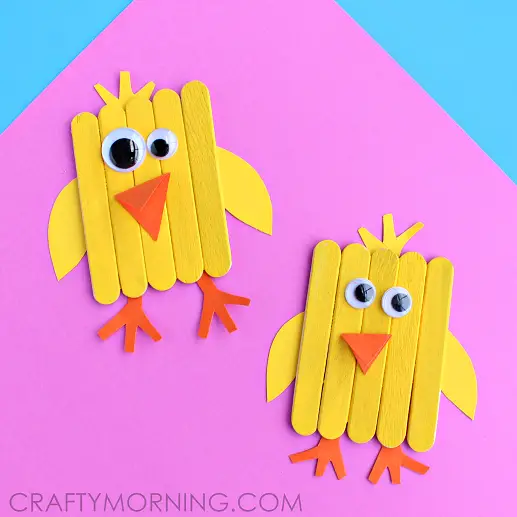
These popsicle stick chicks are almost the replica of the little ones in Taro Gomi’s “Mommy! Mommy!”. Make two of these angular-shaped creatures and a bigger red version for their mommy.
Use them to retell the story or for a game of hide and seek. Hide the mommy around the classroom. Have children hold the two popsicle stick chicks as they go around searching for mommy.
Let children take turns being chicks. This fun-filled activity will create excitement for children for a long time.
Start with gluing all five popsicle sticks on cardboard. Make sure that the cardboard is no bigger than the sticks. Once dry, paint it yellow. Allow the paint to dry before adding the rest of the details.
Cut the wings and feathers on the head using yellow paper. Use the orange paper to make the feet and beak. Attach them to the popsicle stick. Add the eyes. Let it dry before using it for play.
For this craft you will need:
- Five mini popsicle sticks
- Yellow paint
- Paintbrush
- Orange and yellow paper
- Cardboard
- Scissors
- Glue
- Googly eyes
For more information on this craft, go to CraftyMorning.com.
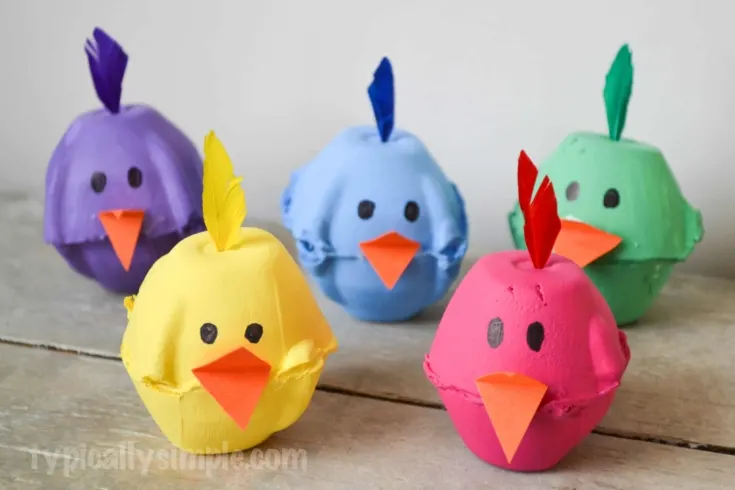
These charming little chicks will melt the children’s hearts. They are tiny and perfect for holding on one hand, and there are many ways to use them in class. Use these chicks to teach colors and use them as counters when counting.
They can also be used to teach children the concept of caring for small and fragile creatures. Allow each one to keep the chicks with them at all times, being mindful that the chicks can get squished or stepped on because they’re small. After a few minutes or an hour, reward everyone who has kept their chicks safe and protected.
Make this craft by cutting the egg carton into single cups. Glue the two cups together to form the chick’s body. Once dry, paint the chicks. Let children use different colors. Allow the paint to dry.
Poke a hole on top of the cups and insert a cut-out feather the same color as the chick. Add the beak and use the black marker to add the eyes. Small googly eyes can be an option for this.
For this craft you will need:
- Egg carton
- Paints
- Paintbrush
- Black markers
- Construction paper
- Scissors
- Glue
For more information on this craft, go to TypicallySimple.com.
Conclusion
These chicken crafts are simple and easy to make and can also be valuable tools in class. Children will enjoy hours of fun and excitement as they become more creative in making these crafts.
Consider trying any of the crafts on our list, and you will surely not be disappointed. Thank you for reading!
Heading out to look for more farm animal crafts? We’ve got you!


