They say that dogs are man’s best friends, but cats are the most affectionate babysitters! Cats love kids, and with their elegance and interesting personalities, kids definitely are fond of them, too.
Whether you already have cats as pets or your child wishes for one, these cat-themed crafts are an excellent opportunity to honor and learn more about these majestic yet warm whiskered fur friends.
Great Cat Crafts for Preschoolers
Here we’ve rounded up 10 ameowzingly easy cat crafts for preschoolers to make for Halloween, pretend play, read aloud, or just for fun! From masks and puppets to hang-worthy cat art projects— there’s sure to be something to get your kids moving and learning.
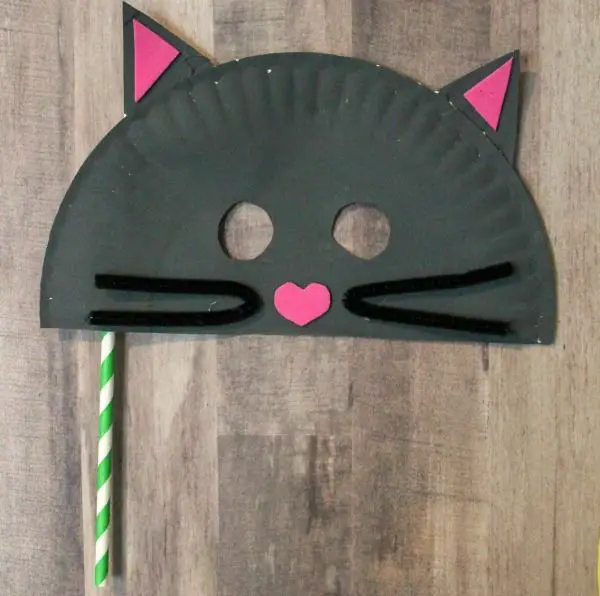
A paper plate is a staple for frugal crafters and Crafts4Toddlers knows that well. That’s why they came up with this easy paper plate cat mask that is not only a fun project to do but also useful in costume parties, playing pretend, and even book reading.
For this, you’ll only need the following materials:
- Paper plate
- Foam sheets
- Pipe cleaners
- Paint (tempera paint is best recommended for preschoolers!)
- Paintbrushes
- Paper straw
- Glue
- Scissors
Putting this together is pretty straightforward. All you have to do is cut your paper plate with the mask area slightly bigger than half, cut out two circles for the eye holes, and glue on two triangular ears cut out from the discarded part of the paper plate. As you work on the cat features, you may want to use the opportunity to teach your little one about basic shapes.
Now that you practically formed the cat head, you can paint it with any color you like. Then once fully dry, add layers and more color to your mask by cutting two triangles for the center of the ears and a heart-shaped nose out of a pink foam sheet. To make whiskers, simply cut a pipe cleaner in half and fold them again in half. Finish it off by attaching a paper straw to the back of your kitty mask to form a handle.
There you have it– a versatile paper plate cat mask craft!
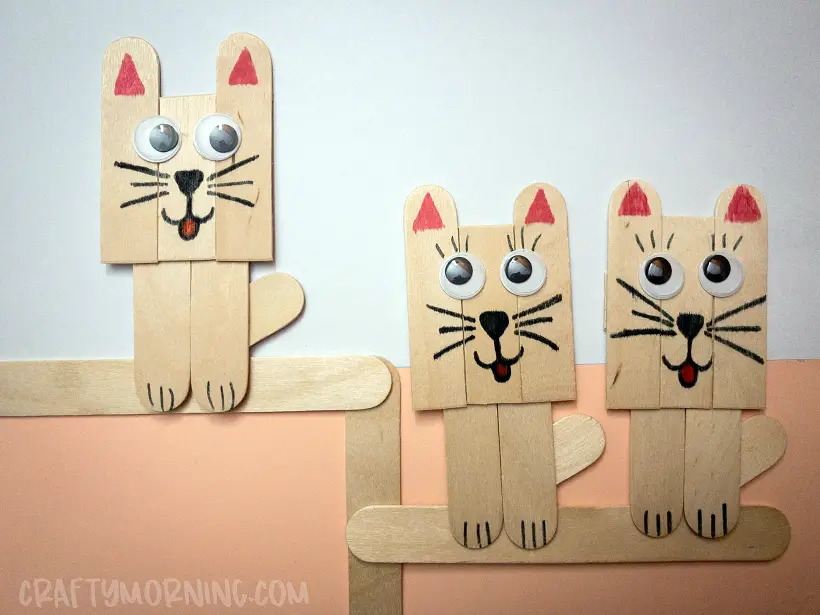
With easy-to-follow steps, you can make not just one but a clowder of this adorable Popsicle stick cat craft in one sitting. This won’t also break your bank as for every kitty, you’ll only need four popsicle sticks cut in halves, then assembled and glued together. Well, except for when your kids want to do more, so be sure to stock up on craft sticks!
To recreate this, gather first the following materials:
- Popsicle sticks
- Googly eyes
- Markers
- Scissors
- Glue
Start by cutting all four Popsicle sticks in half. Popsicle sticks are quite tough to cut, so adults might need to help or do all the cutting in advance. Once you have eight sticks, put three together and cut the top off from the middle stick. Take another stick, cut its top off as well, and glue it across the back, holding the first three sticks together.
Next, add cat legs by attaching two sticks to the bottom. And for the tail, cut a stick in half and glue it diagonally onto the back. Finish it off by gluing on the googly eyes and freehand drawing the rest of the details using markers.
Want a video tutorial on this stick cat craft? Head over to CraftyMorning!
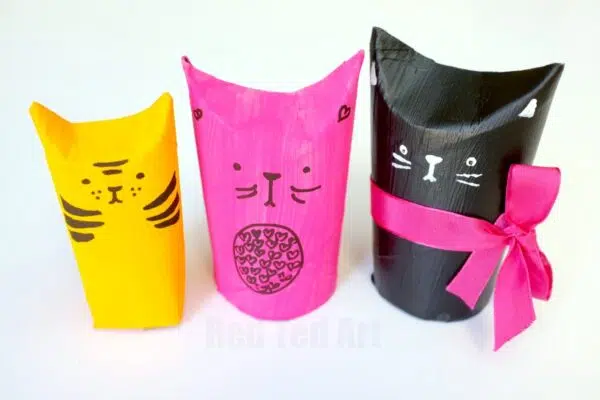
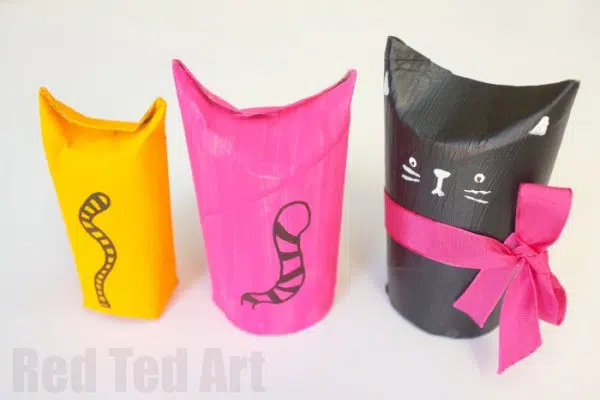
Toilet paper rolls are such a versatile craft material; with a dash of paint and creativity, you can turn them into anything like these adorable cardboard tube cats. This cat craft makes a fantastic display in your cat-loving kids’ room and can also double as a gift box!
For this, you’ll only need a few more supplies other than toilet paper or kitchen towel rolls.
- Paint
- Pen or marker
- Ribbon (optional)
Simply paint your toilet paper roll in your desired color and let it dry. Once ready, shape the top of the tube by squeezing the middle rim and then squeezing the other side so it folds over the top. Then you can now add features to your cat using just a pen or marker!
You can also wrap a ribbon around it to make it more like a gift box. As for closing the other end, you can either stuff it with tissue paper or cut four small slits along the bottom and fold them over.
RedTedArt has more toilet paper roll craft ideas you might want to check out!

Usher the Halloween mood with this footprint black cat craft that pulls double duty as a keepsake! It also features a fun poem you and your young one can recite together after at least an hour of fun motor skills practice.
Here’s what you’ll need:
- Canvas or cardstock for the background
- Paint (yellow, pink, white, black, and any color you like for writing the poem)
- Paintbrush
- Googly eyes
- Glue
To recreate this, have your child paint a yellow moon shape in the background and let it dry. Next, paint your child’s foot black and make a footprint on top of the dried yellow paint with the toes at the bottom edge of the moon. Then add cat features by painting on black ears, and a tail, and gluing on small pair of googly eyes on the heel area.
When it dries, use a fine-tipped paintbrush to paint on the pink nose and center part of the ears. Using white paint, draw on the mouth, whiskers, and claws. Finish it off by writing on your kid’s favorite Halloween poem or a stanza you’d like them to learn.
For more preschool cat crafts or Halloween ideas, click over to FunHandprintArtBlog!
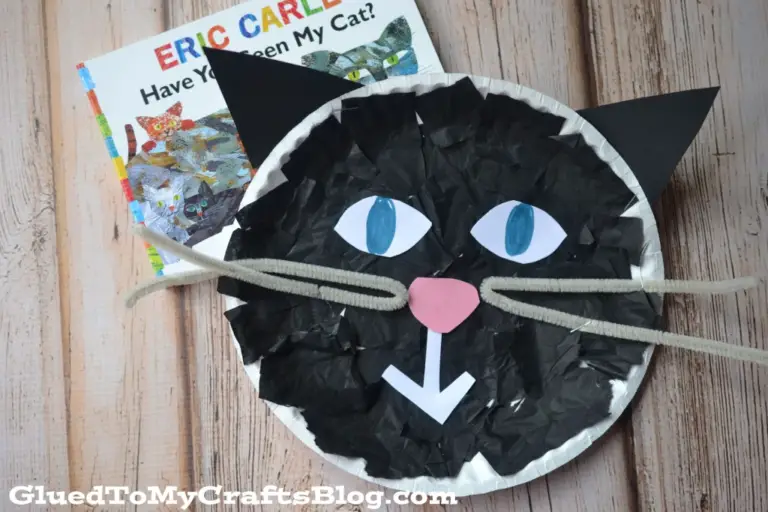
The textured appearance makes this simple paper plate cat craft extra interesting and fun to do. Preschoolers, especially cat lovers, will take pride in being able to do the highlight of this project— cutting and gluing tissue paper squares!
The materials you’ll need are as basic as the process. We bet you already have the following in your crafts bin:
- Large paper plate (one per cat)
- Tissue paper (black or any color you like)
- Pipe cleaners
- Cardstock (black, white, and pink)
- Glue
- Scissors
- Stapler (optional)
GluedToMyCraftsBlog uses black tissue paper but you can of course use any color you like. Let the kids take care of cutting their tissue paper into small squares and gluing them on, covering the entire paper plate. While the little hands are busy, grown-ups help with cutting cat features—diamond eyes, triangle ears, mouth, and nose—out of cardstock paper. Then to make whiskers, simply fold two pipe cleaners in half.
Finish off your cat craft by gluing or stapling its facial features in place. Now you have a cute paper plate feline with tissue fur!
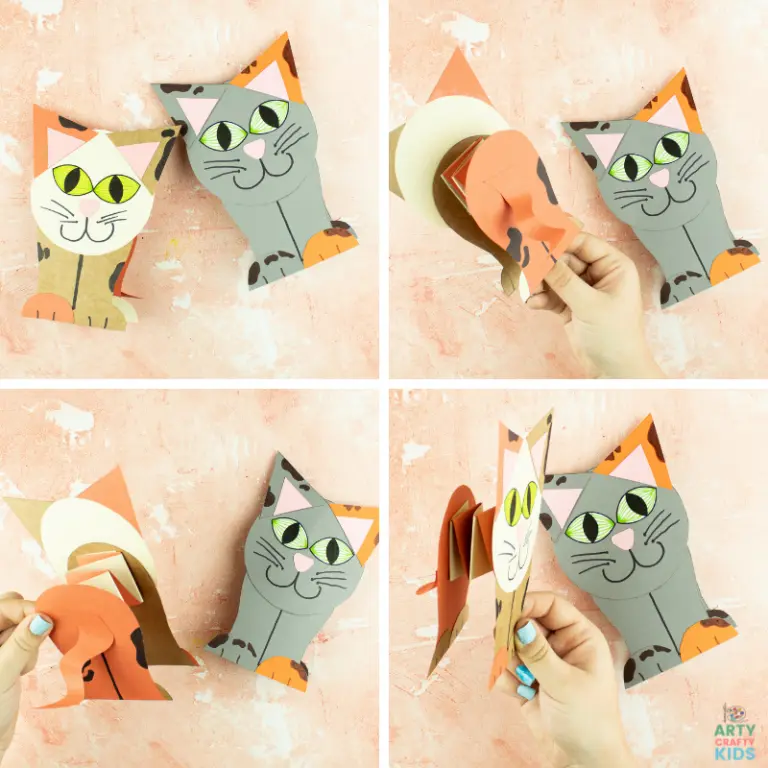
It’s no secret that kids are fascinated with crafts that move and so this slinky cat should be an absolute hit! If you lack the artistic skills to freehand draw a whole cat, ArtyCraftyKids provides a printable template that just needs to be cut out and assembled. You can either trace the template directly onto colored cardstock or have kids color them in and draw on patterns they like.
With that, all you are left to do is work on the magic that brings this feline craft to life— the paper spring! Begin by cutting out two even strips of colored paper at least an inch wide. Alternatively, you can use cardstock strips for a better bounce but they are a bit trickier for younger kids to fold, so if you give them a go, a bit of adult help might be needed.
Next, take the two strips, position them at a 90° angle like forming the letter L, and glue the connecting ends together. Create an accordion fold by folding the bottom strip over the top and creasing the fold along the edge continuously until all the paper has been folded up. Seal both ends with glue and attach them to the slink cat– one end to the front and the other to its back.
There you have it– a retracting and contracting cat craft your preschoolers will enjoy playing with! If you’re saving this for later, here’s all you’ll need:
- Printable slinky cat template
- Colored cardstock or regular paper
- Marker pens
- Pencil
- Scissors
- Glue
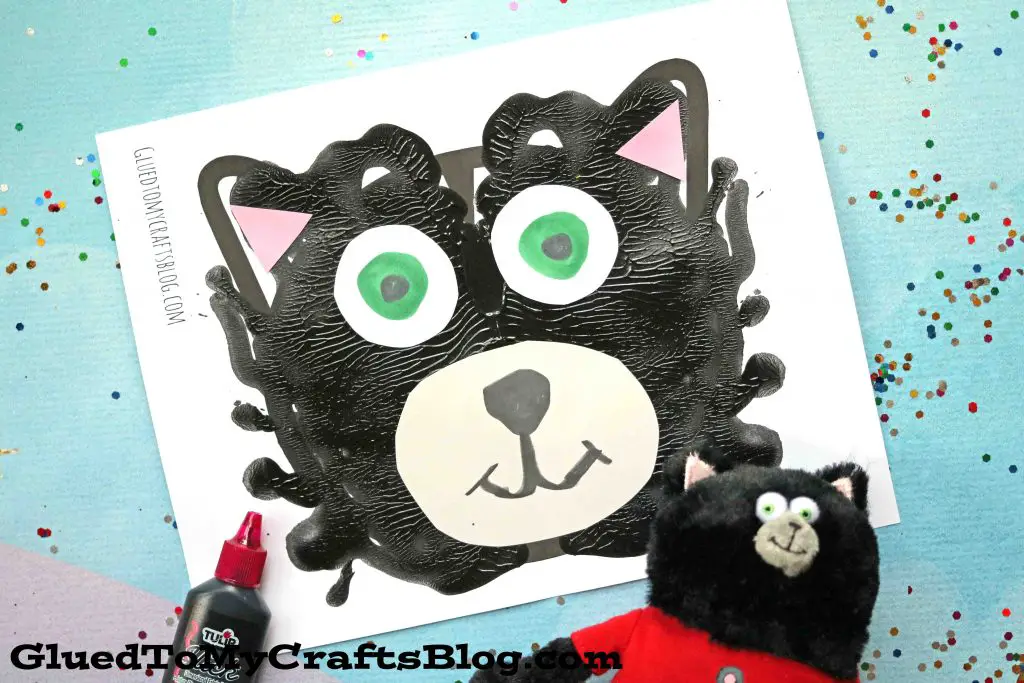
If your child belongs to the early reader crowd who loves the silly kitty, Splat, then this puffy paint cat craft is sure to excite them! The free Splat the Cat printable template from GluedtoMyCraftsBlog makes this project a lot quicker and easier to do. All you have to do is print the template, gather your supplies, and get those little hands ready for sensory and fine motor fun.
For this, you’ll only need:
- Printed cat face template
- Cardstock paper
- Black puffy paint
- Scissors
- Glue
Print the template on thick cardstock paper and fold it in half to create a dividing mark. Unfold and splash some black puffy paint on one side, close to the middle of the paper. Once the paint is down, fold again and squish the paper together. Use your hand to rub all over the folded piece, so the paint inside nicely covers the entire design.
Now it’s time to give your cat a final touch by gluing on facial embellishments cut out from the remaining cardstock. Let it fully dry and display however you wish.
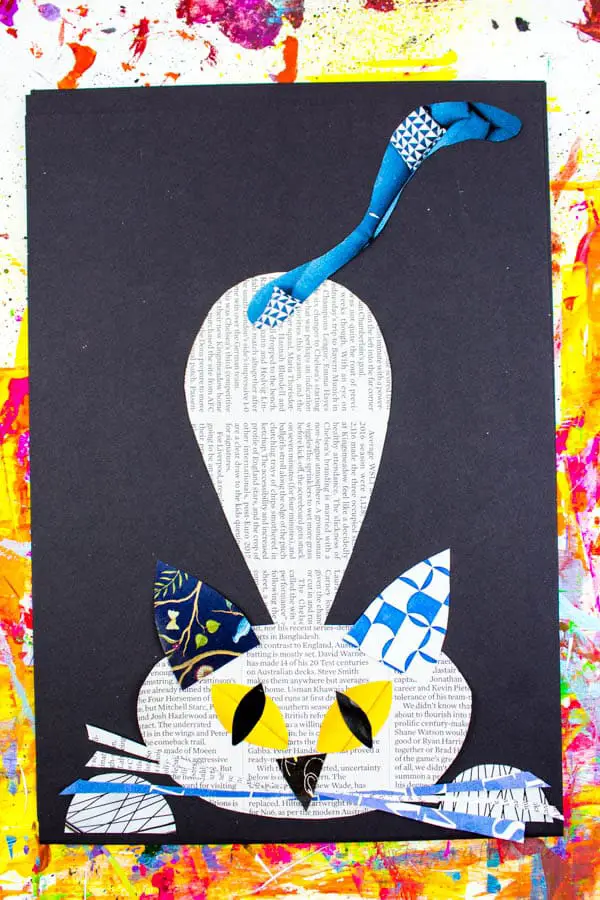
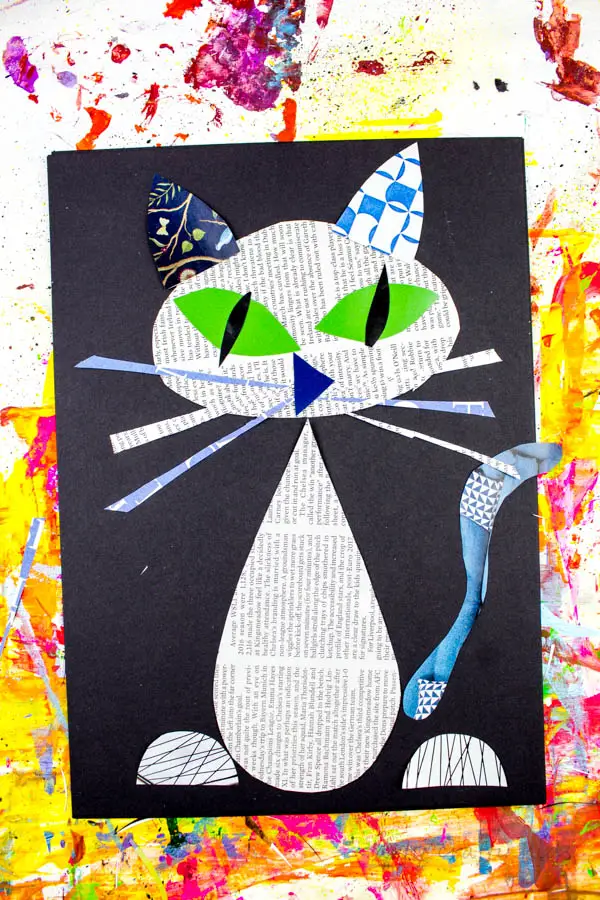
Nothing screams frugal craft more than this cat newspaper art project! With just one printable template and an assortment of recyclable materials, you can create four fun versions of this playful feline. Plus, it’s not only the outcome that is delightful and rewarding but also the skills kids gain and improve in the process.
To make this, you’ll need the following materials:
- Newspaper
- Magazines
- Backing cardstock
- Glue
- Scissors
- White Crayon (with the use of a black backing card)
This is pretty straightforward; all you have to do is print the template and let your imaginations run wild! The template consists of 10 shapes you need for tracing onto newspapers, magazines, or any scrap paper of your choice. Cut them out and have a blast moving them around, letting the cat play in different positions. Once you have decided on your favorite cat pose, glue all the elements to the backing cardstock and add a personal touch using crayons!
Over at ArtyCraftyKids, they have a video tutorial on how to assemble your cat into four different poses, so check them out!
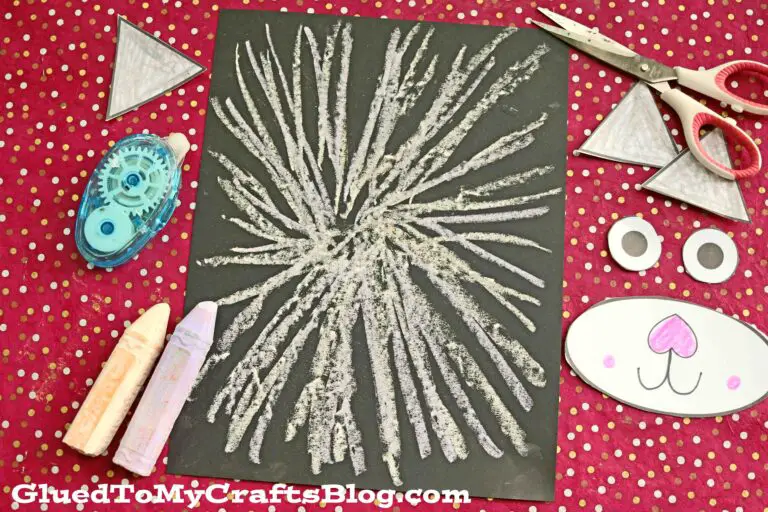
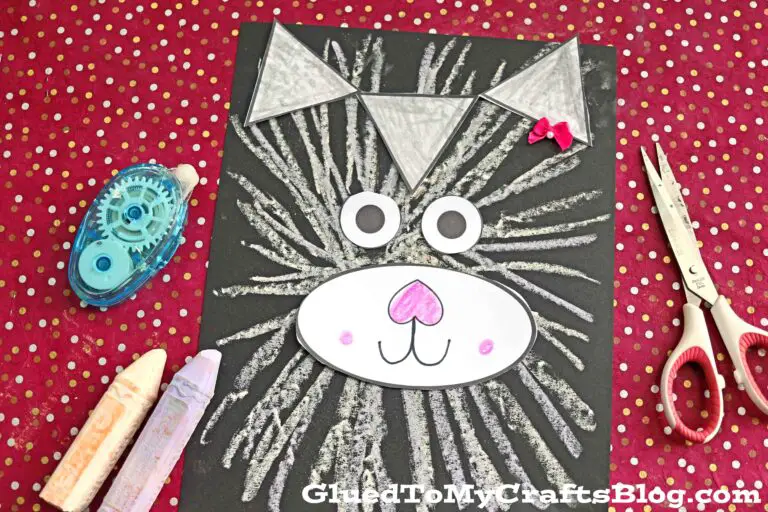
If your little ones haven’t explored the medium of chalk yet, then this easy chalk and paper cat craft is perfect to give them a kickstart! This activity is easy enough for preschoolers to do independently as it only involves cutting basic shapes, drawing, and gluing. However, younger or fine motor challenged kids might need adult help in cutting out oval and circle shapes.
For this, you’ll only need:
- Cat face template from GluedToMyCraftsBlog (optional)
- White and black cardstock
- Crayons, coloring pencils, markers
- Scissors
- Sidewalk chalk (color of your choice)
- Baby wipes
- Glue stick or tape runner adhesive
Start by printing out or drawing the cat face freehand on white cardstock. Color in the elements before cutting out and setting them aside. Now for the highlight, using colored chalk pieces, draw several lines going outward from the center of your black cardboard to make the “fur”. Create as many lines and colors until it’s nice and “fluffy”-looking enough to your liking. Finish it off by gluing on the cutout cat features and adding embellishments you see fit.
Chalks might feel funny for kids at first but after working on this adorable cat craft, for sure they will want to explore and create more!
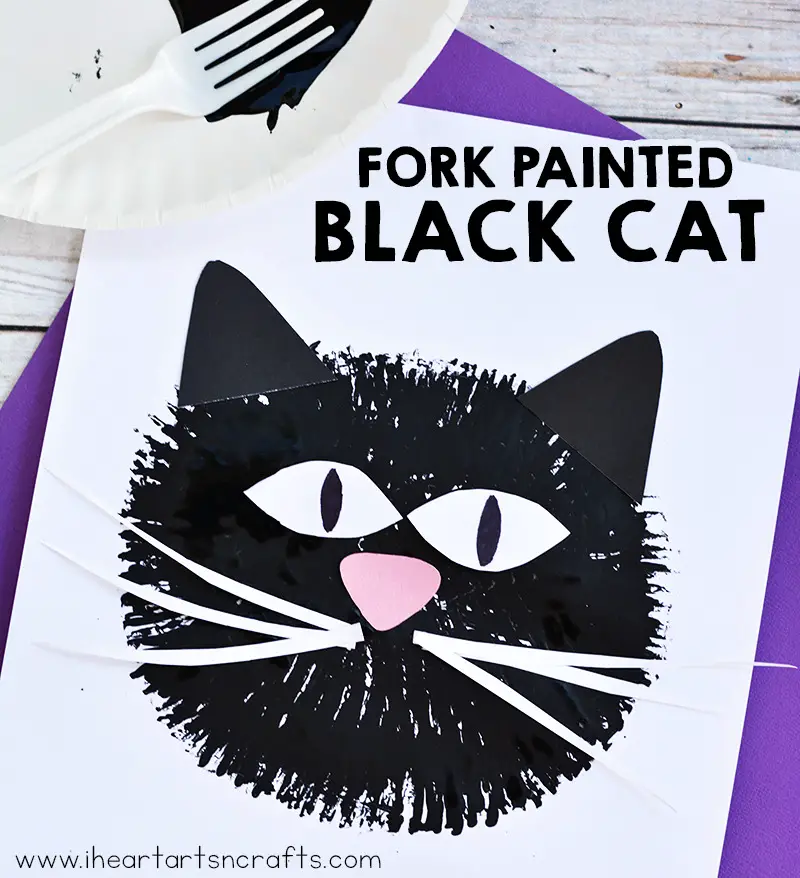
Skip the paintbrush and grab your plastic fork for this easy, fluffy cat painting! Kids will be amazed at how using a fork can achieve a nice-looking fur texture, inspiring them to create more and explore different subjects to paint. And you know how painting helps a lot with strengthening their fine motor control.
To get started, you’ll need only the basic craft materials– nothing fancy, nothing expensive:
- Fork
- Paint
- Construction paper
- Glue
- Pipe cleaners (optional)
iHeartArtsNCrafts uses black paint in their version of this project but you can of course choose any color you like. Simply dip the back side of your plastic fork into the paint and stamp it onto white construction paper. You can stamp from the center outward, forming a circle shape for the face. Continue stamping until you achieve your desired size and fluffiness. Set it aside to dry.
In the meantime, cut out pieces for the ears, eyes, nose, and whiskers from construction paper. You can also use white pipe cleaners for the whiskers to add a 3D effect. Once the painted face is dry, glue all cutout features in place and you’re done! Spend the next seconds admiring and petting your handmade kitty.
Conclusion
It’s no wonder that kids and adults alike are hooked on cats. They’re expressive, cuddly, and entertaining companions. Engaging your preschoolers in making these cat crafts is one fun way to teach them more about these adorable animals, and the responsibilities that come with owning one. With a variety of ideas, there’s certainly one cat craft (hopefully, more) that you and your kids will, paws down, adore!
Related preschool animal theme crafts and activities you might also like:


