Hello, lovely parents and teachers of preschoolers! Are you tired of the same old craft activities? Look no further!
This article presents you with 10 fun nursery rhyme crafts for preschoolers that will boost their fine motor skills, creativity, and language development. So, let’s grab some glue, paper, and scissors and get started on some exciting crafting adventures!
Great Nursery Rhyme Crafts for Preschoolers
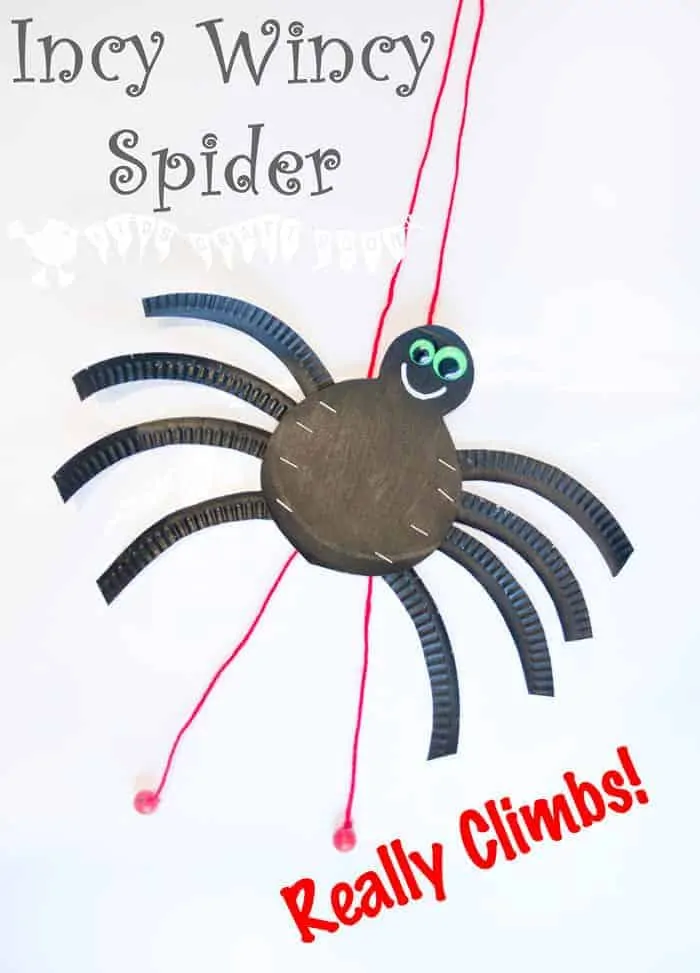
Get ready to add some more excitement to your Incy-Wincy Spider activities with this fantastic climbing paper-plate craft! That’s right, this Incy-Wincy Spider climbs up and down, making this nursery rhyme more fun than ever! Here’s what you’ll need:
• Paper plate
• Paint
• Plastic drinking straw
• String or wool
• 2 beads
• Googly eyes
• Stapler
• Sticky tape
• Scissors
• Glue
To make a climbing Incy Wincy Spider, start with a paper plate in your child’s favorite color. Cut the rim off and divide it in half to make two circles. Cut those circles into quarters to create eight legs. Cut a figure-eight shape out of the center of the plate for the spider’s body.
Add eyes and a mouth using stickers, paint, or markers. Glue or staple the legs onto the body. To make the spider climb, turn it over and tape two short pieces of a drinking straw to the back.
Thread a long string of wool through the straws and tie each end to a bead. Hang the string up high or attach it to a wall. Kids can hold the beads and watch the spider climb up and down.
Kidscraftroom.com is the place to go if you need more information about this resource. We also have more fun spider crafts you may want to check out!
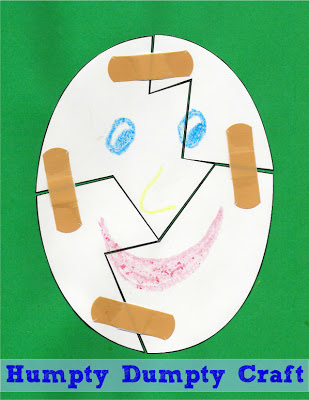
Looking for a fun and easy craft activity for kids? Try putting Humpty Dumpty back together again with this simple and entertaining activity! All you need are a few materials:
• Construction paper or cardstock
• Scissors
• Glue
• Crayons or markers
• Band-aids
First, help your kids cut out the pieces. This is a great opportunity to work on their scissor skills and hand-eye coordination.
Next, they’ll need to glue the pieces onto a piece of paper in the shape of an egg. This is where their puzzle-solving skills come into play! Once the pieces are in place, it’s time to give Humpty Dumpty a face. Grab some crayons and let them get creative.
Now, for the best part – sealing the cracks with band-aids! Not only is this a fun and interactive element of the craft, but it also helps to reinforce the idea that it’s okay to make mistakes and that we can fix them. And there you have it – a simple and fun Humpty Dumpty craft that your kids will love.
To get additional details about this resource, make sure to browse iheartcraftythings.com.
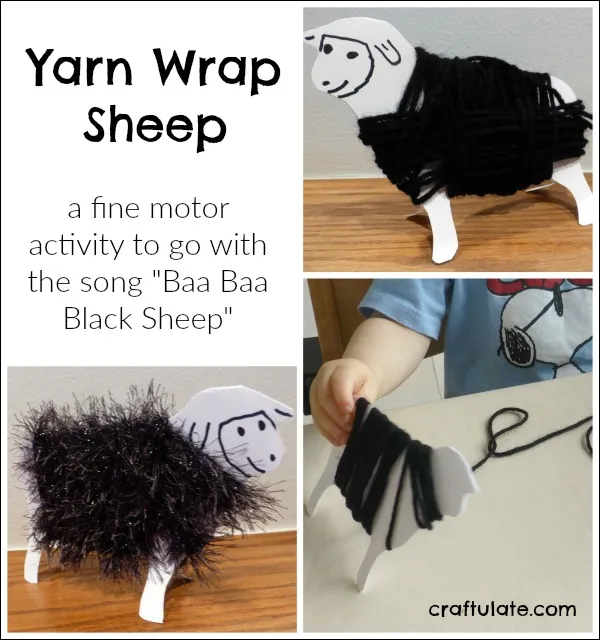
Yarn Wrap Sheep is a great activity for kids to practice their fine motor skills while having fun with the Baa Baa Black Sheep song. Here are the materials needed:
• Cardboard
• Black yarn (two different types)
• Scissors
• Glue
• Tape
To start, cut out a sheep outline from two pieces of card, glue them back-to-back without joining the legs, and draw on some features. Make two sheep using different types of black yarn. Tape one end of the yarn to the sheep and wrap it around the body a few times. Let the child do the same with the other sheep.
Dance the sheep around while singing the song together. Finish the yarn wrap by taping the end of the yarn and opening out the legs of the sheep for display. It’s a fun and engaging craft that kids will love!
If you want to learn more about this resource, don’t forget to visit craftulate.com. You may also want to check out other sheep crafts we gathered!
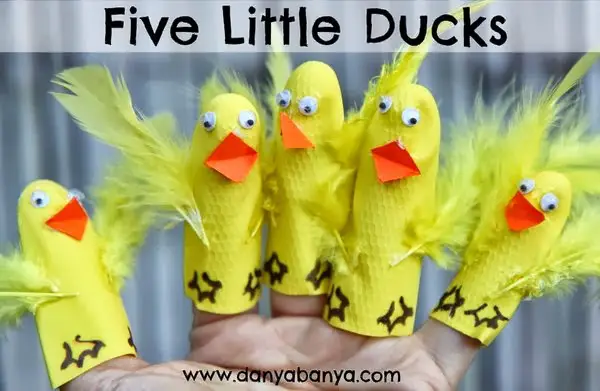
We know ducks are adorable and so are these DIY Five Little Ducks finger puppets that you can make with your kids with some simple materials.
You will need:
• Pair Of Yellow Rubber Gloves
• Googly Eyes
• Feathers
• Black Permanent Marker
• Craft Glue
• Scissors
• Orange Paper
To make these adorable duck crafts, cut the fingers from one rubber glove, and then use craft glue to attach googly eyes in pairs to each finger. Additionally, make tiny paper beaks by folding small orange squares diagonally and affixing them to the puppets.
Use a black permanent marker to draw small webbed feet onto the puppets. Then, attach feather wings with glue and place the puppets on pencils inside paint pots to allow them to dry.
Creating the “Mother Duck” hand puppet involves cutting out a larger beak and webbed feet from orange paper, and then using glue to assemble the parts with some help. These puppets are perfect for singing along to the nursery rhyme and will be a fun addition to your playtime.
For a deeper understanding of this resource, take a look at danyabanya.com.
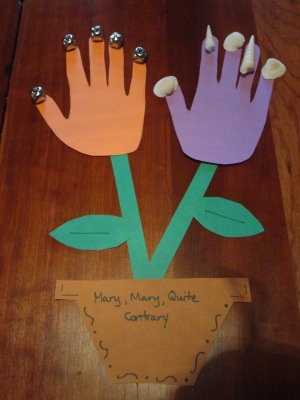
Add a touch of excitement to the Mary, Mary, Quite Contrary nursery rhyme with the Mary, Mary, Quite Contrary Nursery Rhyme Craft. This fun and creative craft project will have kids of all ages engaged and entertained for hours. With a few simple materials like:
• Colored cardstock
• Markers
• Silver bells
• Glue
• Seashells
First, trace your hand on a colorful cardstock and cut it out. Use glue to attach seashells to one handprint and bells to the other. To create stems, cut two long, thin rectangles from green cardstock and two leaves for each stem.
Use brown cardstock to make a flower pot and glue the stems at the back of it. Once it’s dry, feel free to decorate the flower pot and handprints with anything you like.
Lastly, print out the Mary, Mary, Quite Contrary Nursery Rhyme Lyrics on white paper and glue them to the flower pot. Now you have a flowerpot that’s ready to be sung and shaken along with the classic nursery rhyme!
If you’re curious about this resource, head over to allkidsnetwork.com for more information.
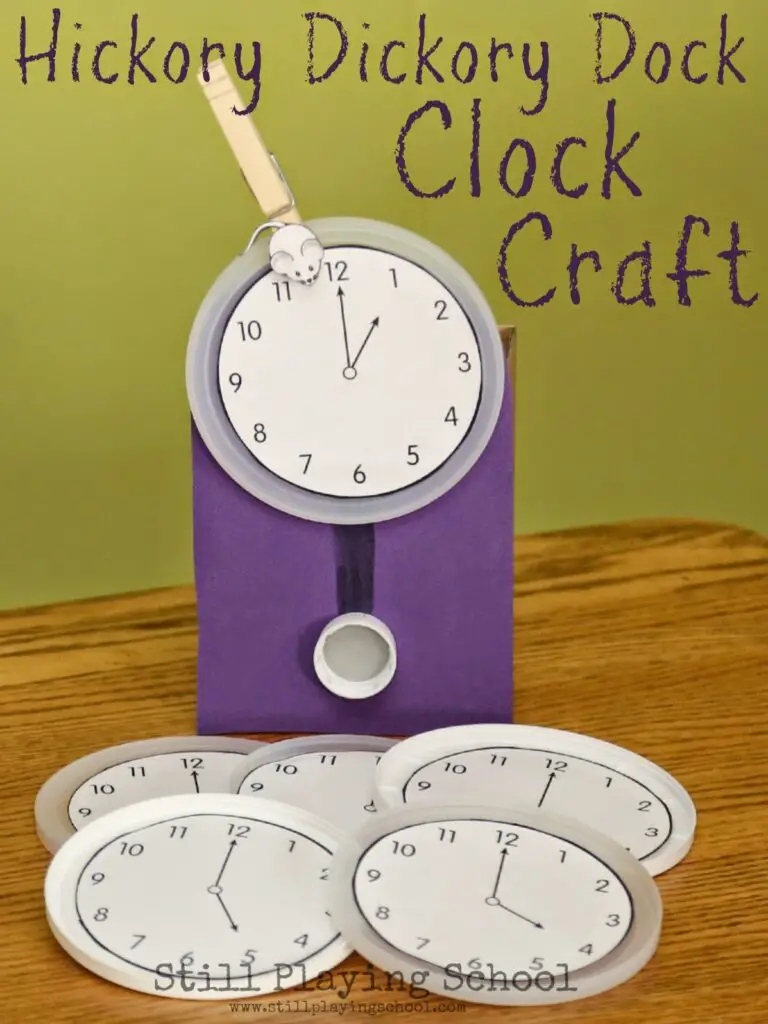
Get ready to learn about time with this fun and easy Hickory Dickory Dock Clock Craft. Children can create their own clock that moves just like the one in the nursery rhyme using materials such as:
• Paper plates
• Scissors
• Brad fastener
• Paint
• Foam Numbers
• Marker
Let’s get started on making a fun clock craft that teaches kids about telling time! Begin by painting a paper plate in any color you like, and let it dry completely. Once dry, cut out the center of the plate, leaving a border to put the numbers on.
Use foam numbers and a marker to attach them to the border. Then, secure a brad fastener in the center of the clock. As you and your child sing the nursery rhyme, your child can practice telling time by moving the clock hands.
This craft is perfect for preschoolers and can be adapted for older children too. Have fun!
Stillplayingschool.com provides more information about this resource, so be sure to check it out.
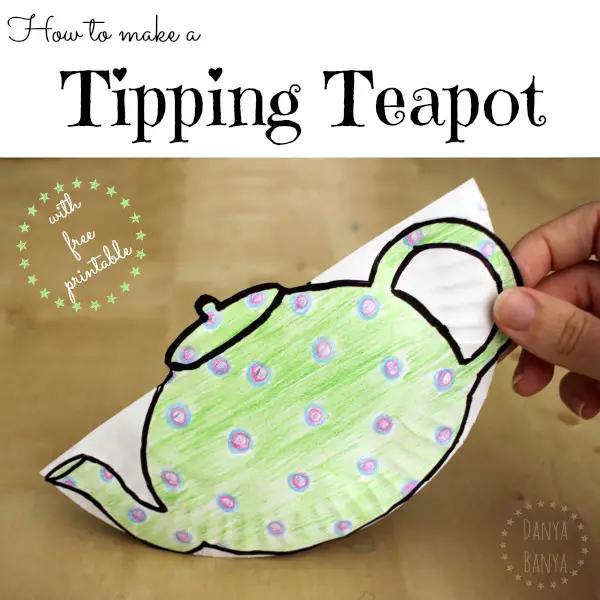
Making a tipping teapot is a fun and easy craft project that you can do with just a few simple materials. To get started, you’ll need:
• Printed image of a teapot
• Paper plate
• Marker
• Glue
Once you have your teapot image, it’s time to start coloring it in. Get creative and make your teapot as colorful and vibrant as you like.
After you’ve colored in your teapot, carefully cut it out using a pair of scissors. Be sure to cut along the lines as neatly as you can.
Next, take a folded paper plate and glue your teapot to the front of it.
Once your teapot is securely attached to the plate, take a black marker and trace around the outline of the teapot.
Finally, it’s time to sing the classic teapot song! Hold your teapot by the handle and tip it over to one side, just like you’re pouring out a cup of tea.
Don’t miss out on valuable information about this resource that can be found on danyabanya.com.
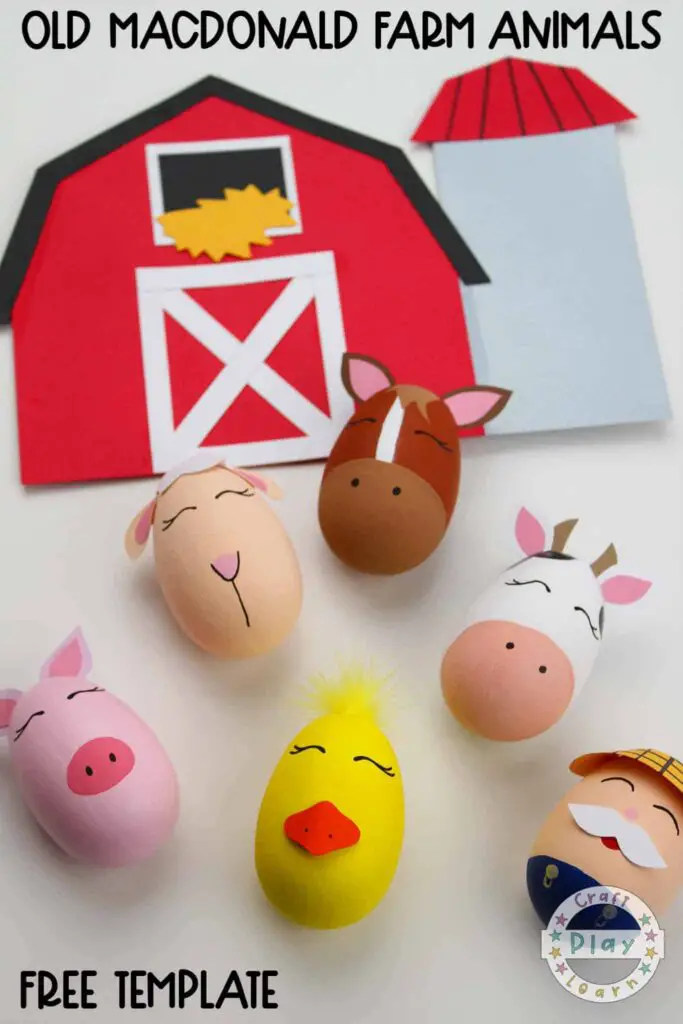
The beloved nursery rhyme “Old MacDonald Had a Farm” has been entertaining children for generations. If you’re looking for a fun and creative way to teach or sing this classic tune with your little ones, this Old MacDonald farm animal craft is the perfect activity! Here are the supplies you’ll need:
• Wooden or Paper Mache Eggs
• Acrylic Paint
• Paintbrush
• Cardstock
• Glue
• Hot Glue
• Pencil
• Black Paint Pen or Permanent Marker
• Scissors
• Feathers
Let’s get started on making your very own farm animal crafts! Begin by painting your eggs, then download and print out the template. Cut out the animal pieces, glue them together, and add some cute facial features and details with a marker.
To complete the farm scene, make a barn craft out of paper, as well. This activity is perfect for all ages and is sure to bring lots of smiles and excitement.
To fully comprehend this resource, visit craftplaylearn.com for more details.
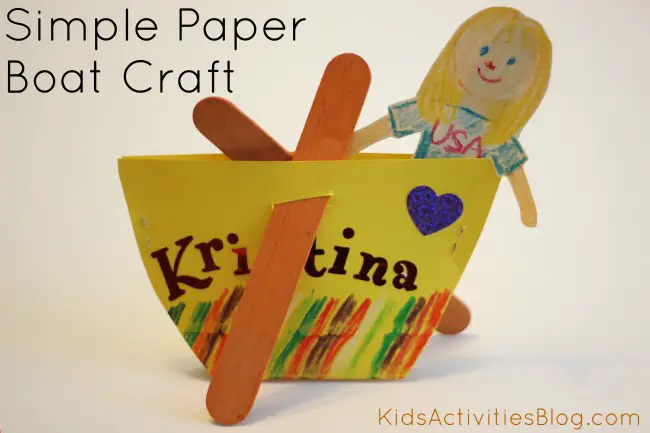
Making paper boats is a simple and fun activity that can be enjoyed by kids of all ages. All you need are a few basic materials that can be easily adapted based on your child’s age and skill level. To create a paper boat, you will need:
• Paper
• Scissors
• Stapler
• Stickers
• Crayons/markers
• Popsicle sticks
• Tape
To start, fold the paper in half and then create an M shape by folding the sides inwards. Next, draw the angled sides of your boat and trim the top and sides to make it the desired size.
Staple the sides together and cut holes in the sides for oars if you’d like. Once the boat is complete, let your child decorate it with stickers, crayons, or markers.
You can then have your child play with the boats in pretend water, either floating them around the house or flying them through the air. This activity is sure to provide hours of entertainment and creativity!
If you’re seeking more information about this boat craft, kidsactivitiesblog.com is a great resource to consult.
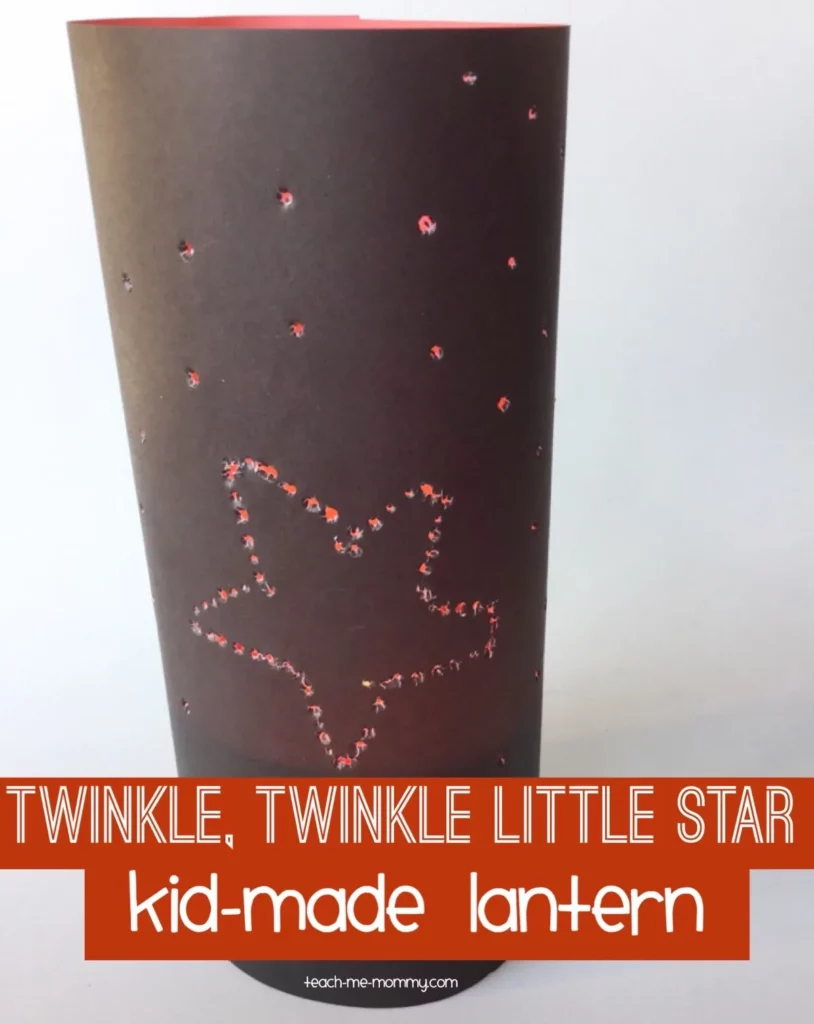
This craft is all about letting your little ones channel their inner artist while building their fine motor skills. Don’t worry, you’ll be keeping a close eye on them while they get to use a sharp object! Gather up some:
• Black paper
• Cardboard
• Star shape cutout
• A sharp object like a toothpick or dowel with a sharp end
First, stick the star shape down with some sticky gum, and let your child go to town poking holes around it. It’s like connect-the-dots, but with a cool twist!
If your little one gets tired of poking holes in the star, add a spiral or some other fun design to make it truly unique. Imagine a row of these beauties lighting up your porch at night! This star craft is a simple and super fun way for kids to show off their creativity.
Teach-me-mommy.com offers further insight into this resource, so be sure to visit the website for more information.
Conclusion
Nursery rhymes are a fun and engaging way to teach young children important skills such as language, communication, and creativity. These 10 easy nursery rhyme crafts for preschoolers are a great way to bring those rhymes to life and spark imagination in little ones.
We hope you and your preschooler enjoy creating these crafts together and continue to explore the world of nursery rhymes. Happy crafting!


