Boats are vessels used on water. There are many different types, and these can be made from various materials. Children will love making these crafts to enrich their knowledge of the different modes of transportation.
Let children explore the different ways of making a boat that can be used as toys or for experiments.
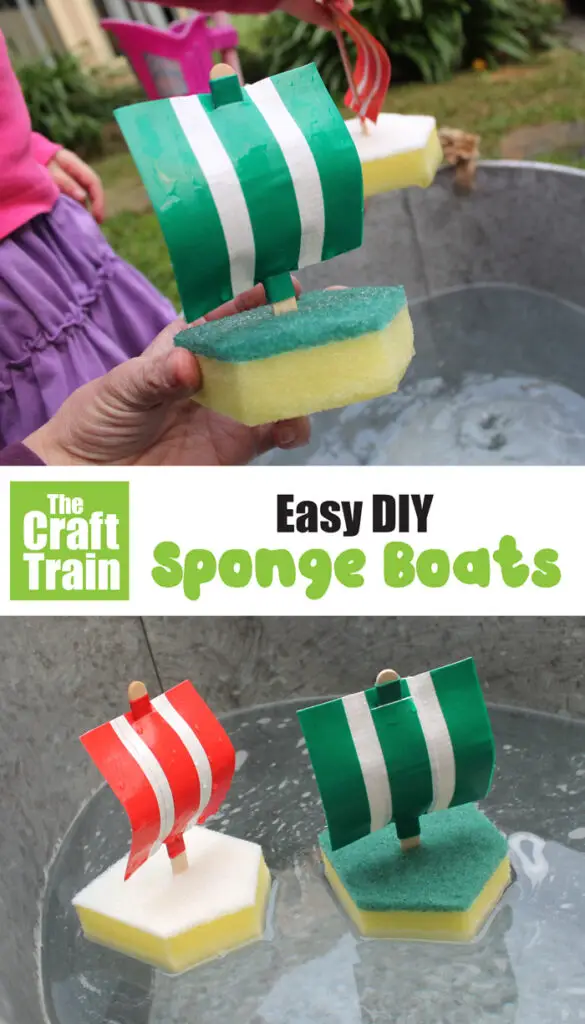
These sponge boats are easy to make, reusable, and can last a long time. Children will enjoy making them, especially the colorful sails. This will help improve their fine motor skills and provide a fantastic sensory activity when playing with it.
Make this craft more challenging for older children by turning it into a STEM challenge. Have children find out how much weight it can carry before sinking. Use small toys for this. They can also race with their boats.
To make the boat, use a marker and ruler to draw an inverted V on the sponge. Cut this out using scissors. Next, use the craft knife to cut a slit in the middle of the sponge.
Make the sail by laying the different duct tapes alternately and overlapping. Cut the edges and make slits in the bottom and top. Insert the craft stick. Finally, insert this into the sponge.
For this activity, you will need:
- Kitchen sponge
- Craft sticks
- Ruler
- Marker
- Craft knife
- Scissors
- Duct tape in different colors
For more information on this activity, go to TheCraftTrain.com.
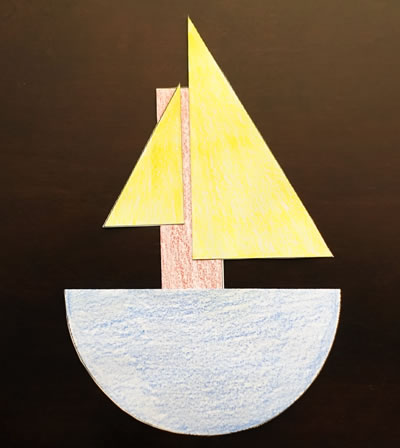
This boat craft is wonderful to help children with shape recognition skills. It is also a great introduction to symmetry and the concept of one-half. Their fine motor skills will improve as they cut, color, and paste the boat pieces.
Download and print the shape template from the site. Have children color the shapes and cut these out. Ask the children to name the different shapes needed to make the boat.
Next, have them fold the shape in the middle. Use the dotted line as the guide. Inform children that the names of the shapes are half-circle and half-triangle. Glue the shapes together.
Another option is to cut the shapes on the dotted line to form two sets of boats to teach fractions.
Assemble the pieces and glue them on construction paper. The site suggests making a water scene by adding cotton balls to resemble clouds and scrunched-up blue tissue paper for the water.
For this activity, you will need:
- Printed shape template
- Construction paper
- Scissors
- Glue
- Crayons or markers
For more information on this activity, go to DTLK-Kids.com.
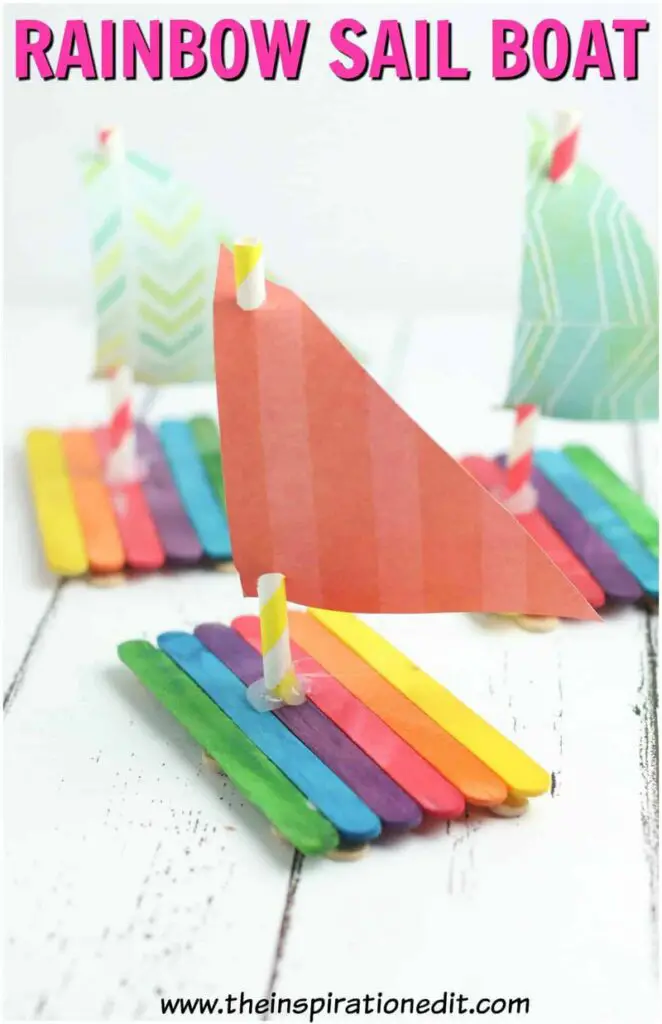
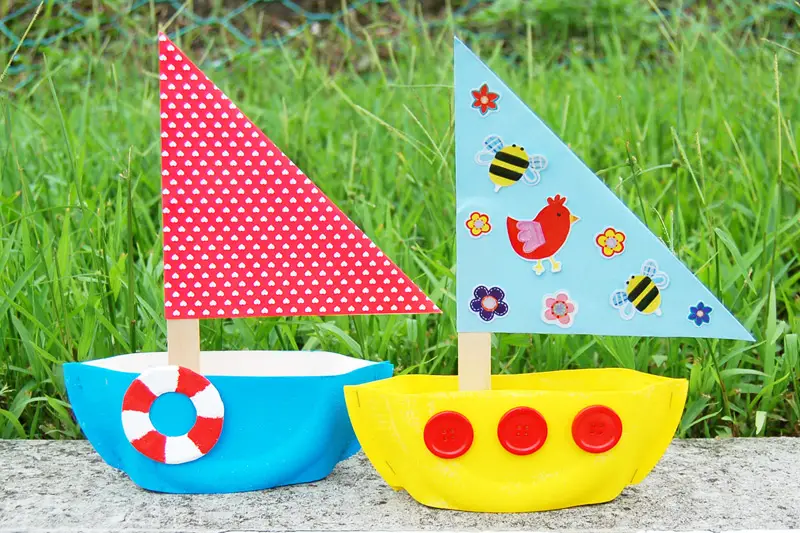
A perfect craft for the summer season, this colorful sailboat can help children improve their color recognition skills and learn about the colors of the rainbow.
The site suggests using this craft to go with the book “Maisy’s Sailboat” by Lucy Cousins. It is about a mouse named Maisy going on a boat adventure with her friends.
Start by laying the colored craft sticks. Follow the order of rainbow colors if desired. Next, cut two plain-colored craft sticks and use the hot glue gun to attach three of these to the back of the colored craft sticks to make the base.
Reinforce the base by attaching two craft sticks lengthwise. Next, make the sail by cutting a right triangle from scrapbook paper. Use a hole puncher to make two holes on the bottom and top of the triangle.
Next, insert the drinking straw and secure it using the hot glue gun.
For this activity, you will need:
- Craft sticks
- Hot glue gun
- Scrap book paper
- Drinking straws
- Hole puncher
For more information on this activity, go to TheInspirationEdit.com.
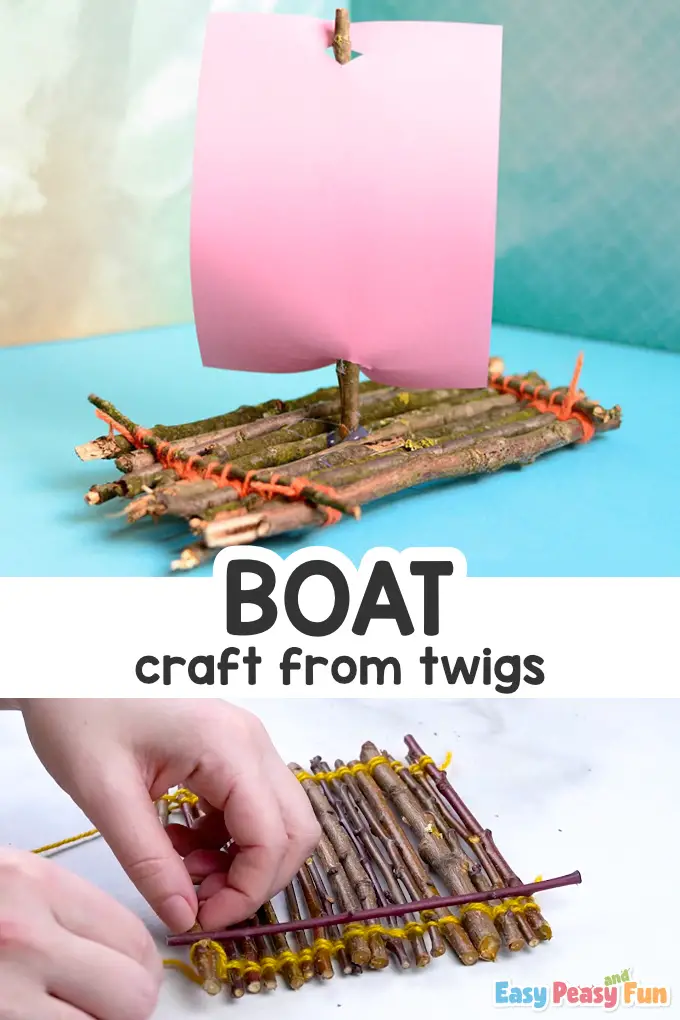
Collecting the twigs for this boat craft is a perfect activity during nature walks. Doing this provides a wonderful sensory experience for children. Tying the twigs one at a time will help improve children’s eye-hand coordination and control.
Begin with choosing the right kind of twigs for this craft. Choose straight, not rotting, and unbroken twigs to make a sturdy boat. Cut the twigs in uniform sizes.
Tie yarn on the end part of the first twig. Wrap it around and add a second twig. Wrap the yarn on both and add the third twig. Repeat this process until the desired width of the boat is achieved. Do the same steps on the other side to complete.
Add twigs under the boat. Refer to the picture on the site for this step. Next, use a hot glue gun to attach a twig in the middle and add the cutout paper sail.
For this activity, you will need the following:
- Twigs
- Yarn
- Hot glue gun
- Paper
- Scissors
For more information on this activity, go to EasyPeasyAndFun.com.
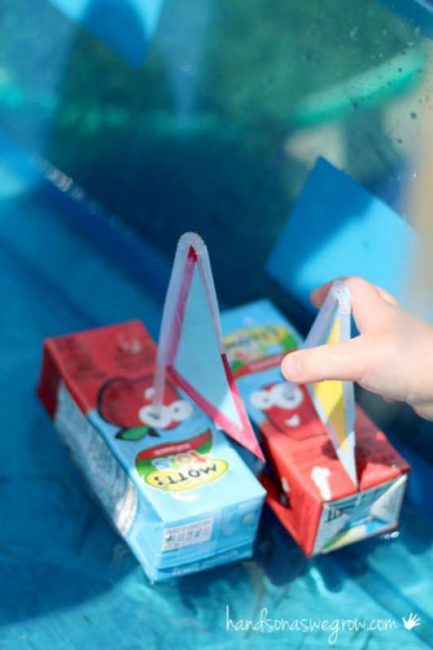
Here’s a simple boat craft that requires minimal assistance from adults. It teaches children about recycling and can be used for STEM activities. Introduce children to the concept of buoyancy through a science lesson.
Start by using an empty box of juice. If desired, clean the empty box before using it. Add sticky tape on the hole where the straw used to be to prevent the water from getting inside.
Next, have the children cut out a triangle for the sail from colored cardstock. Bend the straw and use the sticky tape to attach the triangle. Refer to the picture on the site for this step.
Lay the box down and poke a hole in the middle. Insert the sail. Fill a tub with water to sail the boats.
Extend the activity by using a timer to race their boats. Modify the sail’s shape to find out whether it affects the boat’s speed.
For this activity, you will need:
- Small juice box with straw
- Sticky tape
- Cardstock
- Scissors
- Tub
- Water
For more information on this activity, go to HandsOnAsWeGrow.com.
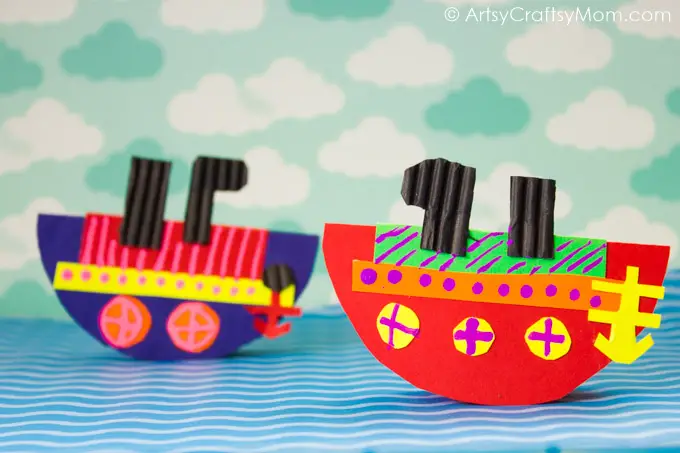
This rocking paper boat craft uses different types of paper. The corrugated paper has a texture that provides a wonderful sensory experience for children. Use this boat craft to teach children shapes and color recognition skills.
Start with tracing a circle on colored craft paper using a small bowl. Cut this out and fold it in the middle. Cut out other shapes, such as a strip of yellow, two small circles, and a red rectangle. Use corrugated paper to cut out the funnels.
Assemble the pieces. Take the red rectangle and fold it in half. Stick this on the folded part of the circle. Add the yellow strip and the small circles. Stick the funnels on the folded part of the circle. Add a cutout anchor if desired.
Use markers to add designs and details to the boat. Make the boat stand and tip to make it rock back and forth.
For this activity, you will need:
- Craft paper
- Corrugated paper
- Small bowl
- Chalk marker
- Scissors
- Glue
- Markers
For more information on this activity, go to ArtsyCraftsyMom.com.
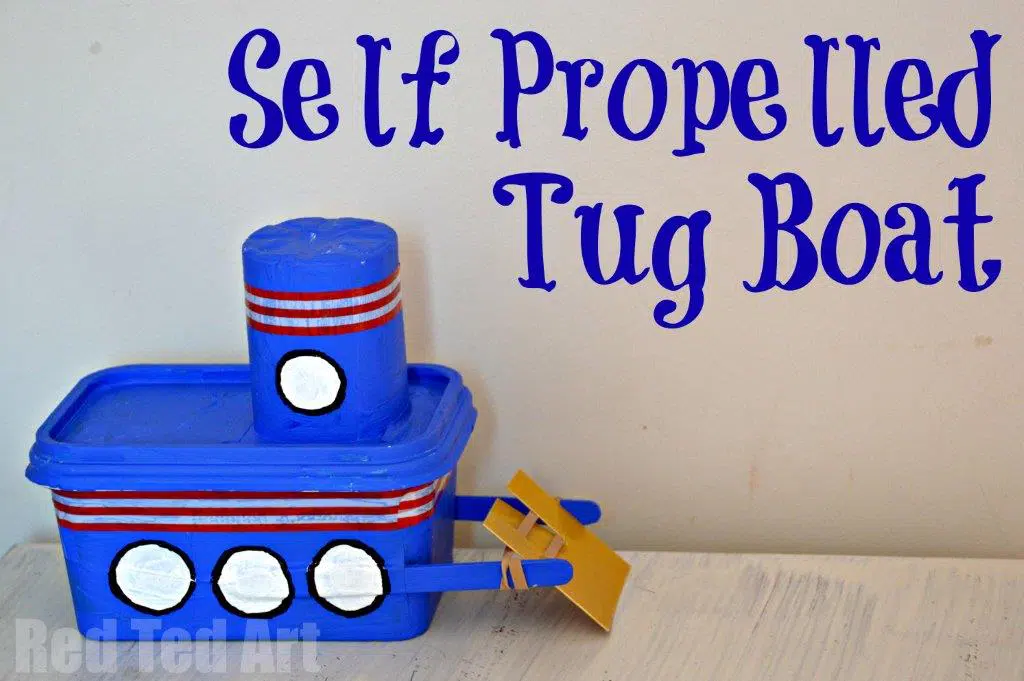
Here’s another boat craft that you can add to your recycling activities. This tugboat, in action, can move on its own through a propeller. Painting and assembling the craft will help improve their fine motor skills.
Older children can use this craft for a STEM activity by finding out how far the tugboat can go or how long it can last before the propeller stops moving.
Start by using clean and dry margarine and yogurt containers. Use duct tape to attach the craft sticks on the sides of the container. Add the lid and flip the yogurt container on the lid. Use the glue gun for it to adhere.
Let the children paint the tugboat. Allow the paint to dry, and add washi tape for decoration. Cut out a square shape from the extra plastic lid to make the propeller. Cut two slits on it so it can be inserted.
Tie a rubber band on the craft sticks and insert the propeller. Refer to the pictures on the site for this step.
For this activity, you will need:
- Rectangular container of margarine
- Empty cup of yogurt
- Craft sticks
- Hot glue gun
- Duct tape
- Acrylic paint
- Washi tape
- Paintbrush
- Plastic lid for the propeller
- Rubber band
For more information on this activity, go to RedTedArt.com.
These cute and colorful sailboats are perfect for young children to make. Teach children the essential parts of the sailboat: the mast, sail, and hull. Discuss precautions when riding a watercraft with a lesson on safety.
Children will improve their fine motor skills when they make this boat craft. These can be used as place markers or to hold candies and other small objects.
To make the sailboat, cut the paper plate in half and stack them together. Trim off the edge. Refer to the picture on the site for this step and the exact measurement. Next, position them to make a pocket and attach using a stapler. Paint the boat.
Cut out a triangle from cardstock or decorative paper. Attach this on the craft stick. Make a small slit in the toilet paper roll using the craft knife. Insert the sail in it and place it inside the paper plate boat.
For this activity, you will need:
- Paper plate
- Craft stick
- Toilet paper roll
- Paint
- Paint brush
- Cardstock
- Scissors
- Craft knife
- Markers
- Embellishments
- Stapler
For more information on this activity, go to FirstPalette.com.
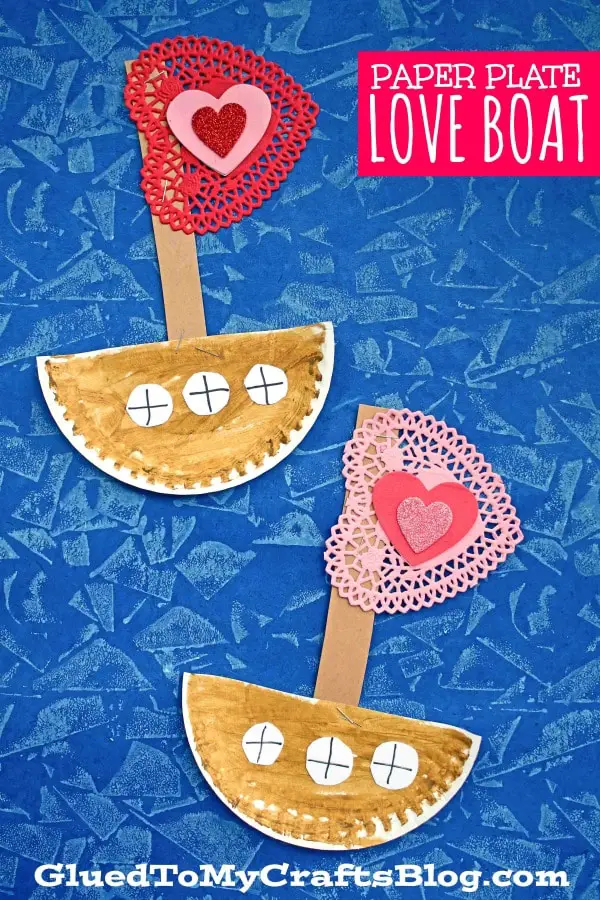
This paper plate love boat is an excellent craft for Valentine’s Day. It can be used to help children with shape recognition skills. Assembling this craft will help improve their fine motor skills.
With the different kinds of hearts, children may learn to compare them based on color, texture, and size. Doing this will help improve children’s oral language skills and help them think critically. Let them also practice counting the hearts and windows.
Start by cutting the paper plate in half and painting it with the preferred color. Make three circle cutouts from white cardstock. Add a cross in the middle to make the boat’s windows using a marker. Glue this on the paper plate once the paint dries.
Use brown cardstock for the boat’s mast. Attach the heart doily on the mast to make a heart-shaped sail using a stapler. Add the heart sticker and other available embellishments, such as glitters or sequins for decorations.
For this activity, you will need:
- Mini paper plate
- Small heart paper doilies
- Large heart stickers
- Scissors
- Glue
- Paint
- Paint brush
- Cardstock
- Marker
- Stapler
For more information on this activity, go to GluedToMyCraftsBlog.com.
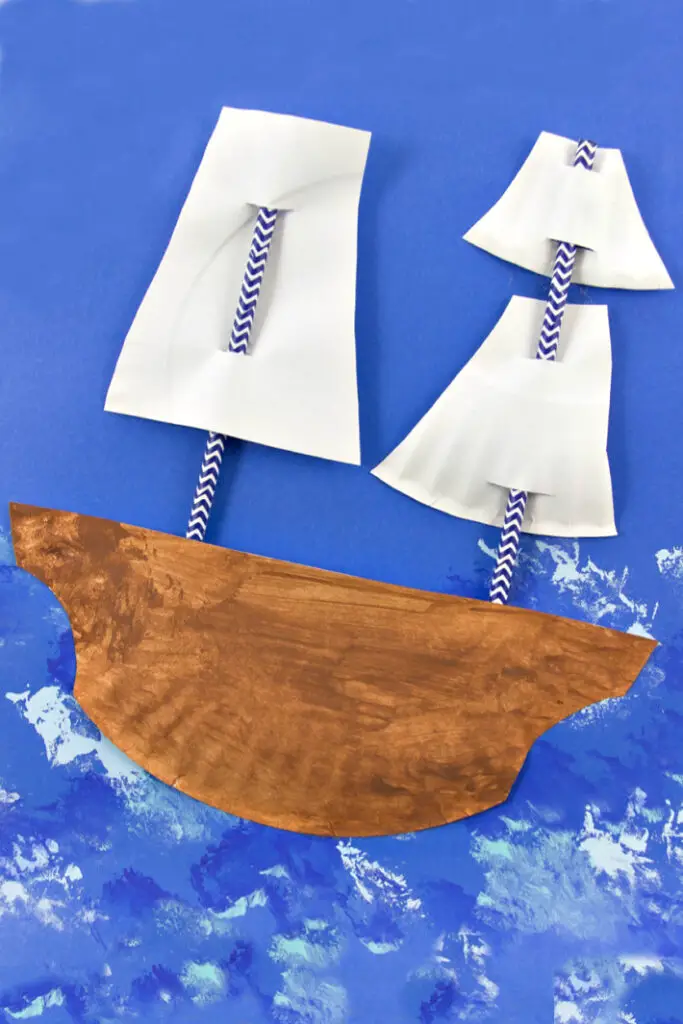
This watercraft is perfect for Thanksgiving Day and for teaching history and geography. For older children, use a map with this craft to help track its course.
Introduce children to the concept of texture in painting. The site recommends using a paper towel, but other objects can be used as well to create a different texture.
Cut the paper plate in half to make the Mayflower, then trim off the sides. Refer to the picture on the site for this step. Next, have the children paint the paper plate brown.
Cut the remaining half of the paper plate into three pieces to make the sails. Use a craft knife to cut slits on the sails’ top and bottom.
Carefully insert the drinking straws in the sails and glue these to the back of the paper plate. Add colors on blue construction paper to resemble the waves in the ocean and glue the Mayflower on it.
For this activity, you will need:
- Paper plates
- Paint
- Paper towels
- Drinking straws
- Cotton balls
- Construction paper
- Glue
- Scissors
- Craft knife
For more information on this activity, go to KidsActivitiesBlog.com.
Conclusion
Children will have a blast making these boat crafts to display and test different hypotheses. These crafts are easily modifiable based on the children’s skills and are engaging. Allow children to explore the fun of traveling on water.
Thank you for reading. Come back and check out our other craft articles soon.


