It’s summertime again, so we will have more time and opportunity to go camping, do outdoor exercises, or catch fireflies outside.
Well, speaking of fireflies, if you cannot get one, why not make your own?
In this writing, we will give you a list of fun crafting activities you can do with preschoolers to create a firefly for this week’s craft time.
Great Firefly Crafts for Preschoolers
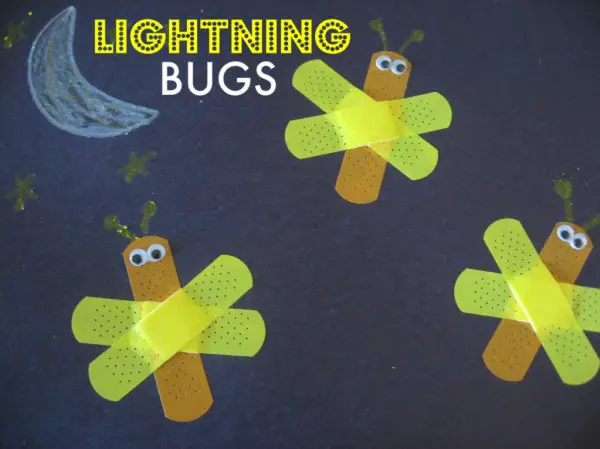
Making a band-aid lightning bug is our first choice for this great activity. This activity will help the child’s fine motor, creative, and recognition skills. It’s also an incredible opportunity for kids to learn how to make fireflies out of band-aids.
For educators, this is a great activity when teaching children about insects and having them draw what they see in the night sky. It is entertaining and colorful, and it’s likely to pique children’s interest in insects. Everyone will be able to participate in making this craft, and teachers will be able to display the creations in the classroom once the kids are done with all the work.
Fixing the bandages as the insect on a board is a fun way for them to spend their free time.
But, before we begin, the following materials are required:
- Black cardboard
- Yellow and white crayons
- Colorful bandages
- Glue
- 2 googly eyes
For each firefly, you will need 3 band-aids – 2 yellow and one of a contrasting color. Start by drawing a lovely night background with a moon and some stars on your black-colored paper. Then, open and stick first the darker or different color band-aid to make the firefly’s body.
As for the wings, crisscross the pair of yellow band-aids over the body. Draw antennae using a yellow crayon and lastly, glue a pair of googly eyes. You can make more band-aid fireflies as much as your background paper can fit!
You can visit the NoTimeForFlashcards.com website to learn more about how to do this activity.
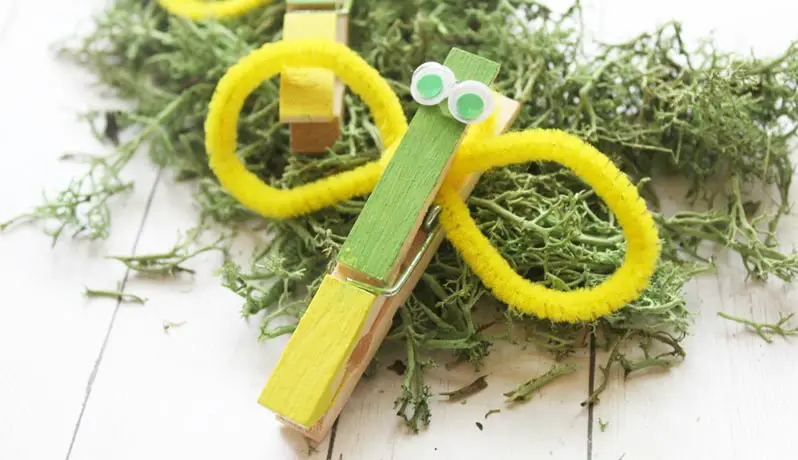
The clothespin firefly craft will not only brighten the kids’ summer class but will also teach them a lot. This activity will help the child’s creativity, color recognition, and attention to instructions. It will also give them an excellent overview of what a firefly looks like by utilizing items they frequently see when mom does the laundry.
Similarly, educators will be able to teach children how to make an insect out of everyday materials. Furthermore, they must provide specific and detailed instructions to the child for this enjoyable activity. Again, this will improve the student’s listening skills and full attention.
But first, we will need the following materials to get started on this enjoyable exercise:
- Wooden Clothespin
- Green and Yellow Acrylic Paints
- Paintbrush
- 2 Googly Eyes or Eye Stickers
- Green or yellow Pipe Cleaners for the Wings
Begin by painting the top half of the pins green and the bottom half yellow or with glow-in-the-dark craft paint. While allowing the paint to dry, make the firefly wings by folding your yellow or green pipe cleaners into a figure 8 shape. Tighten the middle part using the remaining pipe cleaner.
Glue a pair of googly eyes on the top (green) half of the firefly. Secure the pipe cleaner wings in place by either gluing or simply pressing them between the center of the clothespin, and voila! You can now clip your clothespin firefly anywhere you like!
You can visit SunnyDayFamily.com to learn more about doing the full step-by-step guidelines.
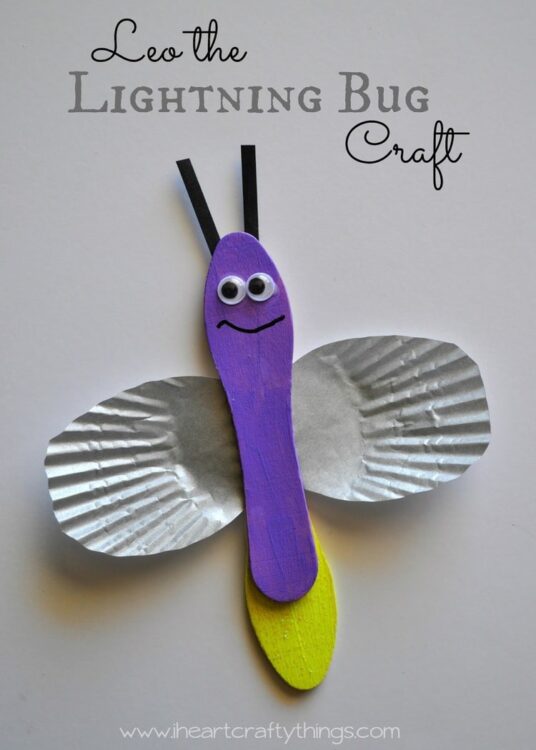
Making a replica of the main character from the book “Leo the Lightning Bug” is a good and fun activity if you have read it. This book craft will help children improve their creativity, geometry recognition, and attention to detail.
Educators can teach children how to copy the book’s firefly and use this craft to present a character while reading. Furthermore, everyone will appreciate the idea of bringing the main character Leo to life and serving as a role model for everyone.
However, before making the craft, instructors should read the entire story of Leo to the class to understand what they will be crafting next.
So, after we finish reading, we must prepare the following materials for the craft:
- Two scoop sticks for every firefly
- Neon Acrylic Paints ( 2 colors )
- Paintbrush
- Silver Cupcake Liner
- 2 Wiggly Eyes
- Black Marker
- 2 Strip Black Construction Paper
- Glue
- Scissors
Putting this together is very simple. Begin with painting your 2 scoop sticks – one with purple neon paint, and half of the other one with yellow. Once dry enough, coat some glitter glue over the yellow neon paint.
While waiting for the sticks to dry completely, make firefly wings by folding your silver cupcake liner in half and cutting a wing shape out, avoiding the folded edge to be cut. When your scoops are ready, unfold your set of wings and glue it on the yellow one. Then, glue the purple scoop stick on top of the yellow one, with the scoop facing the opposite end.
Finish your masterpiece by drawing the mouth, antennae cut out from black cardstock paper and a pair of googly eyes.
For tips and picture guides, you can visit the IHeartCraftyThings.com website.

Another enjoyable activity for preschoolers is making a firefly suncatcher. This activity will improve the children’s shape recognition, craftsmanship, and fine motor skills.
This exercise came from Eric Carle’s “The Very Lonely Firefly,” which also works well with “Sam and the Firefly” book. So, before doing anything else, educators should read one of the inspiring stories to the children. Following that, they can bring the main character, the firefly, to life.
Furthermore, this fun activity allows kids to use their imaginations to design their fireflies. They can use eco-friendly materials such as tissue paper to raise environmental awareness.
This book-inspired activity is another craft educators can use to teach students about color and shape recognition.
So, after hearing the firefly story, everyone should gather the following materials:
- Card Stock
- Colored Contact Paper
- Tissue Paper
- Glue
- Scissors
Have your child cut the tissue paper into small squares. You can use any bright color tissue paper you like. Lay your contact paper, sticky side up, and allow your little one to cover it with the tissue paper pieces they tore.
When done, take another piece of contact paper and lay it down on top of the decorated one to seal it. Then, cut out a teardrop shape to make the thorax and glowing part of the firefly.
As for the head and wing shape, simply cut them out of black or any color cardstock you like, and glue them on your tissue paper collage. And you’re done!
If you want to learn some helpful tips, please visit IHeartArtsNCrafts.com.
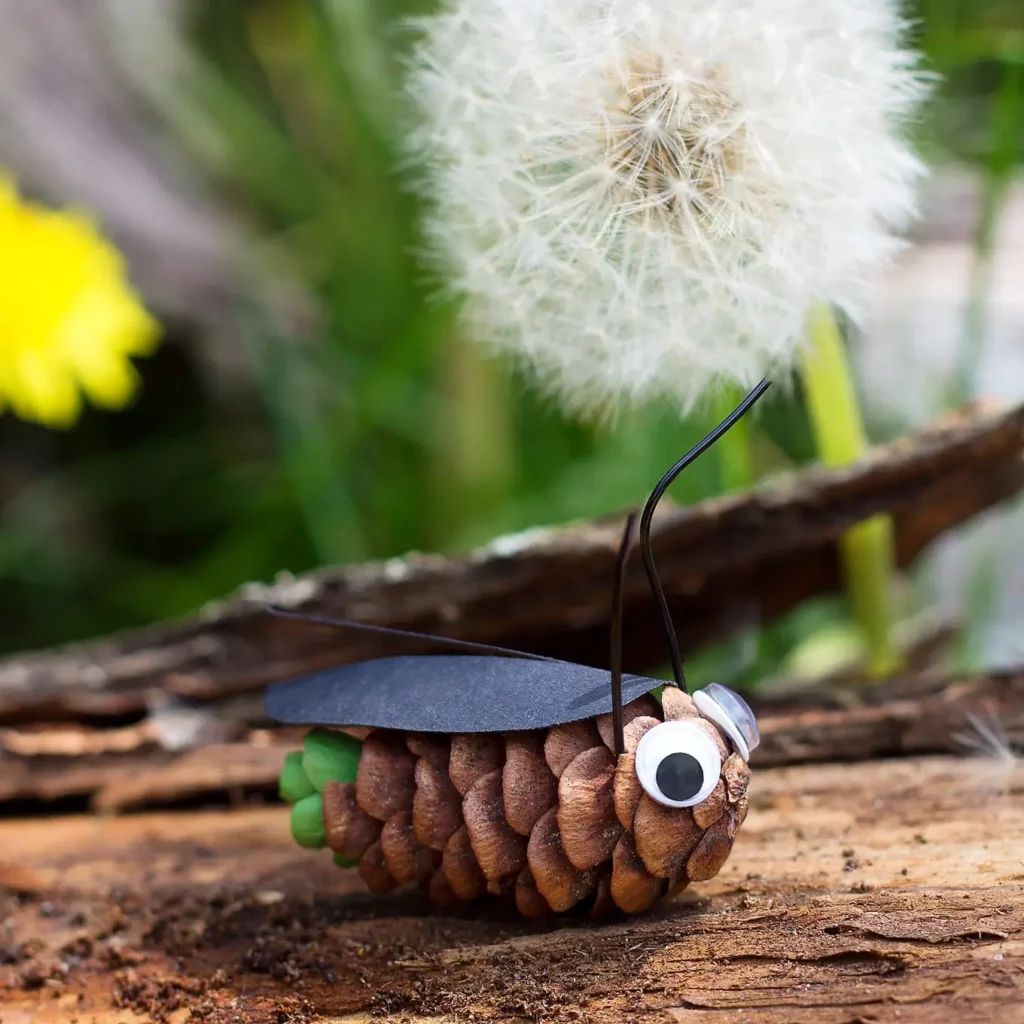
Another fun summer activity for your summer classes is making pine cone fireflies. It fosters excellent creative learning, shape recognition, and fine motor skills.
This activity can be accomplished at any age and in any location but works best if you can make it outdoors. In addition, kids will want to discover how to make those tiny insects out of construction paper and paint.
This is the activity that kids want to do in addition to catching a real firefly in the field. Teachers should show students how to properly grip scissors to cut out the materials needed to make a good insect replica before pasting it. In addition, everyone should also look for the perfect pinecones outside for a great medium.
So, to begin this enjoyable activity, we will require the following materials:
- Tiny Pinecones
- Black Construction Paper or Felt Paper
- Scissors
- 2 Wiggly Eyes
- Hot Glue
- Black Wire
- Green Paint
- Paintbrush
As the pine cone will already serve as your firefly’s body, doing this craft is quick and easy. Let kids have the time of their lives painting the narrow end of the pine cone with green. While allowing it to dry, cut wings out of black paper and snip down the center, but not completely through it.
When the paint dries completely, glue the wings onto the pine cone, bend a piece of wire around the head area to make antennae, and lastly, attach a pair of googly eyes.
Visit FirefliesAndMudpies.com to learn more about this fun activity for everyone.
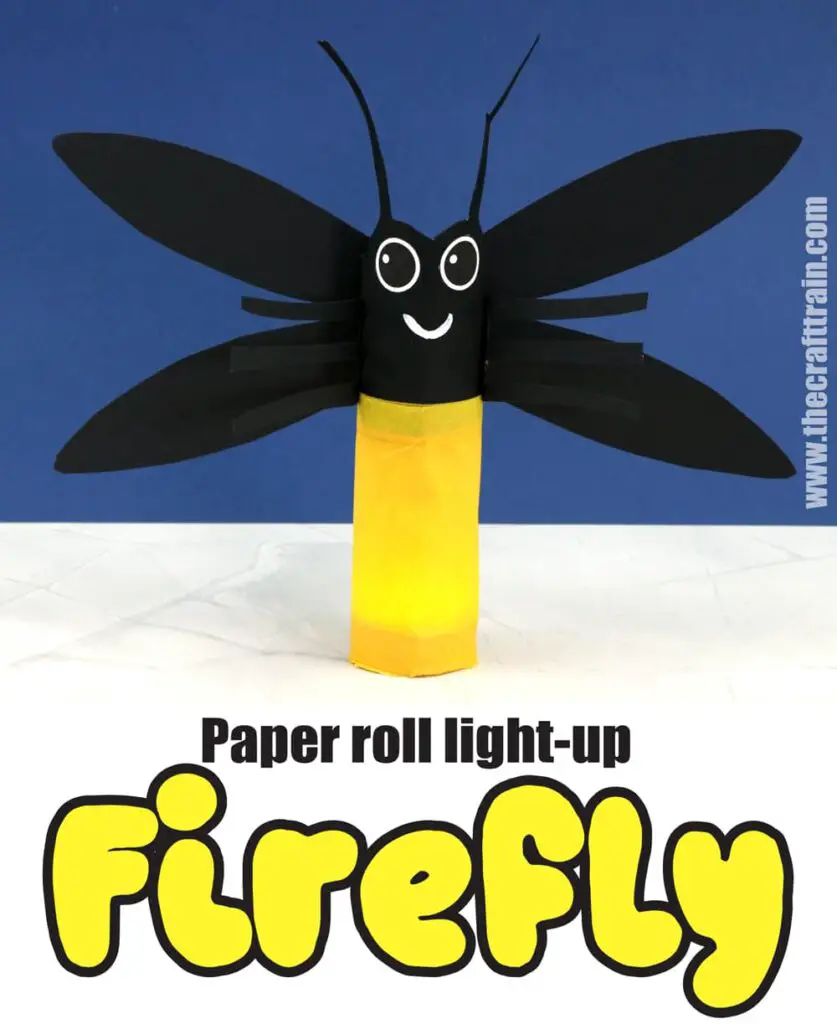
Making a paper roll firefly is one of the best pieces we can do for this firefly-themed activity because we can make it glow in the dark! This activity will teach children to be creative, focus on details, and recognize shapes.
You will need to put a battery-powered LED candle inside the paper roll to make the output illuminate the tail. Furthermore, teachers must carefully guide students on how to make this item because adult supervision is also required.
This paper roll craft will be one of the most eye-catching outputs kids will have, especially if they light it up at night in their bedrooms or even at school.
So, to make this one, we’ll need the following materials:
- An Empty Paper Towel Roll for A Taller Firefly
- Yellow, Black, and White Acrylic Paints
- Paintbrushes
- Staplers
- Glue Stick
- Glue Gun
- Yellow Japanese Paper or Parchment Paper
- Double Sided Tape
- Black Card Stock
- An LED Candle
- Scissors
The free printable firefly template makes this craft a lot easier to make. Simply print the template, cut it out and use it to draw the body of your firefly. The site suggests flattening the paper roll first to make tracing easier. Cut it out then pop the cardboard back into tube and paint it – the top half black and the bottom yellow.
Trace and cut the rest of the template out of black cardboard, then glue them in place. Next, stick a piece of double-sided tape around the top and bottom of the abdomen, and roll it up in a sheet of yellow tissue paper. Trim away any overhanging tissue paper away.
Don’t forget to draw a smile with thin white paint! And finally, to light your firefly up, place it over an LED candle.
Visit the thecrafttrain.com website for the complete guide and tips on making this craft.
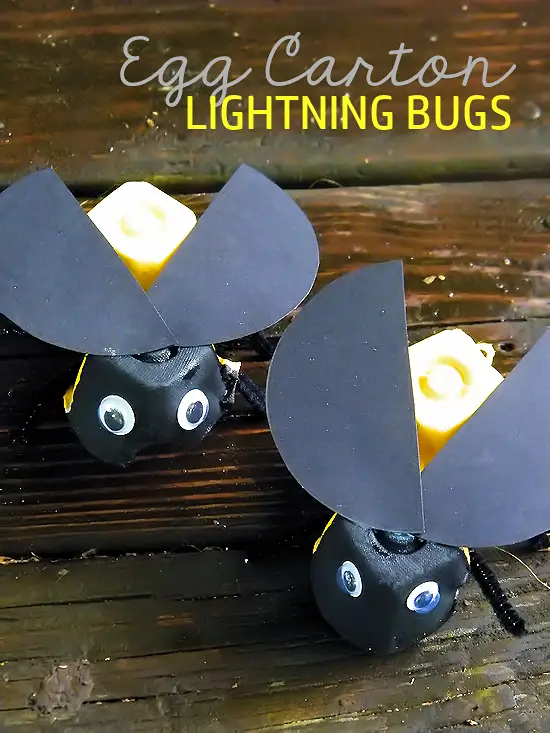
Summertime means making good things and crafts outside in the sun. So the best activity for kids is to make Egg Carton Lightning Bugs, which will help them improve their creative skills, recognize shapes, and practice physical exercises.
Everyone must have time to play and participate in outdoor activities because it promotes excellent physical exercise. This exercise will teach kids how to paint and create pieces to make a beautiful bug.
Similarly, teachers can conduct a follow-up activity such as show and tell about the student’s output to understand the essence and significance of the day’s action.
It’s okay to get our hands dirty sometimes, especially when the kids are learning to play with their egg carton lightning bugs.
So, to get started on this fun outdoor crafting project, we’ll need the following:
- Paper Egg Carton
- Black and Yellow Acrylic Paint
- 2 Wiggly Eyes
- Scissors
- 4 Yellow or Black Pipe Cleaners for the Legs
- Black Cardstock or Black Construction Paper
Putting this together is quick and simple. Start by cutting 2 egg sections from the carton. Paint ¼ of it with black for the head, and the rest with bright yellow color. To make a pair of wings, trace and cut a circle from black cardstock then simply cut it in half.
When the egg carton completely dries, apply glue along the edge of the head area to position the wings over with tips slightly overlapped. Poke 2 holes on either side of the thorax and insert a pipe cleaner for the legs. Finish it off by gluing on a pair of googly eyes.
You can visit ourkidthings.com to see the complete guide to this craft.
Summer improves the quality of life outside and provides more opportunities for children to learn. It also teaches children about the characteristics of fireflies that live outside.
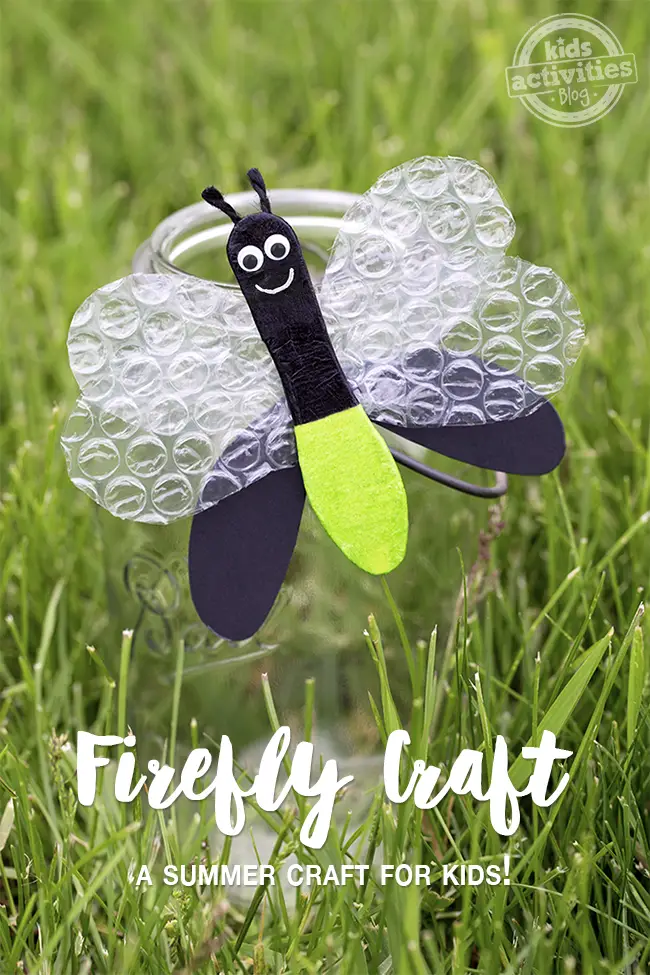
Another activity on our list is the wooden spoon and bubble wrap firefly craft, which will encourage students’ creativity, fine motor skills, and recognition. It also helps kids to be careful when dealing with complex art materials.
Because this craft requires hot glue, teachers must provide detailed instructions and assist the students throughout the process. Furthermore, anyone can participate in this enjoyable activity and then play with the results.
Furthermore, everyone can have fun playing pretend play using the firefly output.
Other than that, we will need the following items to begin this craft:
- Wooden Craft Spoons
- Scissors
- Sealer glue and hot glue
- Black and Lime Tissue Papers
- Glue gun
- Paintbrush
- Bubble Wrap
- 2 Wiggly Eyes
- Black Yarn
- Black Construction Paper
- White Permanent Marker
Assembling this firefly craft is very simple – a wooden spoon for the body, bubble wrap, and paper for the wings. Begin by having your child cut or tear green and black tissue paper into small squares. This will be used to decorate and cover your wooden spoon – black for the head area, and bright green for the bottom half.
When finished and dry, attach the googly eyes and secure the wings cut out from the bubble wrap and black construction paper to the back of the firefly using hot glue. Next, hot glue the antennae. Lastly, draw a sweet smile using a silver or white permanent marker.
You can visit kidsactivitiesblog.com to learn more about this craft activity.
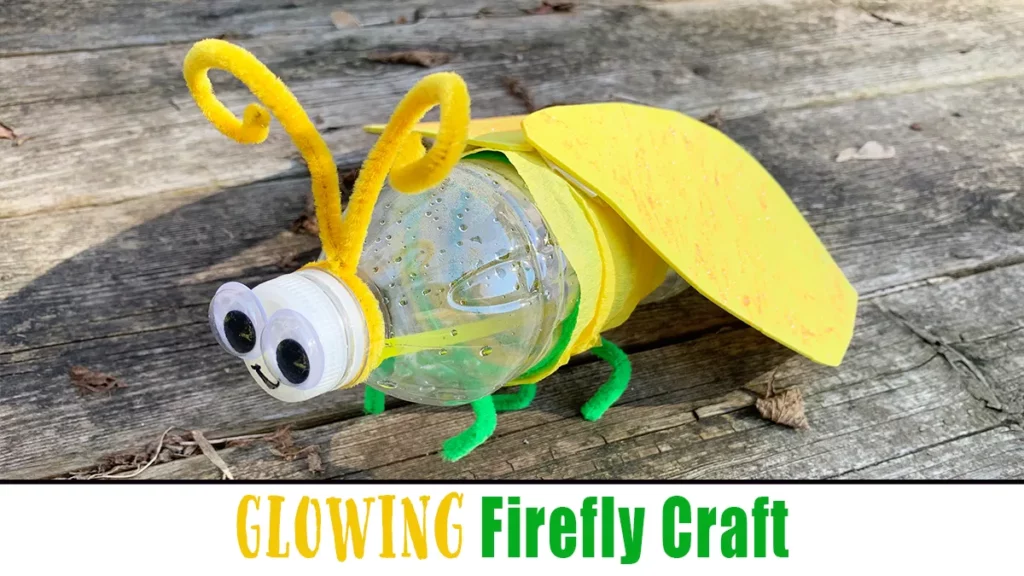
Outdoor activities benefit children’s welfare, including upcycling materials to promote environmental awareness. Children will benefit from this water bottle firefly craft as they learn creativity, upcycling, and fine motor skills.
Everyone will enjoy doing this eco-friendly crafting outside. Furthermore, educators can teach students how to practice fine motor skills by cutting the materials required for the firefly’s body and wings.
However, because cutting the bottle is an adult activity, teachers must first assist students in creating the foundation of the medium they will use, which is the plastic bottle.
Furthermore, kids will enjoy having to pretend to play with this, and it can be an excellent substitute for their screen time.
The things we need to have to make the firefly are:
- Empty Water Bottle
- Yellow Crepe Paper
- Glue
- Tape
- 1 Yellow and 1 Green Pipe Cleaners
- Scissors
- Construction Papers
- Foam Sheets
- Glitter Glues
- 2 Wiggly Eyes
- Black Marker
The whole bottle serves as your firefly’s body, so all you’re left to do is attach the rest of the parts. Begin by wrapping 3 pipe cleaners around the middle of the bottle and bend them to look like legs. Wrap some crepe paper in the same area to conceal the pipe cleaners. Make sure to secure it with glue or tape!
Next, take another pipe cleaner to wrap around the bottle’s neck and curl the ends to make antennae. As for the wings, cut them out of either construction paper or foam sheets and embellish them with glitter glue or different color markers. Attach the wings onto the crepe paper using double-sided tape. Then, glue the googly eyes and draw a smile on the cap to complete your firefly’s face.
For the highlight of the show, take an activated glow stick and insert it inside the water bottle!
You can visit happytoddlerplaytime.com to see tips and a step-by-step guide to making this output.
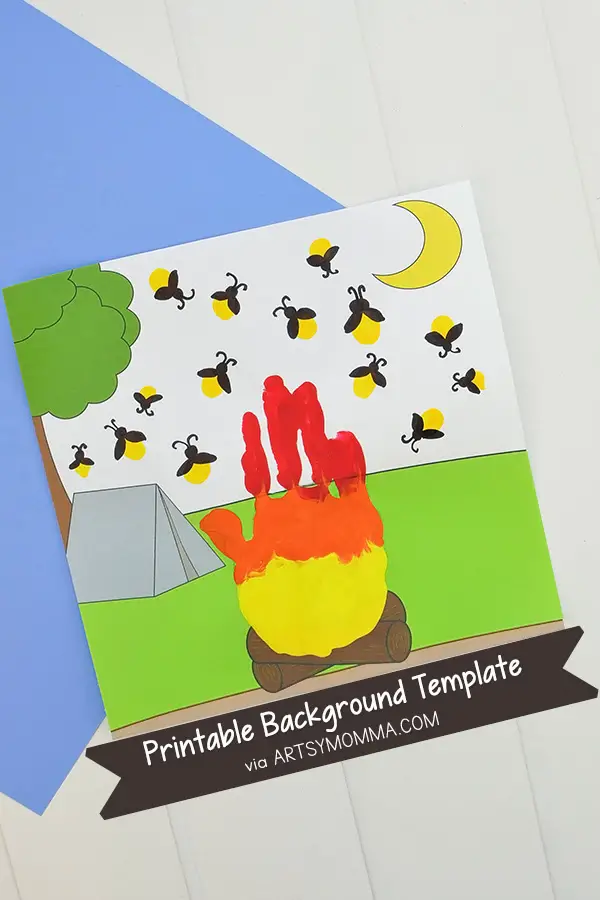
Why not make a Fingerprint Fireflies Around a Campfire Handprint for your kids if you’re looking for a good summer camp activity idea?
You can use a printable template for this activity. Furthermore, it fosters our children’s recognition, craftsmanship, and fine motor skills.
Campers will create a cute fingerprint firefly pattern around a handprint. Educators will show the children how to correctly stamp their fingers on the acrylic paints and make as many tiny fireflies as they want.
This activity may become a little messy, but the mess will serve as a lasting memory for your children. Also, while this job may take some time, it can be a fun activity for everyone with the assistance of adults.
Kids will enjoy stamping their fingers on the printable hand template, which will later serve as the foundation for the fireflies.
So, to begin this outdoor activity, we will require the following:
- Handprint Template Printable
- Acrylic Paints in Red, Orange, and Yellow
- Paintbrush
- Black Marker
Once decided on whether to print the template in color or have your little one color it in, begin working on the handprint campfire. Simply paint your child’s hand red orange and yellow to imitate the color of the fire. Press it with the palm on the logs and the fingers pointing upwards.
Next comes the highlight of this craft – making fingerprint fireflies as many as you want! Just use yellow paint for the body, and draw the other details using black marker – a small black dot on any side of the prints for the head, curly antennae, and 2 ovals on each side for the wings.
You can visit funhandprintartblog.com to learn more about this fun activity.
Conclusion
You now have ten bright ideas for exciting and fun ways to make your fireflies for this week’s crafting period. These activities are beneficial to the children’s well-being and skill development.
So, bookmark this page if you want to learn more about some fun and meaningful exercises to do with your preschoolers.
Related crafts and activities you might like:


