Flowers may come in different colors, shapes, and sizes, but they all symbolize beauty and life. Encourage children to explore the wonders make their day.
These activities are perfect for young learners to practice their skills and enjoy the beauty they bring.
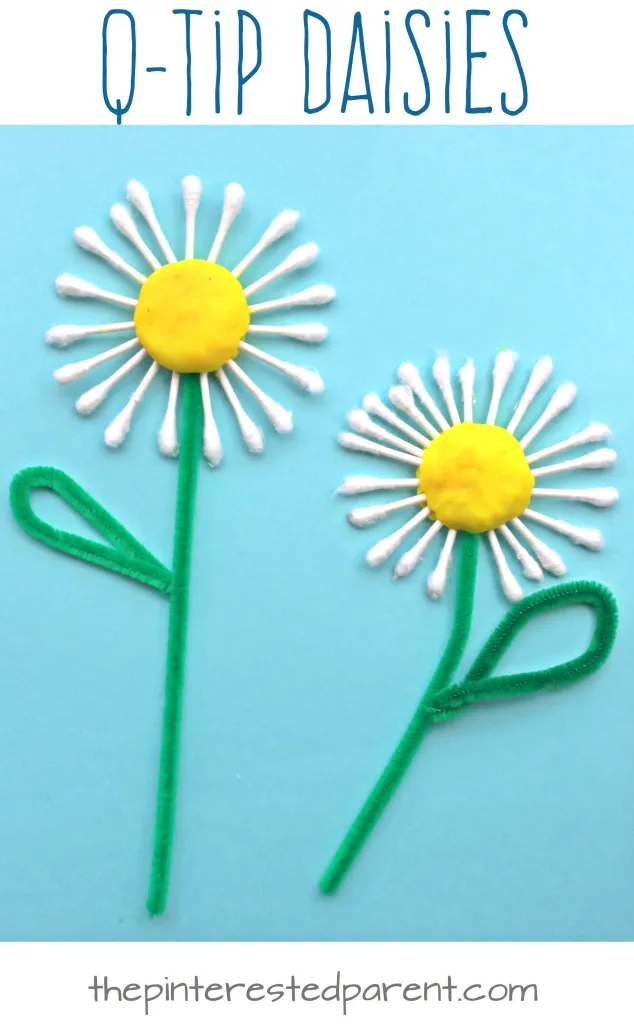
Cotton swabs are the perfect material to make these adorable daisies that will bring sunshine to everyone who receives them. This craft is simple to make and requires minimal preparation.
Children will be able to complete this project without an adult’s assistance. Children’s three-finger grasp will strengthen as they poke the clay with cotton swabs and twist the pipe cleaners.
This is a good activity for children with difficulty holding a pencil or using their fingers to pick up small objects.
Start with cutting several cotton swabs in half. Each tip of the swab will become the daisy’s petal. Next, have the children form a ball shape from a lump of yellow clay. Press this lightly to flatten. Stick each of the swabs into the clay, working all the way around to form the flower
Stick the entire flower on construction paper. Next, add glue to the green pipe cleaner and stick it into the clay. This part will become the stem. Cut a second pipe cleaner in half and form it into a leaf shape. Glue this on the stem.
Repeat the process to make more daisies. Let them dry before using.
For this craft, you will need:
- Cotton swabs
- Yellow clay
- Green pipe cleaners
- Construction paper
- Glue
For more information on this activity, go to ThePinterestedParent.com.
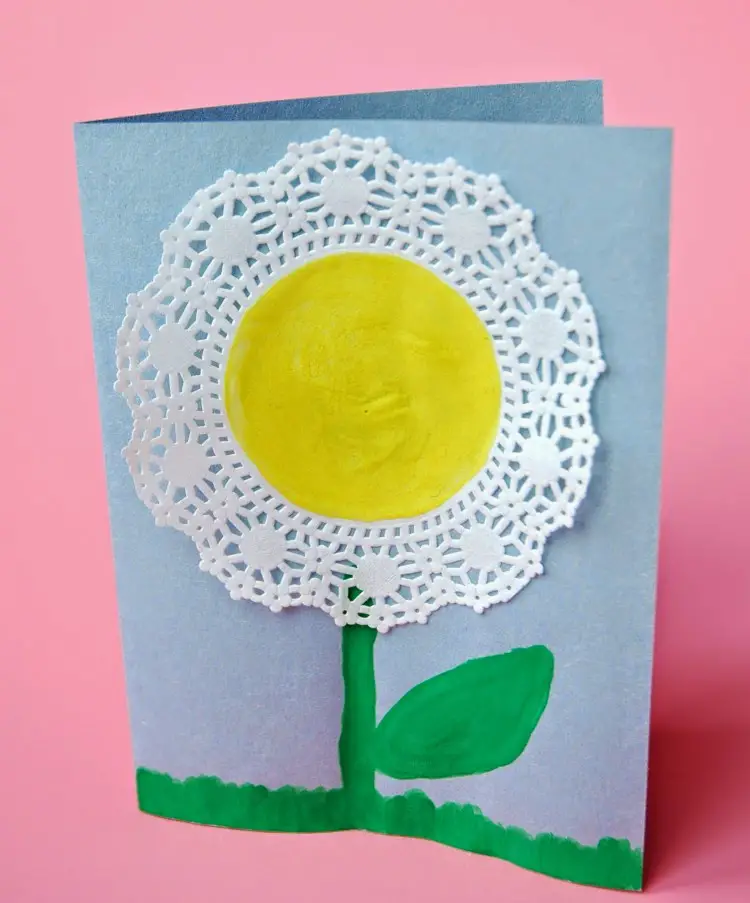
Flowers made from paper doilies are a fantastic activity for young learners to learn how to work independently. They are simple to make and require mostly verbal instructions for children to follow.
It requires limited preparation but is full of fun and excitement for children. These flowers are great to use for comparison. Make several of these at different heights for children to compare.
Use different colors of paint to improve their color recognition skills. Have children add details on the painted part of the flower, such as dots and swirls. Make a pair for children to match.
Vary the number of leaves for children to count and compare. Let them use terms such as more and few.
Instruct children to glue the three doilies on construction paper. Ensure that there is enough space between them. Let them paint the center part of the doilies with their preferred color.
Use green paint to add the stem and leaves to each flower. Let the paint dry before using.
For this craft, you will need:
- Paper doilies
- Paint
- Paintbrush
- Glue
- Construction paper
For more information on this activity, go to Paper-And-Glue.com.
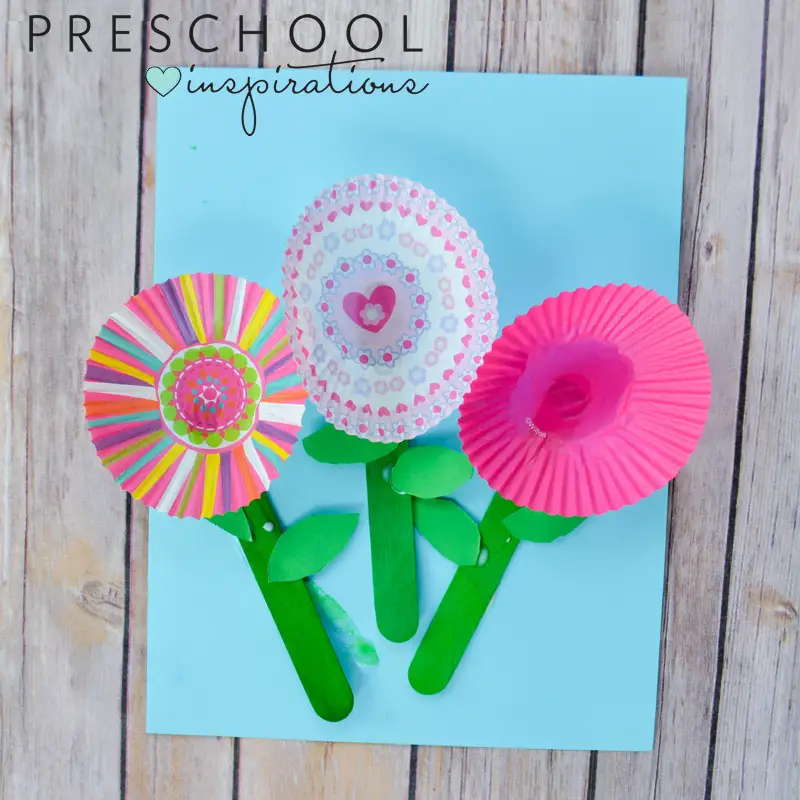
The secret to this fun project is to choose beautifully-printed cupcake liners. If available, use three different prints to make them more interesting to look at.
Use this craft to talk about the different types of flowers. Mention how some flowers differ not just in color but also shape, size, and even their lifespan. If possible, use real flowers for a highly sensorial experience.
Let kids look, touch, and smell them. Ask children what their favorite flowers are and let them provide reasons as they describe them. This will improve children’s oral language and reasoning skills.
On a piece of blue craft paper, have the children glue the three cupcake liners. Ensure that they are spaced evenly and not crowding one part of the paper. Next, they can glue the green craft sticks under each cupcake liner for the stem.
Cut out small leaves from green craft paper. Allow kids to glue these on the stems to complete this flower craft.
For this craft, you will need:
- Cupcake liners
- Craft sticks
- Paint
- Paintbrush
- Glue
- Scissors
- Green and blue craft paper
For more information on this activity, go to PreschoolInspirations.com.
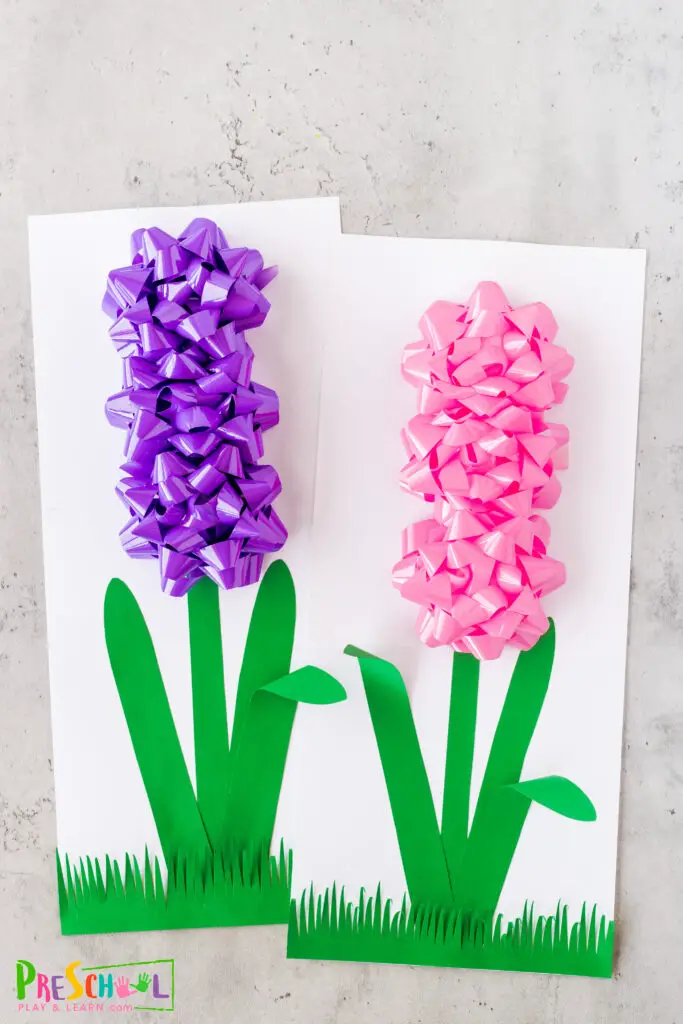
These hyacinths are realistic and would make an excellent design for a card or display. Recycle those gift bows that will end up in the trash. Use colors such as white, blue, red, and pink to help children master the different colors.
Add a varied number of leaves for them to count. Make several of these and stick them on the wall or use them for pretend play. Have children water, pick, and smell them.
Start by cutting three equal strips from the green construction paper. You can do this in advance or have children cut along pre-drawn lines. Trim the edges of the three strips to make them rounded. These will become the leaves.
Instruct kids to cut another green strip this time, slightly shorter than the white paper. This part will become the stem. Glue this in the middle of the white paper.
Stick bows in a row starting from the top of the stem. Add one leaf on each side of the stem. Next, add the final leaf by gluing just half. Use a pencil to curl the edge.
Make the grass from green paper. Stick this on the bottom of the hyacinth. Finally, use the black marker to add details, such as the bee and its flying path.
For this craft, you will need:
- Construction paper in white and green
- Self-sticking gift bows
- Markers
- Scissors
- Glue
For more information on this activity, go to PreschoolPlayAndLearn.com.
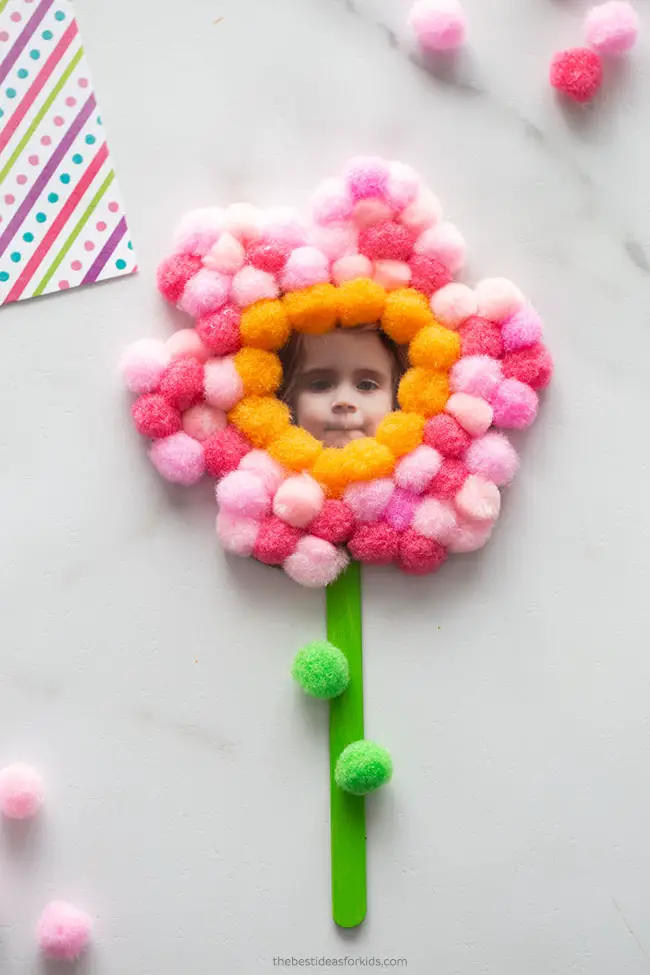
Make this fluffy flower craft to showcase children’s photos or to use as refrigerator magnets. Make one of these every year, or make several with a different picture of the same child. The set of flowers will be a bouquet, a perfect gift to grandparents.
Children glue the pompoms one at a time, so their three-finger grasp will improve. Make them in several colors for color recognition, and let them practice counting as they glue each pompom.
Download and print the free flower template from the site. Cut this out and trace it on cardboard. Children may need help with this task. Cut out the flower outline and make a hole in the center. Cut out the child’s picture to fit behind the flower.
Choose the pompom colors to make the flower’s outline closest to the picture. Glue them one at a time. Next, choose a new color for the petals and add the rest of the pompoms for the petals.
Add green pompoms for leaves. Let this dry. Finally, stick the child’s picture to the back of the flower. Ensure that the child’s face is centered inside the hole. Add magnets to display on the fridge.
For this craft, you will need:
- Printed flower template
- Pompoms
- Cardboard
- Glue
- Craft sticks
- Craft knife
- Magnets
- Child’s picture.
For more information on this activity, go to TheBestIdeasForKids.com.
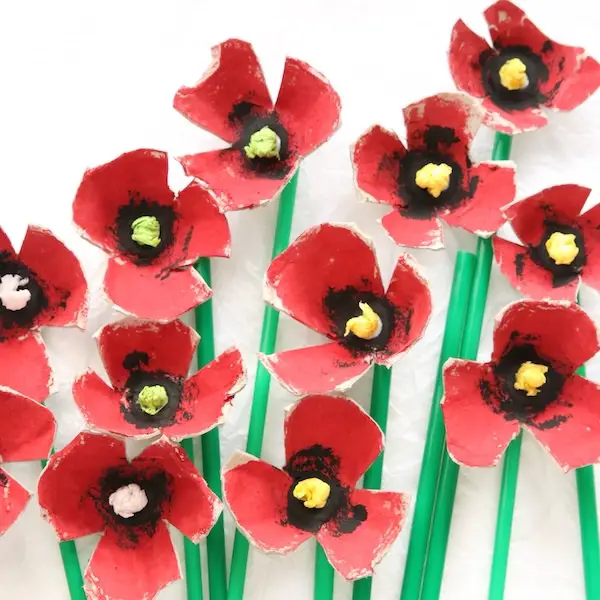
This craft is a beautiful way to recycle egg cartons. Introduce famous artists that have painted poppies, such as Van Gogh, Monet, and O’ Keefe. This craft will be an excellent prop for a lesson on art history as they take on their version of famous artworks.
Children will practice their cutting and painting skills as they make these flowers. Their fingers will become stronger as they crumple the tissue paper to create the center of the poppies.
Make the poppies by separating the egg carton cups. Cut each one and trim off the excess to make the edges rounded. Next, make the petals by cutting three V-shapes on each cup.
Lightly press the egg carton cups to flatten them. Paint these red and add black at the center. Cut or tear a small piece of tissue paper. Crumple this into a ball and stick it on the poppy’s center.
Glue the drinking straws to the back of the poppy. Let these dry before using.
For this craft, you will need:
- Egg carton
- Scissors
- Paint
- Paintbrush
- Tissue paper
- Glue
- Drinking straws
For more information on this activity, go to HappyHooligans.ca.
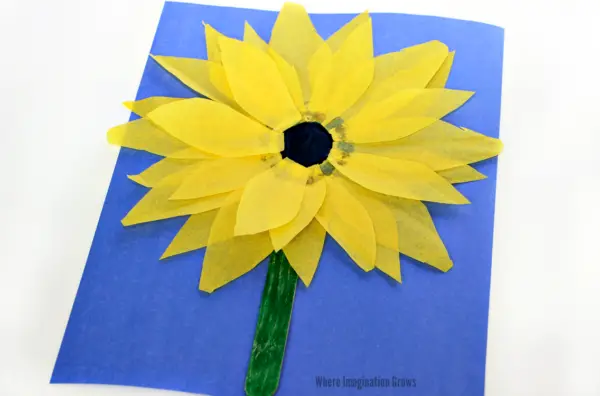
This sunflower craft is an excellent activity in the summer when these flowers thrive. Use this craft to go with the book “This is a Sunflower” by Lola M. Schaefer, which narrates how one sunflower became a patch of sunflowers.
Children can make several of these to create a patch. As they cut the petals, their cutting skills will improve. Their concentration and patience will improve as they glue the petals one by one.
Start by drawing a black circle in the middle of the construction paper using a marker. Paint the craft stick green. Stick this just below the black circle.
Cut out the petals from the yellow tissue paper. Fold the tissue paper several times and cut thin diamond shapes. This step will make several petals in a short amount of time. Assist kids in this or prepare these ahead of time.
Next, glue the yellow petals around the black circle. Let them overlap until it has several layers. Ensure that only the edge closest to the black circle will be glued to give the sunflower a three-dimensional appearance.
If available, add the spiral pipe cleaner in the middle of the flower to cover the black circle. Twist and bend the pipe cleaner to form a spiral. Glue this onto the sunflower.
For this craft, you will need:
- Construction paper
- Tissue paper
- Craft stick
- Glue
- Scissors
- Markers
- Pipe cleaner
For more information on this activity, go to WhereImaginationGrows.com. Also, you might want to check out our pick of the best sunflower crafts for preschoolers!
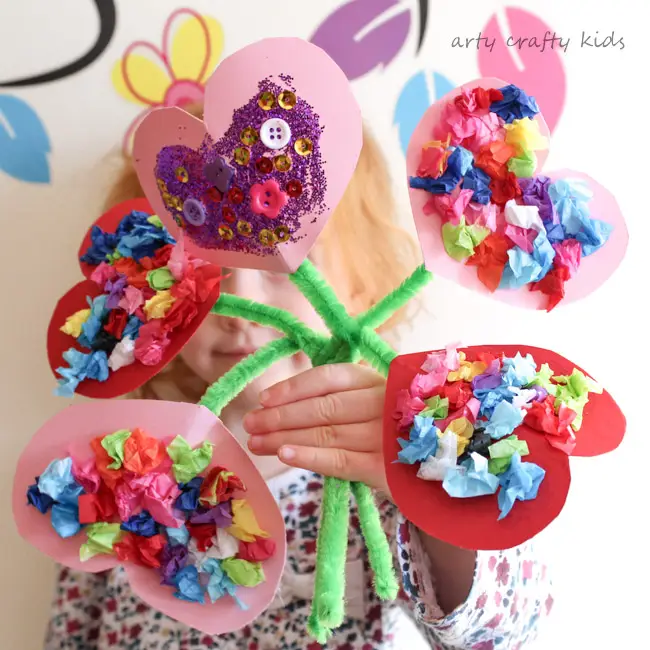
Let children show appreciation as they give these flowers from the bottom of their hearts. Make a pair of these in the same colors for children to match. Use the same colors of buttons, glitters, or sequins on both flowers to make them identical.
Make several of these to teach patterns. Lay them out in ABAB or AABB and let children figure out what comes next after the last flower. Make it more challenging for older children by modifying the patterns. Or, let them create their patterns and have a friend work with them.
To make this craft, start by cutting hearts from cardstock. Fold the cardstock in half and cut it to make easy, symmetrical hearts. Give kids the opportunity to practice their cutting skills by drawing the line and letting them do the cutting. Unfold the hearts and let the children decorate them.
Use whatever embellishments are available or a combination of them. To decorate the hearts with tissue paper, tear a small piece and crumple to make tiny balls. Glue these on the hearts and add glitter or sequins to make these shiny.
Finally, stick the pipe cleaner to the back of the hearts for the stems.
For this craft, you will need:
- Cardstock
- Tissue paper
- Scissors
- Glue
- Glitter
- Buttons
- Sequins
- Pipe cleaners
For more information on this activity, go to ArtyCraftyKids.com.
Related: Heart Crafts for Preschoolers
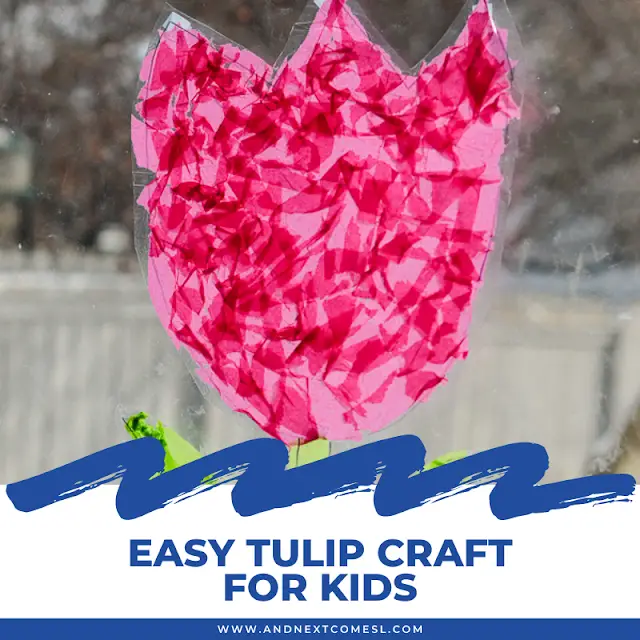
Have children make these light catchers on windows to reflect colors as the sun shines. This craft is easy to make and can be customized based on the child’s color preference.
This suncatcher is perfect for songs, rhymes, and poems about tulips. It can also be used to discuss how a tulip is unique since it grows from bulbs.
This craft is great to go with the book “From Bulb to Tulip” by Lisa Owings, which explains how the tulip plant grows and blooms.
Start with outlining the tulip on contact paper using a black marker. Include the leaves and stem on the outline. Next, have the children cut out small pieces of tissue paper. Scrunch them up before sticking them on the contact paper.
Continue filling the tulip with tissue paper until complete. Next, fill the stem and leaf parts with scrunched green tissue paper. Once the outline is fully covered with paper, add a second contact paper to make the tulip look laminated. Stick this on the window.
For this craft, you will need:
- Contact paper
- Tissue paper
- Marker
- Sticky tape
For more information on this activity, go to AndNextComesL.com.
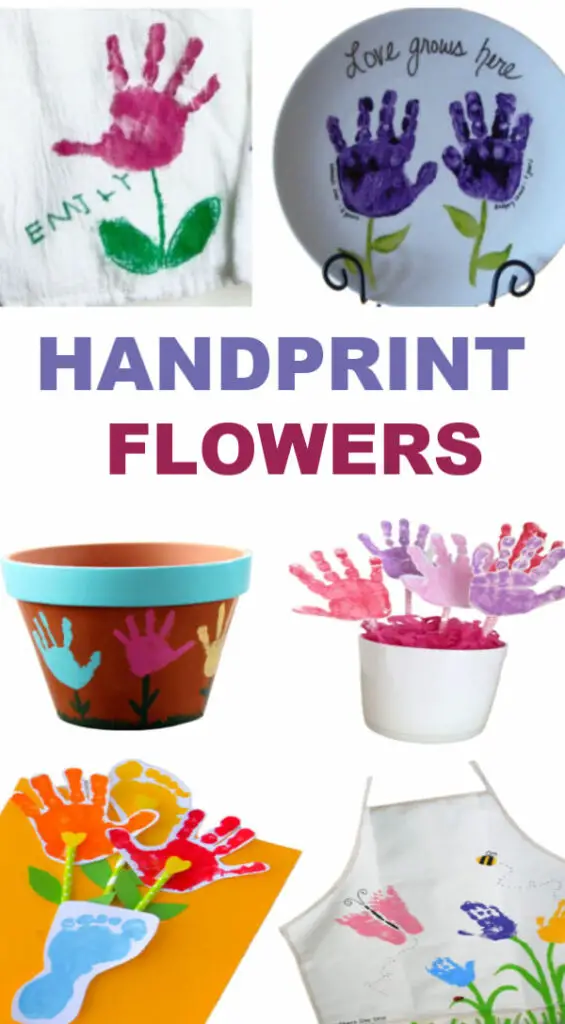
Handprint crafts are a keepsake to cherish. They can be used as growth markers, as well. These creative handprint flowers in a pot are one of those keepsakes parents would love to receive.
Making handprints using paint is a sensory activity that children love. Their fine motor skills will also improve as they cut out their handprints, make balls of clay, and complete the rest of their craft.
Start this craft by painting the children’s hands with their chosen colors. Use different colors to make the flowers varied. Have them press it on cardstock to make the handprints. Let children cut them out.
Next, attach each of the flowers to drinking straws using sticky tape. The straws can be cut to varying lengths to mimic a stunning flower arrangement.
Have children make clay balls to weigh down the flowers in the pot. These will keep the flowers more stable. Place them in the pot. Fill it with shredded tissue paper.
The site suggests adding ribbons, bows, and glitters to make the craft more festive looking.
For this craft, you will need:
- Flowerpot
- Drinking straws
- Shredded tissue paper
- Cardstock
- Paint
- Paintbrush
- Sticky tape
- Clay
For more information on this activity, go to GrowingAJeweledRose.com.
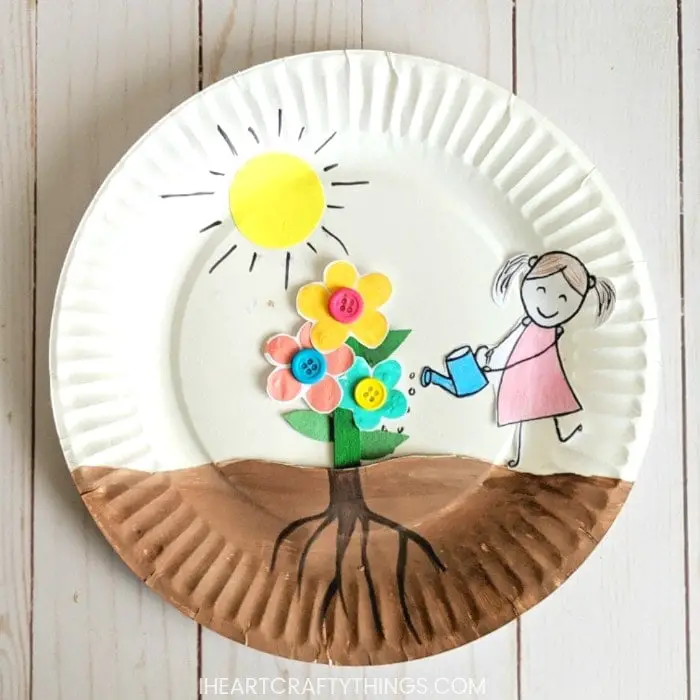
Make this adorable craft to go with the book about flowers titled “Grow Flower Grow” by Lisa Bruce. The hilarious story tells of a girl named Fran, who thought flowers needed human food to grow.
This craft perfectly describes what Fran should have done to grow her flower. Use this craft for a science lesson on what flowers and plants need to grow. Talk about the vital role sun and water play in plant growth.
Point out that, unlike humans, plants do not eat food like burgers and take some time to grow.
Start by marking and painting the soil part on the brown paper plate. Let this dry. With a dark brown marker, draw the roots. Cut a slit on the soil part of the paper plate. See the pictures on the site for more details on this step.
Next, cut a yellow circle from the construction paper to make the sun. Glue this on the top left of the paper plate.
Have students draw a picture of a child watering the plant on a separate paper. Cut this out and attach it to the paper plate. Use the black marker to add details such as the sun’s rays and the water droplets from the watering can.
Have children fingerpaint the petals of the flower. Cut this out and add the button in the center. Add some cut-out leaves. Make several flowers and glue them on the green craft stick. Insert the stick of flowers in the slit.
Push the flowers upwards to resemble a plant growing upwards.
For this craft, you will need:
- Paper plate
- Craft stick
- Construction paper
- Buttons
- Paint
- Markers
- Pencil
- Scissors
- Craft knife
- Glue
For more information on this activity, go to IHeartCraftyThings.com.
Conclusion
Flowers are beautiful no matter their color, size, and shape. They bring smiles to everyone who receives them. They are also a great topic to discuss in preschool.
Let children explore different things about flowers through the crafts in this list. Children will have fun and get excited as they learn and are creative. Thank you for checking out our favorite flower crafts!
You might also be interested:


