The butterfly’s life cycle is a great way to introduce children to the growth process of an animal. It is interesting for children to learn about the metamorphosis of a caterpillar becoming a beautiful insect.
These ten butterfly life cycle activities wonderfully tackle and explain the process. With these, children are guaranteed fun and learning at the same time.
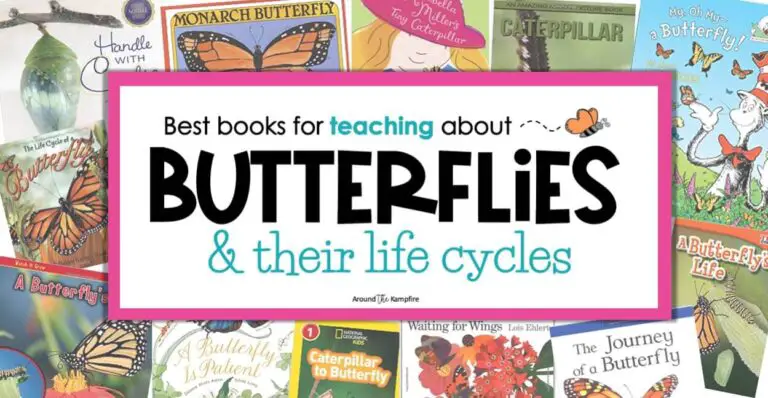
There are tons of books on the butterfly’s life cycle. Some of them are in narrative form, which uses an artistic rendition of storytelling and illustration presented for younger children.
Check out the recommended list of interesting books for your class from the site on this topic.
One of these is “Waiting for Wings” by Lois Ehlert. The book is written in a rhyming pattern that is quite lyrical. The text uses simple sentences and phrases that are short and easy to understand.
The illustrations are colorful and eye-catching. They depict the butterflies’ behavior as they grow from crawlies to winged insects.
Other books are in the form of expository text, which tends to present readers with a real-life illustration and veer towards the scientific facts and process of the life cycle.
Time for Kids’ “A Butterfly’s Life” by Dona Herweck Rice is a book that shows close-up photos of the insect starting from its egg phase until it becomes an adult.
No matter which type of book is preferred, use it to present the insect’s life cycle visually. Point out critical phases such as the caterpillar eating a lot of leaves or it staying in a chrysalis to change its form.
These books are an excellent tool for discussions and to anchor a science lesson on the butterfly’s life cycle.
For more information on this activity, go to AroundTheKampfire.com. Or, check out our selection of the best preschool butterfly books out there!

Children love to sing and songs and rhymes help them remember concepts well. “Butterfly Life Cycle Song” by Mister Kipley is an excellent example of making a science lesson interesting and exciting.
The upbeat tune and repetitive lyrics will make children want to sing as the pictures on the video are shown. Make this song more fun by adding movements for children to remember the life cycle stages easily.
Here are some suggested movements that will also help improve their hand coordination. For the egg, gather all the fingers together to form an O.
For the caterpillar, make a number two with your fingers. Make the two fingers walk on the other arm. This will resemble a caterpillar crawling.
To make the chrysalis, place both palms together as if hiding a tiny egg between your hands. Lastly, open the palms and make a flying action for the butterfly.
Pictures may also be used in place of hand movements. Let children hold or point at an image as the lyrics dictate.
For more information on this activity, go to MisterKipley.com. And for more song and rhyme recommendations, read our list of butterfly songs for preschoolers.

Make a visual representation of the butterfly’s life cycle by having children make this paper plate craft. Use this craft to go with books and science lessons.
As children make this craft, they will improve their fine motor skills through painting, cutting, sticking, and manipulating craft materials.
Download and print the free butterfly life cycle template. Let children cut out the circle. Next, paint the outer ribbed part of the paper plate and let this dry. Stick the template in the middle.
Cut out a leaf shape from the green construction paper and use a black marker to add the leaf veins. Use glue to stick three white pompoms on the leaf to resemble the eggs. Stick this on the egg section of the life cycle.
Make the caterpillar by twisting two pipe cleaners together. Twist this around a pencil and slide it off. This will create a striped spiral. Stick this on the caterpillar section of the template.
Cut a rectangle shape from the tissue paper to make the chrysalis on a branch. Twist both edges and stick on the twig. Glue this in its place on the template.
Lastly, for the butterfly, cut two pieces of the rectangle from different colors of tissue paper about two and a half inches in length and two inches in width. Twist a small pipe cleaner in the middle of the tissue to scrunch it.
Keep the ends of the pipe cleaner in a V shape for the antennas and stick this on the butterfly section. Refer to the pictures on the site for the step-by-step process of this project.
For this activity, you will need:
- Printed butterfly life cycle template
- Construction paper
- Small white pompoms
- Paper plate
- Paint
- Paintbrush
- Glue
- Scissors
- Pipe cleaners
- Marker
- Pencil
- Twigs
For more information on this activity, go to BuggyAndBuddy.com.
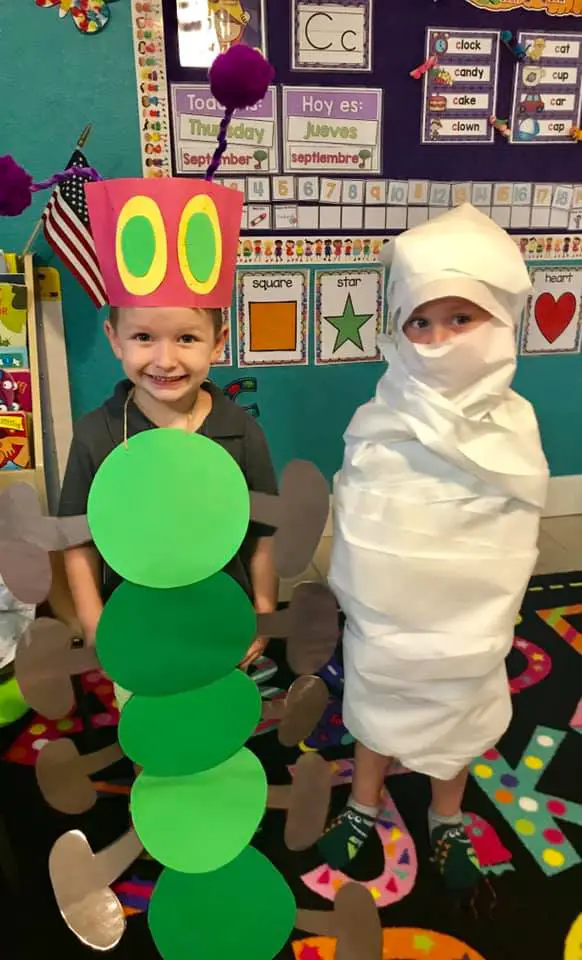
Inspired by Eric Carle’s “The Very Hungry Caterpillar,” this cocoon simulation lets children experience the feeling of being inside a tight cocoon.
This sensory activity will allow children to understand the process of the caterpillar as it stays inside the makeshift cocoon to transform and move in a tight place.
For the cocoon simulation, wrap tissue paper around the child. Wrap the child’s head, arms, torso, and legs. Keep doing this until the child is fully covered with tissue and feels tight, but not constricted.
Ensure that the child’s face is unwrapped to enable the child to breathe well. Use this activity to discuss what the child felt while inside the cocoon. Talk about how difficult it is to move and what other movements can be made while wrapped.
Once the butterfly is ready, let the child break out of the cocoon and use their arms to flap like a butterfly.
The teacher can also signal by having a countdown to make this more exciting. This will help them practice counting numbers by rote.
As suggested on the site, this activity can be used to teach the letter C.
For this activity, you will need:
- The book “The Very Hungry Caterpillar” by Eric Carle
- Tissue paper rolls
For more information on this activity, go to TeachersMag.com.
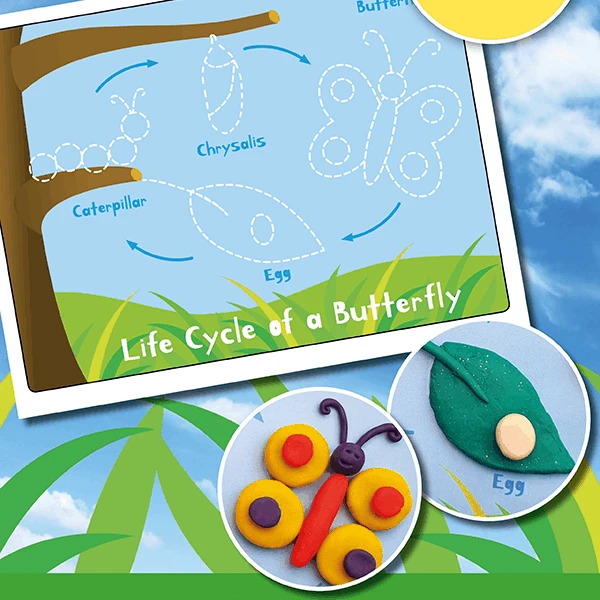
Incorporate playdough into your science lesson on the butterfly’s life cycle with this activity. Children will have fun completing this sensory task. They will also improve their hand muscle strength as they roll and mold the clay.
The site suggests making homemade playdough as an alternative using powdered juice to add a scent. It also offers the book “My, Oh, My–A Butterfly!: All About Butterflies” by Tish Rabe.
This activity is excellent for science centers or for task boxes for children to work on independently.
Download and print the free template on the butterfly’s life cycle. If possible, laminate this for durability. Next, give children different colors of clay to make the pieces. Let them roll, flatten, and shape the dough to fill the outlines on the template.
Let children use cookie cutters for the more complex shapes, such as the leaf and chrysalis. For the face of the caterpillar and butterfly, flatten out a small round clay and use a pointy tool to poke some dents for the eyes and mouth.
For this activity, you will need:
- Printed butterfly life cycle template
- Play dough
- Play dough mat
- Play dough tools
- Dry erase marker
- Laminating sheets and laminator
For more information on this activity, go to ABCsOfLiteracy.com.
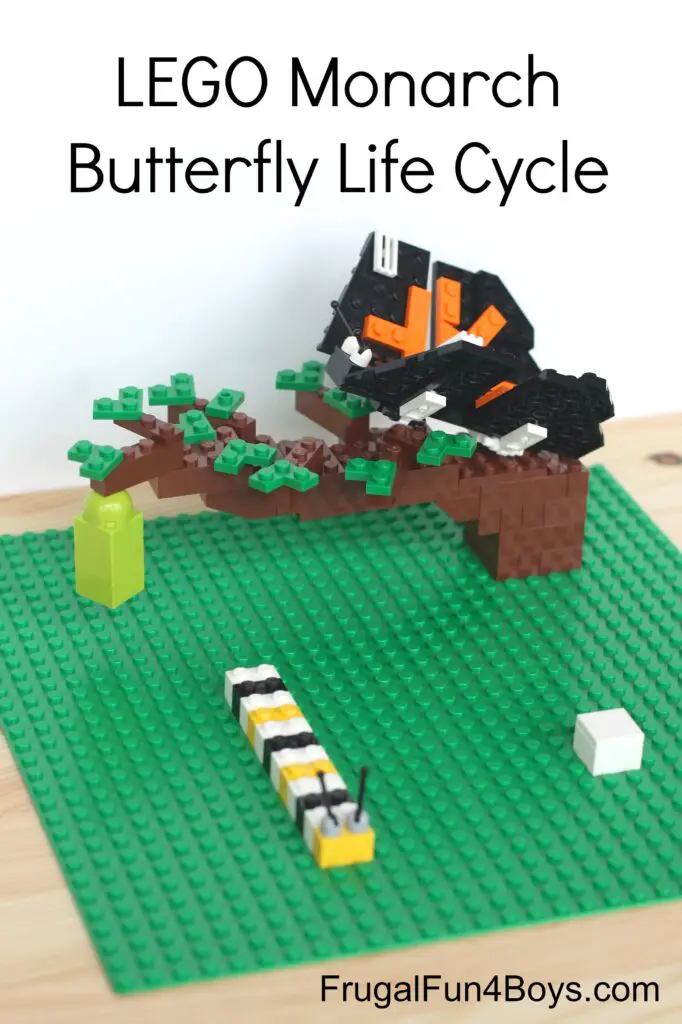
Here’s a great butterfly life cycle craft for Lego enthusiasts and those with a vast collection of Lego pieces. This may not look accurate given that blocks are used to present them, but they are accurate to the colors of a monarch butterfly.
This activity is excellent for honing fine motor skills. As children pick up and put together the small pieces of Legos, they strengthen their finger muscles which are necessary for other fine motor-related tasks such as cutting and writing.
This Lego butterfly life cycle requires different types of Lego pieces which may not always be available. The site does not suggest any alternative, but any blocks may be used so long as the colors conform to that of a monarch butterfly.
On a large plate, place a single square piece for the egg. Connect white, black, and yellow square pieces to form the caterpillar. If available, add antennas. Place this across the egg.
Put together three light green square pieces and a rounded top to make the chrysalis. Attach this to a tree branch made of brown and green pieces to make it look like it is hanging.
Next, make the butterfly wings by putting together flat black pieces with angular edges. Place some orange on them. Attach these to the long rectangle piece using a connector. Finally, add the antenna.
Place the butterfly on the branch opposite the chrysalis as if it is resting.
For this activity, you will need:
- Lego blocks
For more information on this activity, go to FrugalFun4Boys.com.
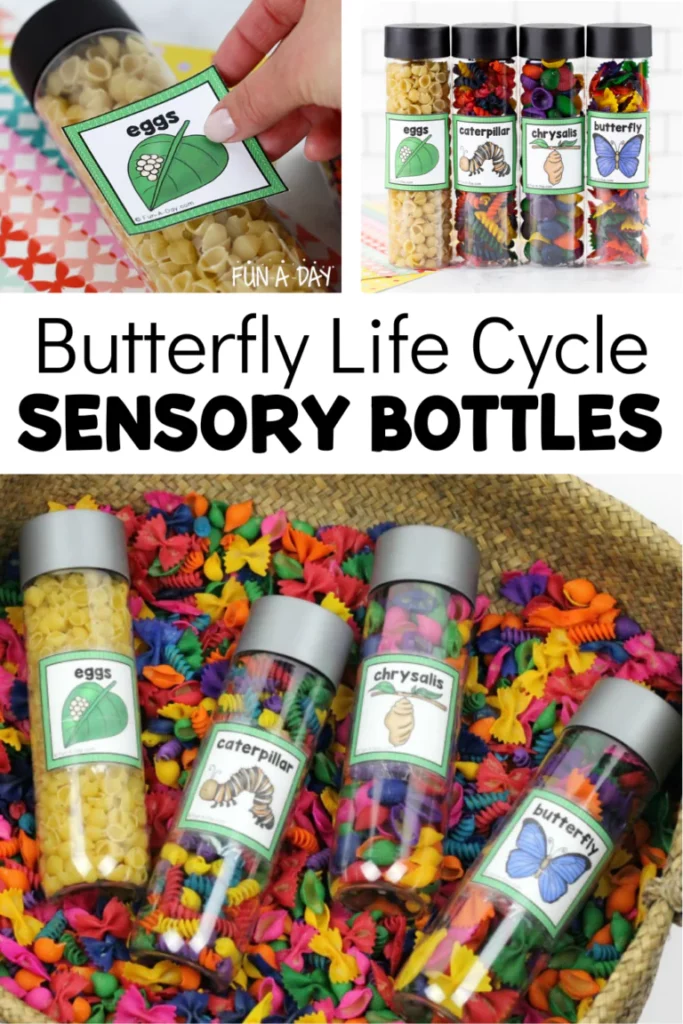
These sensory bottles are great for centers. Let children explore the colored pastas as they learn about the butterfly’s life cycle. Children can play with these in a big sensory bin. They can also scoop, pour, and sort them.
As they do these activities, they will become familiar with the different life cycle stages of a butterfly. They will also learn colors, shapes, and even counting. Use the recommended types of pasta as they closely resemble the butterfly stages.
Start with choosing the bottles for this activity. Use plastic bottles that have been thoroughly cleaned and dried. Next, add color by placing some pasta in a plastic bag with some liquid watercolor shake until all the pieces have been coated.
Lay the pasta on a towel to dry. Make sure all the pasta is thoroughly dried to prevent molds from appearing. Repeat the process until all the pasta pieces have been colored.
Work on the same color for a different type of pasta. Continue with this process until all of these have rainbow colors. Have children sort the pasta shapes into the correct jars, each representing a different stage in a butterfly’s life cycle.
For this activity, you will need:
- Printed labels
- Small pasta shells
- Regular pasta shells
- Rotini pasta
- Farfalle pasta
- Liquid watercolors
- Empty bottles
For more information on this activity, go to Fun-A-Day.com.
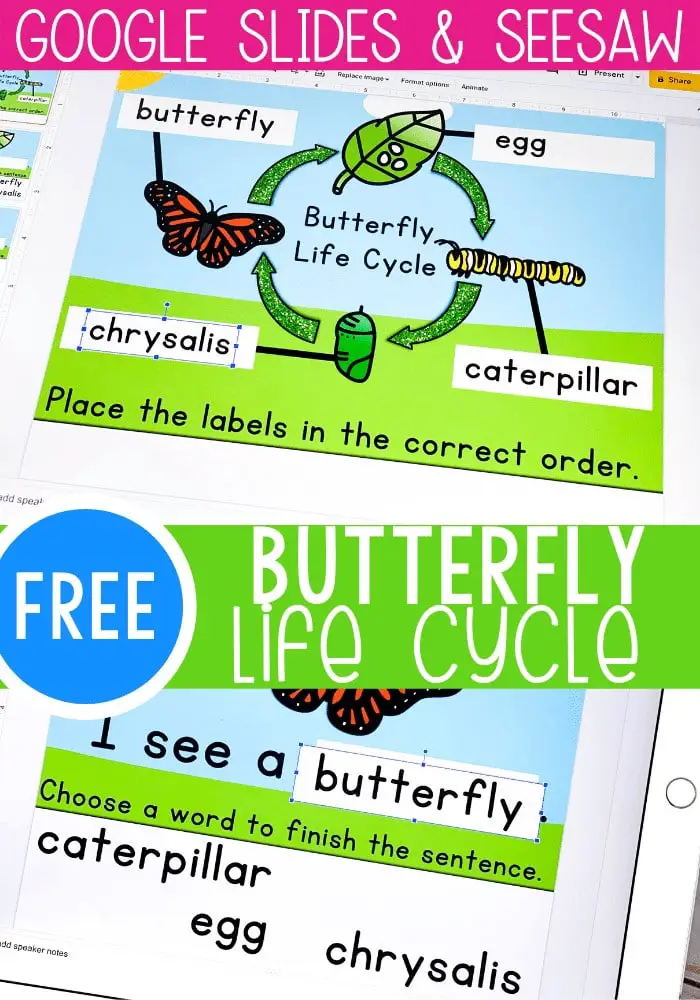
This life cycle activity is digitized and interactive. Children will learn new vocabulary words as they work on their reading skills in this topic.
This activity comes in two versions, and both are editable. They come in Google Slides and Seesaw. Access this free learning material from the site. Follow the instructions and choose the preferred format.
Children can work on this activity using a tablet or computer. The slides can also be printed and turned into a book. Children will have to cut and paste the words on the corresponding boxes.
There are five slides in this activity. The first slide has pictures of the four stages of the butterfly’s life cycle. Children are required to label each of them.
The following four slides present each of the stages, and children are required to drag the correct word on the box.
Children will learn the four vocabulary words in this activity: butterfly, caterpillar, egg, and chrysalis. The sentences are simple and use pre-primer sight words.
The repetitive line “I see a/an ___” makes it easier for children to read and understand.
For this activity, you will need:
- Digital learning material
- Tablet or computer
For more information on this activity, go to ITeachToo.com.
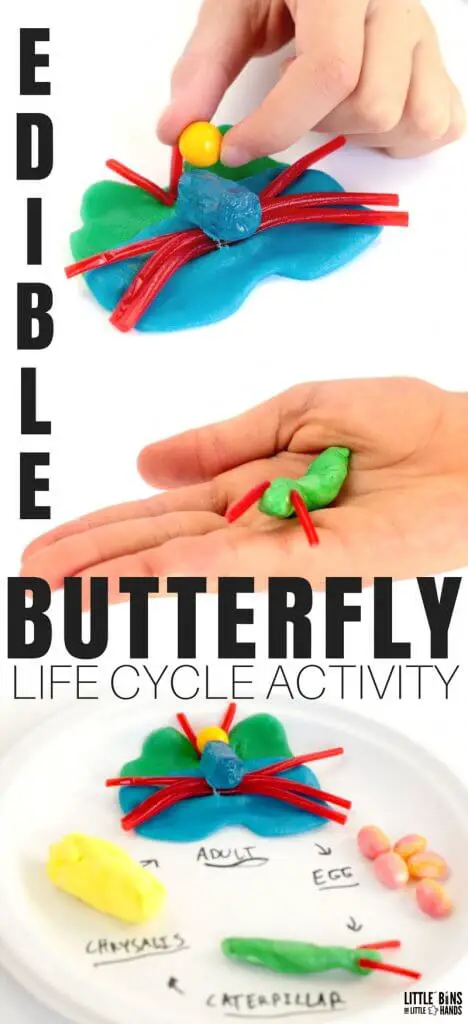
It’s always a hit when a science lesson ends in a feast. Children will enjoy learning and completing this project. The most challenging part is not eating the candies before finishing the task.
This activity can be a STEM challenge for children. Provide the materials and let them be creative in making the butterfly stages using the materials on hand.
Use a black marker to label the four stages in the butterfly’s life cycle. Write the words adult, egg, caterpillar, and chrysalis on the paper plate. Draw arrows that signal the next stage in the process.
Next, choose the right candy for this activity. The site does not recommend a specific brand or type of candy. Choose what to use based on color, size, and shape.
For the eggs, use small round-shaped candies like jellybeans. Place them on the label. Next, make the caterpillar using long green candies like taffy, ropes, or gummy. Add red string licorice for the antenna.
Use a yellow candy such as a taffy for the chrysalis. Mold it to form its unique shape. For the butterfly, use different colors of taffy and gummy candies. Add the red string licorice for the antenna.
For this activity, you will need:
- Marker
- Candies
- Paper plate
For more information on this activity, go to LittleBinsForLittleHands.com.
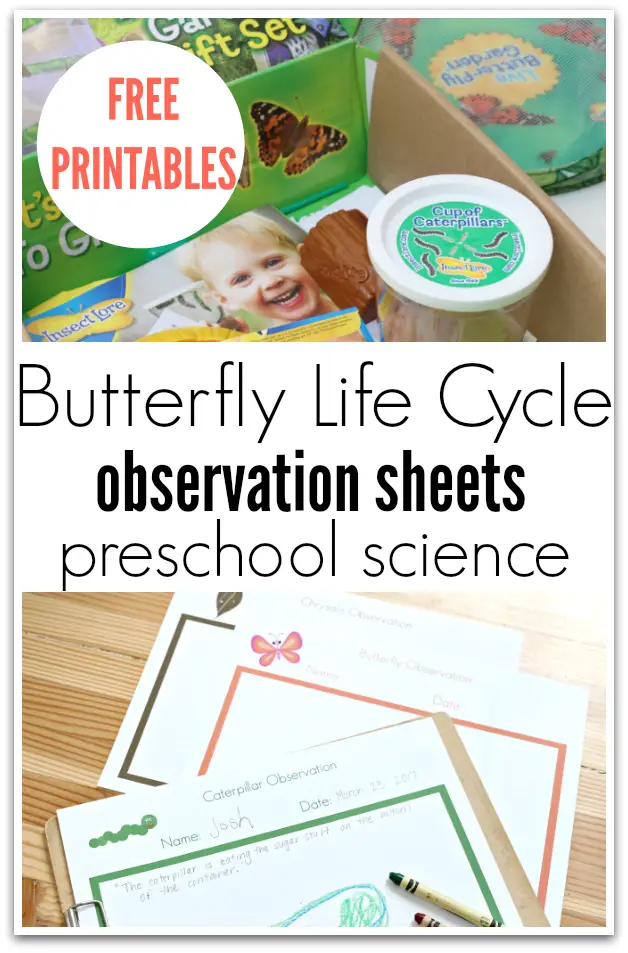
This activity will help children become budding scientists as they learn one of the primary methods of gathering data-by observation.
This activity goes with a kit, which allows children to observe the process of a caterpillar turning into a butterfly in real life.
It can also be used to go with the book “From Caterpillar to Butterfly” by Deborah Helligman, as the site recommends. Three sheets correspond to the three stages of the butterfly’s life cycle- the caterpillar, the chrysalis, and the butterfly.
These printables are great for children to practice writing their names and learn to document facts as they draw and color what they have observed.
Download and print the free observation sheets from the site. Let children write their names and the date of observation. Ask children what they see and allow them to write, draw, and color their work depending on what they can do.
Let children know that their work should represent the animal being observed. Use their work to discuss what they have seen.
For example, talk about what the caterpillar is doing, how fast or slow it is moving, and its physical characteristics such as color, size, and other features.
Once completed, the site recommends compiling their work and turning it into a book.
For this activity, you will need:
- Printed observations sheets
- Pencil
- Crayons or markers
For more information on this activity, go to NoTimeForFlashcards.com.
Conclusion
Let children explore the wonderful world of life science as they participate in the activities on this list. Children will not only be interested but will also find these activities fun and exciting.
As children are exposed to the different ways to learn about a butterfly’s life cycle as presented in these activities, children will remember the concepts and processes better. Thank you for checking out these activities! Come back again soon.


