Bats are usually associated with witches and evil creatures. They are creatures of the night but are gentle flying mammals that keep the insect population under control.
Help children understand the difference between facts and fiction as they make these crafts that promote awareness and care for these misunderstood animals.
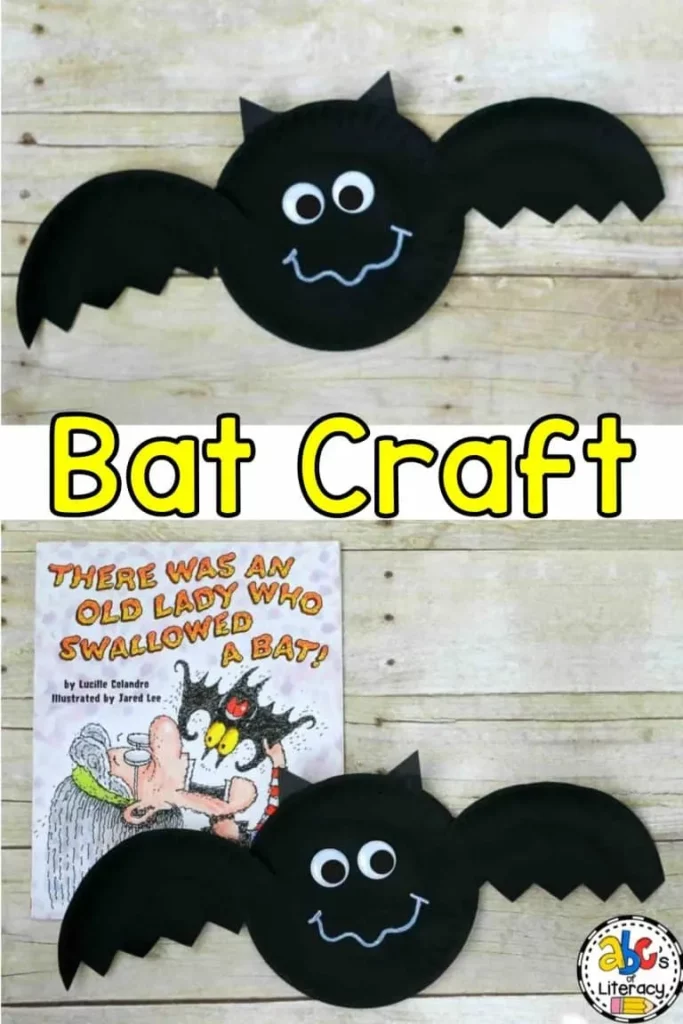
This cute bat craft is inspired by the book “There Was an Old Lady Who Swallowed a Bat” by Lucille Colandro. The site recommends making it after reading the book or discussing nocturnal animals.
This craft will help children improve their cutting skills as they work on a zigzag pattern. It is also a great craft to discuss bats’ characteristics. Use this opportunity to debunk myths about this animal.
Start with making a zigzag line in the middle of the first paper plate. Let the children cut this out. These will serve as the bat’s wings. Next, attach the wings to the second paper plate, ensuring that the zigzag part faces downward.
Paint the paper plate black and allow it to dry. Cut two small triangles from black cardstock to make the bat’s ears. Attach these on the bat as well as the eyes. Lastly, use a white marker to make the mouth.
For this craft, you will need:
- Paper plates
- Paint
- Paintbrush
- Pencil
- Scissors
- Glue
- Cardstock
- Googly eyes
- Marker
For more information on this activity, go to ABCsOfLiteracy.com.
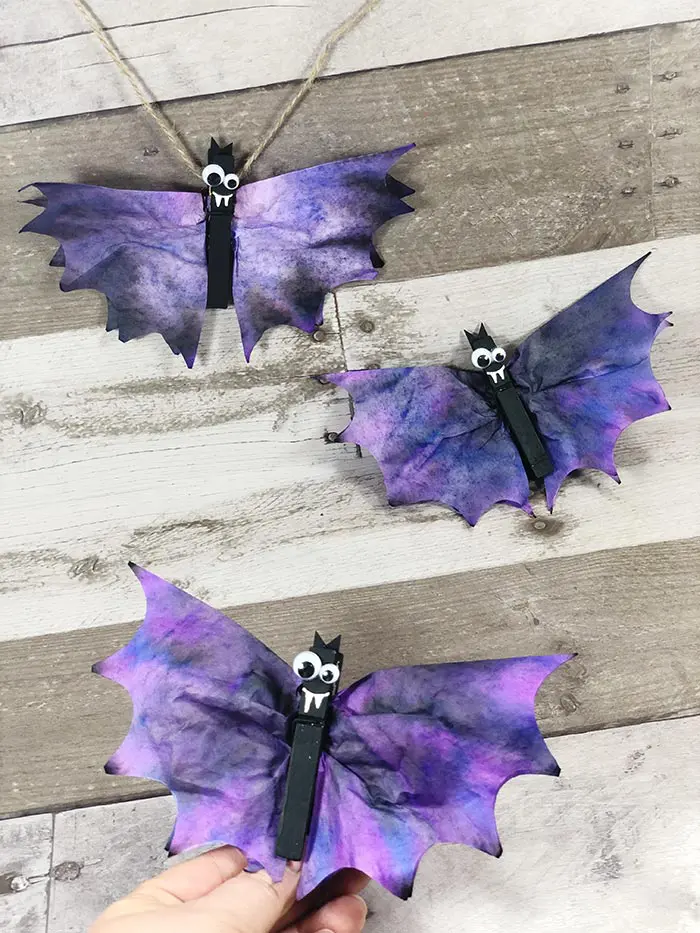
Coffee filters take the spotlight with this unique bat craft. The finished bat wings have a similar look to that of a tie-dye shirt. Children will love this process art that combines colors to create a washed effect.
Use this craft to teach counting activities. Vary the face by using different sizes of googly eyes and making the mouth unique. Make two of each of the mouths to create a pair. Use these for matching or to find the odd-one-out activities.
These activities will help children improve their eye for detail as they learn to scan, focus, and concentrate on the tasks.
Paint the clothespins black and let them dry. Ensure all sides are covered with color. Add a second coat if necessary. Once dry, attach the googly eyes. Draw the mouth and the fangs using a white gel pen.
Next, make the bat wings by flattening the coffee filters and drawing patterns and designs to cover them with colors using washable markers. The site recommends using blue, purple, and black colours to make the bat wings more interesting.
Place the coffee filters on the paint tray and use the spray bottle to spritz water on them. This step will make the colors on the coffee filters bleed. Set these aside.
Once dry, fold them in twice to make four sections. Cut out scallop shapes from the edge. Unfold once, and cut a three-inch slit from the scalloped edge. Insert this on the clothespin bat to complete the craft. Refer to the pictures on site for this step.
For this craft, you will need:
- Wooden clothespins
- Black paint
- Paintbrush
- Googly eyes
- White gel pen
- Washable markers
- Scissors
- Paint tray or craft mat
- Spray bottle with water
For more information on this activity, go to DarcyAndBrian.com.
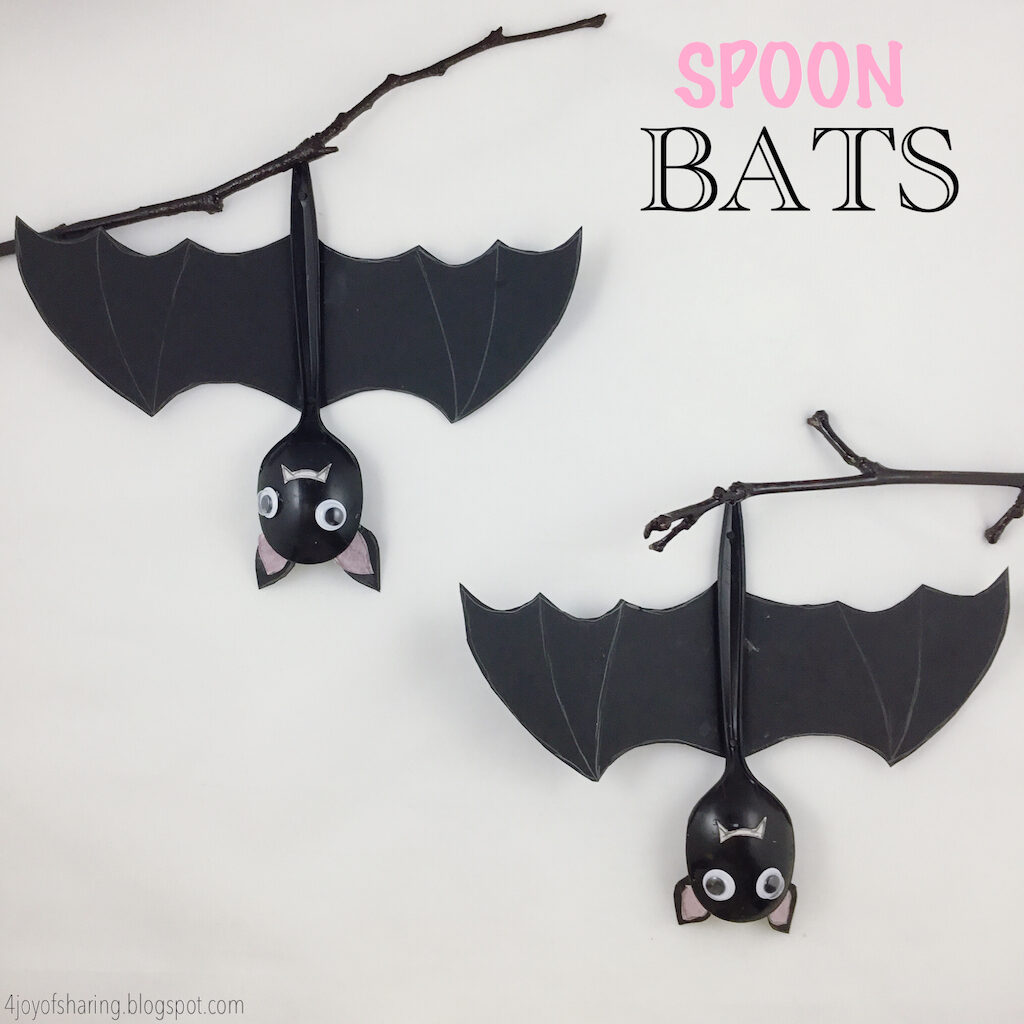
Recycle those utensils from takeout with this adorable craft. Use this to go with the book “Stellaluna” by Janell Canon. The book tells a story of an orphaned bat forced to live in a nest with birds.
Instinct tells her to hang herself upside down, but she is forced to be right side up in fear of getting thrown out of the nest. Use this craft to talk about the unique characteristics of bats.
Discuss the bats’ behavior, food, habitat, location, and other features that make these flying mammals one-of-a-kind.
Make the bat by downloading and printing the bat template. Cut out the pieces and trace the wings and ears on black cardstock. Trace the fang on a white cardstock.
Cut these out and attach them to the spoon. Use the pink tissue paper to cut out the inner ears of the bat. Attach these to the black ears. Lastly, attach the googly eyes.
Hang them upside just like the pictures on the site, by painting a twig or a small branch in black. Attach them using glue and let this dry.
For this craft, you will need:
- Printed bat template
- Black spoons
- Googly eyes
- Cardstock
- Tissue paper
- Glue
- Scissors
For more information on this activity, go to TheJoyOfSharing.com.
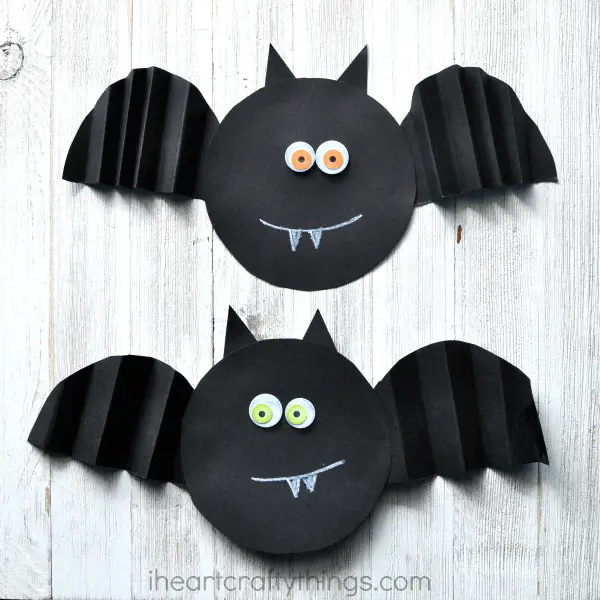
These bats with accordion wings are perfect to go with the song-inspired book “Spooky, Spooky, Little Bat,” illustrated by Samantha Meredith. This book is based on the song “Twinkle, Twinkle, Little Star.”
Use this craft while reading the book to the children and teach them the new lyrics to the popular song during circle time. Children will also improve their fine motor skills by folding the paper wings into an accordion style.
Download and print the bat template from the site. Cut these out and trace these on black cardstock. Glue the eyes and ears on the bat. Draw the mouth and fangs using a white crayon.
Next, make the wings by cutting out a circle from the black cardstock and folding it in an accordion style.
Teach the children this technique of folding by demonstrating it. Fold each part of the paper slowly so that children can copy the movements well. Once finished, cut it in half and unfold it. Glue these two wings on the bat to complete the craft.
For this craft, you will need:
- Printed bat template
- Black cardstock
- Pencil
- Scissors
- Googly eyes
- White crayon
- Glue
For more information on this activity, go to IHeartCraftyThings.com.
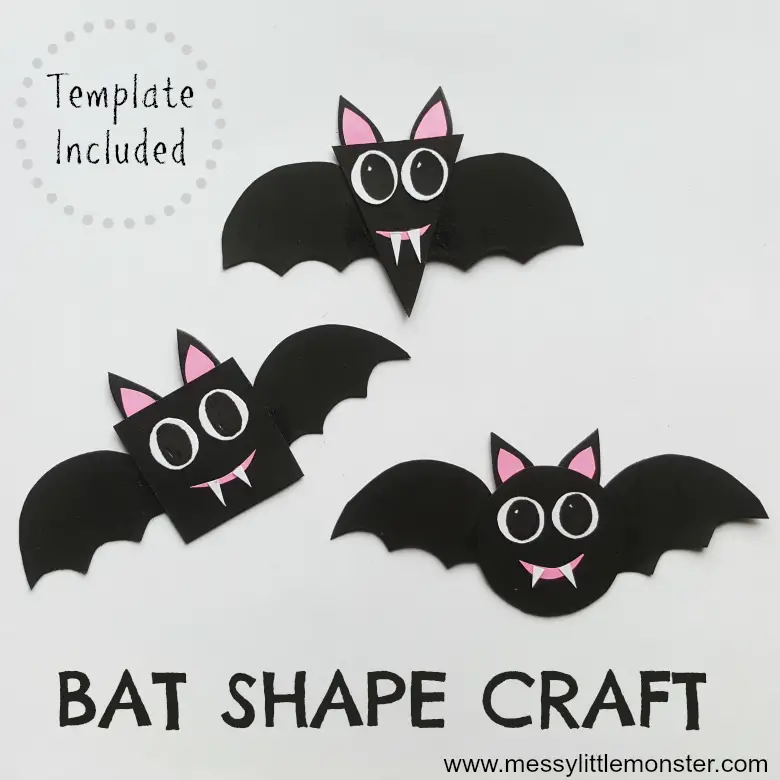
These adorable bats come in three shapes to help children with their shape-recognition skills. Circles, squares, and triangles are the main shapes of this craft.
However, this can be easily modified to help children recognize other shapes, such as rectangles, hearts, diamonds, stars, and ovals. Make a pair of each shape for children to match.
Turn the matching activity into a game by placing one of the pairs of all the bat shapes in a box. Let the children find the matching pair in another container. Place each box on the opposite side of the room and have children race as they match them.
These can also be used as decorations by adding a string to hang for Halloween or lessons about bats.
Download, print, and cut out the free bat template from the site. Trace the pieces on colored craft papers. Trace the body and wings, the mouth on black paper, the inner ears on pink, the fangs and eyes on white, and the pupils on black.
Cut out the pieces and assemble them. Glue the wings on the body. Add the black ears and the inner ears. Add the rest of the facial parts.
For this craft, you will need:
- Printed bat template
- Black, white, and pink craft papers
- Scissors
- Glue
- Pencil
For more information on this activity, go to MessyLittleMonster.com.
You might also want to check out our list of helpful worksheets to teach shapes circles, squares, and triangles.
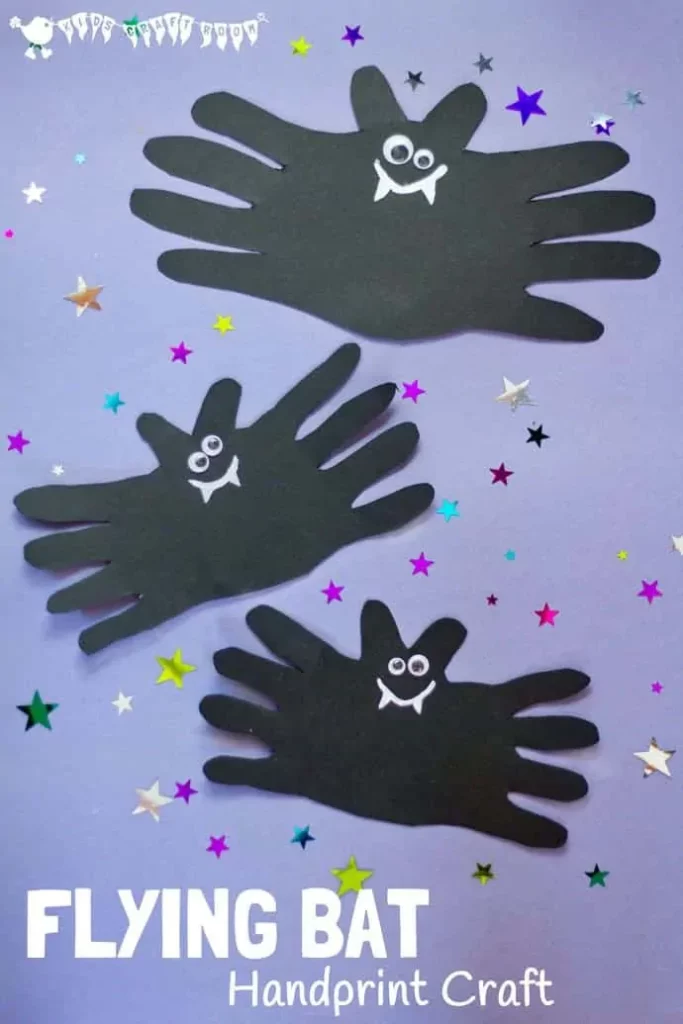
Children will be fascinated as they learn a new way for their hands to behave. Quiet hands, working hands, and gentle hands are familiar words that children use. But what about flying hands?
Show children how the hands resemble a bird with outstretched wings by crisscrossing the thumbs and open palms. Make the wing flap movement and let children mimic the action.
Introduce the concept of shadow puppetry and teach children different hand movements that resemble another thing. This activity will not only be entertaining, but their fine motor skills will improve as they stretch and move their fingers.
Tell the children that the flying hands can be duplicated on paper. Have them spread their hands on a black cardstock to trace. Trace the left hand first, ensuring that the fingers are spread apart.
Next, place the left hand beside the traced handprint. Make sure that the thumb crisscrosses on the first. Trace and cut this out.
Next, glue the googly eyes just below the thumbs. Use white paint to make the mouth and its fangs.
For this craft, you will need:
- Black cardstock
- White paint
- Fine-tipped paintbrush
- Googly eyes
- Pencil
- Scissors
For more information on this activity, go to KidsCraftRoom.com.
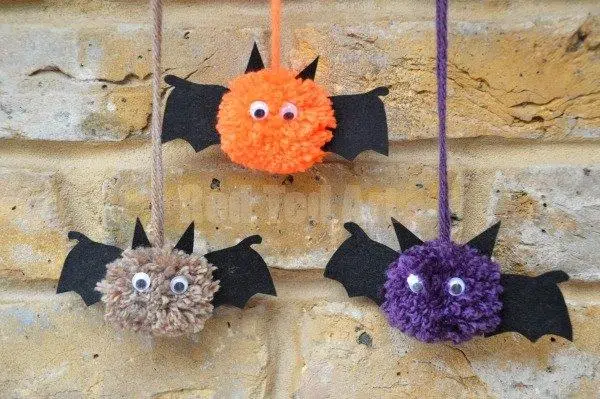
Pompom-making is an art activity that children will enjoy.
The materials needed are readily available, and the technique used to turn the string of yarn into a ball of fluff will help children strengthen their hand muscles and improve their hand-eye coordination skills.
This craft will also teach patience and improve their concentration. Children might find it time-consuming, but the final product is rewarding and worth the effort.
Make the pompom using a pompom maker kit. See the complete details on the site for the entire process of how this can be done. Next, trim the pompom if necessary to eliminate excess yarn and to keep it clean and round.
Cut out the rest of the bat’s parts from black cardstock. There is no available template for these, but they can easily be made by estimating the size of the parts based on the pompom and outlining them on the cardstock.
Attach these parts, including the bat wings, googly eyes, and ears. Let this dry before using.
These bats are awesome to use as counters for Math activities. Make several of them in different colors and sizes to teach children color recognition and comparison.
For this craft, you will need:
- Wool
- Googly eyes
- Black cardstock
- Glue
- Scissors
- Pompom maker kit
For more information on this activity, go to RedTedArt.com.
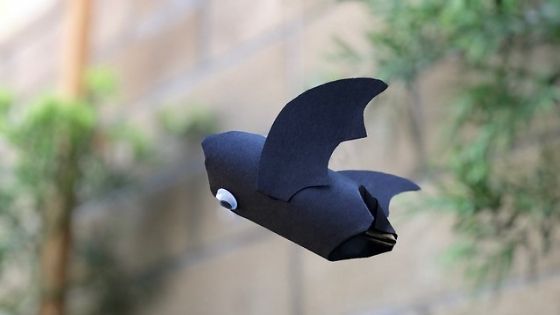
A flying bat in action has to be one of the cutest things children will appreciate for Halloween. The only thing that requires a major decision is whether to add fangs or not.
This activity’s cutting, gluing, and folding steps will help children improve their fine motor skills. Use these as mystery boxes to teach concepts or hold candies for trick-or-treating.
Just write numbers or letters on paper and hide them inside the body. They can also be written on the bodies of the bats if making more than one. Have children find the matching letters or numbers while hanging them on walls or ceilings.
Cut to size a piece of black construction paper to wrap around the toilet paper roll. Glue this and let it dry. Attach the googly eyes.
Next, press the toilet paper’s edges on both sides to form an arch shape. The top part, where the eyes are, will become the ears, while the bottom part will become the legs of the bat. Refer to the pictures on the site for this step.
Cut two wings from the black construction paper. The site recommends folding the paper into two before cutting them to make them identical. Attach the wings to the toilet paper roll.
Poke a hole in its back and attach a string tied to a paperclip to secure it well.
For this craft, you will need:
- Toilet paper roll
- Construction paper
- Googly eyes
- Glue
- Scissors
- String
- Paper clip
- Hole puncher
For more information on this activity, go to MomBrite.com.
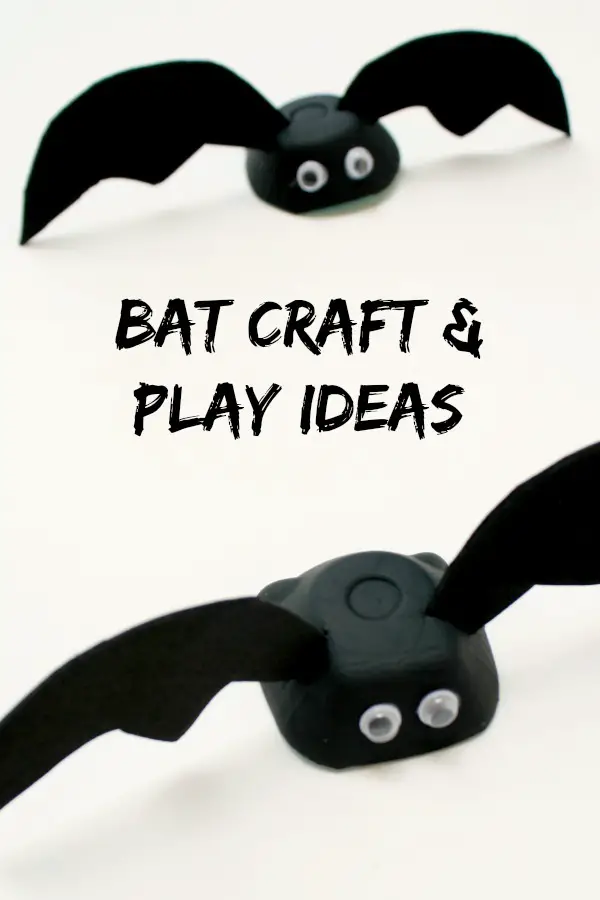
Do not throw away those egg cartons next time you shop for groceries. They can be a handy tool in teaching children concepts while allowing them to become creative.
The cutting skills of children will be tested in this craft. They can practice cutting materials thicker than paper, such as styrofoam and craft foam.
This activity will improve hand-eye coordination, scissors control, and the ability to coordinate both hands during cutting.
Start with separating the individual egg cups from the egg carton. Have children cut them, ensuring that they are handled gently, so they do not break. Paint these black.
While waiting for them to dry, cut out the wings from the black craft foam. To make the wings identical, fold the craft foam in half before cutting. This will result in matching wings in half the time it takes to make two.
Once the paint dries, attach the googly eyes using craft glue. Cut slits on each side of the egg cups for the wings. Insert them carefully and secure them with craft glue.
The site suggests keeping them unglued just in case they will be used for other activities.
For this craft, you will need:
- Styrofoam egg carton
- Black craft foam
- Scissors
- Craft glue
- Googly eyes
- Paint
- Paintbrush
- Craft knife
For more information on this activity, go to FantasticFunAndLearning.com.
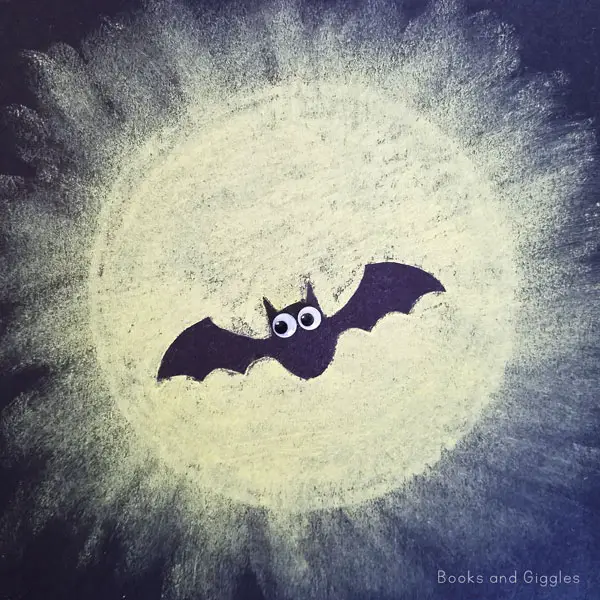
This bat craft looks straight out of a comic book with its fine details from the shading and how this flying mammal is positioned in contrast with the moon’s glow.
Teach children the art of shading techniques with this bat craft. Children will learn to use different materials to create a stunning piece of artwork. Use this craft to go with the book DK Readers “All About Bats” by Caryn Jenner, as recommended on the site.
The site recommends an alternative to the bat sticker by downloading and printing free clipart. Once the bat is ready, stick this in the middle of a black construction paper.
Cover the bat with a plastic lid and trace its shape around it with chalk while holding it firmly. Next, fill the inside part of the circle with chalk.
Have the children use their fingers to spread the chalk by rubbing their fingers from the inside of the circle to an outward direction. Repeat this process until the whole moon casts a glow.
Once finished, remove the excess chalk by blowing it off. Use a clear sealant to protect the artwork. Upon spraying the sealant, the chalked part will seem to disappear. However, the site assures it will become visible once the sealant dries.
For this craft, you will need:
- Black construction paper
- Bat stickers
- Clear sealant
- Googly eyes
- Craft glue
- Plastic lid that is bigger than the stickers
For more information on this activity, go to BooksAndGiggles.com.
Conclusion
There are many misconceptions about these nocturnal animals. Some people fear them and think of them as evil creatures. However, Science facts state that these are a unique type of mammal that brings countless benefits to humans.
Use these crafts to promote awareness among young learners about bats. Use books, videos, and other visuals to help them understand that these flying mammals should not be feared but protected.


