Get ready to play ball with these 10 fun and easy baseball crafts for preschoolers! From homemade hats to batting helmet magnets, we’ve got creative projects for every young baseball fan.
With just a few simple materials and steps, even the littlest sluggers can join in on the fun. Let’s grab some craft supplies and get creative!
Great Baseball Crafts for Preschoolers
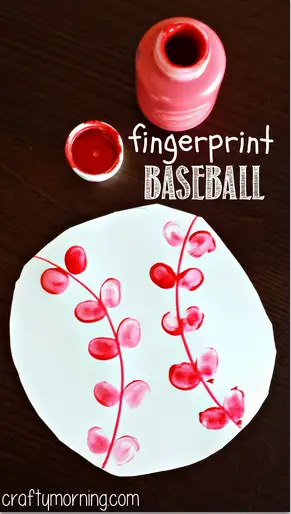
Learn how to play baseball with this super enjoyable and simple project! Also, the little sluggers may join in the fun with just a few basic supplies and instructions.
Gather these materials:
- White paper
- Red washable paint
- Scissors
- Red marker
To make these adorable fingerprint baseballs:
1. Have the kids draw a circle on a piece of paper and cut it out.
2. Use a red marker to draw two curved lines on the circle to create the laces on the baseball.
3. Have the kids dip their pointer finger in red washable paint and make laces on the baseball.
4. Let the paint dry.
Enjoy your fingerprint baseballs as decorations for a baseball party or as a keepsake.
For more information about this activity, be sure to check out craftymorning.com.
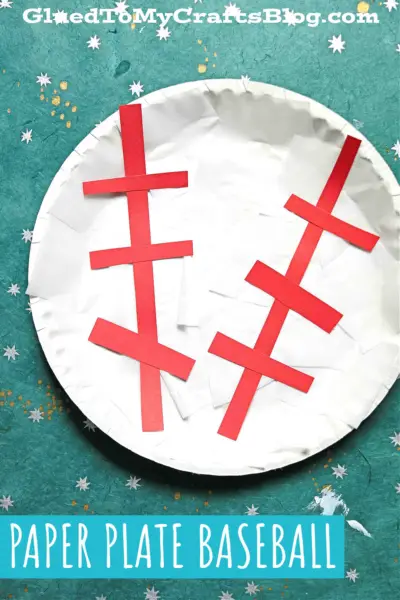
Get ready to hit a home run with this super fun baseball craft! With just a few basic materials and some cutting and gluing skills, your little ones will have a blast creating their own paper plate baseball. Here’s what you need:
- Large paper plate
- White tissue paper
- Red cardstock paper
- Glue
- Scissors
Here are the steps for making a paper plate baseball:
1. Gather materials.
2. Cut tissue paper into small squares.
3. Cover the paper plate with glue.
4. Have the kids place the tissue paper on top of the glue, covering the plate completely.
5. Cut out stripes from red cardstock paper to create the iconic red laces.
6. Once the tissue paper is dry, glue the cardstock pieces onto the paper plate to finish off the craft.
Display their finished baseball proudly or add a special touch. Enjoy crafting with your little all-stars!
For more information about this activity, be sure to check out gluedtomycraftsblog.com.
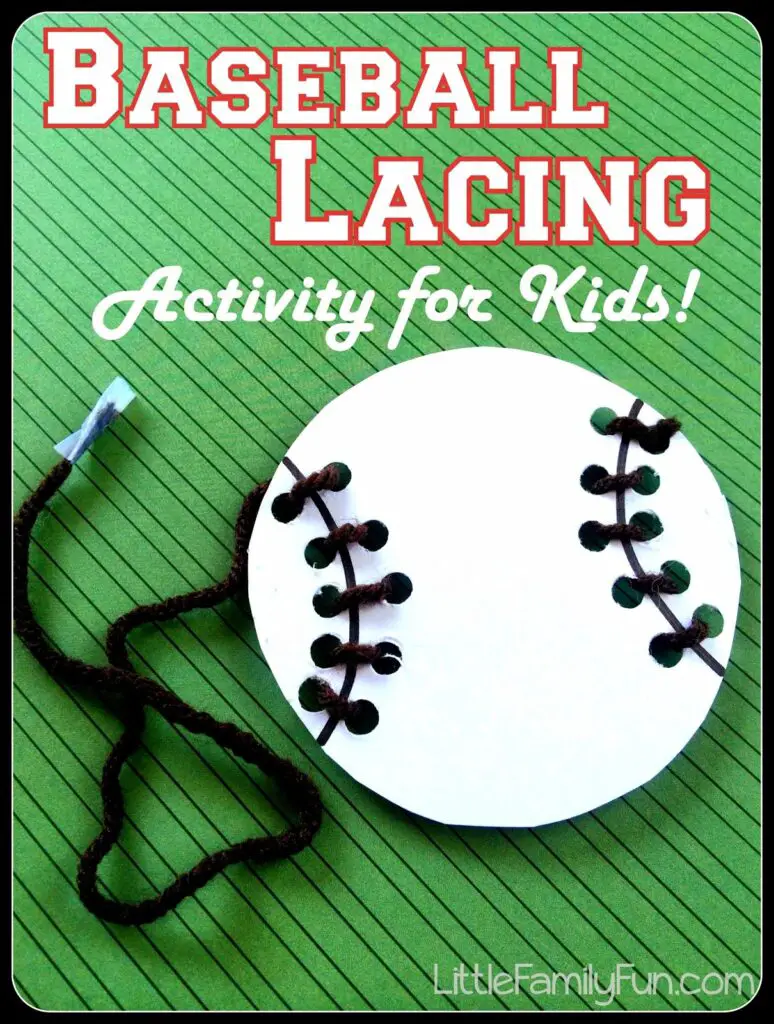
We’ve got a super simple and playful activity for you – it’s baseball-themed, just in time for the start of the season. You can use any shape you like, but we decided to go with a baseball. Ready to give it a try? Gather these supplies:
- White cardstock
- Yarn (any color will do)
- Hole punch
- Marker
- Scissors
- Tape
Trace a small circle onto a piece of white cardstock and draw two curvy lines on either side of the circle with a marker. Use a hole punch to punch holes on both sides of each of the lines.
Cut a long piece of yarn and tape one end to the back of the baseball. Show your child how to lace the yarn through the holes to create the stitches on a baseball.
This activity is great for reinforcing fine motor skills and is a fun way to introduce lacing and stitching. And maybe, your little one may even carry their baseball around all day pretending it’s a kite!
For more information about this activity, be sure to check out littlefamilyfun.com.
Get ready for some delicious crafting fun with our Cupcake Liner Baseball activity! Just grab a few supplies and let your creativity shine as you make a 3D baseball that’s good enough to eat (just kidding, please don’t eat it). Here are the materials you will need:
- White cupcake liner
- Red & black marker
- Light brown & green construction paper
To complete this project, you’ll need to have some basic drawing and cutting skills, as well as the ability to follow directions and use glue to attach your pieces together.
Here’s a brief overview of the steps to make your 3D cupcake liner baseball craft:
1. Spread out the cupcake liner slightly, but don’t flatten it.
2. Use the black marker to draw two curved lines on either end of the liner to create the stitches on the baseball.
3. Use the red marker to draw the stitches over the black lines.
4. Cut out a bat shape from the brown construction paper.
5. Glue the bat on a green piece of construction paper.
6. Glue the liner baseball to the paper, applying glue only to the outside edges. Leave the liner puffed out in the center.
And that’s it! You now have a cute and playful baseball craft to enjoy. If you want to add some extra details, you can try drawing a ball player or a background on your project.
For more information about this activity, be sure to check out thepinterestedparent.com.
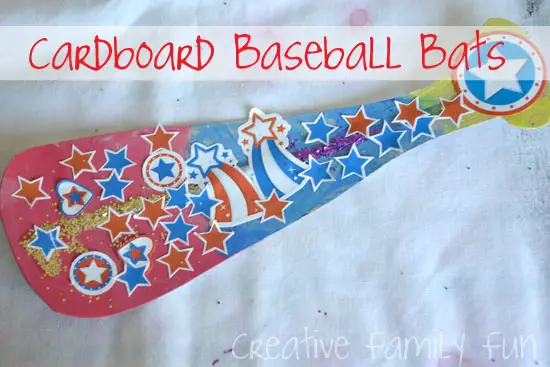
Let your kids’ creativity shine as they design and decorate their very own bats – just watch out for all the glitter! They’ll be ready to play ball in no time. Here’s what you’ll need:
- Cardboard (old cereal or cracker boxes work great)
- Scissors
- Paint
- Glue
- Glitter
- Stickers
Before we get started, cut out a few simple baseball bat shapes from the cardboard. Then gather all your decorations, like paint, glitter, and stickers. Next, let your creativity run wild! Ask your kids to design their very own bat. They can use paint, glue, glitter, and stickers to make them their own.
Don’t be afraid to get messy and use plenty of glitter – the flashier, the better! Once your kids have finished decorating their bats, they’ll be ready to hit some home runs in style.
This activity is a great way to encourage kids to get creative and have fun. Who knows, they might even come up with some unique and original designs for their baseball bats.
For more information about this activity, be sure to check out creativefamilyfun.net.
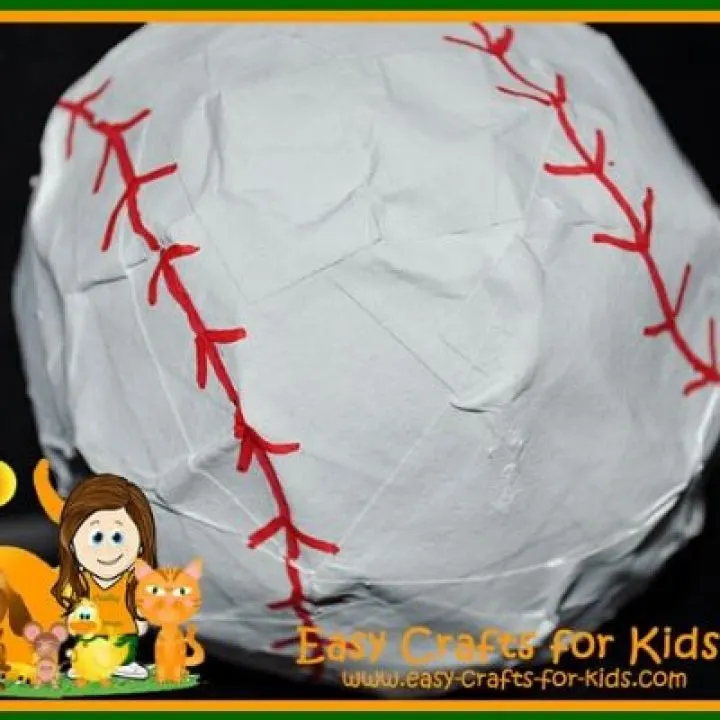
With these paper mâché baseballs, your little ones can practice their swing indoors without worrying about breaking anything. Here’s what you’ll need:
- Bowl
- Water
- Newspaper
- White paint
- Red marker
- Balloon
- Pin
- Glue
- Scissors
- Wrapped candy (optional)
Here’s a brief overview of the steps to make your paper mâché baseballs:
1. Blow up a balloon to the size of a softball. Cut out strips of newspaper and mix up a paper mâché mixture of 3/4 glue and 1/4 water.
2. Cover the balloon in moistened pieces of newspaper, leaving a small area around the end. Allow it to dry.
3. Once the balloon is partially dry, add another layer of white paper. Fill the ball with wrapped candy and cover the hole with more white paper. Allow it to dry.
4. Paint the balloon white and allow it to dry. Use a red marker to draw on the stitching.
And that’s it! You now have your very own paper mâché baseballs for some indoor fun. Grab your bat and have someone throw you the ball!
For more information about this activity, be sure to check out easy-crafts-for-kids.com.
With a focus on sensory and fine motor play, this letter-specific lesson plan is perfect for teaching your toddler all about the letter B. Follow along with us and see how your little one’s excitement for learning grows with each letter of the week.
To complete this lesson plan, you’ll need some basic teaching and planning skills, as well as the ability to follow instructions and lead your child through various activities. You may also need some basic art supplies, depending on the crafts and activities you choose:
- Scissor
- Glue
- Paint
With these fun and interactive activities, your little ones will be well on their way to mastering the alphabet in no time!
For more information about this activity, be sure to check out fromunderapalmtree.com.
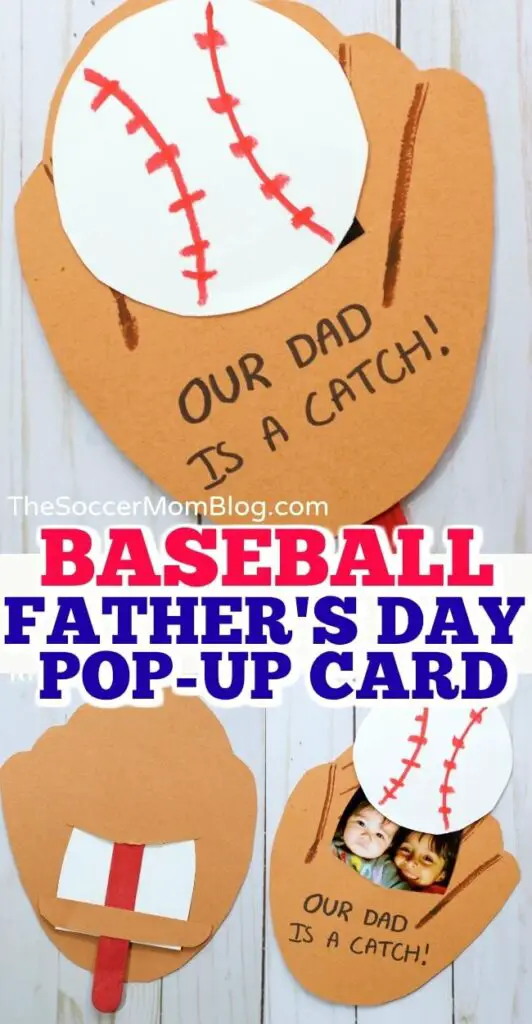
This baseball glove card is super simple to make and only requires a few basic supplies. You and your kids will surely have a blast putting it together and showing off their creativity to their baseball heroes.
Here’s what you’ll need to get started:
- Printable baseball glove pattern
- Brown and white card stock
- Glue stick
- Scissors
- Jumbo wooden craft stick
- Photograph
- Kids paint markers
- Pencil
To make your card, just trace the pattern onto the card stock, cut out the pieces, and decorate your glove and baseball. Then, trim a photo to fit inside the baseball, glue it in place, and attach it to a jumbo wooden craft stick.
Slide the photo into the glove, flip the card over, and glue a stopper tab to the back to keep it in place.
When you’re done, flip the card back over and add a custom message to the front. Then, use the craft stick to push the baseball up and reveal your photo inside. Your dad will be thrilled with this adorable and thoughtful Father’s Day gift!
For more information about this activity, be sure to check out thesoccermomblog.com.

This craft is super easy to make and only requires a few basic supplies. Plus, it’s the perfect addition to any desk or coffee table. Here’s what you’ll need:
- 1 tin can, cleaned and label removed
- Red card stock
- White card stock
- Scissors
- Glue
- Pencil
To make your pencil holder, start by drawing the laces of a baseball on the red card stock and cutting them out. You’ll need four strips of laces in total, two for each side of the can. Next, wrap the white card stock around your can and cut it to size.
Glue the white sheet of card stock to the can, then let it dry completely. Once it’s dry, glue the laces down in a curved pattern, like the laces on a real baseball.
Let the pencil holder dry again, and then it’s ready to use! You can use it to hold your pens, pencils, or even a remote control.
For more information about this activity, be sure to check out drugstoredivas.net.
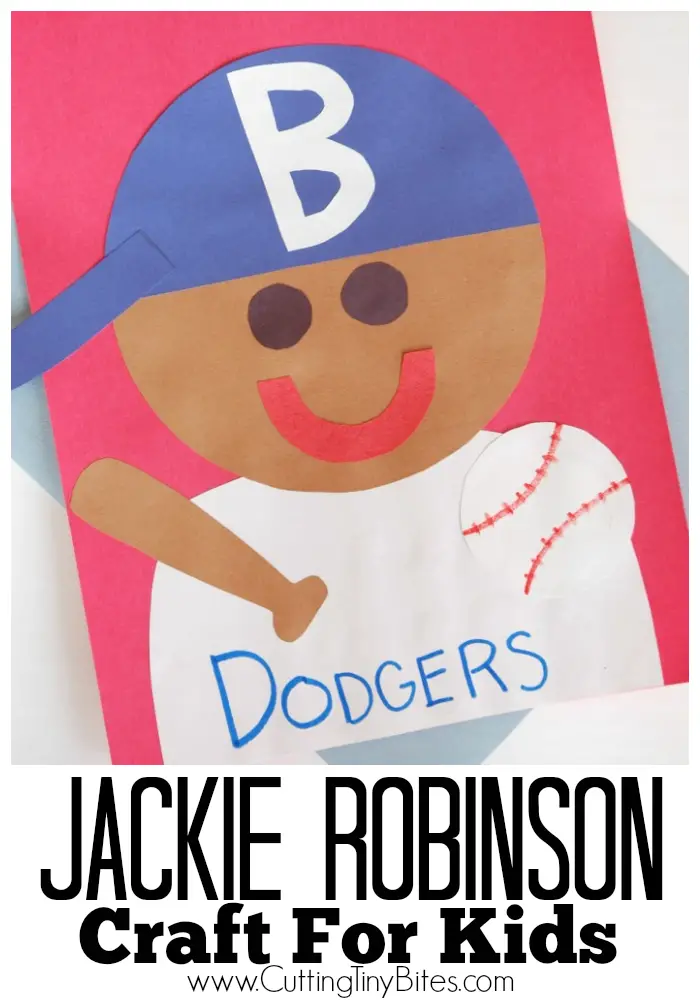
Welcome to our Jackie Robinson craft tutorial! This activity is perfect for Black History Month, a sports theme, or just because you love baseball.
To get started, you’ll need the following materials:
- Construction paper
- Scissors
- Glue
- Markers
To create this craft, start by reading about Jackie Robinson’s life and the challenges he faced as a pioneering athlete.
Cut out and assemble the craft by tracing and cutting a circle for his head (and cutting it in half for his cap), adding circles for his eyes and a rainbow-shaped mouth, and cutting out a white semi-circle for his shoulders.
Glue the pieces onto a piece of construction paper, and add details like a white ‘B’ on the cap and a labeled jersey, as well as a baseball and bat.
This helps kids develop reading comprehension, fine motor skills, creativity, and attention to detail. Plus, they’ll have a fun and colorful reminder of Jackie Robinson’s impact on baseball history.
For more information about this activity, be sure to check out paper-and-glue.com.
Conclusion
Hooray, our baseball crafts are finally complete! These cute little creations are sure to be a home run with any preschooler.
Whether they’re used to decorate a bedroom or playroom, or given as gifts to proud parents and grandparents, these baseball crafts are sure to be a hit! Happy crafting!


