Do you have a sporty preschooler at home? Keep them entertained and engaged with these fun sports-themed crafts! These fun and easy projects are perfect for getting your child excited about their favorite sport. Plus, they make incredible decorations for your child’s bedroom or playroom.
These enjoyable activities can also help your child develop fine motor control and hand-eye coordination skills. So get crafting and let the games begin!
Great Sports Crafts for Preschoolers
These crafts are also a great way to teach your child about different sports. For example, the coffee filter basketball craft can help your child learn about the game of basketball. And the fingerprint baseball card craft is a great way to teach your child about baseball.
So whether you’re looking for a fun and easy project for your child or a way to teach them about their favorite sport, check out these fun sports-themed crafts for preschoolers!
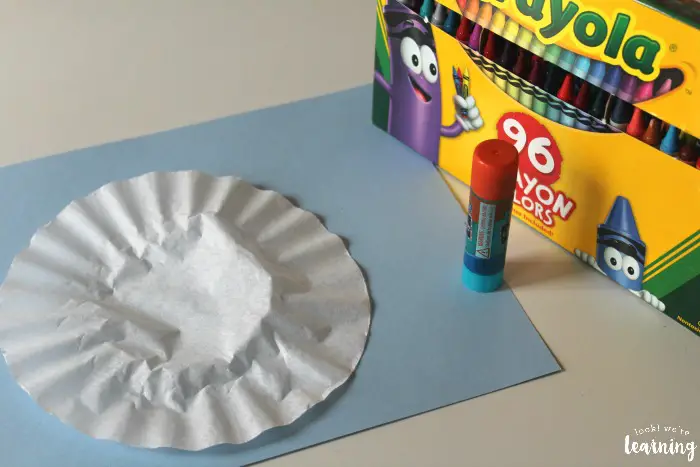
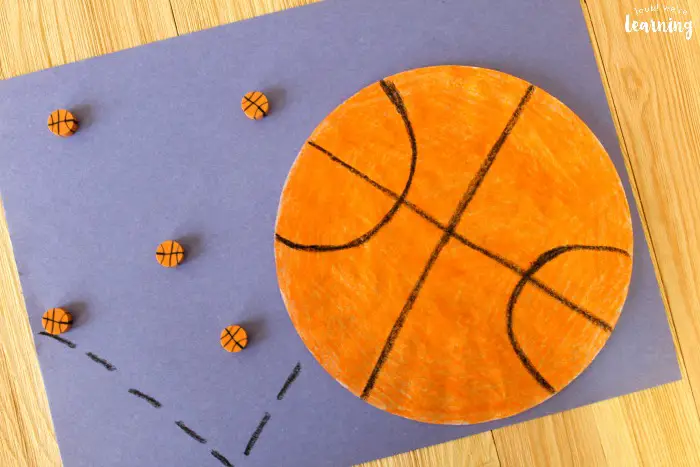
With March Madness in full swing, it’s the perfect time to get your little ones involved in some sports crafts! This Coffee Filter Basketball craft is a simple and fun way to let your preschoolers show their love for the game.
To make your coffee filter basket, you will need:
- 1 white coffee filter
- Colored Construction paper
- Crayons (Orange and Black)
- Glue stick (not liquid glue)
Instruction:
- Using your hands, you have to flatten the coffee filter first.
- Then color the whole coffee filter with a color orange crayon.
- Draw the basketball lines on the filter with a black crayon.
- Draw two intersecting lines in the middle section of the paper, and then draw half-curves at the top and bottom.
- Add a single black line across the lines you just drew.
- In your construction paper, paste the “basketball” into it.
- To bounce from right to left or from the left to the right, place it on the side.
- Add your final details with a black crayon; then, you can call it complete!
Your preschoolers will work on fine motor skills as they color and glue the coffee filter and construction paper together. They’ll also get to know this basketball sport as you discuss the basics of how it works. Your students might start to get interested in this sport, and who knows, they might become one of the most famous basketball stars in the future!
Do you need the full details? Visit Look! We’re Learning!.
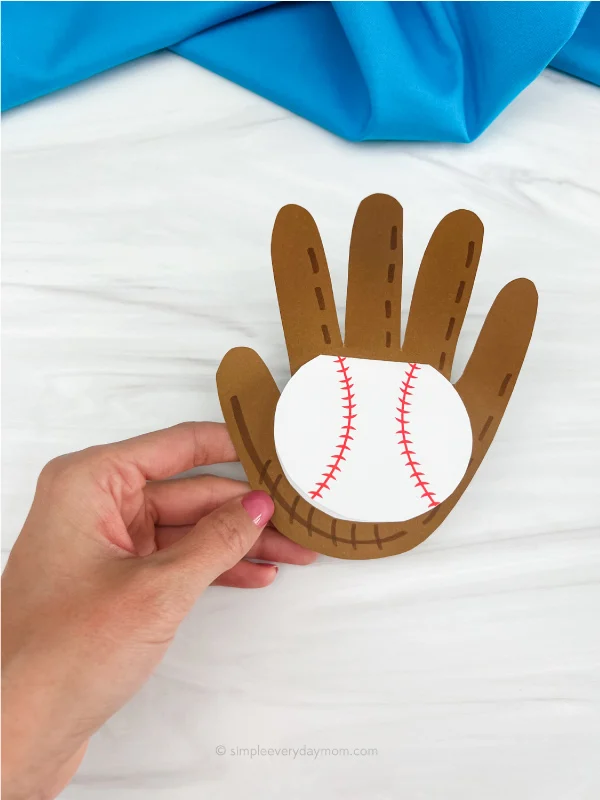
What better way to show off your child’s handiwork than by creating a Handprint Baseball Card! This easy and fun craft is perfect for any baseball fan, and it’s a great way to display your child’s art. Plus, it’s a great opportunity to teach your child some important skills, like cutting and gluing.
To make this craft, you’ll need:
- Baseball template
- Colored cardstock (or construction paper)
- Markers
- Glue stick
- Scissors
- Pencil
Here’s how to make it:
Print out the baseball template on white paper. Next, fold the paper in half along the baseball’s symmetrical line. Cut around the entire circumference of the ball, except for the flat part at its top. Then, trace your kid’s hand onto a sheet of brown construction paper and cut it out.
Use a brown marker to draw cross-hatching stitch marks across the width of their palm print and down each finger to make this look like a glove.
Write a message inside the baseball card, then place it in the center of the handprint. Next, glue down the backside of the card and fold your fingers inward to make it look more like a glove.
The handprint baseball card is a simple and fun craft they will love. It’s also a great way to teach them about the game of baseball. So grab some supplies and get creative with your little ones today.
Check out this sports craft at Simpleeverydaymom.com for your preschoolers to keep them entertained and engaged.
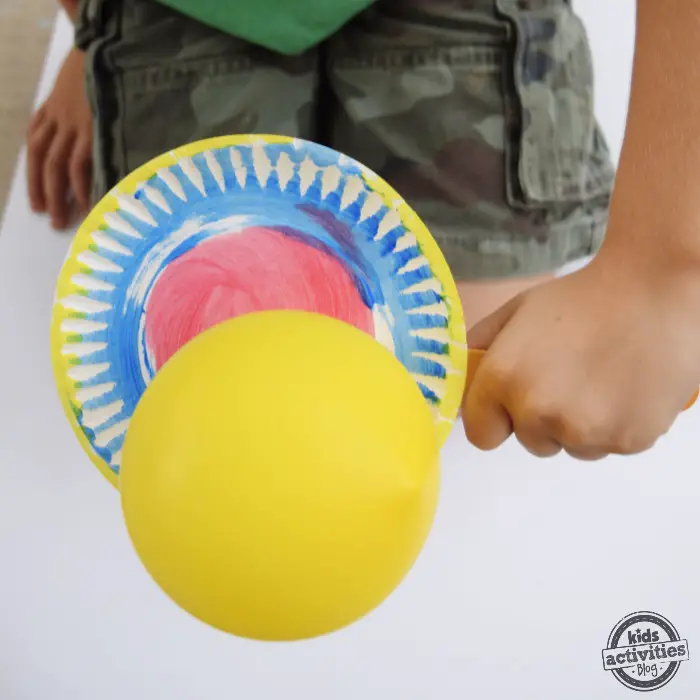
This is a great game to play indoors on a rainy day or outdoors on a hot summer day. It is perfect for preschoolers as it helps them develop hand-eye coordination and fine motor skills. Plus, it is a lot of fun!
To play Paper Plate Tennis, you will need:
- Two paper plates
- A piece of duct tape
- Sticks (you can use popsicle sticks, but you could also use chopsticks, dowels, or anything else you have on hand)
- Paint or crayons (optional)
- A balloon
First, paint or color your paper plates if you would like. Then, use duct tape to attach the sticks to the back of your plates.
You can play the game any way you want, but you can also try this rule. To serve the ball, simply drop it on one of the plates. The goal is to hit the balloon back and forth, keeping it in the air for as long as possible. If the balloon falls to the ground, that player loses a point. The first player to reach ten points wins the game!
Have fun! You may visit Kids Activities Blog for more information about this game.
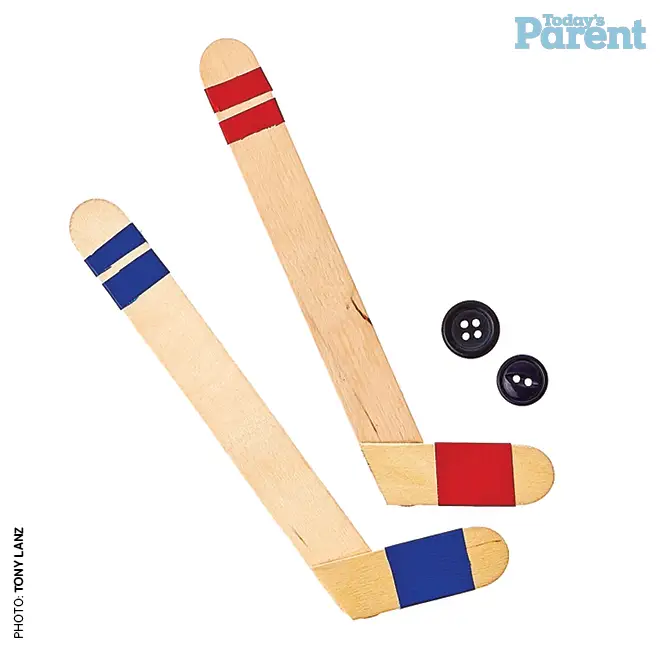
Do you want to teach your little ones some basic hockey skills? Or maybe you’re just looking for a fun and easy sports craft for them to do. Either way, these mini hockey sticks are perfect!
To make them, you only need some Popsicle sticks, red duct tape, a glue gun, black buttons (for the puck), and scissors.
Start by cutting a Popsicle stick at an angle into the bottom quarter. Then snip tiny pieces of duct tape with a width of approximately 1 cm. Glue the angled Popsicle stick piece to one end of the complete-length Popsicle stick.
Finally, adhere the duct tape strips to the blade and shaft using hockey tape! The black buttons will serve as your puck.
Your mini hockey sticks are now ready for some fun! Use them to play mini-games of hockey or just practice your shooting. Either way, your little ones are sure to love them!
Do you have any other easy and fun sports crafts for kids? Check out Today’s Parent for this mini hockey stick craft! Happy crafting!
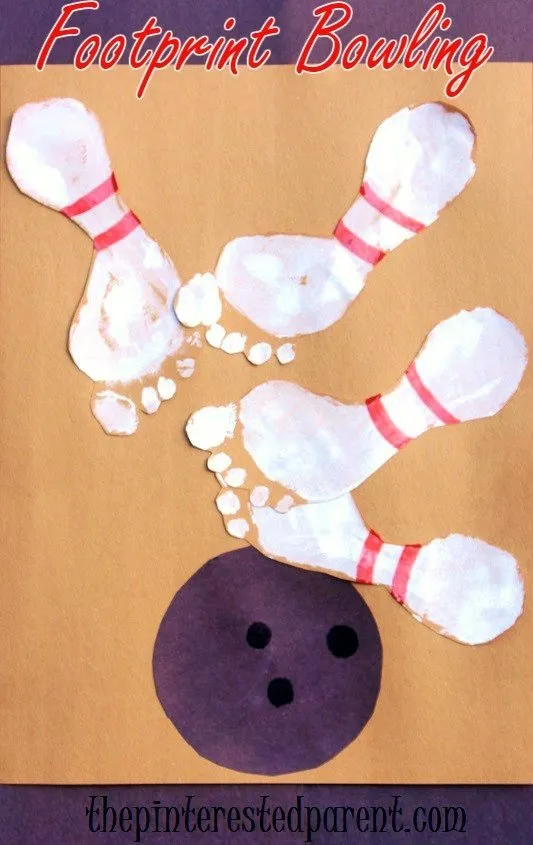
This is a fun and easy game to set up and play with your preschooler. All you need is some paint, two brown pieces of paper, and black construction paper.
To make the pins, simply have your child paint their foot white and press it onto one of the brown pieces of paper. Make three or four prints.
To make the ball, cut a black circle out of the construction paper and draw three circles on it. Glue this down onto the other brown piece of paper.
Your child can then bowl the ball at the pins and see how many they can knock down! This is a great way to encourage gross motor skills and hand-eye coordination. Plus, it’s just plain fun! Give it a try today.
What an easy and fun game to play with your preschooler, right? And be sure to check this post at The Pinterested Parent.
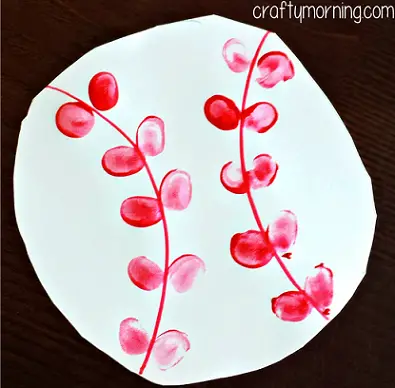
What a fun and easy way to teach young children about baseball! This “Fingerprint Baseball” craft is perfect for little ones learning the game. And it’s also a great way to help them develop their fine motor skills!
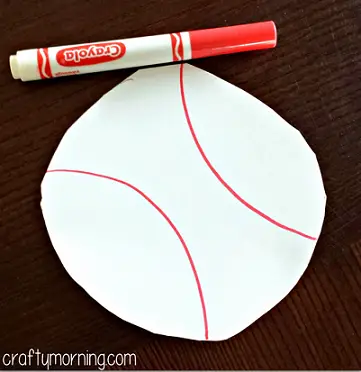
To make this craft, you’ll need some red washable paint, white paper, scissors, and a red marker. Start by drawing a circle onto the paper, and then have the kids cut it out. Next, take the red marker and draw two curved lines. Finally, have the kids dip their pointer fingers in the paint and make laces on the baseball. Let it dry, and you’re all done!
This is a fun and simple craft that your kids will love. So go ahead and give it a try! You might even want to make a few extra “baseballs” so they can play a game of catch afterward. Enjoy!
What other sports crafts do you like to do with your kids? If you enjoyed this post, visit Crafty Morning.
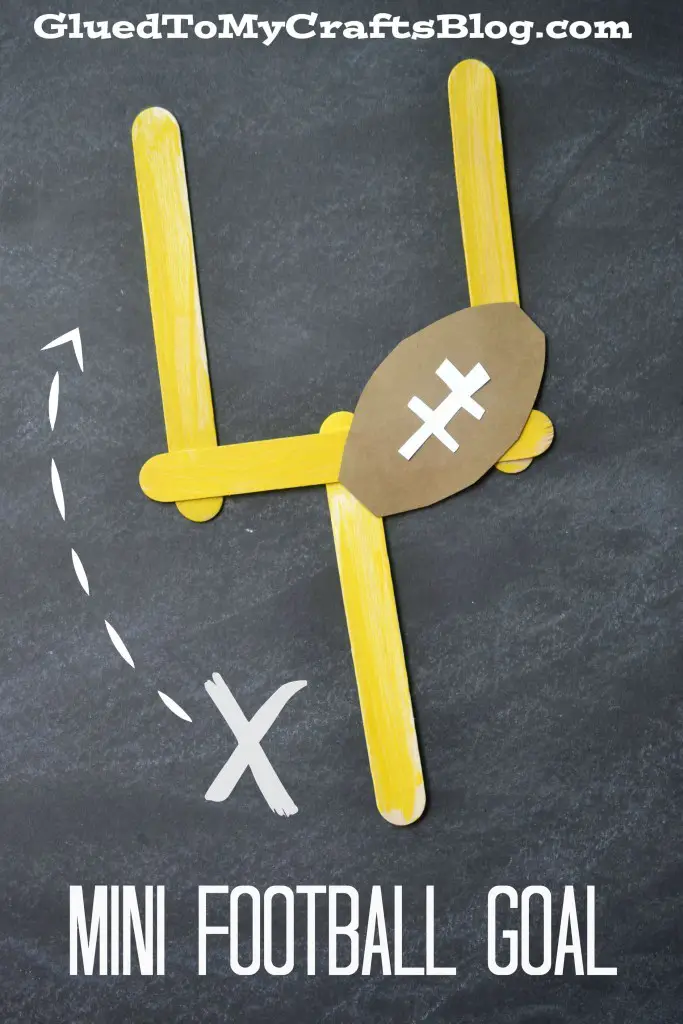
To make this Popsicle Stick Football Goal Craft, you will need just a few supplies. You will need jumbo popsicle sticks, glue, yellow craft paint, a paintbrush, a small paper plate, and brown and white colored cardstock paper.
To make your goal, begin by gluing three popsicle sticks in a “U” formation. After the glue has dried, add a fourth popsicle stick to the bottom of the “U” to complete the field goal shape. Finally, paint it yellow.
Cut a small football shape from your brown cardstock while the paint and/or glue is drying. Glue “lacing” from the white to the center of the football. Simply glue the ball to the top of your popsicle stick field goal to complete the Mini Popsicle Stick Football Goal.
This easy and fun sports craft is perfect for any little football fan and is a great way to work on those fine motor skills. Your child will love painting the popsicle sticks yellow and then lacing up the football. This Popsicle Stick Football Goal Craft will surely be a hit with any preschooler!
Do you have a little football fan at your house? If so, visit Gluedtomycraftsblog.com for more details about this craft.
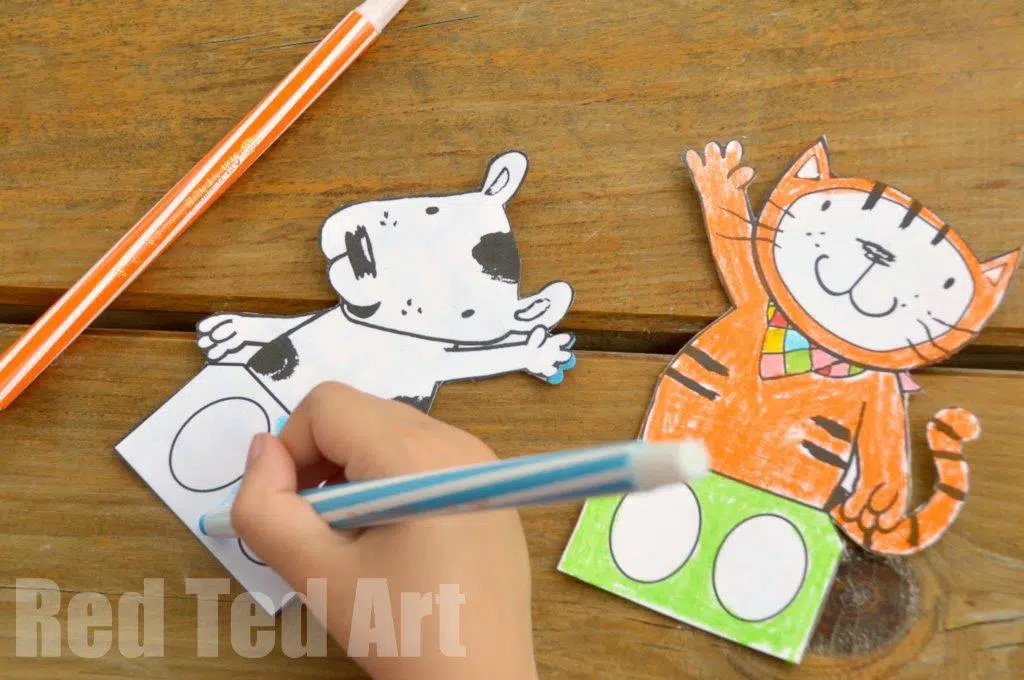
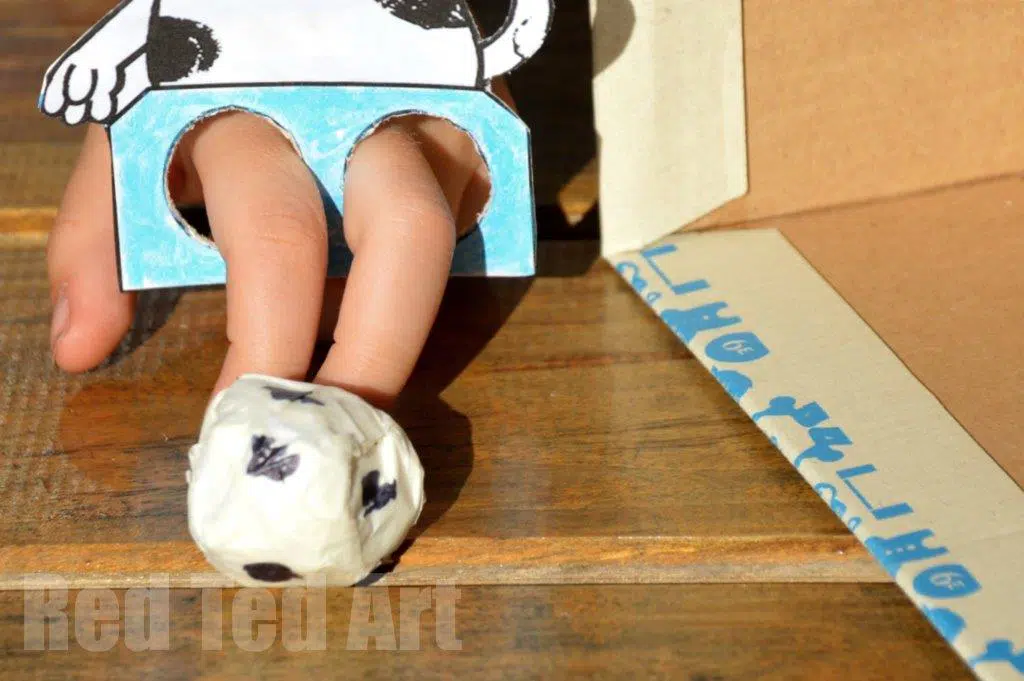
Parents, are you looking for a fun and easy craft to do with your preschool? Poppy Cat Finger Football is the perfect activity! Not only is it super cute, but it’s also an excellent way for little ones to learn about sports and coordination.
To make your own Poppy Cat Finger Football game, you will need:
- Poppy Cat Character Template
- Scissors
- Glue
- Cardboard
- Crayons or colored pencils
- A piece of paper
- A shoebox
Instructions:
- First, print out your Poppy Cat characters and glue them onto some cardboard.
- Cut out your characters and color them in.
- Next, make your football by scrunching up a piece of paper.
- Finally, use the shoebox as the goal.
Your Poppy Cat Finger Football game is now ready to play! Have fun and watch your little ones learn essential coordination skills.
If you get interested in this sports craft, visit World Cup Crafts.
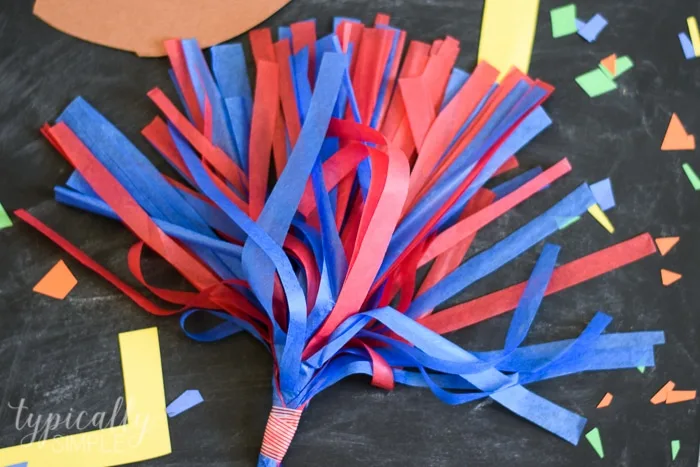
Making tissue paper pom-poms is a fun and easy way to show your team spirit! You’ll just need tissue paper (choose whatever you like or your team color), scissors, and washi tape.
Take two pieces of tissue paper in your team’s colors and fold them lengthwise in half. Then, cut the big rectangle down the width (long ways) into halves to make two smaller rectangles.
Keep the two pieces of tissue paper folded together and cut thin strips starting at the open end and stopping approximately an inch before the fold. After cutting all your strips, tightly roll the tissue paper together at the folded end and seal with washi tape.
Time to show your support for your favorite team! These are also fun to use as decorations for a party or tailgating. Go team!
Try this sports craft and check out Typically Simple for more details.
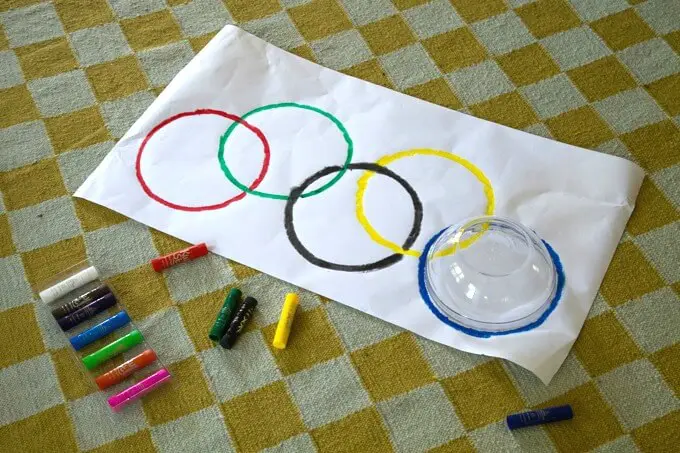
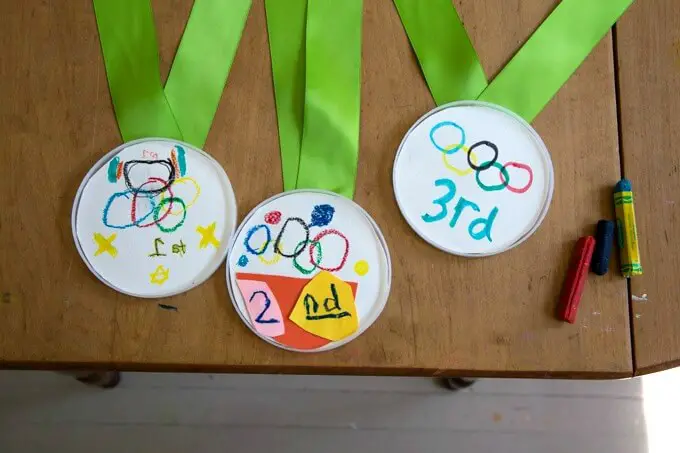
Now it’s time to make your Olympic Medal Craft! This is a great activity for sports-loving Preschoolers. It helps them learn about different colors and how to use glue properly. Plus, it’s a lot of fun! Here’s what you’ll need:
- Plastic lids
- Hot glue gun
- Sturdy paper
- Oil pastels
- Ribbon, about an inch and a half to two inches wide
- Mod Podge
Directions:
To make the medals, first trace the lids onto paper with a pencil. Cut out the circles you traced, then glue them to the inside of the lids with hot glue. Next, cut lengths of ribbon long enough to loop around your child’s chest and overlap in the middle at the bottom. Use hot glue to attach the overlapping ends together, then attach the ribbons to the back of the lids with more glue. Finally, use oil pastel or any color to decorate your Olympic medals!
There you have it! Now make more so everyone can join in on the fun! Sports crafts are a great way for Preschoolers to learn and have fun simultaneously. So get creative and see what you can come up with!
Check out Artfulparent.com and have fun!
Conclusion
The process of doing these crafts is just as important as the final product. It is a time for the children to be creative, have fun, and explore. So don’t worry if it’s not perfect, that’s what makes it so special. Thanks for trying out our exciting sports crafts for preschoolers! We hope you enjoyed it as much as we did.


