The nineteenth letter of the English alphabet is one of the most used and easily recognized. We have listed ten unique activities that children can do and make for them to learn the letter.
Animals, colors, and plants are some topics that can be integrated with learning the letter S. Children will learn the different ways of painting and cutting with these crafts.
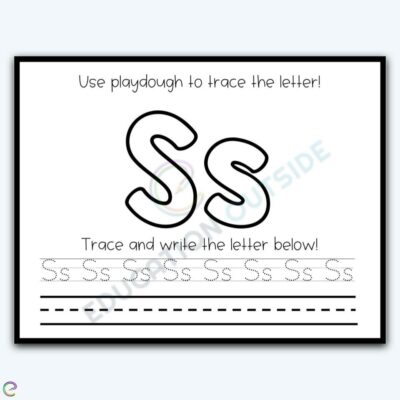
Playing with clay is a hit with children. That is why incorporating this activity with letter learning is a no-brainer. Children will highly benefit from this activity.
Their hand and finger muscles become stronger as they roll and manipulate the clay. They will learn the shape of the letter S by filling the outline of the mat with clay. They can practice tracing the letter and later write them on their own.
Download the playdough mat from EducationOutside.org. Print the mat and prepare the rest of the materials needed for this activity. Let the child make the uppercase and lowercase letter S using playdough.
Place the clay letter S on the mat. Assist children by demonstrating how to roll the clay to make it long enough to fit on the mat.
Let them use markers or pencils to trace the dotted letters on the line. Lastly, please encourage them to make the letter Ss by writing on the line.
For this activity, you will need:
- Letter S Playdough Mat
- Playdough
- Markers or pencils
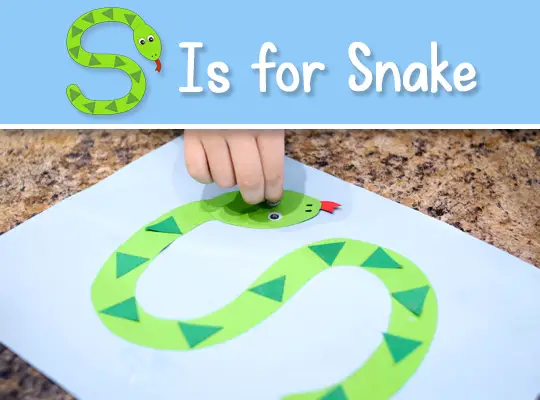
Snake is the perfect animal to make when learning the letter S. The hissing sound of the snake and its shape resemble the animal very well. This craft is simple enough for even young children to work on by themselves.
Begin with printing the snake template. Cut the snake’s body, head, and tongue and trace them onto the colored cardstock. Choose lime green for the body and head. Use the red cardstock for the tongue.
Glue the snake on the light blue cardstock. Other colors may be used for this part. Cut small triangles from the green cardstock and glue them on the snake.
Ensure these triangles are small enough to fit inside the snake’s body. For younger children, draw the triangles on the green cardstock so it will be easy for them to cut through the lines.
Next, glue the head and tongue. Glue the eyes on the head. Finally, use the black marker to draw the nose. The Snake Craft is now complete!
For this craft, you will need the following:
- Snake template
- Printer paper
- Lime green, Red, Green, and Light blue cardstock
- Googly eyes
- Glue
- Scissors
- Pencil
- Black marker
For more information on this activity, head over to Blog.AllAboutLearningPress.com
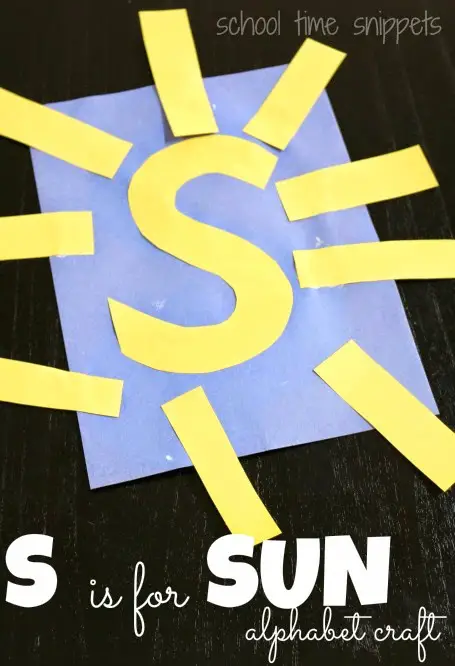
Here’s another way to help children recognize the letter S. Use the yellow sun to help children remember what the letter S looks like. The S Sun Craft is a good supplemental activity after learning songs, rhymes, and poems that go with the letter.
This activity is simple to make and uses readily available materials. It can be partnered with other tasks to help introduce the letter S.
There are several storybooks about the sun that may be used. The blog recommends several books connected to the letter S, which can be helpful.
Choose a bright yellow construction paper that resembles the color of the sun. Cut a big letter S and some strips for the rays. Let the child paint glue on the letter S, making sure to follow the shape.
Stick the letter on blue paper. This color represents the sky. Let the child add the sun’s rays by sticking them around the letter S.
For this activity, you will need the following:
- Yellow and blue construction paper
- Glue
- Paintbrush
For more information on this activity, head over to SchoolTimeSnippets.com. Or, if you’re looking for more sun centered projects, check out our list of sun crafts for preschoolers!
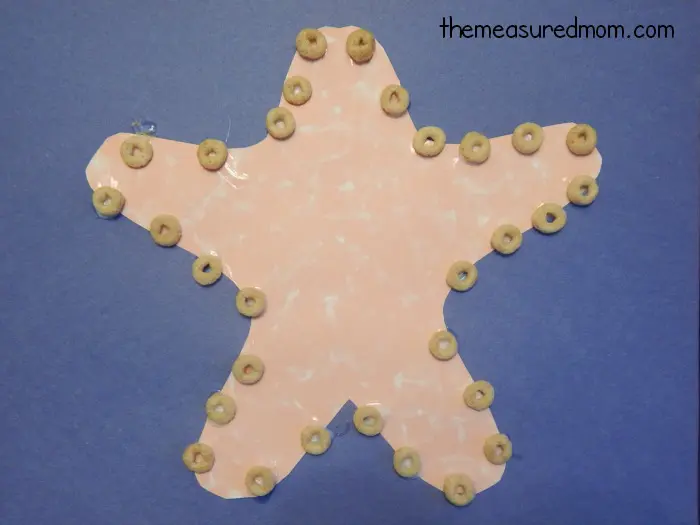
Many objects begin with the letter S sound. Starfish is one of them, and in this activity, children will find it challenging to complete the craft before consuming all the cheerios needed.
Start with outlining a starfish. Cut it out and glue it onto another sheet of paper. Dot the outline of the starfish with glue. Allow the child to place a cheerio on every glue dot. Let this dry.
There are so many ways to extend and modify this activity. First, add glue dots in the middle of the starfish in the form of the letter S and allow the child to add cheerios to it. Once dry, this can be used as a textured letter for the child to finger trace.
Second, the child may draw or cut small pictures to stick in the middle of the starfish. Use pictures that begin with the S sound, such as socks, snails, and spiders.
Lastly, this craft can be used to talk about other sea creatures that begin with S, such as seahorse, sting ray, sponge, swordfish, seal, etc.
To find out more about this craft, go to TheMeasuredMom.com
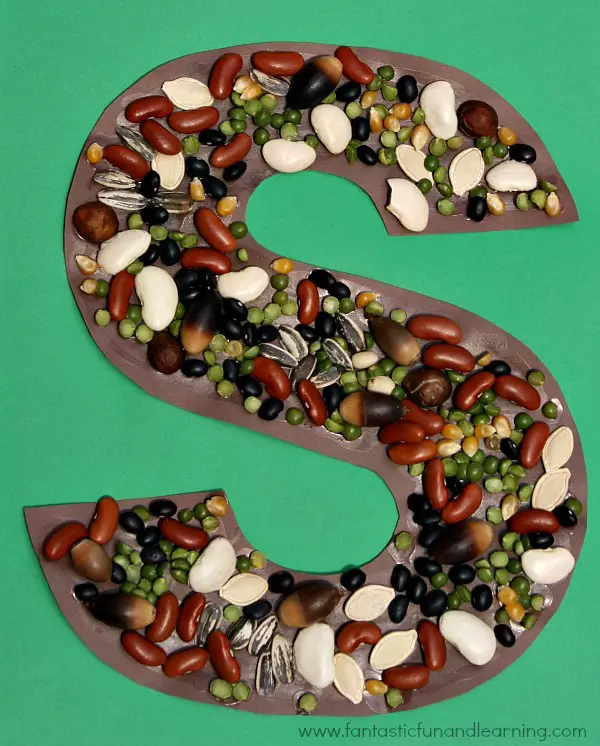
Letter learning and nature study go hand in hand in this activity. Since the word seed starts with the letter S, this is a good way to introduce children to some concepts about plants.
With this craft, children can learn the different kinds of seeds, where seeds come from, and the life cycle of plants. They can sort seeds based on color, shape, or size before gluing them on paper.
They can also count the seeds and compare their unique characteristics. Point out that some seeds are flat while some are chunky. Some have a brittle covering that can be cracked open, while some have several colors on the skin.
To make this craft, make an outline of the letter S on a piece of cardstock. Cut it out and place it on a tray. Cover the letter with glue. Give children a container of different seeds.
Let the children stick the seeds on the area covered with glue. Allow this to completely dry. Picking the different sizes of seeds will allow them to improve their fine motor skills.
For an added challenge, use tweezers or tongs to pick up and place the seeds on the letter S. To make this craft last longer, ensure that the seeds are dry and bug-free.
For this craft, you will need the following:
- A cardstock or construction paper
- Glue
- Different seeds
- Art tray
For more details on this craft, check out FantasticFunandLearning.com
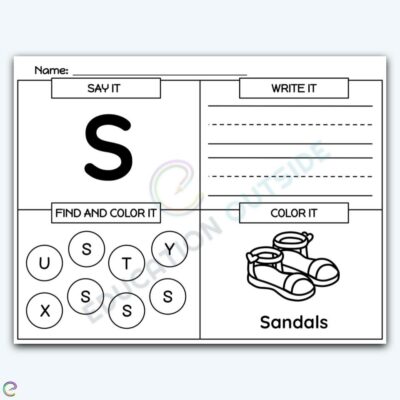
Capital Letter S Activity Mat is a great worksheet to help children improve letter recognition. This simple worksheet targets several letter knowledge skills.
It has four different tasks, which can be incorporated into letter S lessons and extended further to supplement letter learning activities.
Get the worksheet from EducationOutside.org. Once printed, ask the child to say the letter name. If the child is unsure, an alphabet chart may be used.
The teacher may demonstrate how to correctly figure out the name of the letters by pointing at each letter while singing the alphabet song.
Next, ask the child to write the letter on the blank, using the letter on the left as a reference. Use a crayon to color the letter S in circles as the child correctly identifies them.
Lastly, say that the word sandals start with the letter S. Let the child color the picture. This worksheet can be used after a game of hidden objects.
The teacher may place several letter S objects such as magnetic letters, flashcards, wooden puzzles, foam letters, etc. Add a few other letters so that children may practice identifying the correct letter.
Another option is to have different objects that begin with the letter S. Have each child take turns getting the object in the bag. As each object is retrieved, say the name and its beginning sound.
For this activity, you will need:
- Printable worksheet
- Marker
- Pencil
- Crayons
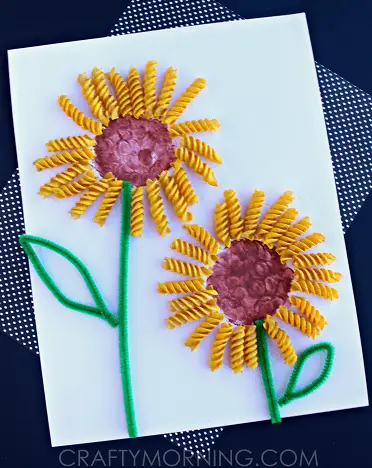
Sunflowers are adorable, and this craft is bulletin board worthy! Children will love the different ways of using paints and noodles to create a unique version of these lovely flowers.
Start with choosing the right noodles for this activity. The site recommends rotini noodles. Other noodles can be used as a substitute for rotini.
Choose dry pasta noodles that are about an inch or two in length. Ziti, penne, fusilli, and other spiral-shaped pasta can be used in place of rotini.
Place the noodles on a paper plate. Paint the noodles yellow, allowing the color to get into those curves and crevices. Let these dry completely.
Next, create the middle part of the sunflower by making big circles on white cardstock. Have the children dip their fingers in brown paint and fill the circle with color.
For younger children, draw the circles on the paper as a guide. These lines will make it easy for them to locate where their finger should land as they paint. Let the brown circles dry.
Glue the rotini noodles around the brown circles. Use green pipe cleaners to make the stem and leaves. Glue them to complete the flower.
An option is to add real sunflower seeds to the brown circle to add more texture and give the flowers more dimension.
For this craft, you will need the following:
- A white cardstock
- Dry rotini noodles
- Glue
- Yellow and brown paint
- Green pipe cleaners
- Paper plate
- Paintbrush
For more details and for more sunflower crafts, go to ACraftyLife.com
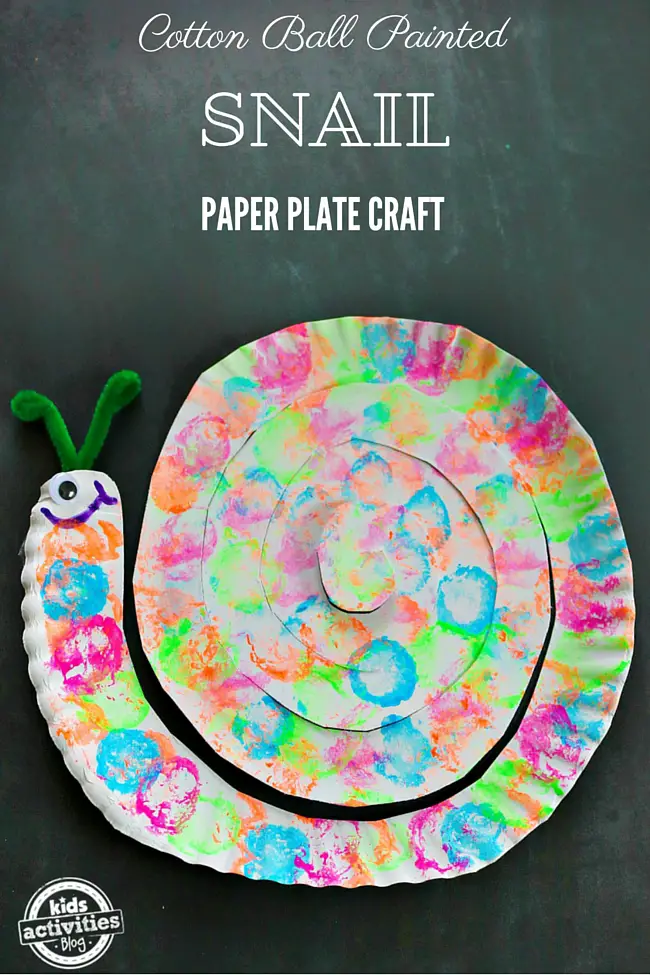
Making crafts that require painting is always a hit with children. Surprise the children by letting them know they are using cotton balls instead of a paintbrush to put color on the snail.
Start with cutting the paper plate into a spiral shape from the edge to the middle part in a circular manner. For younger children, draw the spiral on the paper plate as a guide for cutting.
Cut the edge of the head part to make it round. Next, stick the googly eye and the pipe cleaner antenna on the head.
Give the child the clothespin to hold the cotton ball with as it is dipped in paint. Have the child dab the cotton ball on the snail craft to create an interesting pattern. Let the paint dry.
Other items that can be used to paint are cotton buds, an old toothbrush, and pieces of vegetables that would otherwise be thrown out, such as carrot tops, broccoli stems, celery stalks, etc.
These will give an interesting pattern to the snail. Children will strengthen their finger muscles as they adapt to holding these painting implements.
This activity helps teach primary and secondary colors to children. Allow the children to mix the primary colors as they become fascinated with the results.
For this activity, you will need:
- Paper plate
- Paints
- Cotton balls
- Clothespin
- A googly eye
- Green pipe cleaner
- Glue
- Scissors
For more information on this activity, check out KidsActivitiesBlog.com
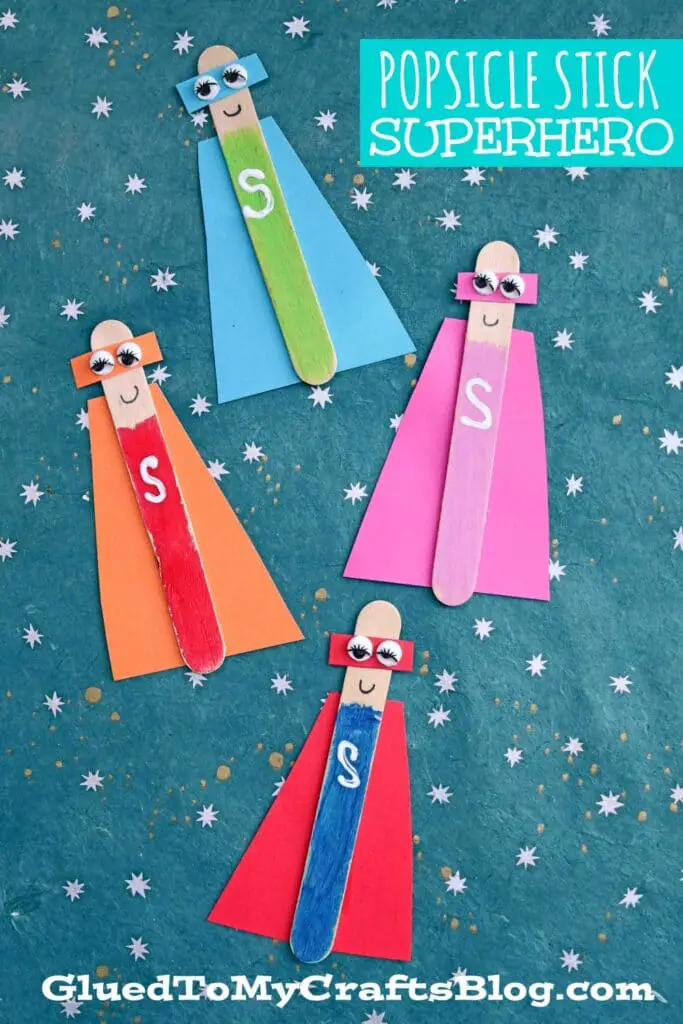
For superhero fans, this craft is the best letter S project! These Popsicle Stick Superheroes can double as bookmarks or be made as ornaments to hang.
Children will enjoy learning about the letter S while playing with this superhero craft. This activity will also help improve their fine motor skills through cutting, pasting, and painting.
Start with painting the popsicle stick. Leave about an inch unpainted. This part is for the face.
For young children, place a small amount of paint on a paint palette or a small container and refill when necessary. Let the children use their preferred color.
Next, have the children paint the letter S in the middle of the popsicle stick. Allow the paint to dry.
Cut a triangle from the cardstock for the superhero’s cape. Glue this on the back of the popsicle stick. Next, cut small rectangles for the superhero’s mask. Glue this on the unpainted part of the popsicle stick.
Stick the eyes on the rectangle. Use a black marker to draw the mouth. To extend this activity, allow children to explore different things that start with the letter S while their superheroes fly, such as stars, sky, sun, etc.
For this craft, you will need:
- Cardstock
- Large popsicle stick
- Googly eyes
- Scissors
- Marker
- paintbrush
For more information on this activity, check out GluedToMyCraftsBlog.com

Salt painting is a unique art technique every child will be excited to try. This Letter S Salt Painting craft gives an embossed but grainy texture, much like using sand.
This craft is great to use as textured material to help non-visual learners identify the letter through touching and feeling its shape.
It is also a good activity to practice the different colors that they have previously learned.
Start with choosing thick cardboard that will not easily turn into mush when the glue is applied. Outline the letter S with a pencil.
Place this on the art tray. Doing this will prevent the salt from getting scattered everywhere.
Next, squeeze a small amount of glue on the outline until it is completely covered. Have the child sprinkle salt on the glue. Shake off the excess salt and let it dry.
Once dry, the salt will harden and be ready for painting. Give the child a paintbrush to dip in watercolor. Carefully apply the paint to the salt. Let this dry.
Control the amount of water used for painting so that the salt will not melt during this process.
For this activity, you will need:
- Cardboard
- Salt
- Pencil
- Glue
- Watercolor
- Paintbrush
- Art tray
To know more about this activity, go to ABCDEELearning.com
Conclusion
These activities are the perfect supplemental activities when teaching the letter S. They are unique and fun to do. The crafts are simple enough for young children to make. They can also be modified depending on the child’s ability.
We hope you’ll consider adding these to your letter s lessons. Thank you for reading!


