Let’s be real—with summer approaching, you are probably beginning to worry about how to avoid your kids’ cries of boredom and more importantly, help them retain the things they’ve learned from school. The good news is that you’ve made the right choice searching for sun craft ideas! And you don’t have to look further as we have gathered here some of the best sun crafts for preschoolers that are not only an excellent source of fine motor development but also great for learning related concepts such as the weather and solar system.
Great Sun Crafts for Preschoolers
There are a lot of easy and inexpensive ways to make a sun—paper plate sun, CD sun, basically, anything in your house that is round or you can turn round. With so many great ideas, there’s sure to be a sun craft that will tickle your preschoolers’ creativity and get them moving.
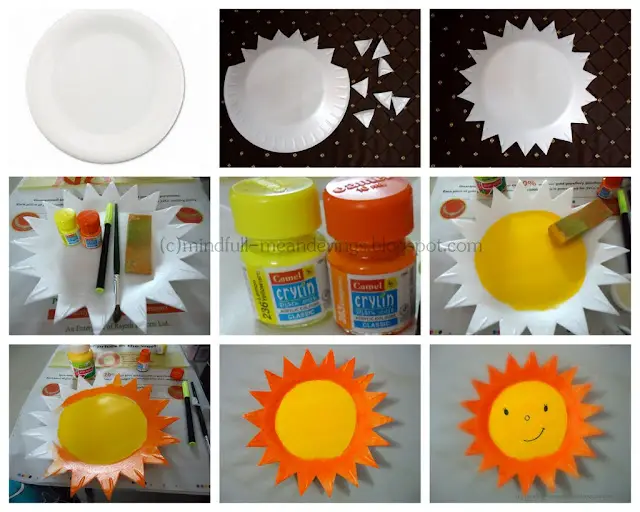
With just a few basic supplies and three simple steps, you and your little ones can instantly bring summer into your home! This foam plate sun craft is perfect for kids practicing their scissor skills and have just begun using their non-dominant or “helping” hands to manipulate materials.
To make this, you’ll only need the following:
- Foam plate
- Acrylic colors (golden yellow and orange)
- Scissors
- Sponge
- Black pen/marker
Start by cutting out triangles continuously along the edges of your foam plate to create sun rays. Then using a sponge, paint the center of your plate yellow and wait for it to dry. Once completely dry, move on to painting the edges with bright orange and finish it off by drawing on the eyes, nose, and mouth with a black pen or marker.
This foam plate sun makes a fantastic wall decor. You can even add some embellishments like tiny bells on the corners if you want to!
For more foam plate craft ideas, head over to ArtsyCraftsyMom.
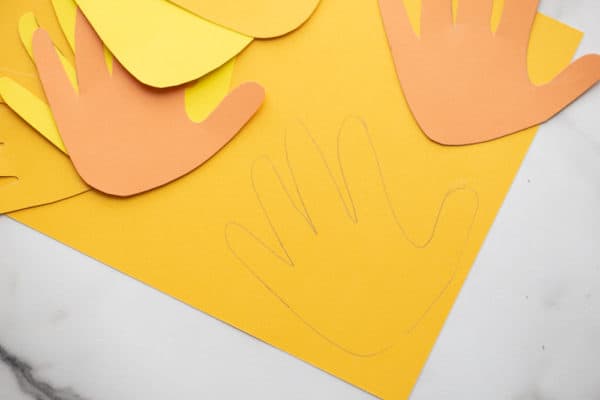

Paper, little handprints, and a dab of creativity are all that you need to put together this handprint sun craft. Fun and straightforward, you can have this project as a whole class activity or with larger groups, provided that the kids have developed enough hand control to cut curving lines. Otherwise, advance prep or help from adults is needed.
For this easy handprint craft, you’ll only need these materials:
- Paper plate (1 per project)
- Yellow tempera paint
- Paintbrush
- Glue
- Scissors
- Construction paper (yellow and orange)
- Large googly eyes (optional)
- Chenille stem (optional)
- Markers
First, have kids paint their paper plates yellow and let them dry. Meanwhile, work on tracing and cutting handprints out from yellow and orange construction paper. You might need six to eight handprint cutouts to cover one paper plate, depending on the size of the children’s hands.
Once the handprints are glued around the edges, attach the google eyes and chenille stem for the mouth, or alternatively, just draw a smiley face on the center of your sun using a black marker. And that’s it– you now have a handy sun craft to play with, display, hang, or treasure.
For more kids’ art and activities, check out LittleBinsForLittleHands. They have fun ideas just below this craft!
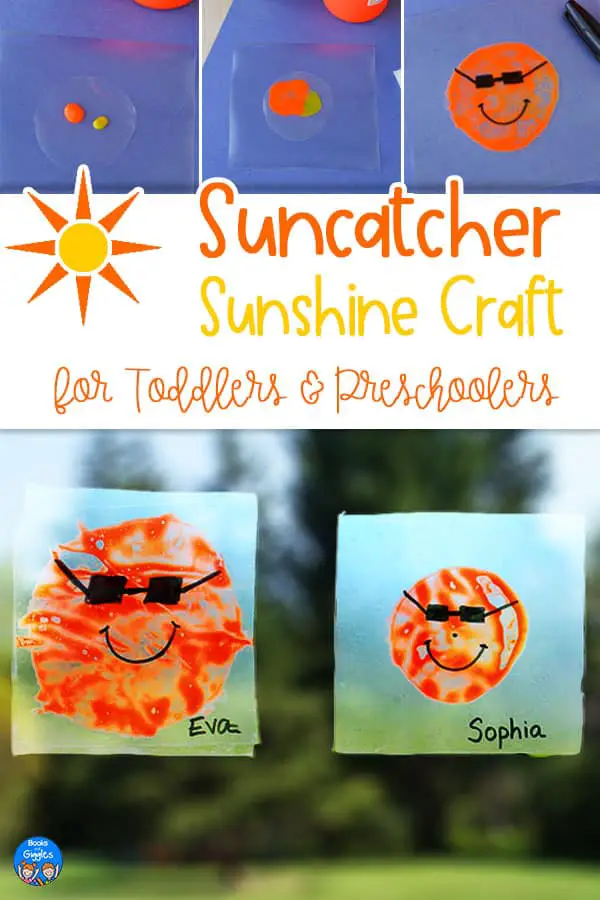
Bring in some sunlight to your house with this ironically cool suncatcher craft! Although a little bit tricky to prepare and requires some special supplies, it will be worth the effort, especially if color mixing excites your little one.
To get started, gather the following materials:
- Zip-top bag
- Paper to stabilize your plastic bag
- Clear re-stickable contact paper
- Tempera paint (yellow, orange or red)
- Scissors
- Ruler or any straight edge
- Black marker
- Circle cutter (optional)
Before handing over the task to kids, adults will have to seal up tempera paint inside layers of plastic and contact paper. To do this, begin by inserting a sheet of paper into the plastic bag to stabilize it. Cut out a 3-inch circle from both layers of plastic to give you a pair at once. Then on your contact paper, cut out two 5-inch squares and trim off about ¼ inch from one side of one of the squares. Make sure to lay it down with the sticky side up.
Next, position one of the circles in the middle of the square and squeeze out a small amount of orange and yellow paint onto it. Place and line up the other circle on top of the paint and seal it by peeling the backing off the second contact paper and laying it onto the craft, sticky side down.
Now, let the kids do the exciting part; have them use their fingers to mix the paint sealed up inside the plastic. Flip it over and ensure that the exposed sticky edge is facing down. To finish it off, draw on a smiley and sunglasses that makes your suncatcher looks chillin’ in the summertime.
Kids will have a blast working on this project but we know that the preparation part is quite tricky so be sure to head over to BooksAndGiggles for precise instructions and tips!
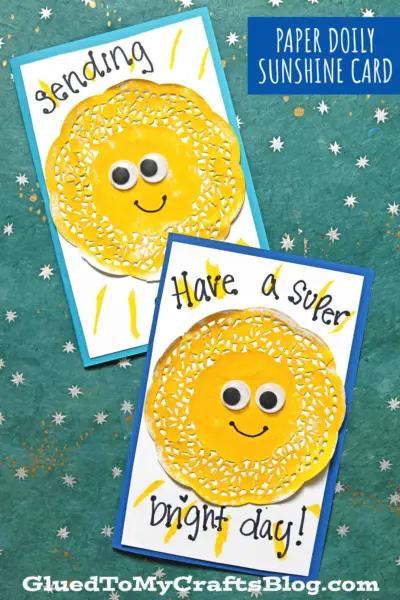
These sweet doily sunshine cards are sure to brighten up the day of anyone who receives them! Creating these cards involves minimal cutting, thus making it an excellent go-to craft for I’ll-do-it-myself kids.
For this activity, you’ll need:
- White circular paper doilies
- Yellow crayon or paint crayon
- DIY or pre-made cardstock cards
- Glue stick
- Small googly eyes
- Scissors or paper trimmer
- Black marker
With scissors or a trimmer, start by trimming down a sheet of white cardstock to fit the front of your card. This serves as the “sky” for your sun. Make it slightly smaller than the card so you can add some color around the edges. Then color your paper doily yellow and glue it onto the center of your card front. With yellow crayons, draw on some sun beams around the doily. Finally, attach the googly eyes, draw on a mouth, and if you want, stick a few embellishments such as gems and glitters to add a personal touch.
Aside from all the fine motor benefits in the process, giving away these sunshine cards provides an opportunity for preschoolers to interact with other people, build relationships, and practice kindness.
Head over to GluedToMyCrafts for detailed instructions and photo outcomes for inspiration!
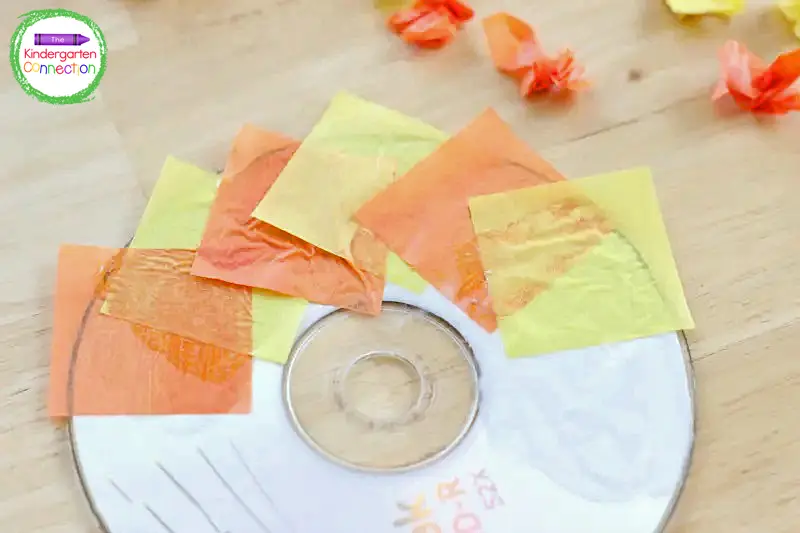
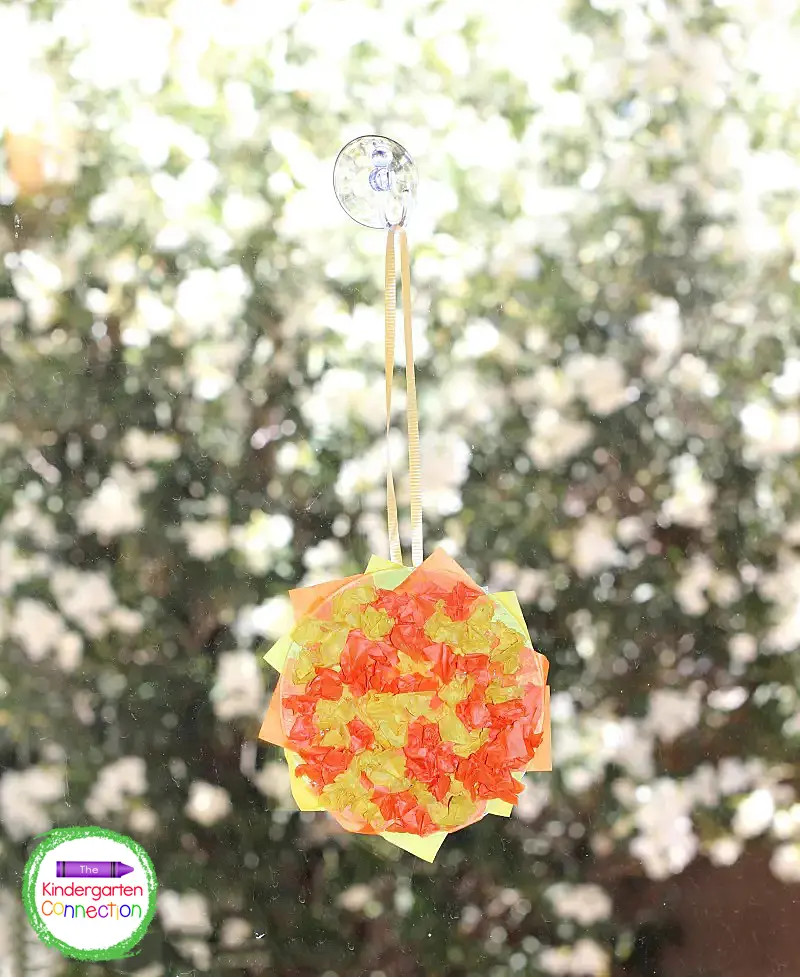
If you have some old or unwanted CDs, don’t toss them out yet as you can turn them into fancy summer decor. While this sun CD craft looks really gorgeous, recreating this won’t actually cost you much time and money—except if your little one can’t get enough making more of these!
For this, you’ll need the following materials:
- CD
- Tissue paper squares (orange and yellow)
- Glue
- Paper plate
- Q-tip
- Ribbon (optional)
To get started, squeeze a good amount of glue on your paper plate to help those little hands minimize as much mess as possible. Have them crumple a handful of yellow and orange tissue paper squares and set them aside. Using a Q-tip, apply a generous amount of glue, covering the entire face of the CD. Glue on pieces of uncrumpled tissue squares turned sideways and overlapping around the edge to make sun rays.
Also, stick a few more pieces to cover the hole in the middle. Now get the crumpled tissue paper you set aside and glue them on, completely covering the face of the CD.
As simple as that, kids get to improve their hand and eye coordination and at the same time, have fun.
For helpful gluing tips, read over the blog of the clever minds behind this craft, TheKindergartenConnection.
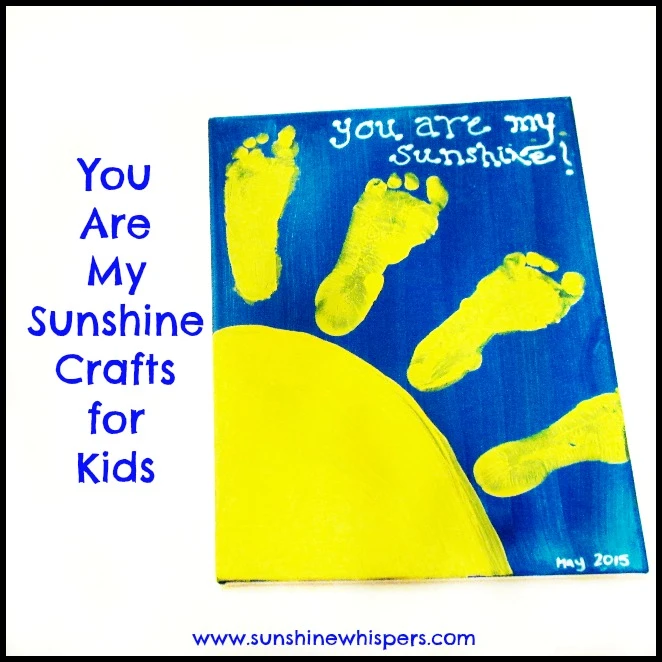
Figuratively and literally tell your little ones that they are your rays of sunshine with this unique footprint sun craft! Rather than the usual hand or arm print, this project creatively uses footprints as the sunrays. This also gives kids a short and quick scope for improving not only fine motor but gross motor skills too.
To get started, prepare the following materials:
- Canvas
- Bright blue and yellow acrylic paint
- Paintbrushes
- White paint marker
Begin with painting your blank canvas bright blue to create a sky-like background. As much as possible, try painting with brush strokes in the same direction and do more than coat to make the color pop. Once dry, use the yellow paint to draw a partial sun in a size that would leave enough space for your child’s footprint. Now, you can paint your child’s feet to make the sun rays! Paint on some loving message or any personal touch you see fit.
The creator over at SunshineWhispers, who humbly claims to not be an expert with footprint crafts, has some useful tips to make this project easier for everyone so be sure to head over to the blog!
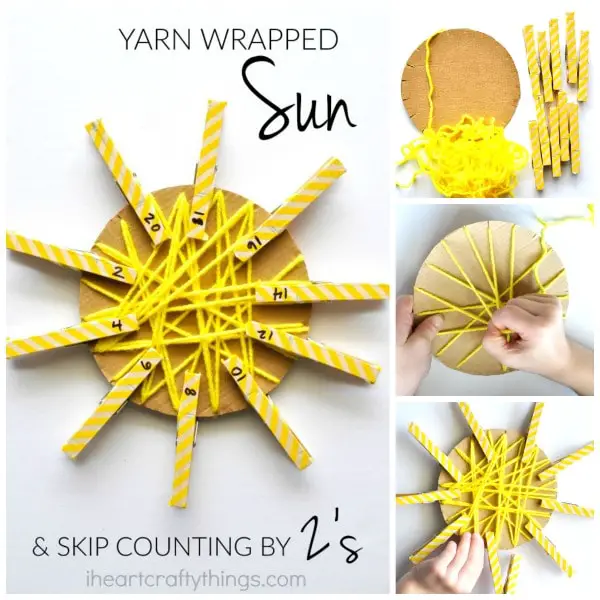
This sun craft is more than just a fun fine motor and creativity exercise! iHeartCraftyThings cleverly incorporated skip counting by 2’s as part of their clothespin yarn-wrapped sun craft. Of course, you can make this your own and add in other math components or any subject you see fit for your preschooler’s productive summer.
To recreate this, you’ll need to gather these materials:
- Cardboard
- Wood clothespins (at least 10 pcs)
- Yellow yarn
- Yellow washi tape or paint
- Scissors
- Black marker (optional)
To make your sun, simply cut out a circle from the cardboard and cut small slits around its edge to help with the yarn wrapping. You may as well prepare your clothespin by having kids paint them, or you can just cover them with washi tape if you’re thinking of reusing them with other subject units.
Going back to your sun, cut a long piece of yellow yarn, tape it to the back of the cardboard, and let kids wrap it around the sun until they reach the other end of the yarn. Finish it off by clamping all of the clothespins onto the yarn-wrapped cardboard. And you’re done! Depending on what concept your little one is currently learning, you can add numbers, letters, or even words on the clothespins.
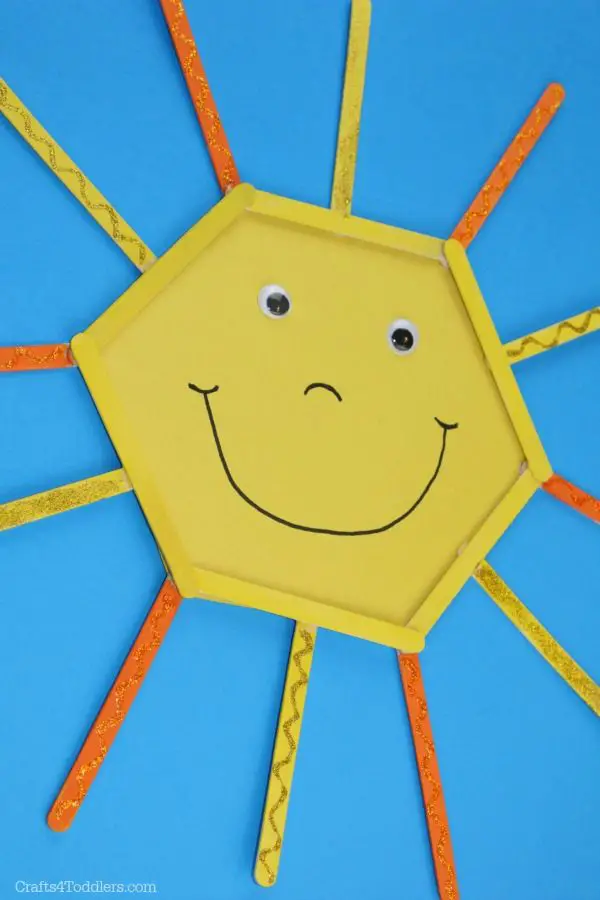
Talk about summer, the sun, space, and the hexagon shape with your kids as you make this popsicle stick sun craft! With just a little more than popsicle sticks, you can put together an inexpensive but solid sun craft that will last you throughout the summer break.
All you have to do is form six popsicle sticks into a hexagon shape and glue them together. Then grab 12 more popsicle sticks and glue them to the bottom around your hexagon for the sun’s rays. Once everything dries, paint your hexagon sun and rays using yellow and orange paint.
After the paint dries, cut out a hexagon shape from the yellow construction paper to cover the middle of the stick frame. From there, attach googly eyes and draw on a smiley face using a black marker. You can definitely fancify your sun more by adding decorations such as glitter glues on the rays.
If you find Crafts4Toddlers’ idea to suit your kid’s taste, save this complete list of materials for reference:
- Popsicle sticks (18 total)
- Washable glue
- Washable paint (yellow and orange)
- Yellow construction paper
- Paintbrush
- Marker
- Googly eyes
- Scissors
- Glitter glue (optional)
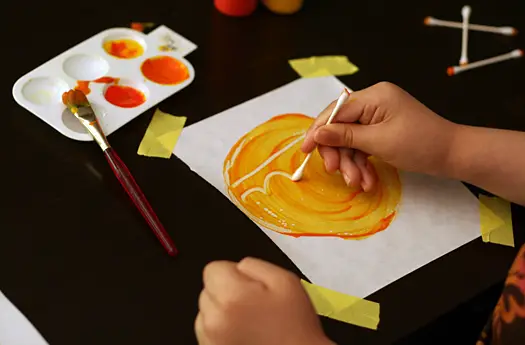
Unleash the artists within your preschoolers in making this sun monoprints craft! This activity requires a few basic materials. However, the process is pretty addicting, especially for kids who just love to draw and doodle, so be sure to stock up on papers and paint!
All that is needed to prepare are the following supplies:
- Surface to paint on (freezer paper, tabletop, wax paper, or laminated placemats)
- Paper for printing (ideally, 6″ squares of drawing paper)
- Tempera paint (yellow and/or orange)
- Paintbrush
- Q-tips
Once your painting area is all set and those little hands are ready, have them dip their brush in either yellow or orange or both, and paint a circle. Be mindful of your paint getting too thick to avoid too much smearing later.
Next, use a Q-tip to add designs and patterns you could think of—spirals, dots, scallops, wavy lines, anything under the sun! When you’re satisfied with your art, carefully lay a piece of plain paper on top of your painting and gently press or pat the sheet. Lift it off and admire your finished sun monoprint!
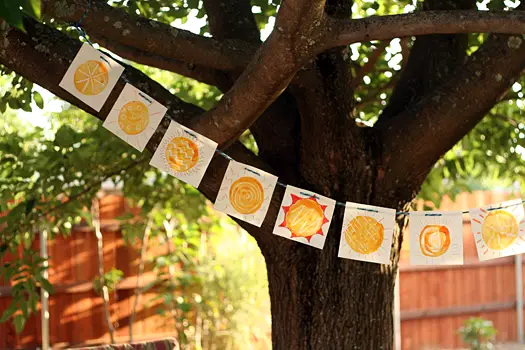
Make as many as you want, and if you’re feeling inspired, display your masterpieces on a banner the same as with MakeAndTake’s idea.
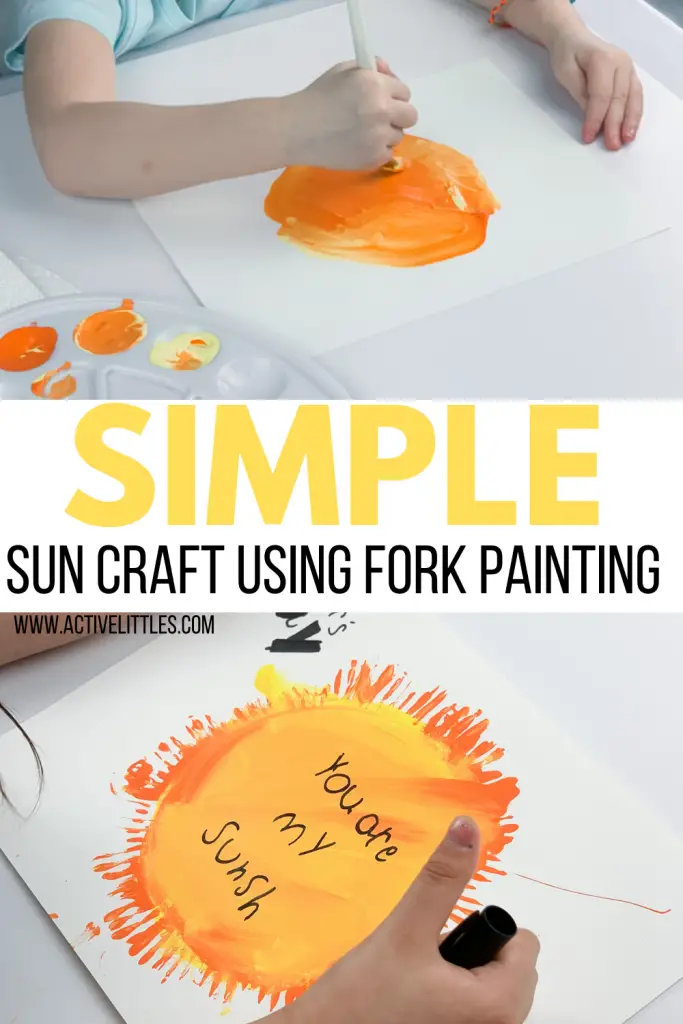
What better way to end a long hot day than indulging in a simple, relaxing fork painting sun craft? In this activity, kids get to build more hand muscle control, improve their concentration while working on detailing, and as well as exercise their creativity.
To get started, gather the following materials:
- Acrylic paint
- Plastic/kids’ fork
- Cardstock paper or paper plate
- Paintbrush
- Paint palette
Choose your preferred sun material first: either a cardstock or a paper plate, any will work. Then on your paint palette, pour on a good amount of the colors orange, yellow, and a mix of both. If you’re using cardstock, trace a circle using a bowl, and paint it in with a mix of orange and yellow. Once all covered, it’s time to grab your fork, dip its tip into paint and have a blast creating sun rays around the circle!
It’s a super easy craft that can help you engage your little one in a discussion about the sun, weather, summer solstice, and even as simple a topic as its colors!
For more preschool art and crafts ideas, visit ActiveLittles!
Conclusion
Summer vacation is a cherished time for kids. However, along with it is the boredom and threat of summer slide that parents and teachers worry about. These sun crafts are one of the best ways to keep preschoolers exercising their minds and bodies. With various materials and stunning outcomes, they will have fun working on these projects and will be naturally interested in related subjects such as the changing weather, nature, and even beyond Earth where the Sun is.
Have you found your favorite preschool sun crafts yet? Save this post so you can come back and do the others soon!
Related preschool crafts and activities you might like.


