Ice cream is a favorite for nearly every kid. And the only thing more fun than eating ice cream is doing ice cream crafts! Ice cream crafts are great any time of the year but are especially fun in the summer when it seems like ice cream is “in season.”
We gathered some of our favorite ice cream crafts for preschool to help you find your child’s next craft project. Check out the options below and don’t forget to have tons of fun making ice cream crafts!
Great Preschool Ice Cream Crafts
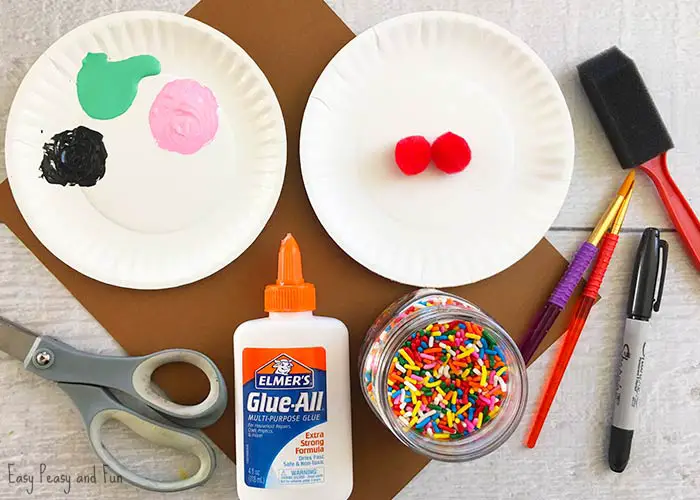
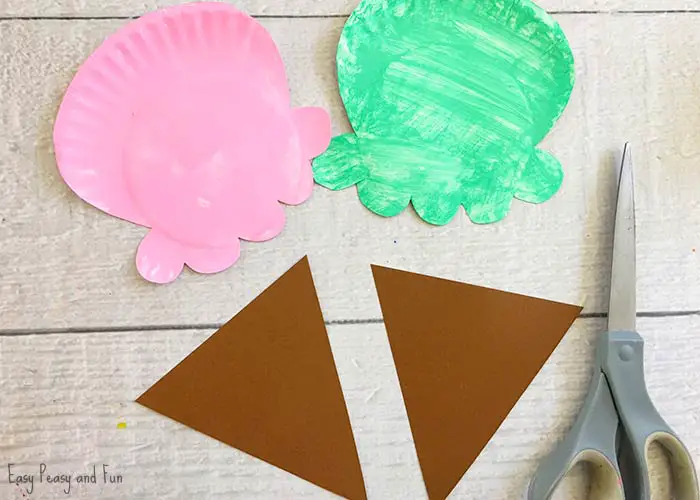
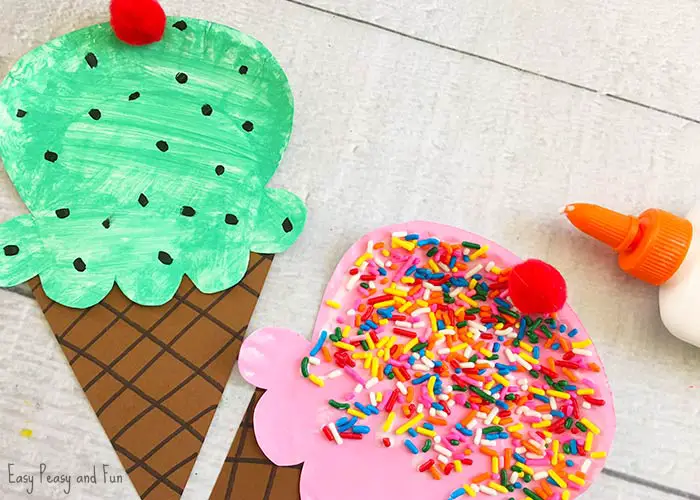
Make an ice cream cone out of a paper plate and some brown paper with this cute craft. This will require a bit of prep work from an adult. Start by drawing scoops of ice cream on a paper plate. Either cut them out yourself or if your child has good scissor skills, have them cut it out. Let your child paint or color the scoops any color they like to make their favorite flavor.
Next, cut two large triangles out of brown paper (or let your child do the cutting). Draw a criss-cross pattern down the triangle to look like a cone. Glue the scoop to the top of the cone. Now, decorate your ice cream! Add black or brown dots for chocolate chips or real or plastic sprinkles. You can also use pieces of tissue paper or use your creativity to make something totally unique! Finally, glue one red pompom to the top of your scoop as a cherry on top and you’re all done. Check out EasyPeasyandFun.com for pictures and more detailed instructions.
Materials
- Paper plate(s)
- Brown cardstock or construction paper
- Various colors of paint for ice cream flavors
- Paint brushes
- Red pom poms
- Black markers
- Sprinkles, glitter, or squares of tissue paper for toppings
- Glue
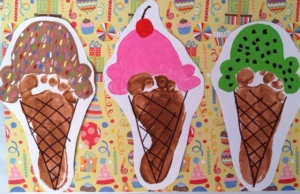
It’s always a bonus when you can turn a craft into a keepsake. This activity from BeTheBestNanny.com uses your child’s footprint as the ice cream cone as a future reminder of how small their feet once were. And it’s easy and requires common materials you likely have around the house too.
Start by painting the bottom of your child’s foot with brown paint. Have your child step onto a piece of white paper and press down on all areas to obtain a complete footprint. After the paint is dry, use bright colored paint to paint your ice cream scoop on top. Finally, have the child use a permanent marker, sequins, poms, or whatever else to decorate their ice cream with chocolate chips, sprinkles, or whatever your child’s imagination can dream up. Then, glue this to a piece of cardstock. You can use this as a decoration or add it to a piece of cardstock to make a fun birthday card.
Materials
- White construction paper
- Cardstock
- Glue
- Scissors
- Sequins, tissue paper, sprinkles, poms
- Black permanent marker
- Various paint colors (brown and ice cream colors)
- Paintbrush
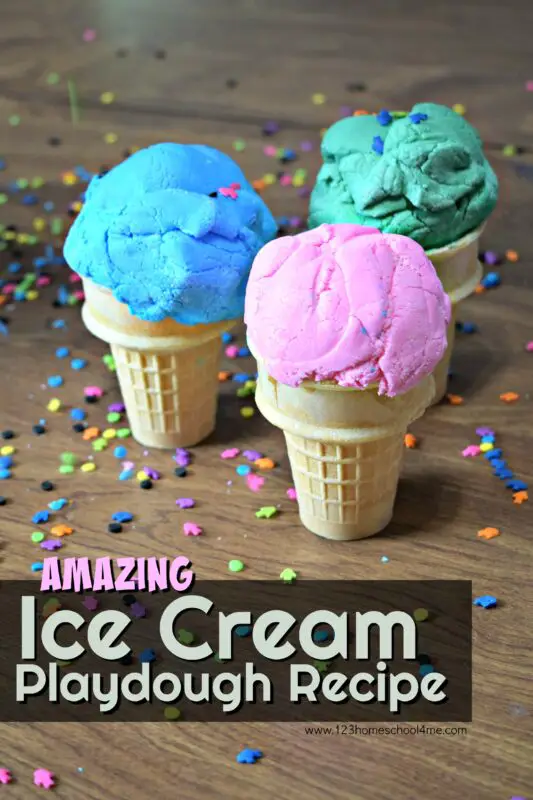
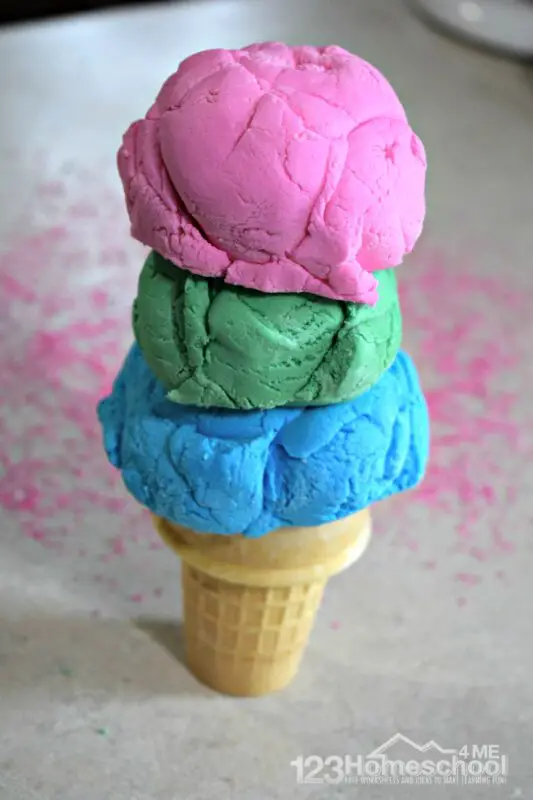
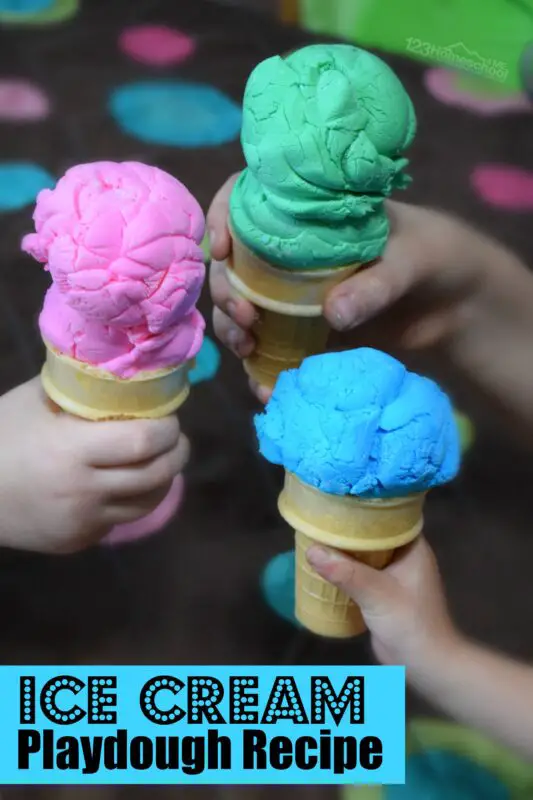
Young kids love exploring with all their senses, so why not give them something they can not only touch and see but also taste and smell? This edible playdough recipe is a great activity you can make together with your child and then let them play and snack at the same time. Although this has a ton of sugar in it, at least there’s no worry of the child ingesting something they shouldn’t.
This requires few ingredients and will give hours of fun. Start with Funfetti frosting, which comes in a variety of colors. Mix half of a container of frosting with 2 cups of powdered sugar. If the mix is too dry, add a bit more frosting. If the mix is too sticky, add some powdered sugar until you reach a scoopable consistency. Your child can use a real ice cream scoop to scoop the ice cream into bowls or cones, or simply knead, roll, and shape it into ice cream shapes. If desired, you can make several colors for playtime. For more details, check out 123Homeschool4Me.com.
Materials
- Funfetti frosting
- Powdered sugar
- Cones, bowls, sprinkles, etc.
- Ice cream scoop
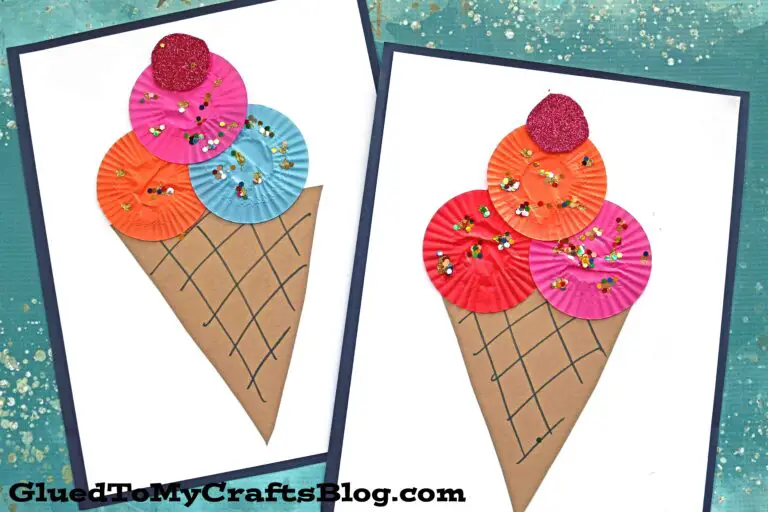
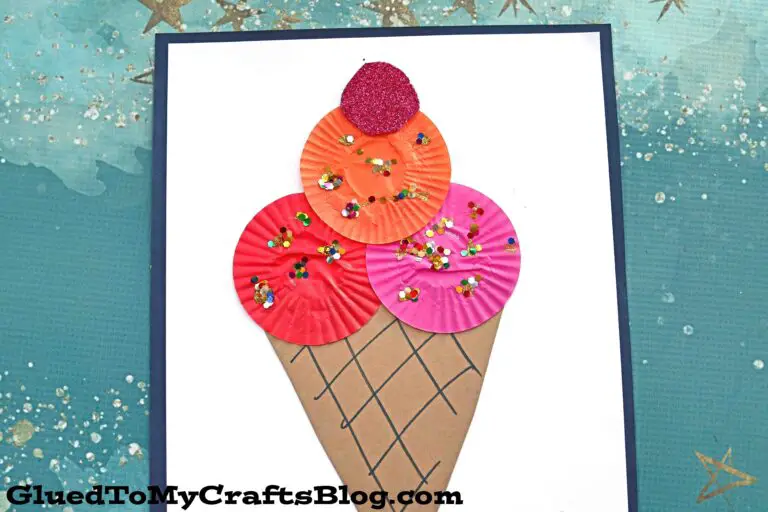
Simple crafts are often the best type. Especially when you have the materials on hand already. All you need for this fun ice cream cone is some cupcake liners, paper, and glue. Start by letting your child pick out which ice cream colors they want on their cone. Have them flatten three liners and glue them to the top of a white piece of paper or cardstock. Then, have the child cut a large triangle out of brown paper (younger children may need you to do this step for them).
Using a black marker, draw criss cross lines on the brown triangle to add dimension and glue this below the cupcake liners so they appear to be in the “cone”. Cut a small circle out of red paper for the cherry on top and add any additional decorations such as sequins, glitter, stickers, poms, rhinestones, etc. That’s all there is to it with this craft from GluedToMyCraftsBlog.com.
Materials
- Brown, white and red cardstock or construction paper
- Cupcake liners
- Glue
- Black permanent marker
- Scissors
- Optional decorative materials (poms, stickers, glitter, sequins, etc)
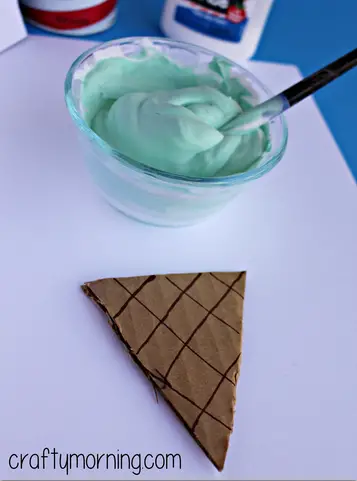

Shaving cream is an excellent material for texture and volume. It is a lot of fun to play with and also makes great 3D crafts like this one from CraftyMorning.com. Start by mixing shaving cream and white glue together until stiff peaks form. Add some food coloring or paint to achieve whatever color ice cream your child desires. Next, cut out a triangle from a piece of cardboard or brown construction paper and glue it to a piece of white cardstock.
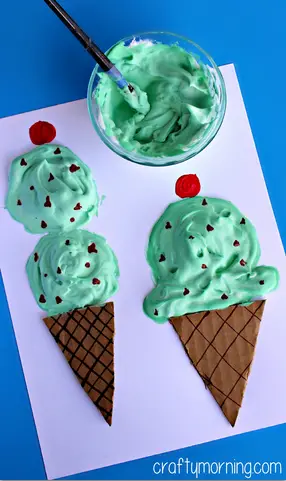
Now, let your child get creative! They can draw, swirl, or blob the “ice cream” onto the cone with a paintbrush. Give them time to enjoy the puffiness and see how it reacts differently than other types of mediums. You can add black dots as chocolate chips or find other ways to add texture and color to the ice cream. Paint a red cherry on top and you’re done!
Materials
- White cardstock
- Cardboard
- Shaving cream
- White glue
- Food color or paint in various colors
- Red paint
- Paintbrush
- Scissors
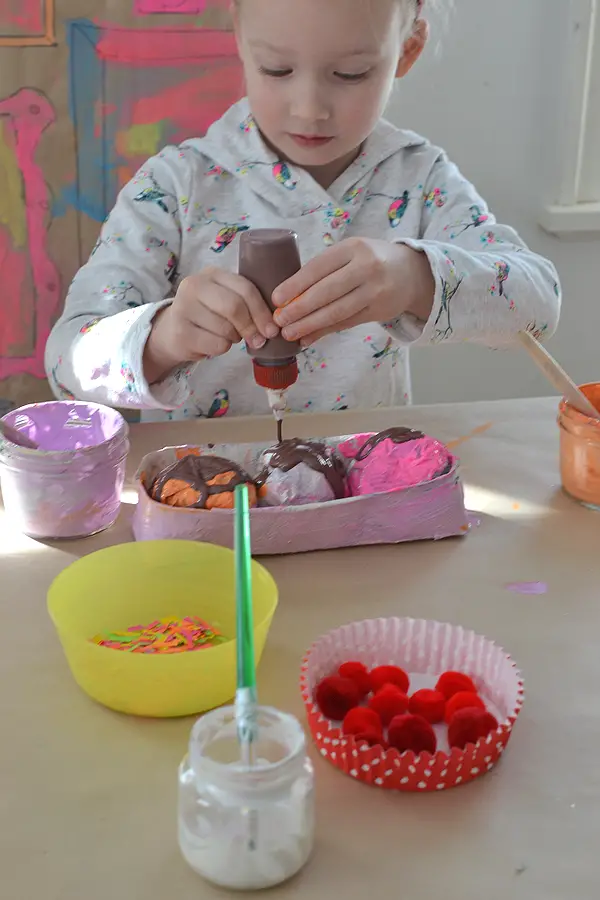
Paper mâché engages all of a child’s senses. The ooey gooey feeling of dipping paper into the thick liquid, the smell, and the milky texture are sure to bring up lots of exclamations of “eww or gross.” However, most kids can’t get enough of this and will love coming back several times to add layers.
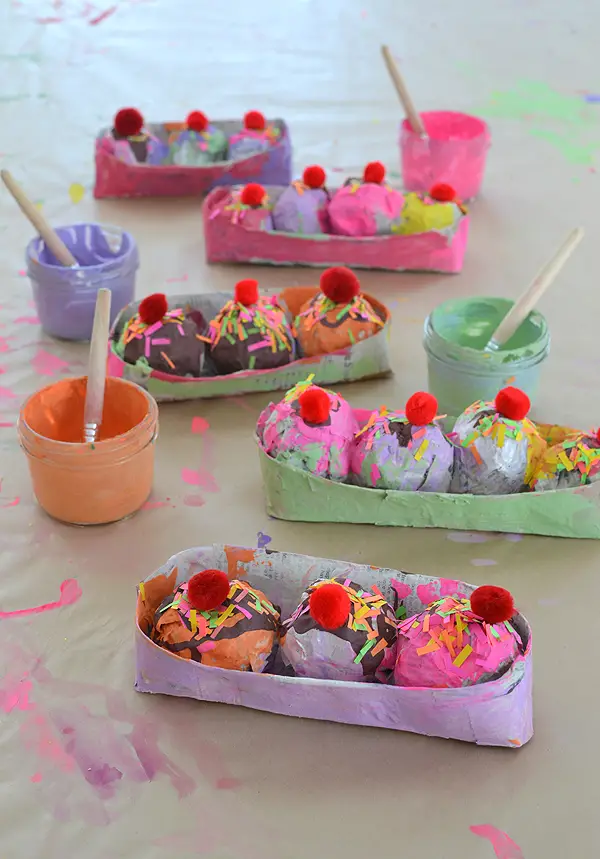
Create an ice cream bowl out of a cereal box or other thin cardboard. Tape it together as necessary. Children will likely need help with this step or have these already created. Be sure to make it big enough for multiple “scoops” of ice cream. Crumple tin foil into balls. Mix flour and water into a pancake mix consistency and dip strips of newspaper into the liquid. Cover the ice cream bowl with strips of paper then proceed to cover the tin foil. Check out ArtBarBlog.com for help with techniques. Cover with multiple layers to ensure complete coverage and then allow to dry completely. Once dry (after a day or more), let the painting commence. Kids can paint their scoops in different colors. For added fun, use tempera paint in a squeeze bottle to add realistic chocolate or strawberry drizzle. Add a red pom and confetti sprinkles and there you have it! This hands-on activity is sure to be a hit.
Materials
- Thin cardboard (cereal boxes are perfect)
- Newspaper
- Tin foil
- Flour
- Water
- Glue
- Paint
- Squeeze bottles (if desired)
- Red poms
- Confetti
- Masking tape
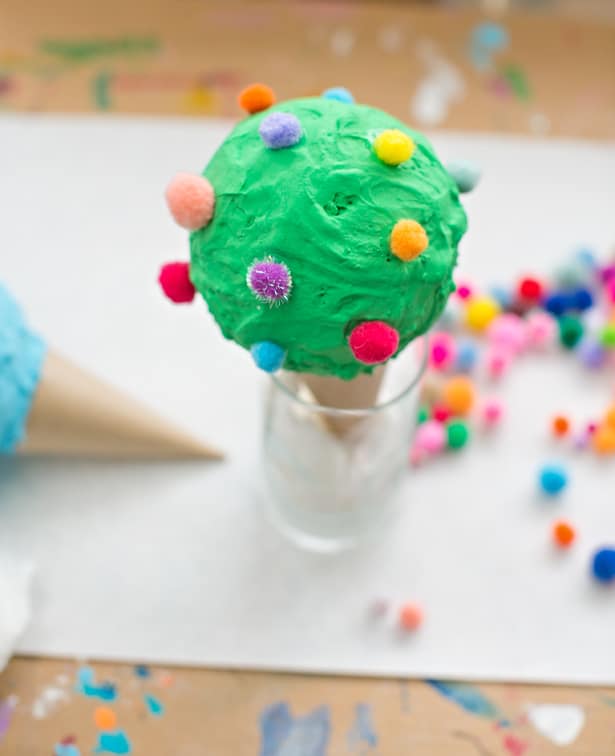
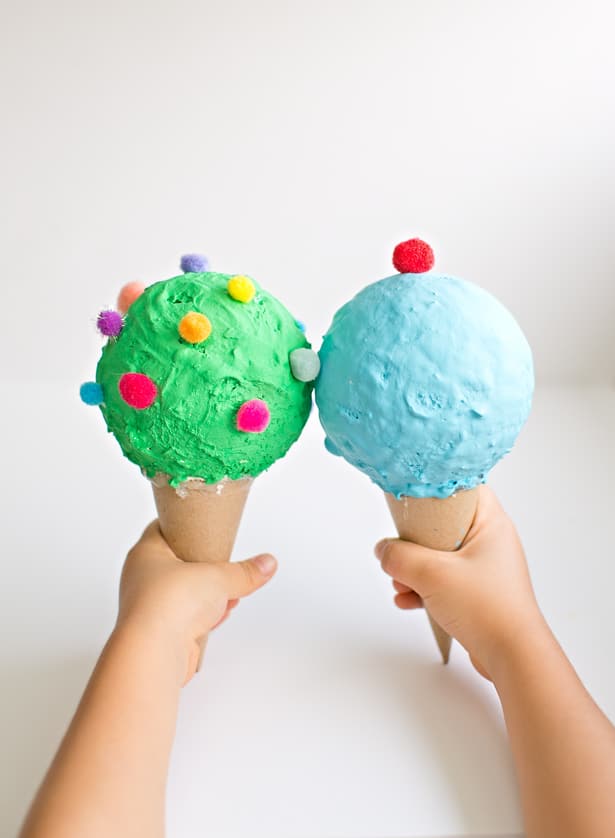
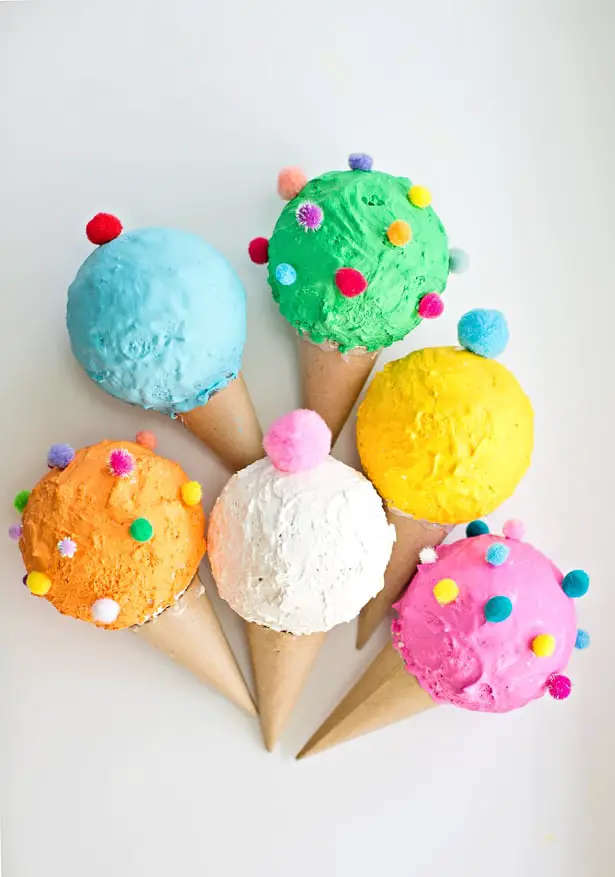
This fun craft from HelloWonderful.co is perfect for ongoing pretend play. You’ll need a few more materials than other crafts but since these can be used in play, it is well worth the effort. Mix plaster of paris and water to a frosting-like consistency. Have your child completely cover the styrofoam balls with this mixture and allow them to dry.
Attach the styrofoam balls to paper mache cones. Once the glue is dry, let your child be creative and paint the balls whatever colors they want. Allow these to dry upright by using cups. The final step is to add any toppings to the ice cream your child desires. This can be poms, glitter, sprinkles, or anything they can dream up. Now your child is ready for all kinds of pretend play like an ice cream shop or dessert night.
Materials
- Plaster of Paris
- Water
- Paper mache cones
- Strong Craft Glue
- Styrofoam balls (4-inch)
- Paint
- Paint brushes
- Poms
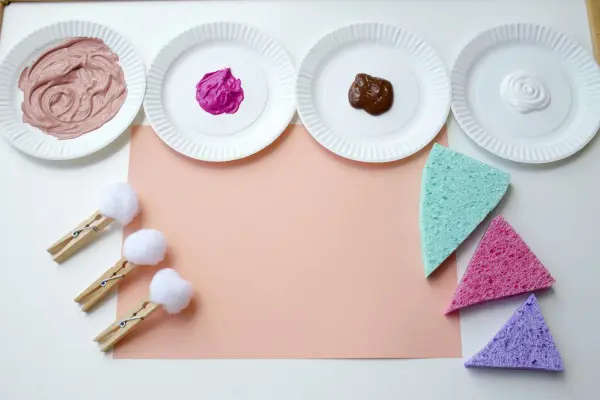
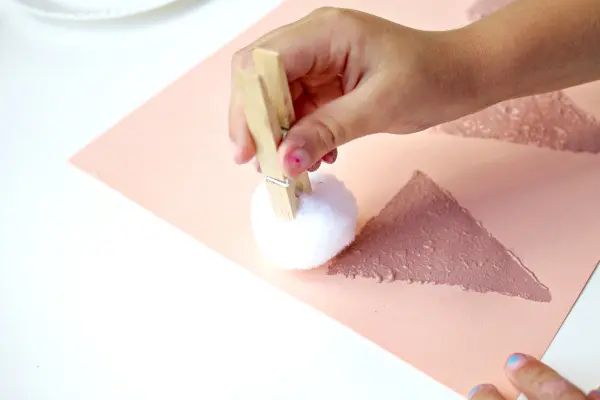
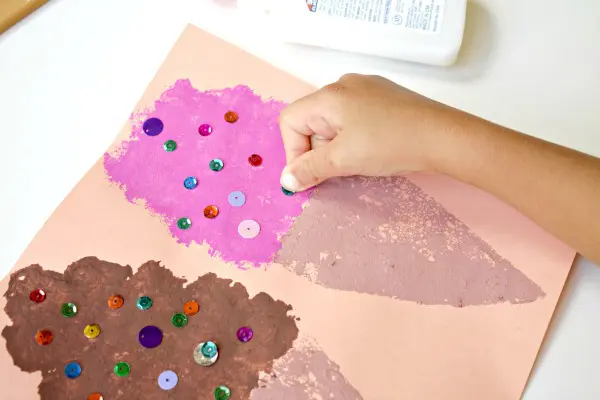
Using sponges to paint adds texture both to the finished product and the creative process. Kids love to touch things with various textures and see how those textures create different visuals. Grab some inexpensive sponges for this activity and cut them into triangle cone shapes. This is a great time to discuss the shapes and sizes of the sponges.
Have your child dip the flat side of the sponge into brown paint and press it onto a piece of white construction paper or cardstock. Stamp this as many times as desired across the paper. Next, use a cotton ball held by a clothespin for the scoops. Kids can dab this onto the paper multiple times to create large scoops. Once their ice cream is the size they desire, add sequins or confetti to top the whole thing off. Thanks to FantasticFunandLearning.com for this hands-on idea.
Materials
- Construction paper
- Sponges (cut into various sizes of triangles)
- Paint (brown and a variety for scoops)
- Cotton balls
- Clothespins
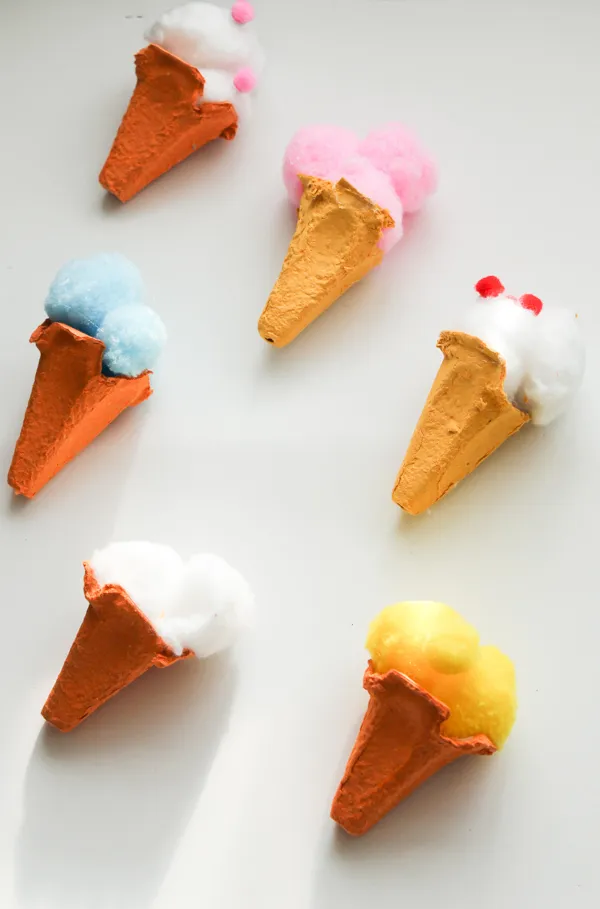
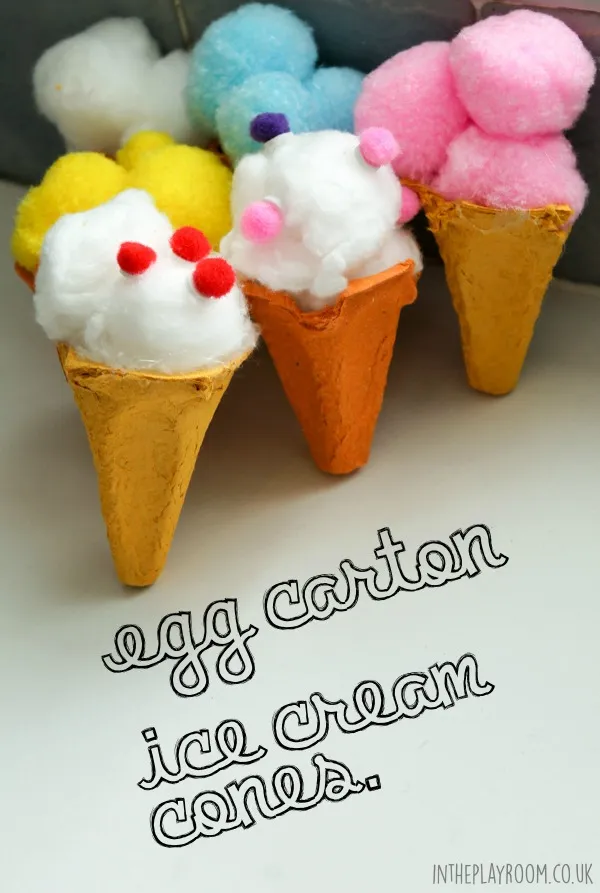
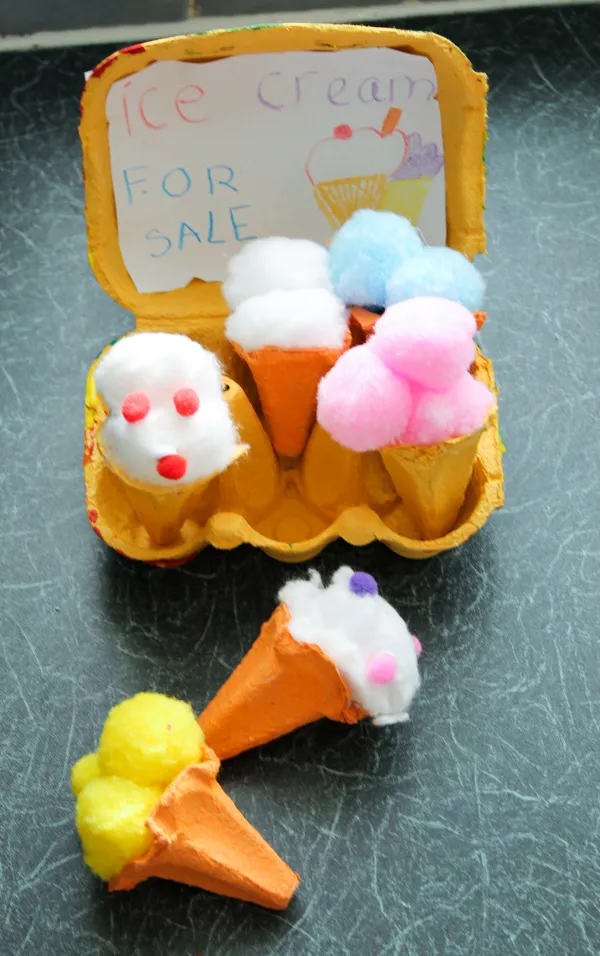
Using recycled materials is always a cost-effective and environment-friendly idea. Take those empty egg cartons and turn them into fun play for your child with this idea from InThePlayroom.co.uk. Cut the cones out from the inner portion of the egg carton. These make excellent cones for pretend play.
Next, dip cotton balls in paint to color them whatever ice cream color your child desires or buy colored cotton balls to skip this step. You can also use colored poms for this instead. Glue the ice cream balls into the cones and add details like sprinkles or cherries, and voila! Once the glue dries, your child can use these in pretend play.
Materials
- Cardboard egg carton
- Paint
- Cotton balls or poms
- Glue or glue gun
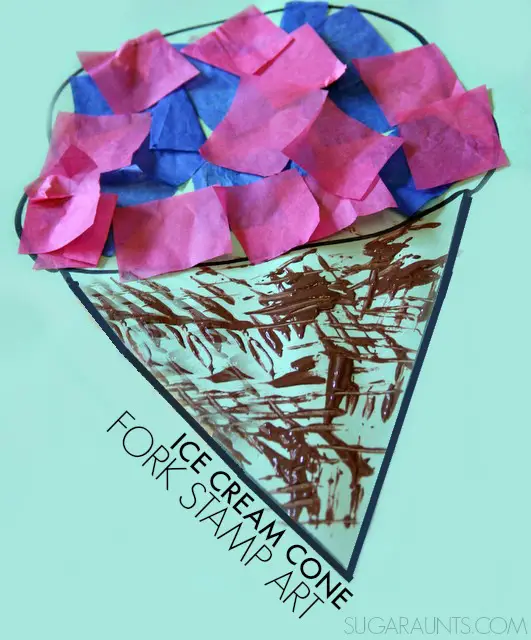
Ice cream is never not in style. For a quick craft on those hot, sticky days, grab a fork, a piece of paper, and some paint. Draw the outline for your child so they have a good idea of where to paint. Dip a fork (for less cleanup, use a plastic fork) into brown paint and let your child stamp and slide the fork to make a textured cone. Check out TheOTToolbox.com to see examples.
Use torn-up bits of paper to fill in the scoop of ice cream. This enables creativity in your child, allowing them to make the scoop as colorful and engaging as they want. Crumpling and tearing paper is great for fine motor skills and develops necessary muscles in the child’s hands. That’s all there is to it. Now you have a great decoration for your wall or refrigerator. It might even inspire you to have an ice cream date with your favorite child(ren).
Materials
- White paper
- Brown paint
- Fork
- Glue
- Bits of paper or full paper for the child to tear
Conclusion
I scream, you scream, we all scream for ice cream. And while we can’t eat ice cream constantly, you can let your child create ice cream crafts anytime. All of the hands-on crafts we listed are great for developing preschool skills and entertaining at the same time.
Most materials are common and likely found around the house. Just choose the activity you think your child will most enjoy and get started. From keepsakes to 3D art and pretend play, there are many options for you on the list above. Thanks for stopping by!
For more fun and engaging preschool learnings:


