Superheroes are more popular than ever, so your little ones probably can’t get enough of them. So if you’re looking for some fun craft ideas to do with your preschoolers, why not try out one (or all!) of these fantastic superhero crafts?
Great Superhero Crafts
Are you searching for a creative way to occupy your toddler or younger child? Then, keep reading to learn about these great superhero activities! From handprint superheroes to Captain America paper plate shields, there’s something for everyone. And the best part is, these crafts can all be made with items you probably already have around the house. So gather up those toilet paper rolls and get ready for some fun!
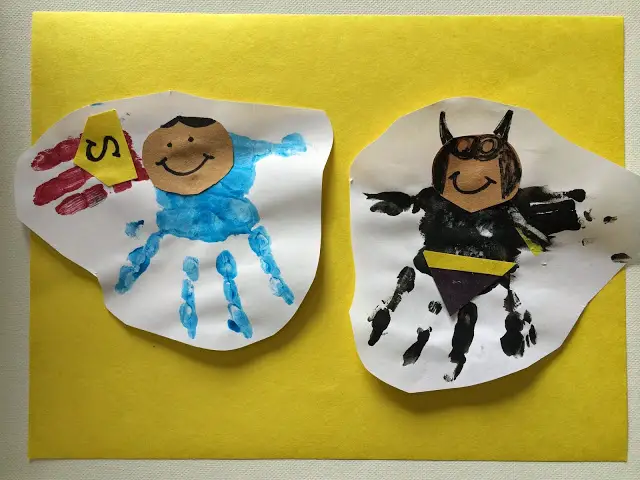
Are you looking for a fun and easy craft with your preschooler? Look no further than handprint superheroes! This craft is perfect for little ones learning how to use their hands and fingers to create. Plus, it’s a great way to teach them different colors and shapes.
To make handprint superheroes, you will need:
- White paper
- Paint (any color, depending on your chosen superhero)
- Construction papers (any colors too, to design your chosen superhero)
- Scissors
- Glue
Here are the three simple steps to follow:
1. Paint your child’s hand with the chosen color of paint.
2. Help them place their handprint on the white paper.
3. Cut out the superhero shape from the construction paper and glue it onto the handprint.
And that’s it! You’ve now made your very own handprint superhero.
You may visit The Chirping Moms for more superhero crafts too.
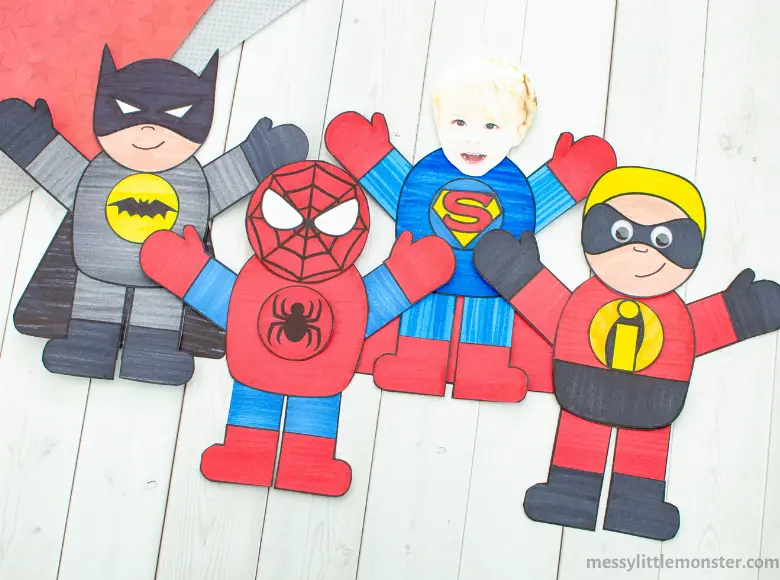
This is a fun and easy craft for preschoolers that can be done with just a few supplies. All you need is a template, white cardstock, markers (any colors), glue, scissors, a head picture, and googly eyes (optional). With this craft, your child will learn how to mix and match different features to create their unique superhero!
First, print out the template onto white cardstock. Next, have your child use the markers to color in the different features. They can be as creative as they want! Once they’re done coloring, it’s time to cut out the pieces. Help them cut out each piece, then set them aside.
Now it’s time to start assembling the superhero! Start by gluing the head onto the body. Then add the arms and legs. Finally, glue on the cape. If you’re using googly eyes, add those now. Otherwise, you can take a photo of your child in their superhero costume and glue that onto the front.
There you have it! A mix-and-match superhero craft that your child will love. And the best part is, they can make as many different superheroes as they want!
So have fun and let their imaginations fly high. Download your template at Messy Little Monster.
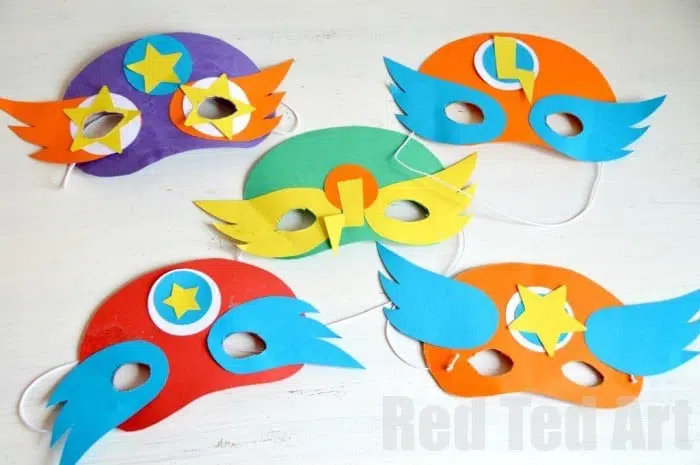
Making your own superhero masks is a great way to let your creativity shine! You can make them as simple or detailed as you like, and you only need a few supplies to get started.
You’ll need some cardstock in assorted colors, a scissor, glue, and elastic. Then, you’re ready to start!
There are a few different ways you can make your masks. You can start by cutting out basic shapes like circles or squares or get more creative and cut out more intricate designs. Once your shape is cut out, you can decorate it however you like! Finally, you can add details like eyes, mouths, or even capes.
Once you’re happy with your design, it’s time to attach the elastic. This will help keep your mask in place when you’re wearing it. To do this, simply glue the elastic to the sides of your mask. Once the glue is dry, your mask is ready to wear!
You’ll be a pro with a bit of practice in no time! Now that you know what you need and how to do it, it’s time to start!
Put on your cape, and let your imagination take flight! Check out Sunshinewhispers.com.
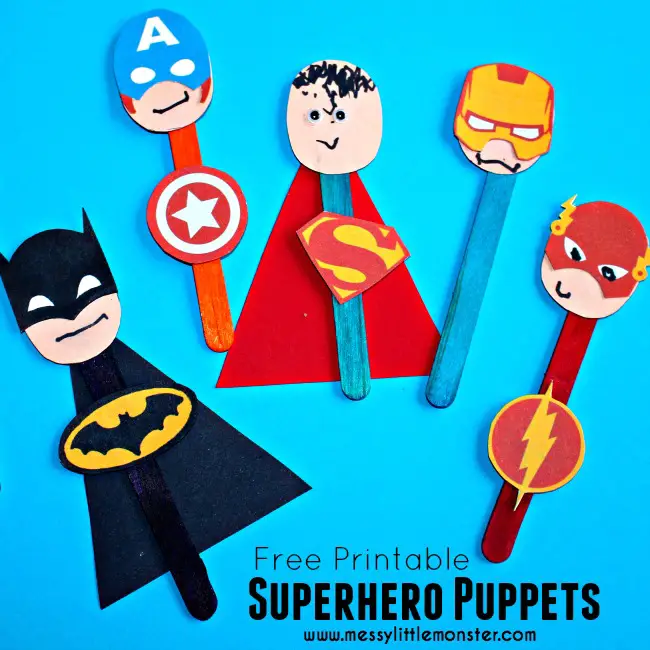
Do you want to make some superhero stick puppets with your little ones? Here’s what you’ll need:
- Superhero masks and badges (you can find these printables online)
- Flesh-colored cards
- Craft sticks
- Pens
- Colored paper
- Glue
Here’s how to make them:
1. Cut out the superhero masks and badges.
2. Cut an oval out of the flesh-colored cards for the face. Glue the mask to the face.
3. Glue the oval face with the mask onto the tip of the craft sticks and the badge in the middle.
4. Draw eyes onto the masks with pens, or you can also use googly eyes.
5. Cut out small pieces of colored paper or cardstock for the cape. Glue these onto the back of the craft sticks.
Your superhero stick puppets are now ready to play with!
With these supplies, your little ones will learn how to:
Cut out shapes
Color in their favorite superhero’s colors
Assemble their puppets using glue
Making these puppets is a great way to spend some quality time with your kiddos, and they’ll love being able to play with them afterward.
See more at Messy Little Monster.
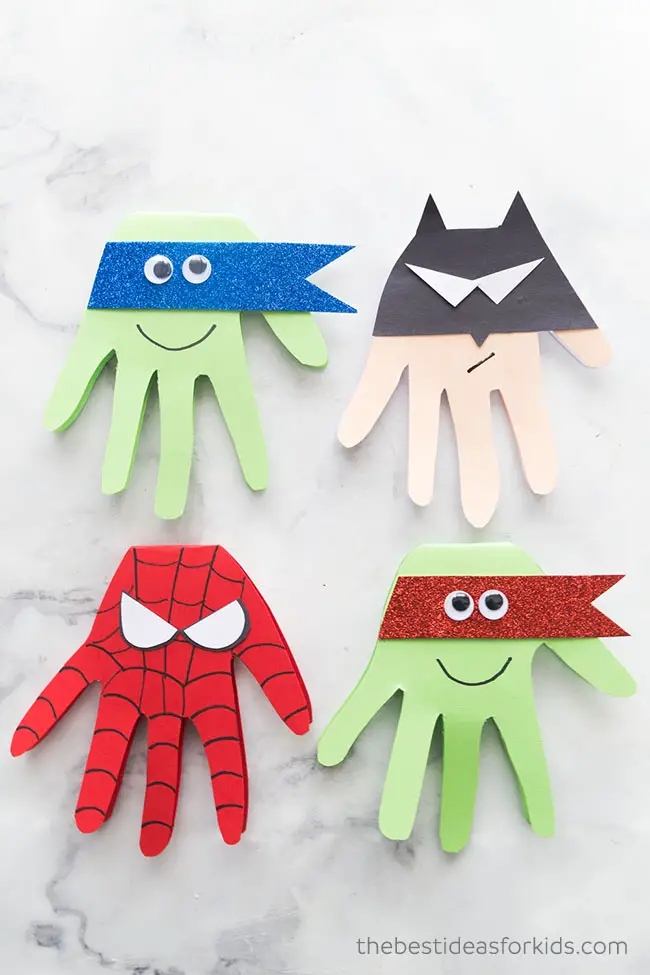
Making “Handy” Superheroes is a fun and easy craft for preschoolers. All you need are some supplies like cardstock, construction paper, scissors, glue, and googly eyes. You can also use markers to add extra details to your superhero.
To make your superhero, start folding the cardstock and tracing your hand. Then, design the front of your superhero however you like. Finally, write a message inside the cardstock handprint to personalize your card.
This is a great activity for parents or teachers to do with their preschoolers. It’s a fun way to let them be creative and use their imaginations!
Check out some of the superhero examples at The Best Ideas for Kids.
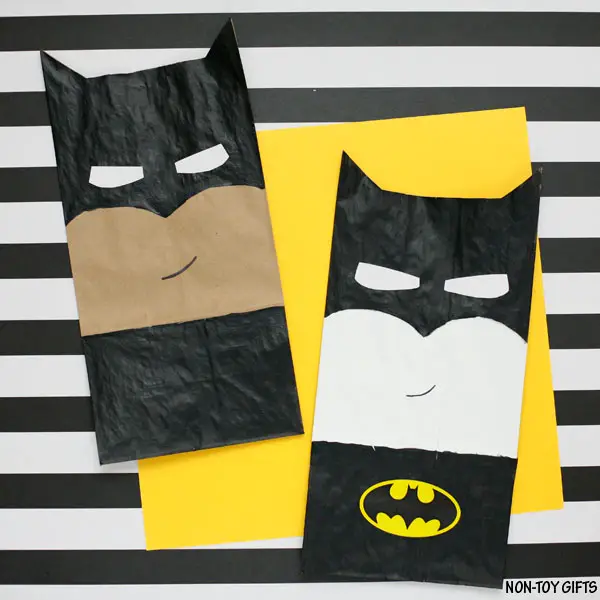
Are you still searching for a fun and easy craft with your preschooler? This paper bag superhero is the perfect project! You can create an adorable superhero that your child will love with just a few supplies.
What You’ll Need:
- Brown paper bag
- Paintbrush
- White and black paint
- White paper
- Glue
- Batman logo (or any other superhero logo)
- Black marker
- Scissors
Instructions:
Paint the Batman mask black at the top and bottom of the paper bag. The middle of the paper bag is left white to depict Batman’s face. On a white sheet, draw Batman’s eyes using a black marker, then cut them out and adhere them to the paper bag. At the bottom of the paper plate, glue the Batman emblem. To produce batman’s mouth, use a black marker.
Your preschooler will have so much fun making this Paper Bag Superhero!
Try it now, so drop by at NonToyGifts.
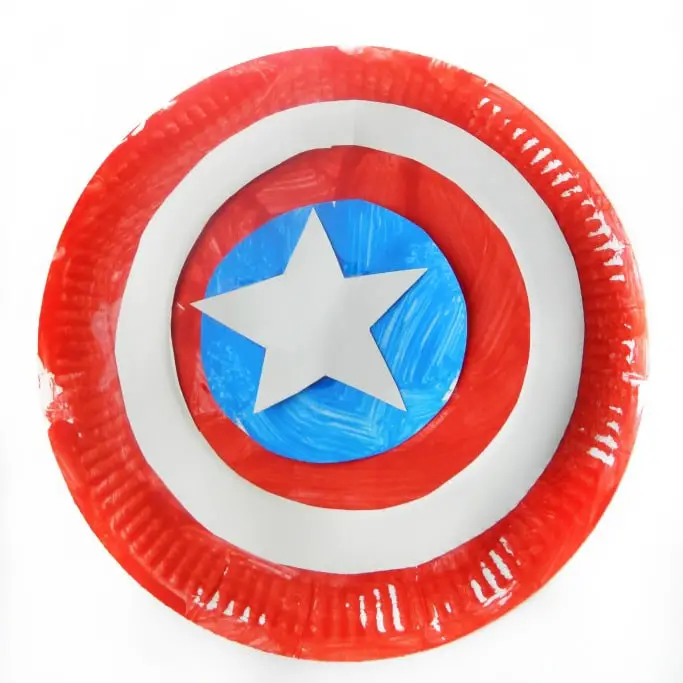
The Captain America Paper Plate Shield is not only a simple and pleasant activity to do with your kids, but you don’t need many materials. All that’s necessary are some paper plates, cardboard, glue, red and blue paint, and scissors!
This project is great for helping kids learn to follow directions and develop their fine motor skills.
Here’s how you make it:
1. Begin by painting the paper plates red and blue. You can either use a brush or a sponge to apply the paint.
2. Once the paint is dry, paste the smaller blue paper plate onto the red one, then cut out a star shape from the center of one of the plates. This will be Captain America’s shield.
3. To make the shield’s handle, cut a strip of cardboard and glue it to the back of the shield.
That’s it! Your Captain America Paper Plate Shield is now complete!
Ready to start this craft? Visit The Joys of Boys.
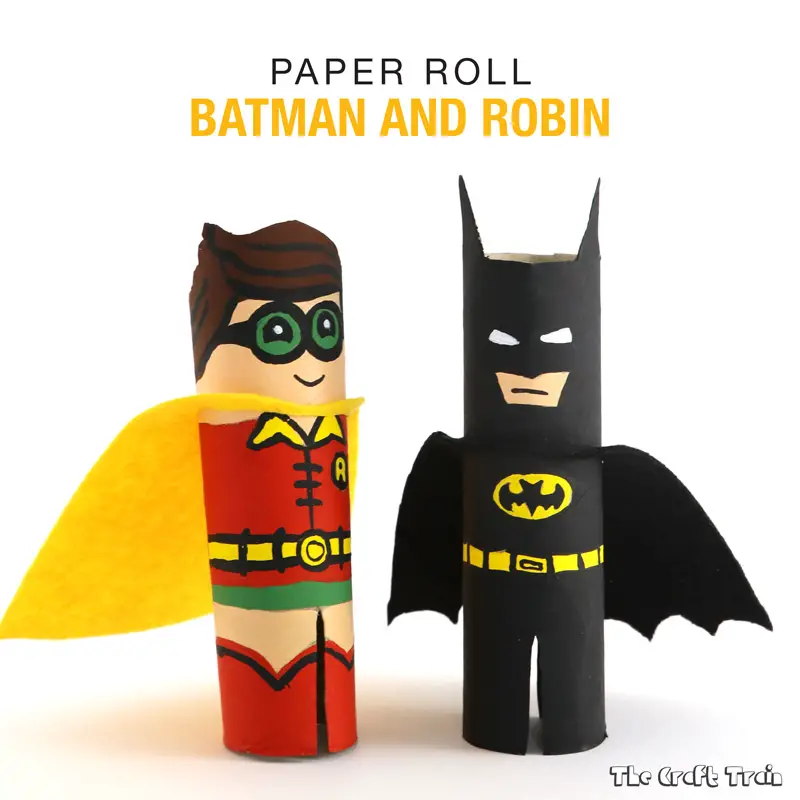
Are you looking for a fun and easy craft with your little ones? These Toilet Paper Roll Superheroes are perfect! Not only are they fun to make, but your kids will learn valuable skills like painting, cutting, and gluing. Plus, they’ll get to use their imaginations to create their own unique Lego Batman characters.
You’ll need:
- two paper towel rolls
- paint
- felt in black and yellow
- scissors and paintbrushes
- You’ll need to draw a double form (that is, Batman has four ears, and Robin has two fringes) for your superheroes’ bodies. Trim the back one off, leaving just one fringe and pair of ears. Next, sketch each character’s features. You can print some pictures available on the internet as a reference; however, you can also use these completed characters as a guide. Paint the details in their true colors and allow them to dry.
- Creating the capes is easy. Simply fold a piece of paper in half and sketch out a basic cape shape about 2/3 the size of your character. You can use the same template for both characters’ capes, but Batman’s will have semicircles along the bottom. Cut out the shape, unfold it, and you now have a symmetrical-looking cape!
- To make the head hole for your character, simply trace the bottom part of the cardboard roll on the top end where the head will go. To create a felt cape that is snugly fitting, use this template to cut out your fabric design and attach it with pins. Once everything is dry, put the cape over your character’s head, and you’re finished!
Your little ones will have much fun making their own Toilet Paper Roll Superheroes! And you’ll love seeing their imaginations come to life.
So get crafting and enjoy! You may visit TheCraftTrain.
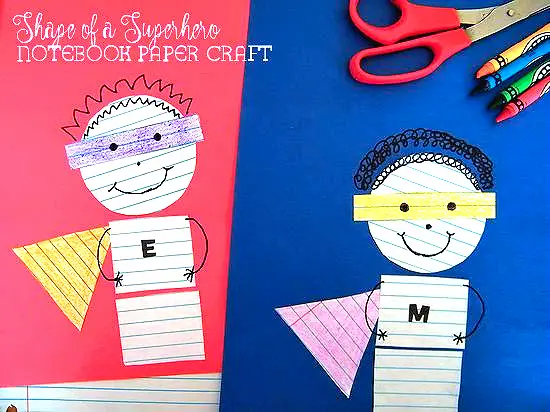
Are you ready to make your very own superhero? This fun and easy Superhero Shape Craft is perfect for young kids. You can create your own heroic character with just a few simple shapes.
To make this craft, you will need:
- Notebook paper
- Construction paper
- Scissor
- Colored pencils/crayons
Instructions:
1. Start by cutting out the different shapes from your piece of notebook paper.
2. Glue the shapes in place on a sheet of construction paper to create your superhero.
3. Draw simple arms, hair, a smile, and dots for eyes on the rectangular face mask with the black marker.
4. Use colored pencils or crayons to color the cape and face mask.
That’s it! Your superhero is now complete.
If you want pics or need more details, you may browse it at OurKidThings.

Do you have a little superhero fan at home? If so, they’ll love these easy-to-make Superhero Cuffs!
You’ll need:
- Paper rolls
- Paint (any colors)
- Scissors
- Construction paper (any colors)
- Glue
Here’s how to make them:
1. Paint the paper roll any color you like. Let it dry.
2. Cut strips of construction paper to glue around the outside of the paper roll to add a design based on your chosen superhero.
3. Once the glue is dry, your little one can wear their Superhero Cuffs and pretend to be their favorite superhero!
If you’re ready to start, visit CAMP for more ideas about this craft.
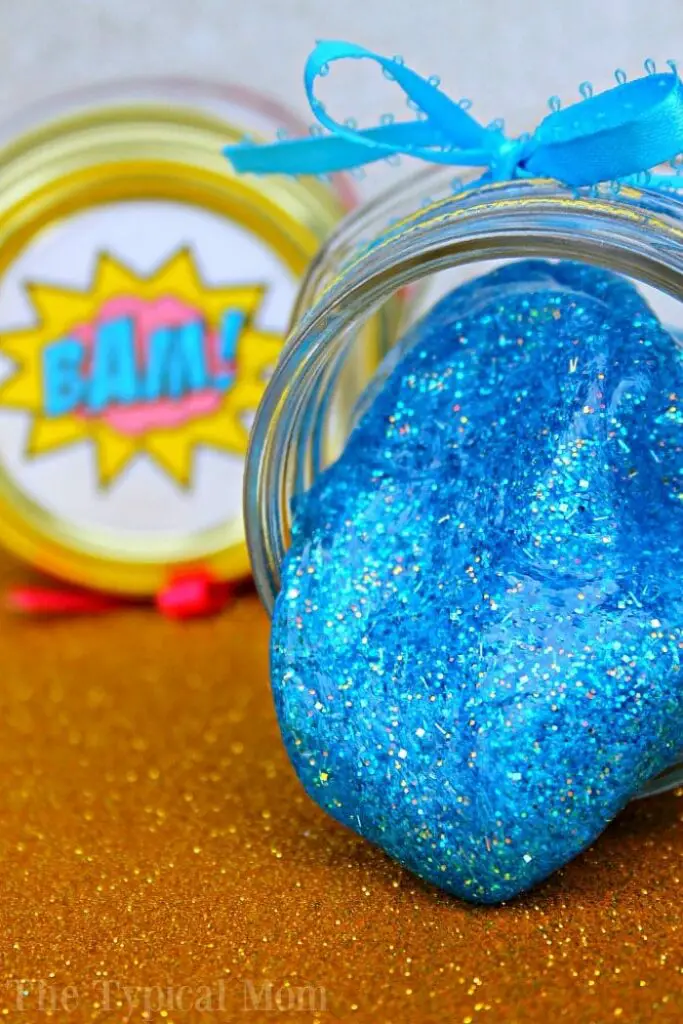
Is your kid hooked on watching superhero movies? If so, they’ll love this slime craft! It’s super easy to make and lots of fun to play with. Plus, it’s a great way to learn some new skills.
Here’s what you’ll need:
- 6 ounces glitter glue (any colors)
- 1/2 tbsp. baking soda
- 1-2 tsp glitter (optional)
- 2-4 drops of food coloring (optional)
- 1 tsp contact lens solution
- 1-2 drops of essential oils (optional)
Here’s how to make it:
1. Pour the glitter glue into a bowl.
2. Add the baking soda and stir.
3. If you’re using food coloring, add it and stir.
4. Add the glitter (if using) and stir.
5. Add the contact lens solution and stir until the slime forms.
6. If you’re using essential oils, add them and stir.
Enjoy your superhero slime! Drop by The Typical Mom for more information about this activity.
Conclusion
So there you have it, some fantastic superhero crafts that your preschooler is sure to love! They can have hours of fun while making their own superheroes with a little imagination and creativity. So get crafting and let your little one’s imaginations run wild!


