Halloween is a great time to get creative with your kids and make some fun, goofy monsters! These monster crafts are perfect for preschoolers and will definitely get them into the Halloween spirit. There’s something here for everyone, from pool noodle monsters to paper plate monsters.
Great Monster Crafts for Preschoolers
What are some of the best crafts for young children? These 11 Goofy Monster Crafts for Preschool are perfect for any occasion. From simple to complex, these crafts will keep your little ones entertained for hours. Not to mention, they’re also great for developing fine motor skills. So what are you waiting for? Get your crafting supplies ready, and let’s get started!
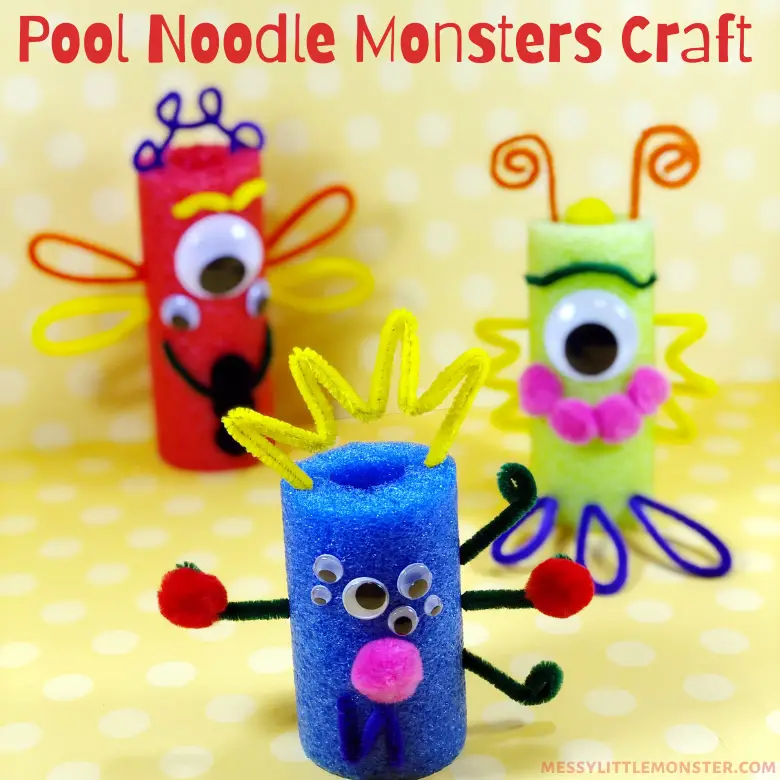
Making pool noodle monsters is a fun and easy craft that your kids will love. It’s also a great way to teach them some new skills. You can create some really fun and unique creatures with just a few supplies.
To make your pool noodle monsters, you’ll need:
- Pool noodles
- Wiggle eyes
- Pom poms
- Chenille stems
- Glue stick
- Glue gun
- Knife
- Scissors
Start by cutting the pool noodles first into six-, five-, and four-inch sections with a kitchen knife. Then, let your kids get creative and design their own monsters. Add the eyes, mouth, and other details with the pom poms and chenille stems.
Once they’re all done, you can help them glue everything in place with a glue stick or gun. And that’s it! Your kids will have a blast playing with their new pool noodle monsters.
Parenting Tip: Let your kids get as creative as they want with this craft. It’s a great way to encourage their imagination and have fun together. And when they’re done, you can put all the monsters on display for everyone to see!
Do you need more details about this monster craft? Visit Messy Little Monster.
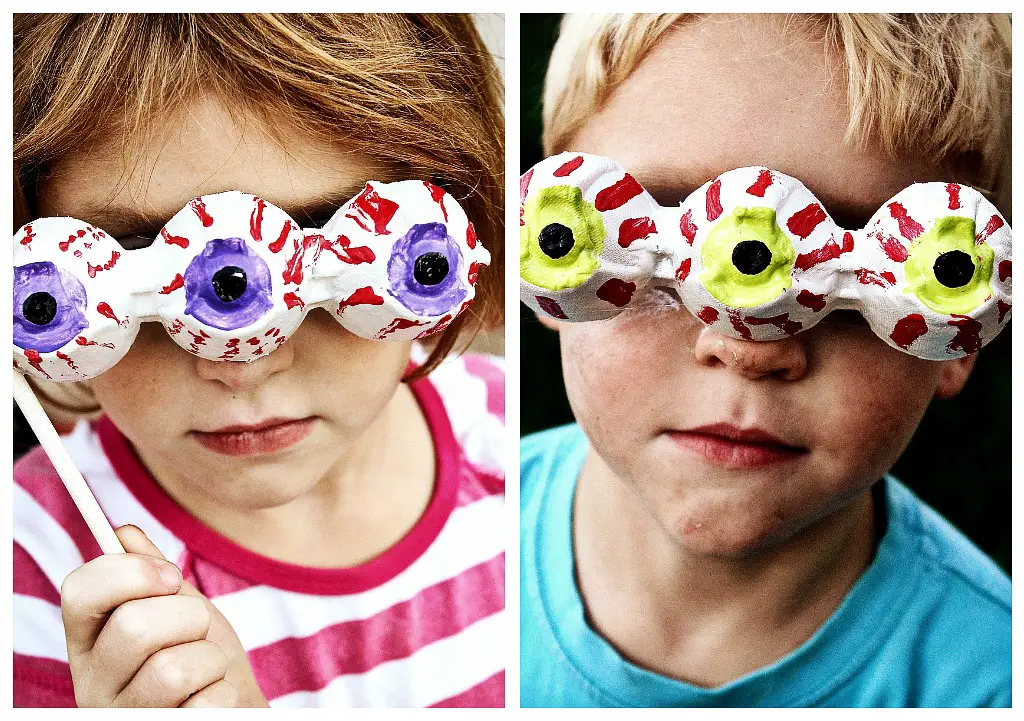
Making Egg Carton Eyeball Props is a great way to introduce your child to the world of crafting. Not only will they have fun, but they’ll also learn some important skills along the way. Here are three things your child will learn by making these props:
- How to use different types of paint
- How to mix and match colors
- How to glue things together
Here’s what you’ll need to get started:
- An egg carton
- A paintbrush
- Paint (black, red, white, and other bright colors)
- A glue gun
- A glue stick
- A wood dowel
Here’s how to make the props:
- Cut three egg cups from the carton and paint them white, allowing each coat to dry before adding the next.
- Once the second coat is dry, it’s time to paint on some eyeball features.
- Start with a bright color in the center of each eye and then add black pupils and red veins; set these aside to dry.
- When ready, use a glue gun to attach each wood dowel to the side of an eye mask.
Your child will have a blast making these props, and you’ll be amazed at how much they learn in the process! So get crafting today! Egg carton eyeball props are great for Halloween but can also be used year-round. So get creative and have fun!
You may see more samples at Multiples and More.
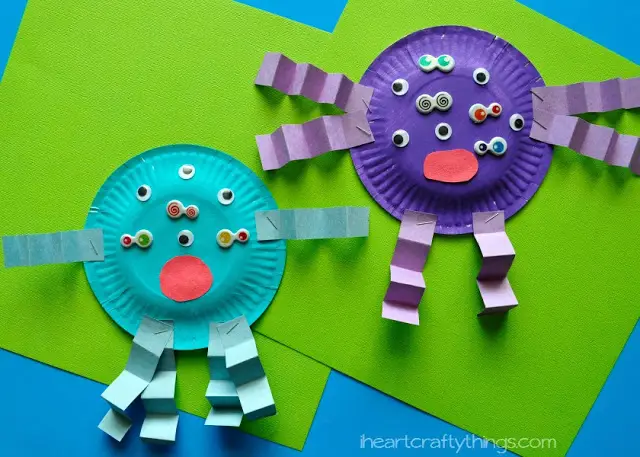
This Paper Plate Monster is a fun and easy craft for your kids! It’s perfect for Halloween but can be enjoyed any time of year. Your little ones will love creating their monster and also get to practice some important skills. Here are three things your child will learn by making these paper plate monsters:
- How to use mixed colors
- How to use a paintbrush
- How to apply glue
Here’s what you’ll need to get started:
- A paper plate
- A paint brush
- Acrylic paint (color of your choice)
- Adhesive
- A stapler
- A glue stick
Here’s how to make a paper plate monster:
- Begin by painting your paper plate(any color). Let it dry completely before setting it aside.
- Once the paint is dry, glue on a mouth cut out of construction paper and decorate the plate with wiggly eyes.
- From your construction paper, cut out three long strips. Cut each strip in half, then fold the strips accordion style. The example used matching colors but feel free to use as many colors as you want–you can even use more than they did!
- Glue your monster’s hands and feet to its body. To attach the arms and legs, staple them onto your monster using a stapler (adult help may be required).
And that’s it! Your little one will enjoy playing with their new Paper Plate Monster. Plus, they’ll be proud of all the new skills they learned. Win-win!
Do you have a little one that loves to make things? Check more details at I Heart Crafty Things.
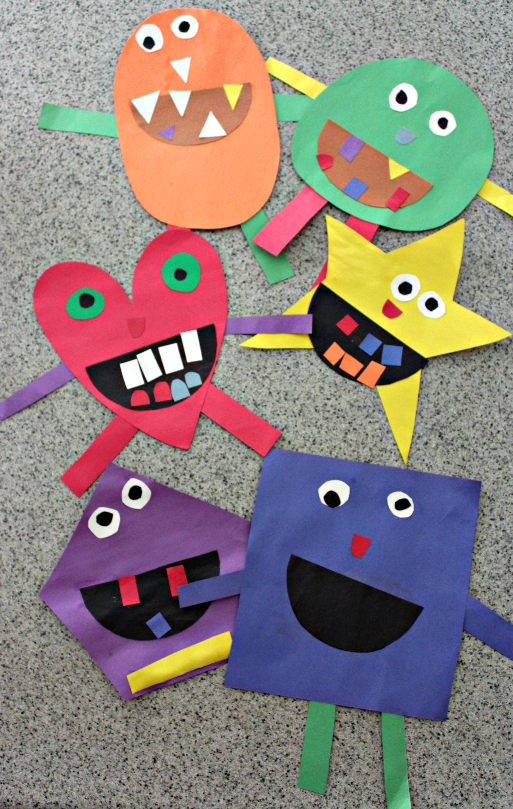
A shape monster is a creative and simple activity for kids to participate in. It’s a fantastic place to start if you want to get your children into constructing things. It can be basic or sophisticated, depending on their age and talent level.
All you need are some basic supplies and a little bit of creativity.
To make a shape monster, you will need:
- Paper
- Scissors
- Glue
- Markers or crayons
Here’s how to make the shape monster:
- Have your child cut out different shapes from the paper.
- They can use scissors or rip the paper into pieces. Once they have a variety of shapes, they can start gluing them onto the monster.
- Encourage your child to be creative and use their imagination. They can make their monster any color or size they want. The possibilities are endless!
Look no further if you’re looking for a fun, creative activity that also develops fine motor skills! With this project, kids will end up with an original creature made by them. All it takes is some imagination and some simple materials. So why not give it a go today?
Do you need more details about this craft? Visit Live Well Play Together

The yarn-wrapped monster craft is a fun and easy way to make a cute little monster. This hands-on craft is a great way to add a personal touch to any gift, and it’s also perfect for using up leftover yarn or something to do when you’re bored. All you need are some supplies that you probably already have at home.
All you need for this craft are:
- A yarn
- A pencil
- Scissors
- Cardboard
- Glue
Here’s how to make this monster:
- Start by wrapping the yarn around the pencil. Continue wrapping until the entire pencil is covered.
- Cut the yarn and tie a knot at the end.
- You will need to cut a piece of cardboard into an oval shape.
- This will be the body of your monster. Once you have cut out the oval, glue it to the middle of the yarn-wrapped pencil.
- Now you can start decorating your monster! You can use whatever materials you have on hand to give your monster a unique look. Some ideas include googly eyes, pom poms, pipe cleaners, markers, and feathers.
- When you’re finished decorating, cut a small hole in the top of the cardboard oval. This will be where you insert the pencil to stand up your monster.
Your yarn-wrapped Monster is now complete and ready to scare your friends and family! Be creative with it and have fun – there are no limits to what you can do!
You may see more samples at Arty Crafty Kids.
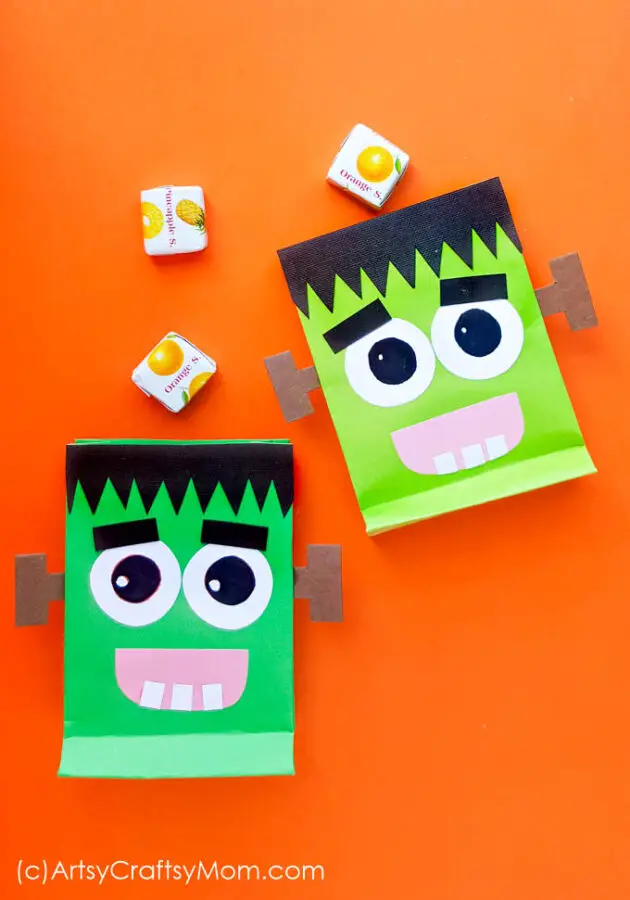
Making your own Frankenstein treat bag is a great way to show off your creativity and have some spooky fun this Halloween. All you need are some basic supplies and a little time, and you’ll be ready to fill your bag with treats for all the ghouls and goblins in your life.
To get started, you’ll need:
- A paper bag
- Colored paper
- Scissors
- A glue stick
- Printout of the template
These are the following steps to make a Frankenstein bag:
- Begin by cutting out two large eyes from the colored paper. Glue them onto the front of the paper bag.
- Next, cut out Frankenstein’s mouth from the colored paper. Glue it onto the front of the paper bag, just below the eyes.
- Now you’re ready to start decorating! You can add whatever details you like, such as stitches, bolts, or even a few pieces of candy. Be creative and have fun!
Once you’re finished decorating, your Frankenstein treat bag is ready to be filled with goodies. Hand them out to your friends, family, or trick-or-treaters this Halloween, and enjoy the festivities!
For more details, just visit Artsycraftsymom.com.

The Paper Cone Monster Craft is perfect for those days when you want to do something productive with your kids but still have some fun. It’s simple enough that even young children can participate, providing a great opportunity to teach them about colors, shapes, and fine motor skills.
You will need:
- Glue
- Printable paper cone monster craft template
- Coloring supplies
- Colorful paper
- Scissors
Here’s how to make a paper cone monster:
- Print out our template and cut out the pieces.
- Color in the pieces however you like. Then, cut out the colored pieces.
- Assemble your monster! Take the cone shape and glue it on the eyes, mouth, and other decorations.
- Glue on the arms and legs.
- Give your monster a name, and stand back to admire your handiwork!
And that’s a wrap! We had so much fun making this Paper Cone Monster Craft; we hope you did too.
For more details about this, just visit Easy Peasy and Fun.
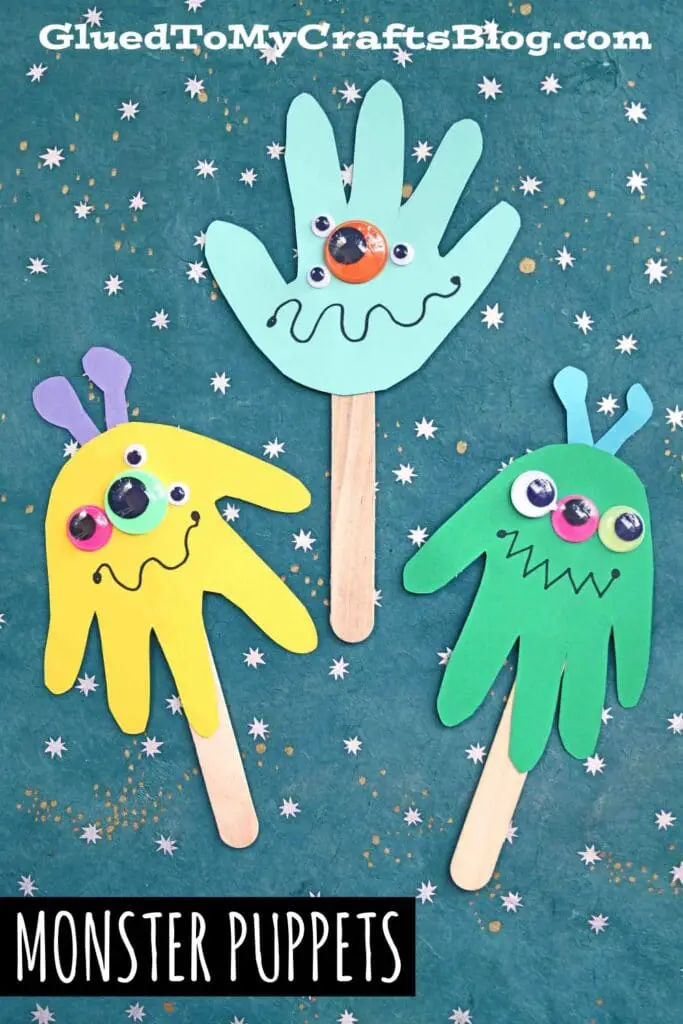
Do you want something interesting to do with the kids? These monster handprint puppets are ideal! They only require a few materials and are a lot of fun to create. They’re also fantastic for creative play. Continue reading to find out how to make your own.
To get started, you’ll need:
- Colorful cardstock paper
- Scissors
- School glue
- Jumbo popsicle sticks
- Wiggle eyes
- A black marker
Here’s how to make monster handprint puppets:
- Cut out handprints from the cardstock paper. You’ll need two handprints for each puppet.
- Decorate the handprints however you like.
- We used wiggle eyes and a black marker to give our monsters some personality.
- Once your handprints are decorated, it’s time to assemble the puppets.
- Place a popsicle stick in between the two handprints and glue them together. That’s it!
Your monster handprint puppets are now ready for playtime. We hope you have as much fun making these as we did. Happy crafting!
You may see more samples at Gluedtomycraftsblog.com.
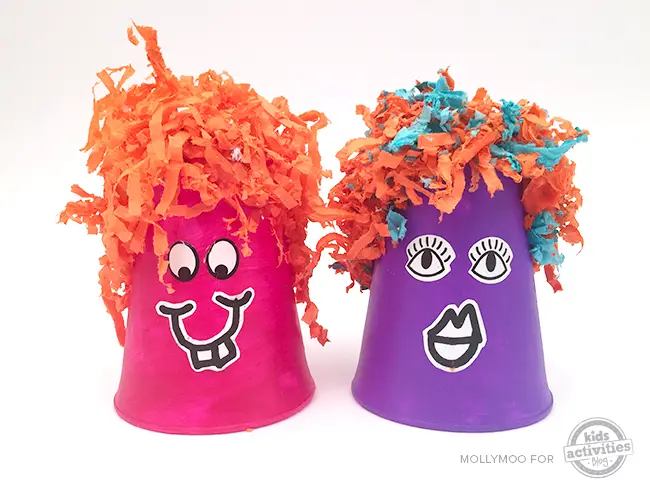
They’re the perfect little creatures to make if you’re looking for a quick and easy Halloween craft. And it uses materials you might already have laying around. These are great for pretend play, decorations, or just as a fun way to keep kids busy.
To get started, you’ll need:
- Glue
- Foam cups
- Paint
- Googly eyes
- White paper
- Black marker
- Shredded paper
Follow these simple instructions:
- Start by gluing the foam cups together. You can either glue the bottom of one cup to the top of another or glue them together side by side; once you have your cups glued together, it’s time to start painting them. You can paint them any color you like, but we think black, green, and purple look best for monsters.
- Add the googly eyes. We like to put two eyes on each monster, but you can use as many or as few as you want. Once the eyes are in place, it’s time to give your monsters a mouth.
- Cut a small triangle out of the white paper and glue it onto the front of the foam cups.
- Then, use the black marker to draw a mouth on the triangle.
- Finally, it’s time to add some shredded paper to your monsters. This will be their hair, so use as much or as little as you like.
Once you’re happy with your monsters, set them aside to dry and enjoy your handiwork ! and happy crafting!
You may see more information at Kidsactivitiesblog.com.
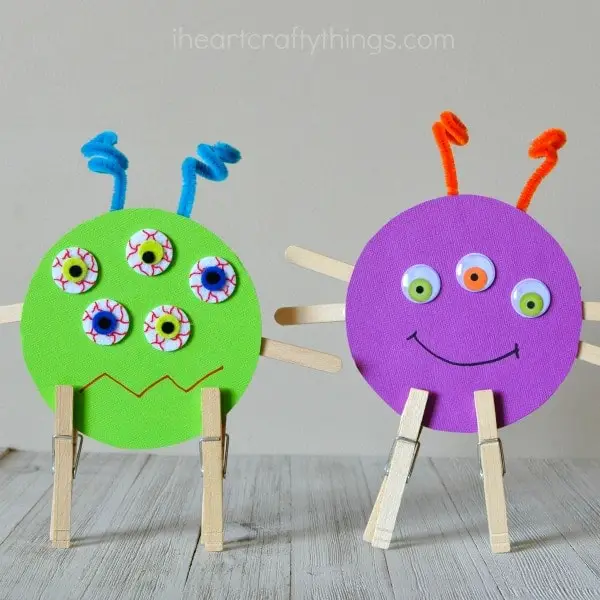
This Recycled CD monster craft is a fun and easy way to recycle old CDs. This project can be done with children of all ages and requires no special skills or supplies. It’s a great way to teach kids about recycling and upcycling!
Here’s what you’ll need:
- Old CDs
- Scissors
- Pencils
- Cardstock or construction paper
- Wood clothespins
- Craft sticks
- Googly eyes
- Pipe cleaners
- Markers
- Glue
- Duct tape
Here’s how to make a CD Monster
- You’ll need to cut out some simple shapes from your cardstock or construction paper. You’ll need two large circles for the body, two smaller circles for the eyes, two triangles for the ears, and a small rectangle for the mouth. Set these aside for now.
- Use your scissors to cut out two large circles from your old CDs. These will be the monster’s body.
- To assemble the body, glue the two CD circles together with your tacky glue. Then, glue on the cardstock eyes, ears, and mouth. The clothespins can hold everything in place until the glue dries.
- Now it’s time to add some personality to your monster! Use the markers and pipe cleaners to create fun hair, horns, or anything else. Be creative and have fun!
- Once you’re satisfied with your monster’s appearance, it’s time to give him a name. Use the duct tape to write your monster’s name on one of the craft sticks. Then, glue or tape this stick to the back of the monster’s head.
Your recycled CD monster is now complete!
For more details about this craft, visit I Heart Crafty Things.
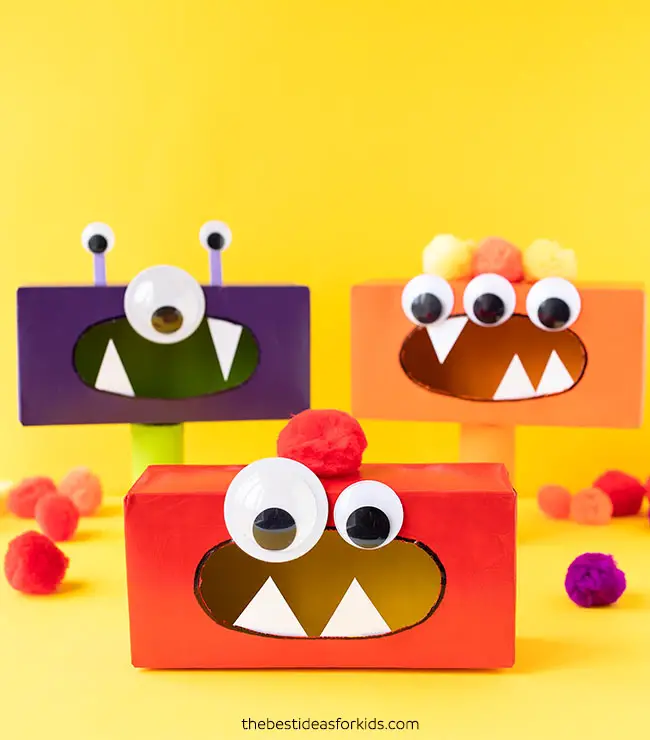
Tissue Box Monsters are a fun and easy way to recycle those old tissue boxes! You can turn an ordinary tissue box into an adorable little monster with just a few supplies. These monsters are perfect for kids of all ages and make great decorations for any room in the house. Plus, they’re super easy to make so you can whip up a whole bunch in no time!
Here’s what you’ll need:
- Tissue box
- Colored paint
- White cardstock
- Acrylic paint (white)
- Googly eyes
- Black marker
- Big pom poms
- One popsicle stick (optional for the purple monster)
Here’s how to make a tissue box monster:
- Remove the plastic liner inside of the tissue box to start making the craft.
- Cover the outer layer of the box with your white paint to prime it and protect against any colors seeping through.
- Let that dry, paint it with your desired color, and make sure to use a dissimilar color on the inside too.
- Use a black marker to outline where your creature’s mouth would be – doing this will ensure that it will stand out even more.
- Next, for your box, cut just one popsicle stick in the middle and paint it using a purple color(adults should help with this part). You may now glue the two tiny googly eyes on the sticks once they have dried. Create a little slit mark at the top of the tissue box using a craft knife to move the sticks in.
- Time to glue the bigger googly eyes near or at the upper part of your tissue box; you can add as many or as few eyes as you want!
- Cut teeth out of paper or cardstock and glue them to the mouth of the tissue box.
- To make your monsters more character, you may decorate their heads with pom poms.
Aren’t these monsters adorable? We adore their simplicity and that a tissue box may be recycled to produce them! You may even make similar creatures with granola boxes.
For more detailed instructions, check out The Best Ideas for Kids.
Conclusion
These are just a few great monster crafts you can do with your preschooler! With a little imagination, you can turn almost anything into a monster. So get creative and have some fun! Your preschooler will love it! And don’t forget to check out our other great Halloween crafts for more spooky fun!
Looking for more Halloween crafts and activities? Check these out:


