Halloween is the best excuse for spooky themes. What better way to explore this idea than to have ghost-themed activities? We have listed ten fun and easy crafts for children to enjoy.
Children will love these adorable crafts while showing off their creative side. Most of these crafts can be tailored to fit the different skill levels of children. Let’s go over them.
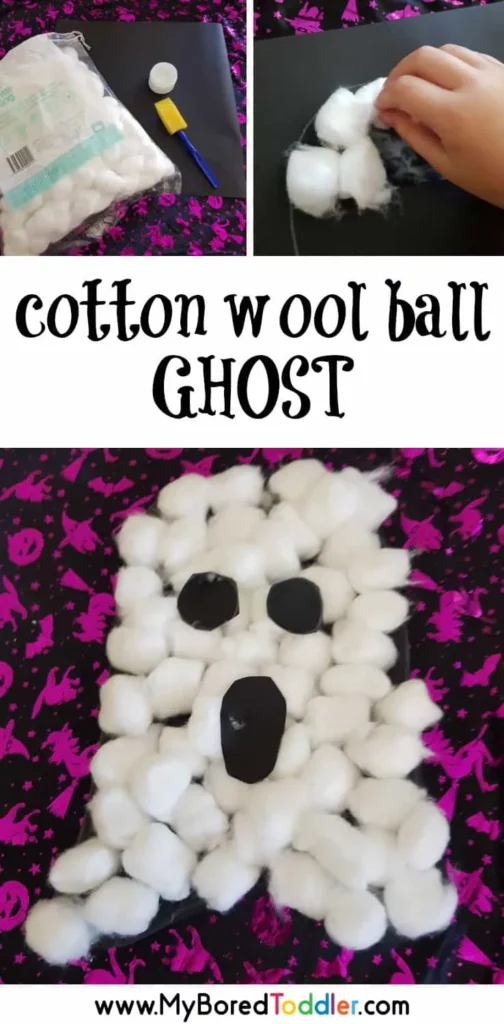
Simple does not necessarily mean not fun. This cotton wool ball is one of the easiest crafts to make for preschool children. The whole process is simply sticking cotton balls on a piece of paper.
This craft can be modified for children with varying levels of fine motor skills. Older kids may be given instruction and a demonstration. Younger kids may need some assistance in completing this craft.
To make this craft, use a white crayon to outline the ghost on the construction paper. This outline will become the guide for children when placing the cotton balls.
Next, using an applicator, spread a small amount of glue inside the outline. Allow the older children to do this on their own. Assist the younger ones.
Have the children stick the cotton balls on the paper where there is glue. Repeat this process until all areas are covered. Let this dry completely.
The teacher may now cut out the ghost. Another option is to assist older children in cutting the outline of the ghost.
Cut out two circles for the eyes and an oval for the mouth from the remaining black construction paper. Stick them on the ghost. Now, it’s ready for play or decoration.
Head to MyBoredToddler.com for the step-by-step process and for other recommended activities related to this craft.
For this craft, you will need the following:
- Black construction paper or cardstock
- Cotton balls
- Glue
- Glue applicators like sponge or paintbrush
- White crayon or pen
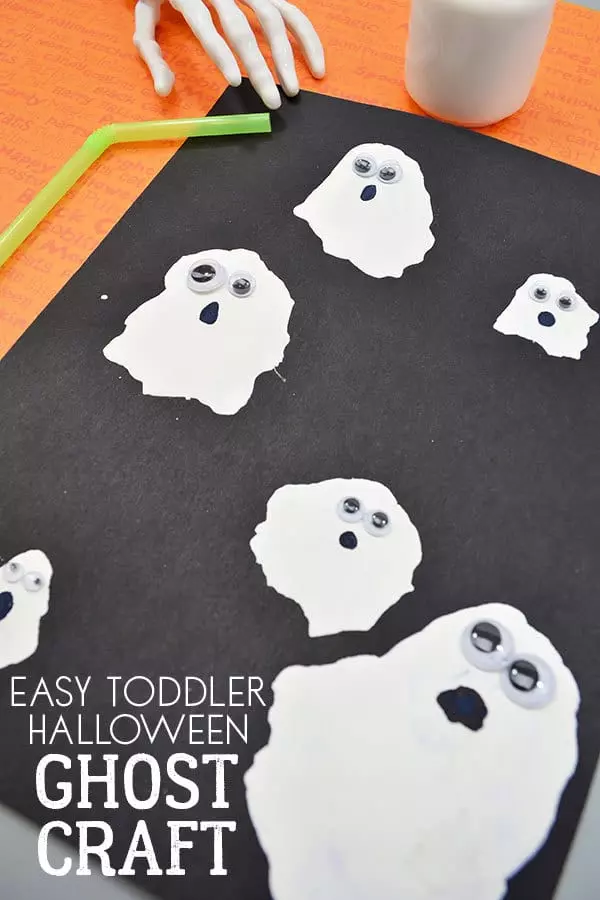
This ghost craft is easy to make and is a great activity for children who do not like to get their hands covered in paint. The only difficult part is waiting for the paint to dry.
As a precaution, make sure the straw is clean and disinfected. Using a pipette, squeeze a small amount of white paint on the black construction paper. Each dot of paint will become a ghost.
Remember that the bigger the paint dot, the bigger the ghost will be. Make sure the paint dots are evenly spread so that the ghosts will not overlap.
Next, ask the child to blow into the straw to spread the paint creating a blob-like shape. RainyDayMum.co.uk suggests special techniques when using the straw to make different shapes of ghosts.
Once all paint dots look like ghosts, let this dry. Use the rounded part of the ghost as the head area. Stick on two googly eyes and use the black marker to draw the mouth. Vary the shape of their mouths to make them unique.
For this craft, you will need the following:
- Black construction paper
- Googly eyes
- White paint
- Black marker
- Drinking straw
- Pipette
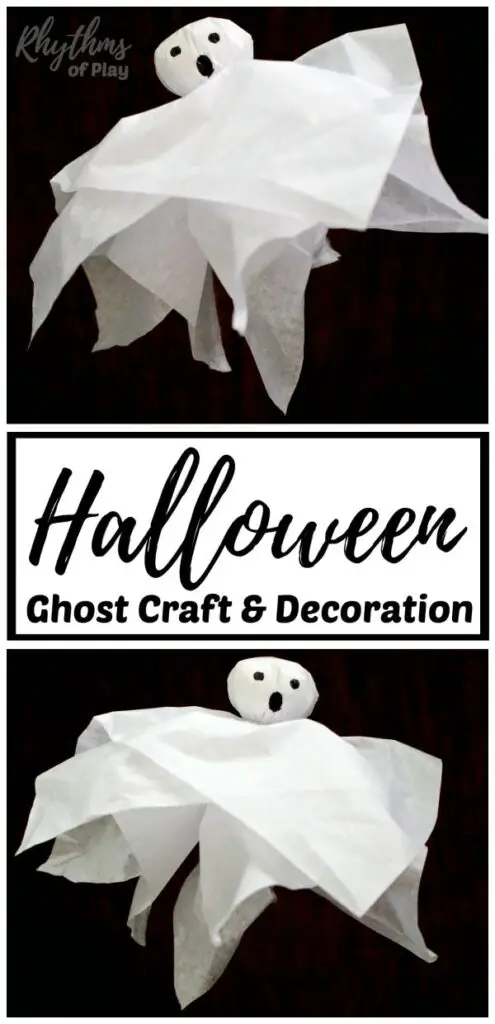
This tissue paper ghost activity teaches resourcefulness. It is very versatile and encourages the use of recycled items. Aside from cutting, this also helps children learn crumpling and tying skills which are essential fine motor skills.
Older kids may practice measuring skills as they cut squares for the body of ghosts. This craft is simple and can be put together in just a few minutes.
To make this craft, use white materials and cut squares for the ghost’s body. These can be about 10 to 12 inches but vary depending on your preference.
Lay the two papers on top of each other, ensuring the pointy edges are not touching. Use the materials listed to create a round shape for the head. Place the head of the ghost in the middle of the paper. Carefully wrap the head with white paper to cover it completely.
Secure the head with the fishing line or ribbon. Tie this around the neck of the ghost. Now, it’s time to make a face!
There are two ways to make a face. A marker can be used to draw the eyes and mouth. Another way is to cut out circles from black paper or felt and glue them on the head.
There are suggestions for using the same materials to create different sizes of ghosts for outdoor decorations. There are pictures provided for the process of this craft.
Prepare the following for this craft:
- For the body of the ghost, any of the following in color white – tissue paper, tulle, garbage bags, an old pillowcase, or a bedsheet
- For the head of the ghost, any of the following-cotton balls, crumpled paper, plastic bags, cloth scraps, old socks, or balloons
- Scissors
- Fishing line or ribbon
- Black marker, black construction paper, or black felt
Check out RhythmsOfPlay.com for more details.
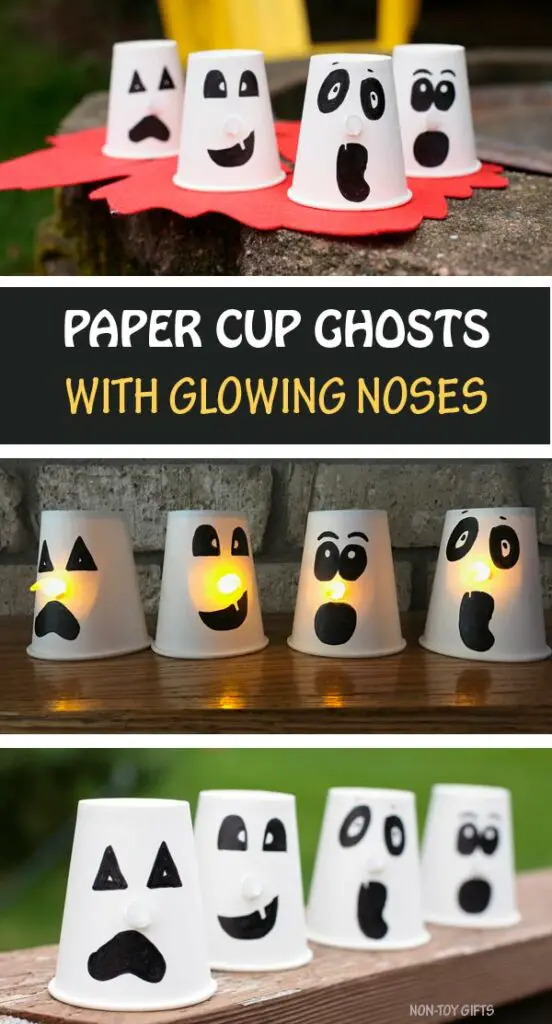
This craft is a perfect last-minute activity. It is very simple and uses only three materials. It can be completed in just a few minutes but will greatly add to every classroom’s spooky collection of ghosts.
This craft is a great way to help children improve their fine motor skills while being creative.
Make sure the paper cups are clean and dry for this activity. Flip the cup upside down, so the opening rests on a flat surface.
Using a black marker, outline the eyes and a mouth, ensuring that they are not too close to each other. The space between the eyes and mouth will be for the nose.
Use the marker to shade the eyes and mouth. Let this dry. Next, use a pencil or a sharp pointed tool to poke a hole in the nose. Insert the flameless tealight.
Now the ghost with a glowing nose is ready for display!
NonToyGifts.com provides suggestions on how to make different designs for the eyes and mouth. Head on to the site for more details.
For this craft, you will need:
- White paper cups
- Black marker
- Flameless tea lights
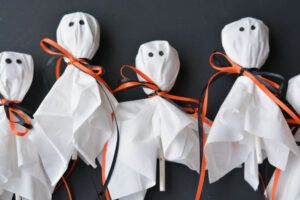
Are you thinking of a perfect craft that doubles as a Halloween giveaway? Then, this Lollipop Ghost is a great idea for children to make and give. Choose round lollipops since they make the perfect heads for these spooky creatures.
To make this craft, use all three coffee filters to cover the lollipop. Wrappers of these candies can come with bright and shiny prints. Please ensure they are not visible through the paper by adding more coffee filters when necessary.
Next, use a rubber band to secure the coffee filters. Tie it tightly on the neck to prevent the papers from slipping. Use the black marker to make the dots for the eyes.
Cut some twine or ribbons. Tie them as ribbons on the lollipop’s neck, ensuring that the rubber band is completely hidden. Show children how to fluff the frills of the coffee filter.
This activity is a great way to help children practice tying ribbons. It will also help them strengthen their finger muscles by stretching the rubber bands as they secure the coffee filters.
For this craft, you will need:
- Round lollipops
- Three coffee filters for every lollipop
- Orange and black baker’s twine or thin ribbons
- Rubber bands
- Black marker
- Scissors
For a detailed step-by-step process, head to MomCaster.com.
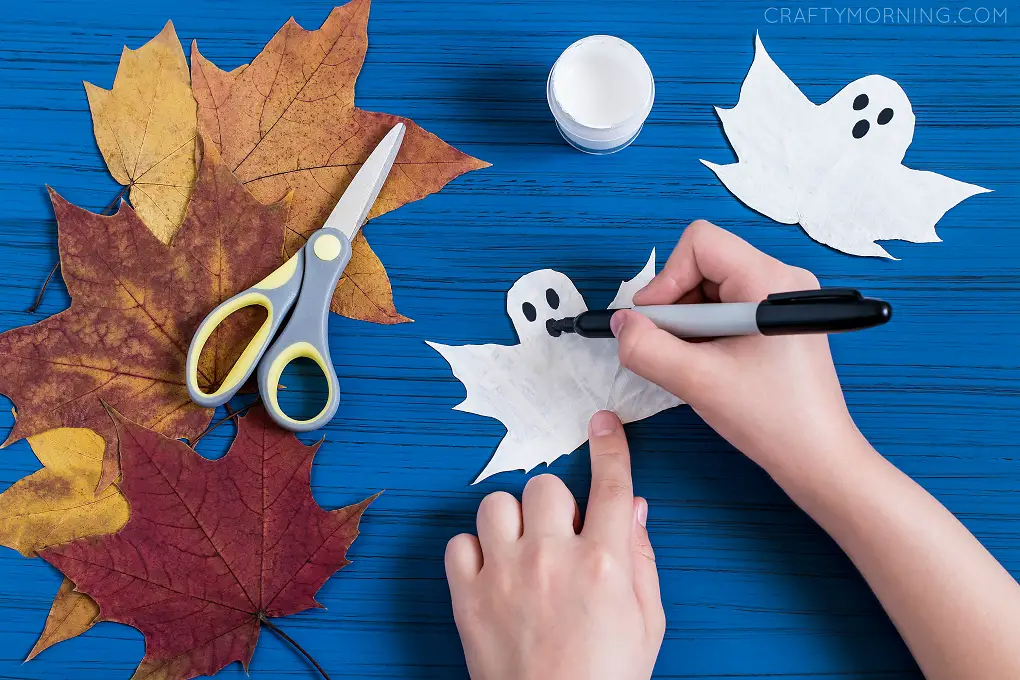
Environment-friendly crafts are always welcome in any home or classroom. This craft can be a follow-up activity after a leaf-hunting or nature walk. This craft recommends the use of maple leaves.
Other types of leaves can be used as long as they are large enough to look like flying ghosts with outstretched arms. As a precaution, choose leaves that are safe to handle and will not cause irritation or other side effects.
Start with choosing and cleaning all the leaves. Make sure the leaves are rot-free and have no tears or holes. Have the children paint the leaves with white paint. Let them dry.
Make sure that no other color is visible. Add a second coat if necessary. If this craft is intended to be hung like a dream catcher, painting both sides of the leaf is advisable.
Use the scissors to round the top pointy part of the leaf. This part will be the head of the ghost. Use the black marker to draw eyes and mouth. The leaves can now be glued onto black paper or hung using a string.
Prepare the following for this craft:
- White paint
- Paintbrush
- Black marker
- Scissors
- Leaves
For more information on this activity head to CraftyMorning.com.
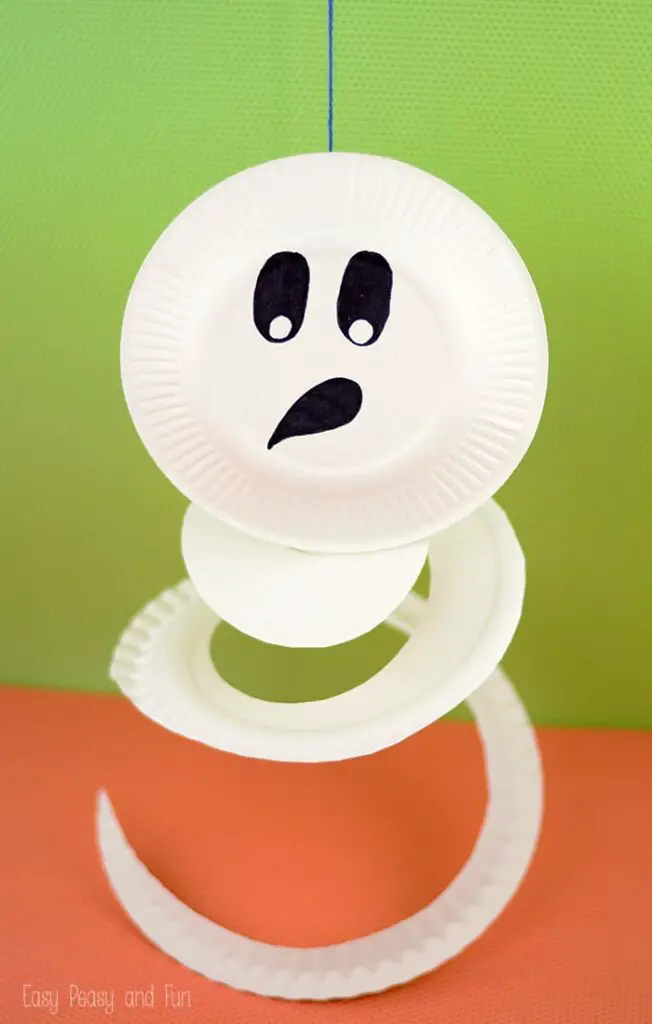
This paper plate ghost is a great activity to help children practice cutting curved lines. Children will learn to control their hand movement, twisting as they cut around the plate.
To make this ghost craft, make a line on the paper plate for children to follow if necessary. Cut the large paper plate in a spiral manner. Assist the children by giving them directions on how to move the paper plate properly as they cut.
Cut in a circular motion from the paper plate’s ribbed edge, creating a spiral to the center. This part will be the ghost’s body.
Use a black marker to outline the eyes and mouth on the smaller paper plate. Shade the outline in black. Create a spooky expression if desired.
Attach the head and body by gluing the small paper plate on the center part of the spiral. Use a thread to hang the ghost. Any slight wind will make this craft swirl.
For this craft, you will need to prepare:
- Small and large paper plates
- Scissors
- Glue
- Black marker
- Thread
To find out more about this activity, check out EasyPeasyandFun.
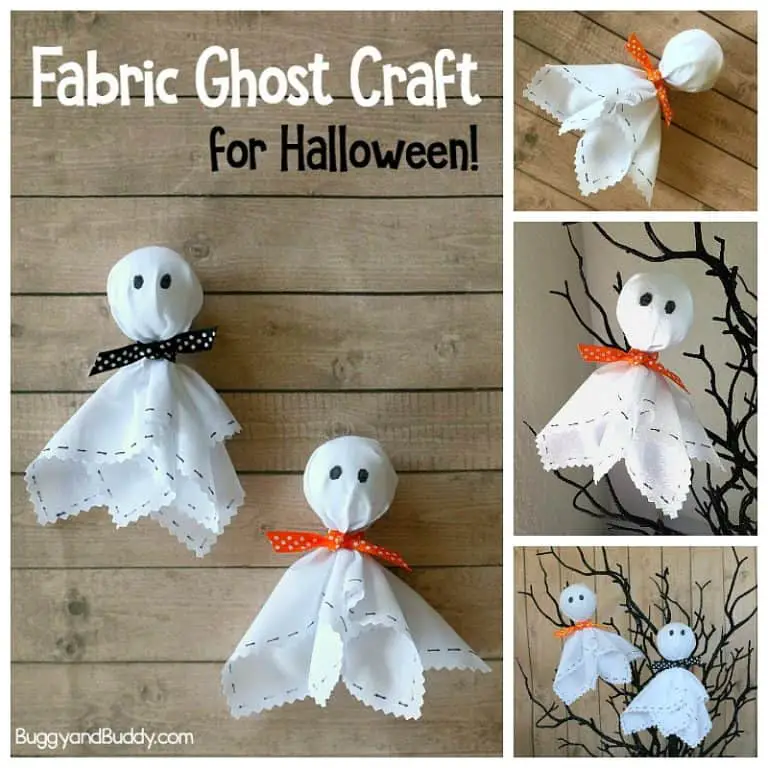
Designs that are timeless and can be reused in classrooms yearly are a definite must. These mini-fabric ghosts are not only easy to make, they are also cost-efficient decors, perfect for classrooms with low budgets.
Cut several 9-inch squares from the white fabric. Decide whether the edges need securing from the possible fraying. An option is to use pinking shears or decorative scissors to trim the edges.
Using these special scissors will prevent the fabric from fraying and provide an interesting design element for the finished ghost craft.
Allow older children to measure and cut their squares. For younger children, either prepare the squares in advance or provide a template for them to use as a guide.
An added design is to draw short dashes on the edge of the fabric. Take note that not all markers can be used for fabrics. Test the marker to make sure it will not bleed.
Next, make the ghost’s head by placing the ball in the center and gathering the fabric. Secure the head by tying a ribbon around the neck. Assist the children in this step if necessary.
Use the black marker to make eyes. Lastly, tie the fishing line on the neck. Now it’s ready to hang!
For this craft, you will need to prepare the following:
- White fabric such as muslin
- Scissors
- Pinking shears or any decorative scissors for fabric (optional)
- Styrofoam balls in 1.5 diameter
- Black marker
- Ribbons
- Transparent string or fishing line
For more details on this activity, go to BuggyAndBuddy.com.
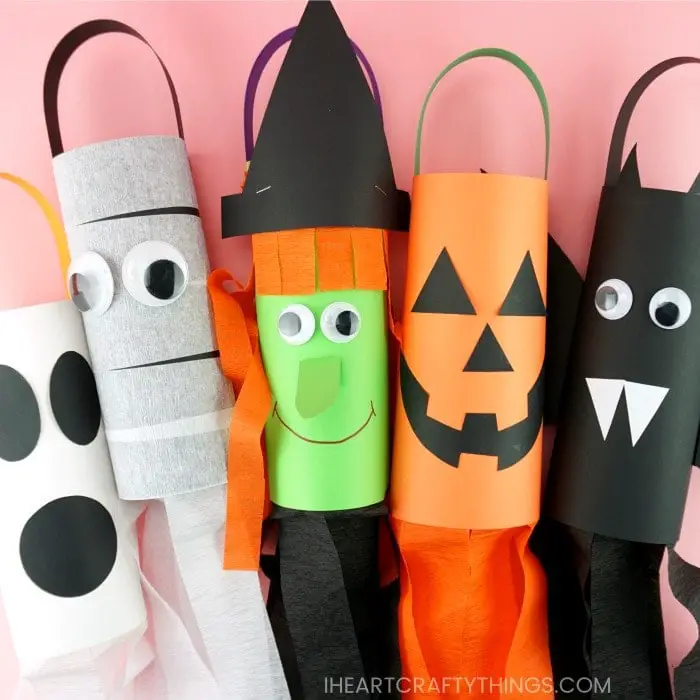
Here is another simple yet adorable Halloween craft. Children can make this craft with minimal help from adults.
Trace the template for the eyes and mouth on black cardstock to assemble this craft. Cut and glue them to the center of the white cardstock.
Next, cut six strips of crepe paper measuring 24 inches in length. Position them on the back of the cardstock on the opposite side of the face of the ghost. Glue them at the bottom of the cardstock, making sure not to overlap. These will sway in the wind once finished.
Roll the cardstock to make a tube using glue to attach both ends. Once secured, attach a strip of cardstock in any color on top of the windsock for the handle.
Hang the windsock in an area where it gets a breeze to appreciate it fully. The template is a paid product and can be found on IHeartCraftyThings.com.
For this craft, you will need the following:
- Windsock template
- White and black cardstock
- White crepe paper
- Markers
- Scissors
- Glue
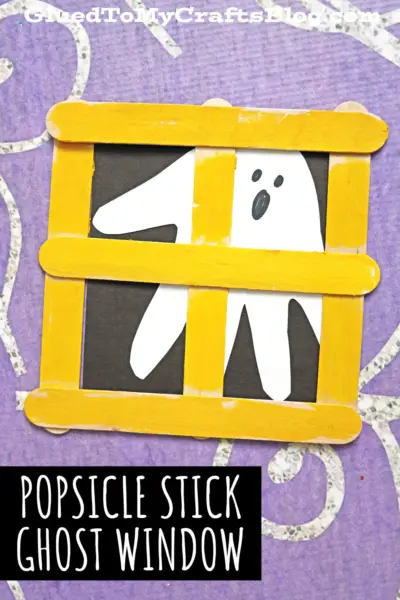
Popsicle Stick Ghost Window is almost effortless and uses readily available materials. This peeping ghost is more delightful than spooky and an excellent activity for young children to put together on their own.
To make this craft, glue four popsicle sticks together to make a square. Next, glue the remaining two sticks in the middle of the square, forming a cross. Once dry, let the children paint the window using craft paint. Let this dry completely.
Meanwhile, trace the child’s hand on white cardstock. Cut out the handprint. Use a black marker to add the eyes and mouth.
Use the black cardstock to cut a square that is a little bit smaller than the popsicle window. Glue the handprint on the black cardstock.
Attach the popsicle window on the black cardstock. Position it properly so that the ghost’s face is in the middle of the hollow part of the window.
For the video on how to make this craft and for more details, check out GluedToMyCraftsBlog.com.
For this craft, prepare the following:
- Six large popsicle sticks for every window
- Black and white cardstock
- Craft paint
- Paintbrush
- Black marker
- Scissors
- Glue
Conclusion
These ghost crafts are simple yet fun to make with children. They help children develop not just their fine motor skills but also their creativity in the process.
These crafts teach children to work independently, gaining valuable confidence as they complete the craft.
Give these crafts a try in your classroom or home. We hope you liked this list. Have a wonderful crafting this Halloween!
In the mood for more preschool Halloween or fall crafts and activities? Check these out.


