Doctors are one of the most recognizable community helpers that children adore. Help children explore how amazing doctors are as they learn to understand the role doctors play in keeping everyone safe and healthy by providing medical care.
Here are ten amazing doctor crafts to consider for a medical-themed lesson.
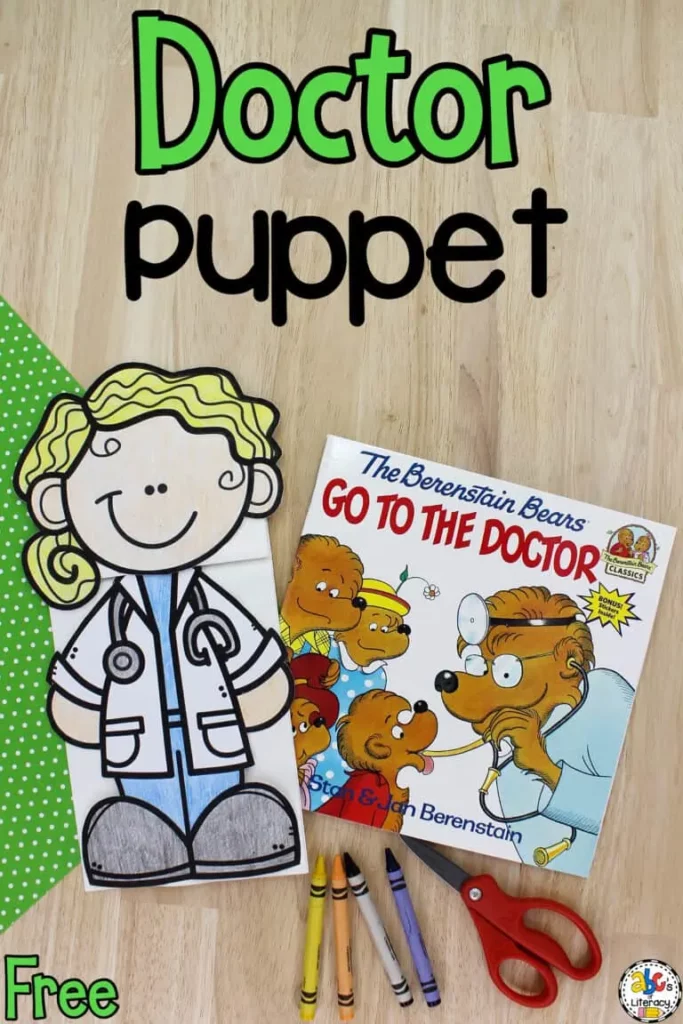
Inspired by the book “The Berenstain Bears Go to the Doctor” by Stan and Jan Berenstain, this paper bag puppet is a great tool to retell the story and to use in pretend play areas. As children use dialogues during play, their oral language skills will improve.
Cutting, coloring, and pasting to complete this craft will help enhance children’s fine motor skills. Their hand muscle strength and coordination skills will improve as they play the puppet by making opening and closing movements with their fingers.
Download and print the free doctor template from the site. Have the children color and cut these out. There are two puppets for children to choose from. They can also customize the skin tone using a crayon representing the children’s skin.
Glue the head on the flap of the paper bag and the body below the flap. If possible, use a white lunch paper bag. Use the lined paper for children to write about their experience with doctors. They can also make a poem, as the site suggests.
Once finished, have the children glue this on the back part of the paper bag.
For this activity, you will need:
- Doctor puppet template
- Paper bag
- Scissors
- Glue
- Crayons
For more information on this activity, go to ABCsOfLiteracy.com.
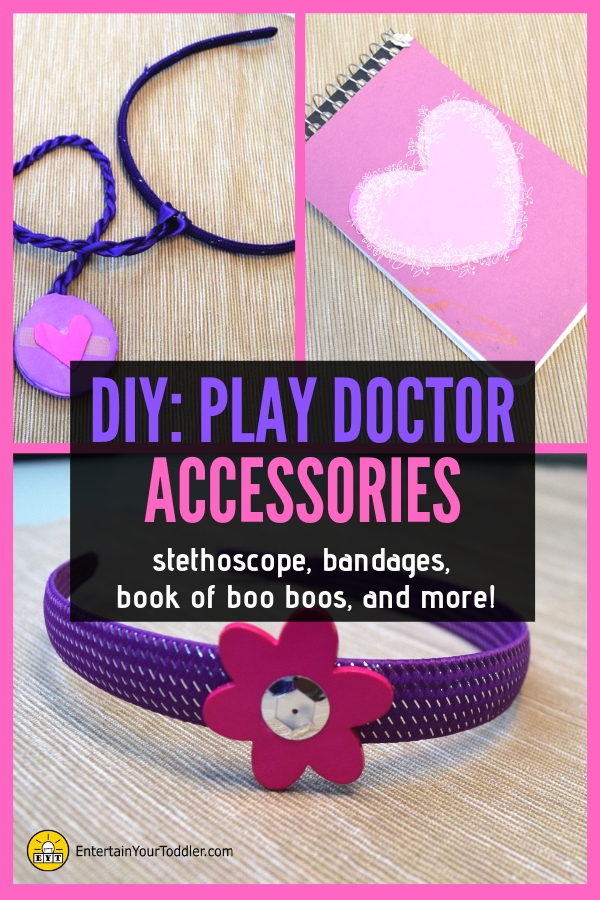
Doctors need tools to help diagnose patients. One of these tools is the ever-reliable stethoscope. Make one using readily available materials. Children will have fun making them while improving their fine motor skills.
This toy stethoscope is perfect for pretend play areas or for hospital-themed centers. Explain to the children the purpose and how doctors use this tool.
Tell them that it is used to listen to the patient’s heartbeat and breathing patterns. Doctors use it by placing the chest piece on the patient’s chest and moving it across several times to listen to the sounds fully.
To make the stethoscope, glue together two foam sheets using stick glue. Cut this into a square shape. Repeat this step to make two sets. Next, use any available circle to trace the foam, such as a jar lid.
Cut a small heart shape from a different color of foam sheet. Set all these pieces aside. Next, take the headband and loop a ribbon. On its end, glue the square foam sheets by sandwiching the ribbon.
Once the glue dries, cut out the circle shape and attach the heart to the circle.
For this activity, you will need:
- Headband
- Foam sheets
- Ribbons
- Hot glue gun
- Stick glue
- Pencil or marker
For more information on this activity, go to EntertainYourToddler.com.
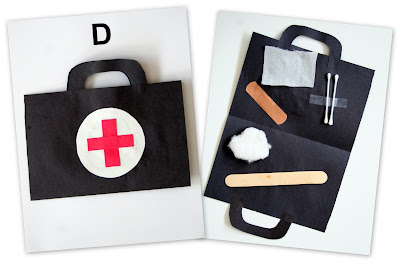
Doctors carry a bag or kit that contains different supplies to help treat the patients. Create one for children to use in pretend play areas that mimic the real thing. Explain to the children the names and uses of these supplies.
Doing this will increase their vocabulary and help them better understand the doctor’s job by using the supplies. For example, let children know that cotton swabs and cotton balls are used to clean the open wounds of patients.
This craft can also be used to teach the letter D.
To make the kit, fold a black construction paper and cut a rectangular shape. Next, cut out two letters Cs for the handles, one white circle, and two short red strips for the symbols.
Assemble the bag by attaching the handles and gluing the circle in the center of the folded paper. Place the red strips on top of each other to form a cross. Once the glue dries, attach the supplies using stick tape to keep them in place.
For this activity, you will need:
- Construction paper
- Scissors
- Glue
- Sticky tape
- Cotton swabs
- Band-aid
- Cotton balls
- Craft stick
For more information on this activity, go to HomeschoolCreations.net.
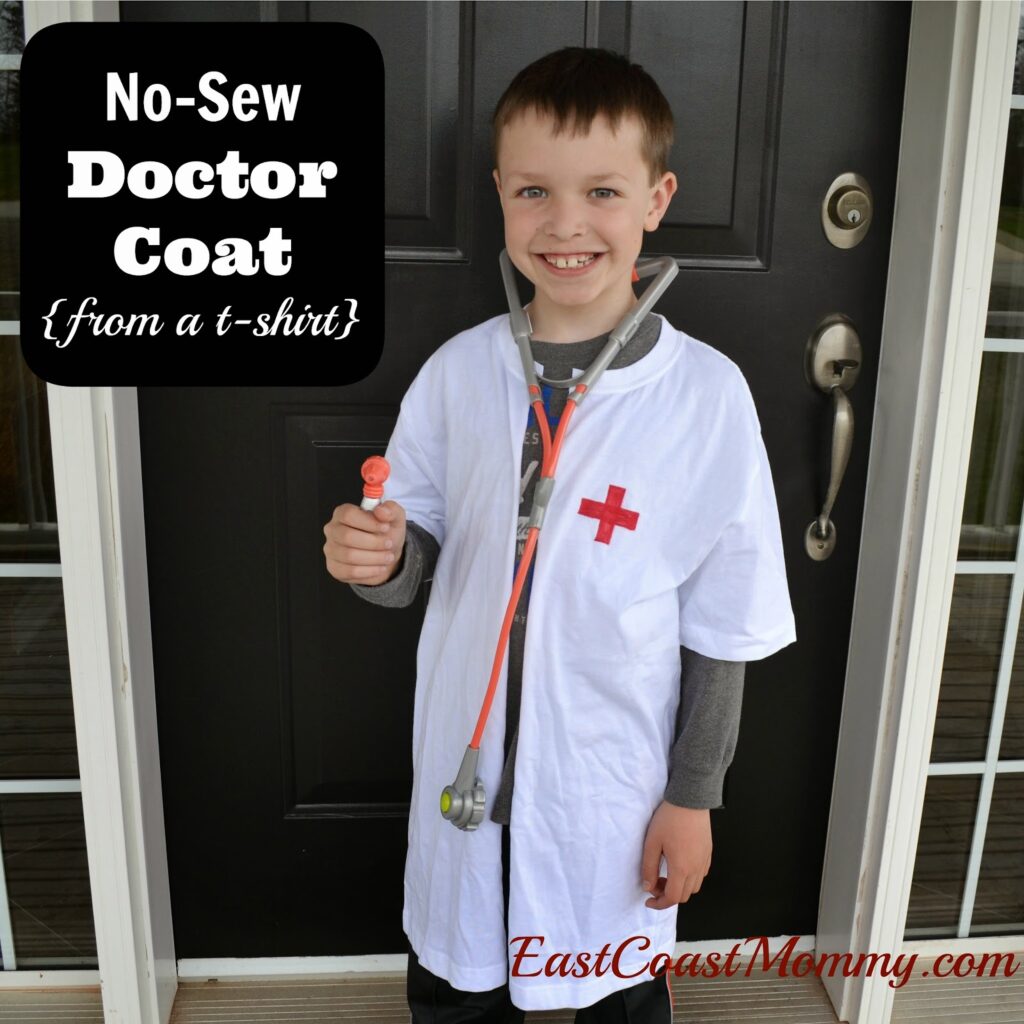
Complete the doctor’s outfit by making an inexpensive doctor’s coat. This coat is a perfect way to reuse an old white t-shirt. It also does not need any sewing. This coat is a great addition to the pretend play area.
Cutting a different material than paper and making the red cross on the shirt will allow children to improve their fine motor skills.
While this activity is simple, ensure that young children are assisted as scissors will be used, and cutting the cloth requires some pressure.
Choose a white shirt in size meant for adults. Take out a red marker and outline the cross on the upper right side of the shirt. Have children fully shade the outline to make it look solid red cross.
Next, cut the shirt in the middle, from the neck to the hem, or vice versa. For children, drawing a line, they can use as a guide when cutting would be better.
For this activity, you will need:
- Old white t-shirt
- Scissors
- Red marker
For more information on this activity, go to EastCoastMommyBlog.blogspot.com.

Not all doctors are the same. Some have a specialization. A surgeon is one of those doctors specializing in dealing with patients requiring surgery. In this activity, children will explore how amazing surgeons are.
Children will use a mold as they work on Playdough. The movements used when playing with Playdough, such as pressing, rolling, and squeezing, will help strengthen children’s hand muscles.
Their fine motor skills will also improve as they use knives and other cutting tools. Use this activity to go with a Science lesson on the brain and its parts.
Start flipping the mold and pressing enough Playdough inside to take on the shape fully. If working on different parts of the brain, use different colors for different parts. Refer to the pictures on the site for this step.
Next, carefully unmold the brain, use a towel to support it, and keep it intact. Place this on a tray and provide children with different cutting tools, such as plastic knives, to cut the brain open like a surgeon.
For this activity, you will need:
- Brain mold
- Playdough in different colors
- Cutting tools such as plastic knives and scissors
- Tray
For more information on this activity, go to LeftBrainCraftBrain.com.

An x-ray is one of the ways doctors can identify or diagnose a problem with ailing patients. This craft introduces children to x-rays and gives them a clear example of what x-rays look like.
This is a great activity for a Science lesson. Explain to the children that having an x-ray is like photographing what is underneath our skin, such as bones and organs.
Emphasize that this procedure does not hurt. If possible, show children a real x-ray so that they can understand it better. Use this craft to go with the book for preschoolers “Jessica’s X-ray” by Pat Zonta.
Making this craft provides a sensory experience for children while they improve their fine motor skills as they cut and glue the cotton swabs.
To make the craft, fill the spray bottle with white tempera paint. Add some water to dilute it slightly. Place the children’s hands on the black construction paper. Position the hand properly so that a part of the arm is also included.
Spray with the white paint until it creates a noticeable outline. Let the child take off their hands and clean them while the paint dries up.
Next, cut up some cotton swabs and glue them on the hand outline to resemble bones.
For this activity, you will need:
- Black construction paper
- Tempera paint
- Spray bottle
- Water
- Cotton swabs
- Glue
- Scissors
For more information on this activity, go to HomeschoolCreations.net.
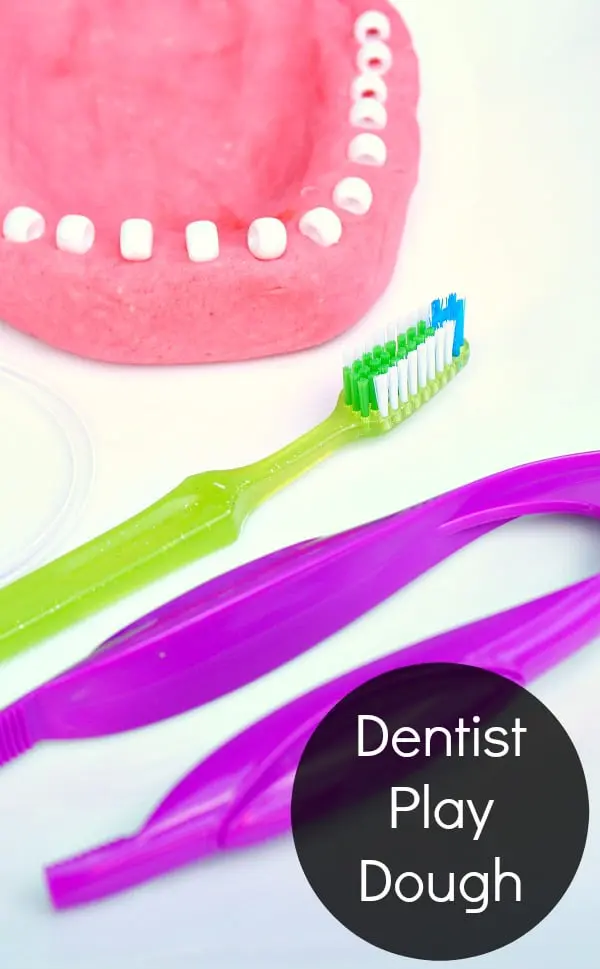
Oral hygiene is necessary for young children to learn. Knowing proper care of our teeth and gums will keep them healthy and strong. One of the ways to care for teeth is by going to the dentist.
Use this activity to help children understand the dentist’s work. This is a great way for children who are hesitant about visiting the dentist. Brushing, flossing, and teeth pulling will help children improve their fine motor skills and coordination.
Make the gum by using rose-colored Playdough. Form this to make it look like the lower jaw. Pinch the sides to raise these to resemble the gums. Add the white pony beads one at a time, with the holes facing sideways.
Press the beads enough to the clay to keep stable and prevent it from falling off. Children can now brush their teeth with a toothbrush. Use the string to teach children how to floss. Finally, have the children use the tweezers to pull out each tooth.
For this activity, you will need:
- Rose-colored Playdough
- White pony beads
- Toothbrush
- Tweezers
- String
For more information on this activity, go to FantasticFunAndLearning.com.
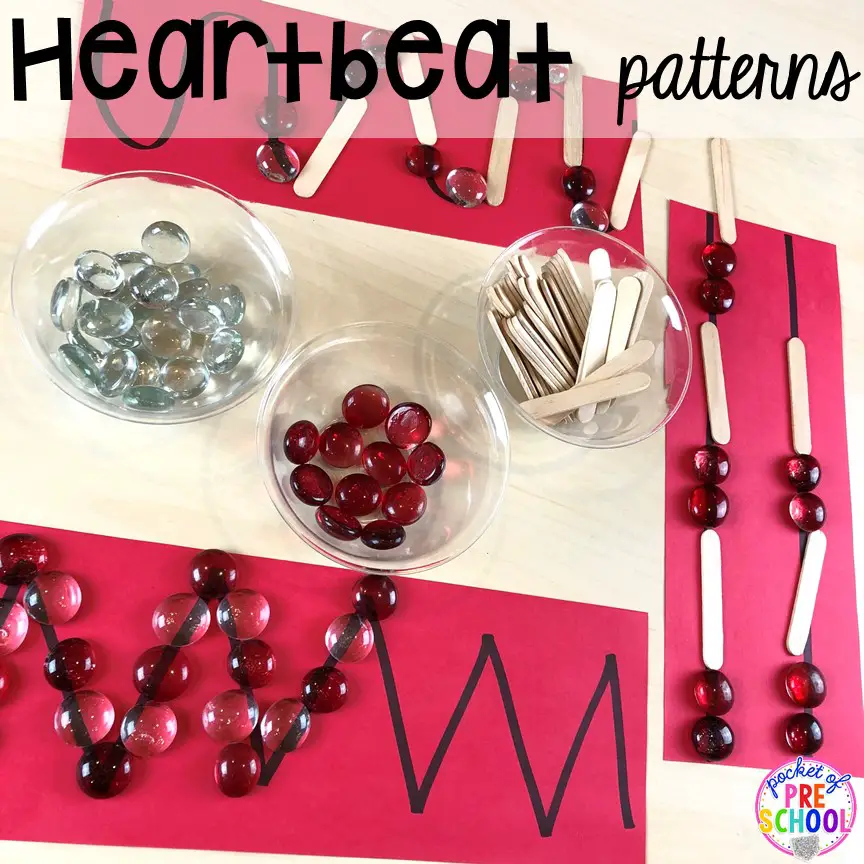
When our heart beats, it creates a rhythmic pattern that allows the doctor to find out if there is a problem. These patterns are seen in a special monitor that shows varying up and down lines forming a zigzag or continuous curved pattern.
This activity will allow children to explore these different lines through a sensory activity. It will also help children improve their visual-tracking skills and learn directionality.
Using the glass pebbles will also help improve their three-finger grasp. The pebbles can also be used to teach counting. Let children count as they place the pebbles or take them off the lines.
Create a pattern mat by cutting the red construction paper in half lengthwise. Draw continuous lines such as zigzags, curved lines, and long straight lines.
Place the loose pieces in small containers or bowls. Ask the children to fill the lines with pebbles until the end. The site suggests using other materials, such as pompoms if glass pebbles are unavailable.
For this activity, you will need:
- Glass pebbles and other loose pieces
- Craft sticks
- Small containers
- Red construction paper
- Black marker
For more information on this activity, go to PocketOfPreschool.com.
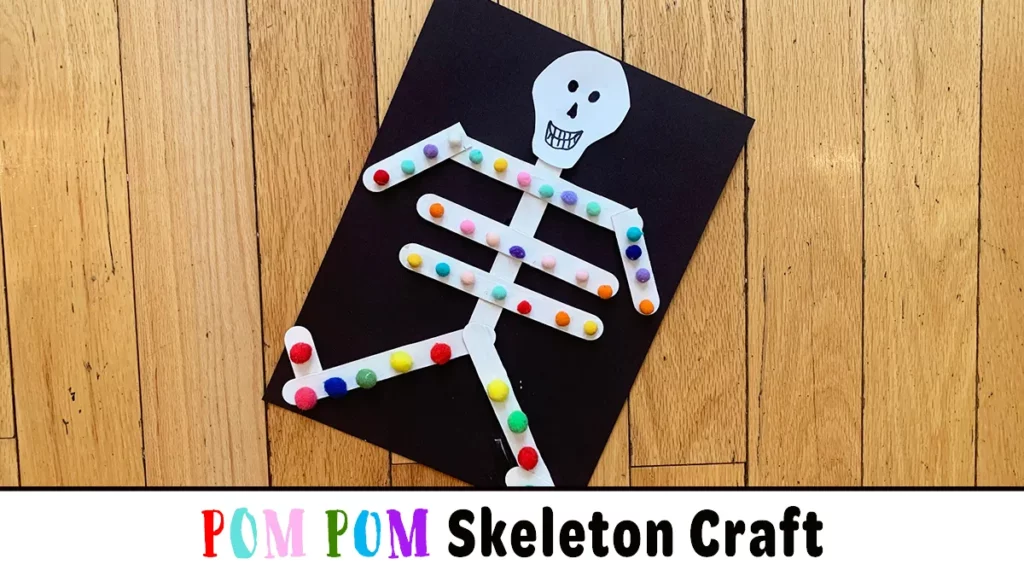
This wonderful craft teaches children about the group of bones inside our bodies. A great activity for a Science lesson, this skeleton can be used for topics on bones and x-rays. It is also a craft perfect for Halloween or Dia de los Muertos
The use of colored pompoms will help with children’s color recognition skills. Assembling the skeleton by cutting and gluing the pieces together will help their fine motor skills.
Start with painting eight pieces of craft sticks white. Let these dry. Glue these on black cardstock following the skeleton pattern. Refer to the picture on the site for this step. Cut some of the craft sticks for the arms and feet.
The site suggests drawing lines as a guide for younger children. Once the craft sticks dry, add the pompoms. Glue these on the sticks until fully covered. Provide some space in between pompoms.
Next, cut out a skull shape from white construction paper. Use the black marker to add details, such as eyes, nose, and teeth. Attach the skull to the skeleton to complete the craft.
For this activity, you will need:
- Craft sticks
- Paint
- Paintbrush
- Pompoms
- Cardstock
- Construction paper
- Marker
- Scissors
- Glue
For more information on this activity, go to HappyToddlerPlaytime.com.
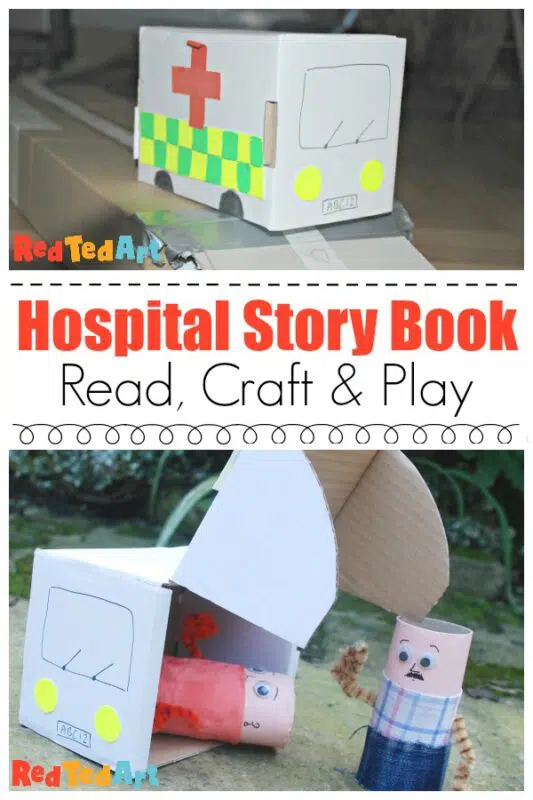
This doctor craft is based on the book “Harry & the Robots” by Ian Whybrow. It is a story about a boy named Harry who is fond of robots. When his grandma had to be taken to the hospital, he took his robots with him to help her recover.
This doctor craft goes perfectly with the ambulance craft featured on the site. Use this craft to retell the story and a puppet play.
Encourage children to create dialogues or conversations between the characters to help them develop their oral language skills.
To make the doctor craft, paint a toilet paper roll using a color that represents the child’s skin tone, if possible. Once dry, cut to size two different cloth scraps that will fit around the paper roll.
Use the glue to attach these. Place one piece of cloth on the bottom for the doctor’s pants and the other on top for the shirt. Allow this to dry. Glue the googly eyes and use the marker to add facial features, such as eyebrows, nose, and mustache.
Next, poke two holes in the sides and cut the pipe cleaner in half. Insert these in the hole and twist to secure.
For this activity, you will need:
- Toilet paper roll
- Cloth scraps
- Googly eyes
- Paint
- Paintbrush
- Glue
- Scissors
- Pipe cleaner
For more information on this activity, go to RedTedArt.com.
Conclusion
Doctors are responsible for helping us live healthy lives and providing medical attention to those sick and wounded. Use the crafts on this list to help children become aware of the doctor’s job.
As they learn about this career, they will also learn more about their bodies and become more aware of their health.
Thank you for reading!


