Among the many kinds of reptiles, children are highly familiar with snakes. These magnificent animals are usually misunderstood. These slithering creatures draw attention because of their body shape, unique tongue, and beautiful markings on their bodies.
Let children explore how unique and wonderful these animals are through these ten easy crafts that they can do and enjoy.
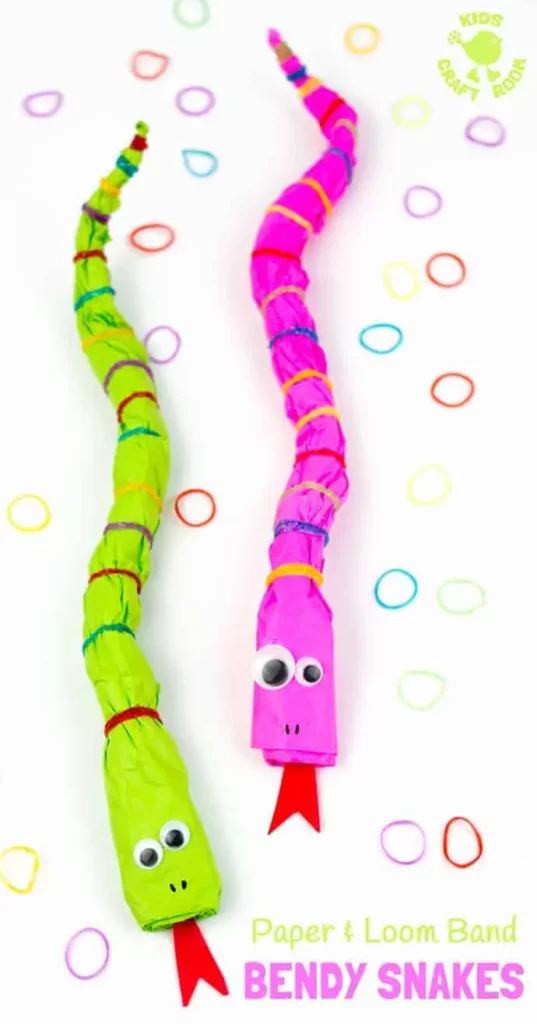
Everyone will likely want to get signed up for this simple craft that requires rolling papers and using up leftover loom bands from past projects. Allow children to customize their snakes by choosing the color of the tissue paper and loom bands to use.
Teach color patterns by alternating the colors of the loom bands. Create different sizes of snakes-longer and shorter and fat and thin.
Teach concepts by attaching small pieces of paper on the snake’s tongue with letters, numbers, or shapes. Children may also use their snakes as a pointer.
Start by rolling a piece of newspaper to form a snake shape. Use as many or as few as needed to create this animal’s shape. Make the head part flat and the tail part pointy by pressing and twisting.
Once the snake’s shape is formed, wrap it in colored tissue paper. Ensure that it is not wrapped tightly to prevent the paper from tearing. Use the loom bands to secure the rolled papers.
Make the head by cutting a piece of the same color of tissue paper to wrap around it. Refer to the pictures on site for this part. Secure with a loom band but keep the end part of the head hanging to place the tongue.
Add the final touch by cutting the snake’s tongue from red tissue paper. Attach this to the mouth and googly eyes on the head.
For this activity, you will need:
- Newspaper
- Tissue papers
- Loom bands
- Googly eyes
- Glue
For more information about this activity, go to KidsCraftRoom.com.
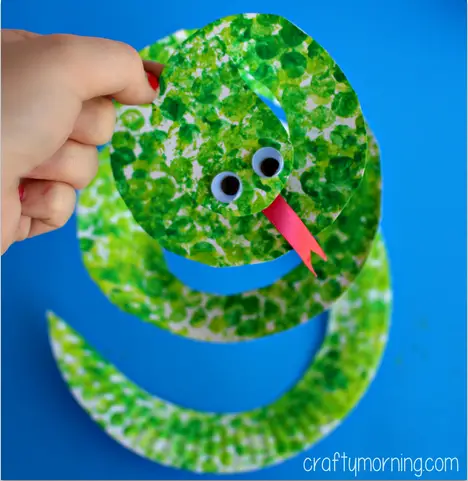
Recycle the bubble wrap from package deliveries through this process art. This craft is simple to make and highly enjoyable to look at once finished.
Let children learn simple art techniques by layering different colors on the snake to make unique markings. Allow children to add designs on their snakes by adding some drawings or even using stickers.
Show children pictures of snakes and let them use other colors other than green shades.
Wrap a piece of bubble wrap around the rolling pin big enough to cover its entire area. If a rolling pin is unavailable, use a paper towel or toilet paper rolls. Use a tray big enough for the rolling pin or a flat surface to cover the bubble wrap with paint.
Use two shades of green and let the rolling pin be covered entirely with paint. Roll it on the paper plate to create the snake’s skin. Next, use the scissors to cut from the paper plate’s end to the center part to make a spiral.
Cut a rounded shape for the head once the scissors reach the end. Allow the paint to dry before adding the red tongue and the googly eyes.
For this activity, you will need:
- Rolling pin
- Bubble wrap
- Paper plate
- Colored paper
- Paint
- Scissors
- Glue
- Tray
- Googly eyes
- Ribbon
For more information about this activity, go to CraftyMorning.com.

The colored crafts stick is the star on this snake project. Let the children decide how long their snakes will be by adding or reducing the number of sticks that will be used. Allow them to choose the color combination of the sticks to create a unique output.
Stick the velcro dots on the craft sticks. Use just one dot for each stick. Place them on the end of the craft sticks.
Make the head by cutting the tips of the craft stick and another small piece to hold them together. Glue them together. Cut out and attach the snake’s tongue using the red felt. Refer to the pictures on site for this step.
Once dry, add the googly eyes and decorate the sticks. Make lines, shapes, and other designs using markers. Add buttons if available, and use glitter glue to make the snake shimmery.
Assemble the snake by attaching each one to the velcro dots. This snake craft should look like a folding ruler.
Make a short and long version of this craft for children to compare. Use this to introduce the concept of tally marks. Ask the children questions like, “How many of you used a blue craft stick?” or “How many have triangle designs on the snake?”
Tally the children’s responses on the board. Questions can be about colors, the size of the snake, and designs and patterns.
For this activity, you will need:
- Colored craft sticks
- Makers
- Craft glue
- Velcro dots
- Buttons
- Red felt
- Glitter glue
- Scissors
For more information about this activity, go to NaturalBeachLiving.com.
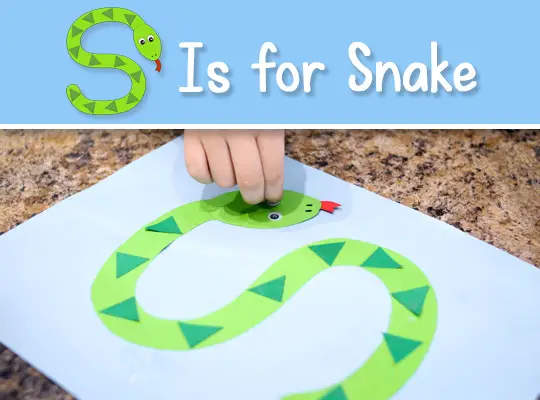
What a great way to teach the letter S! This snake craft is simple for children to make. Encourage children to write the letter S on the triangles or between them. Practice saying the sound of S as the children trace the shape of the snake.
Download and print the free snake template on the site. There are two options for this step. One is to print the template directly on light green cardstock and cut. The other option is to print on regular printer paper, cut out and trace on cardstock.
Cut out the pieces and assemble the snake. Glue the body on a light blue cardstock. Add the triangle scales and the head on the top part of the letter S. Attach the snake’s tongue and the googly eyes.
Modify this craft by changing the shapes of the scales on the snake. Instead of triangles, use other shapes such as circles, squares, rectangles, hearts, and diamonds.
For this activity, you will need:
- Printed snake template
- Two sheets of printer paper
- Colored cardstock
- Googly eyes
- Glue
- Pencil
- Marker
- Scissors
For more information about this activity, go to AllAboutLearningPress.com.
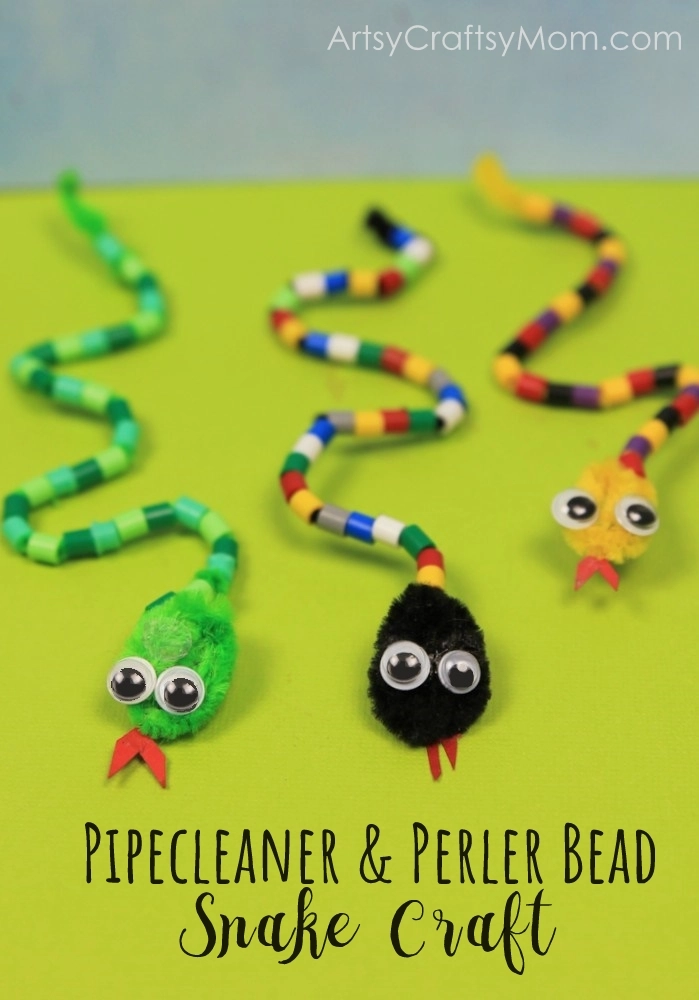
This pipe cleaner craft looks like a tiny snake baby looking for its mama. By twisting the pipe cleaner and adding the beads, this craft will significantly help improve the children’s fine motor skills.
Start by twisting one end of the pipe cleaner to form a coil. This part will become the head. Ensure that there are no spaces between the coils.
Next, start the beading process. Have the children insert the Perler beads one at a time, forming a pattern or a solid color to fill the rest of the pipe cleaner.
Cut out the tongue from red felt. Use glue to attach the tongue and googly eyes. The site shows different ways to present the final output. Twist their bodies to form a coiled pose, a slithering pose, an attack pose, or coil it around an object.
This snake craft is a great companion for the book “Hide and Snake” by Keith Baker, which is like a hidden picture type of storybook.
For this activity, you will need:
- Pipe cleaners in different colors
- Perler beads in different colors
- Craft Glue
- Googly eyes
- Red felt
For more information about this activity, go to ArtsyCraftsyMom.com.
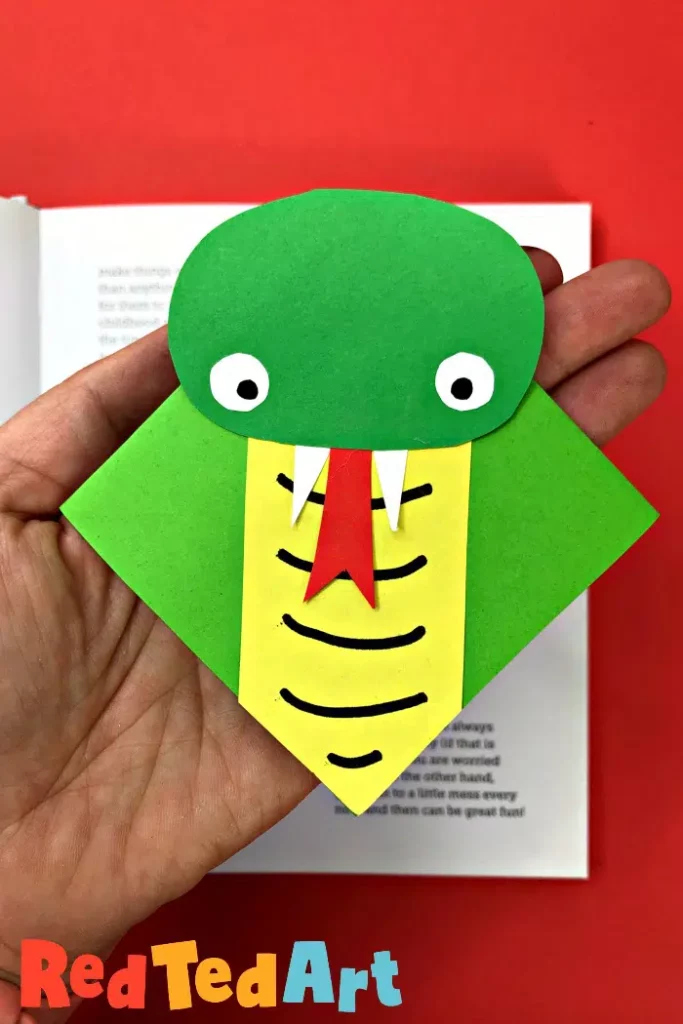
This venomous-looking snake is perfect for holding a page of one’s favorite book. With the folding paper technique, children will improve their fine motor skills. Assist the children as they need to fold the paper with accuracy.
Start with folding the green paper into a diamond shape bookmark. Refer to the step-by-step photos and video on the complete process of this step.
Next, take the yellow paper and make it the same size as the green bookmark. Cut this into four pieces by cutting the triangle edges off the three sides of the yellow square.
What is left is a long straight arrow shape. See the pictures on the site for this step. Cut out a green oval for the snake’s head, two white circles for the eyes, two white triangles for the fangs, and a red tongue from the colored scraps of paper.
Take the yellow piece of paper and add curved lines to it. This part will be the snake’s tummy. Next, flip the green bookmark, so the folded part is on the bottom. Attach the tummy, ensuring the pointy edge matches the bookmark’s edge.
Assemble the head by adding the eyes. Use the marker to add pupils to the white circles before sticking on the green head. Add the fangs and tongue as well.
Lastly, stick the head on the top part of the tummy. Let this dry completely before using.
For this activity, you will need:
- Square paper about 6×6 inches in size
- Yellow, white, green, and red paper scraps
- Black marker
- Scissors
- Glue
For more information about this activity, go to RedTedArt.com.
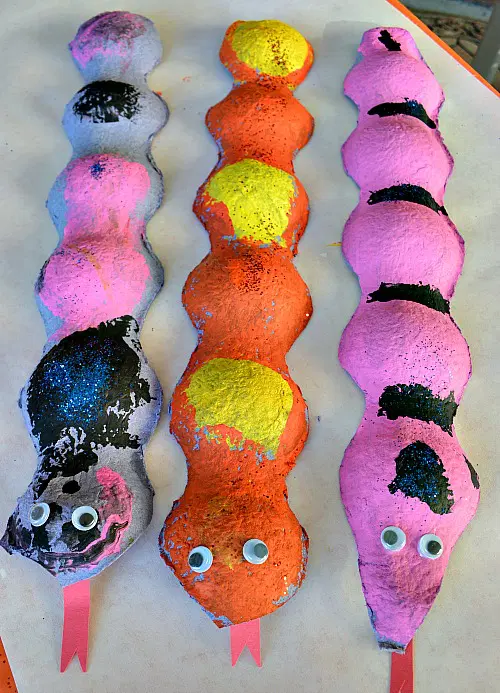
On your next grocery trip, request fruit trays that will eventually be discarded. The site recommends using apple trays since these are the perfect shape for this craft.
The tray used on the site has four rows of cups holding the apples. Cut out each of the whole rows of cups from the tray carefully. These will be enough for four snakes. Trim off the excess on the sides.
Flip the row of cups so that the bumpy parts are on top. Have the children paint this part. Add designs or use different colors to make their snakes unique. Allow the paint to dry.
Next, cut out the forked tongue from the red construction paper and stick it underneath the last cup in the row. Add the googly eyes to complete. Glitters are optional to make the snakes sparkly and look glammed up.
Use this activity for a fun game, hide small pieces of paper that will fit under the cup with drawings of shapes or written numbers. Ask the children to guess the shape and give them clues such as “ It has three sides” or “The number after five.”
For this activity, you will need:
- Cardboard fruit trays
- Paint
- Paintbrush
- Googly eyes
- Red construction paper
- Glitter
- Glue
- Scissors
For more information about this activity, go to FunLittles.com.
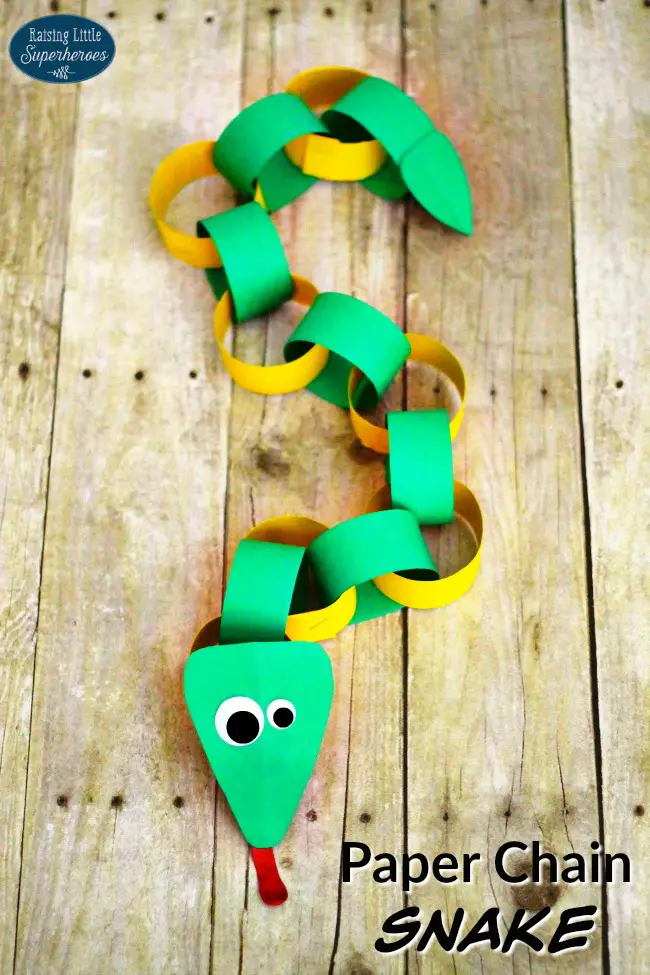
Who does not like paper chain crafts in preschool? No one, that’s for sure! This snake craft is effortless to use from start to finish.
Children can make this craft on their own in no time. As they cut and fold the strips of paper to make the paper chains, they will improve their fine motor and eye and hand coordination skills.
Start with folding the first of the three green cardstocks to make eight long strips. Fold the paper three times horizontally to get eight rows. Cut them and set them aside. Do the same for the second green and yellow cardstock.
Make the paper chain by taking both ends of a green paper strip and stapling. Insert a yellow paper strip and staple. Continue with this pattern of green-yellow chains until no more paper strips are left.
Cut two triangles of different sizes from the green cardstock. Make the edges round. The bigger triangle is for the head, while the smaller one is for the tail.
Attach the head on the first chain. Add the eyes and the red balloon to make the tongue. Stick the smaller triangle on the other end of the chain to make the tail.
For this activity, you will need:
- Three sheets of green cardstock
- Yellow cardstock
- Scissors
- Glue
- Stapler
- Googly eyes
- Red balloon
For more information about this activity, go to RaisingLittleSuperheroes.com.
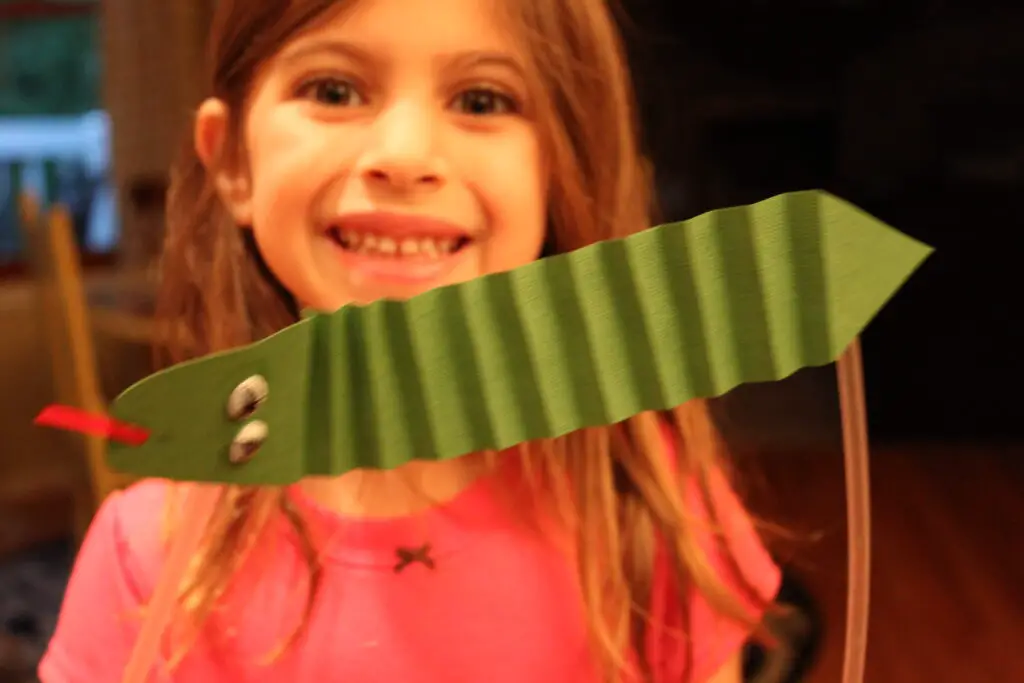
An accordion-folded snake craft is an adorable tool for storytelling. Children will have fun making it longer and shorter, and they can move the straws apart or closer. Their fine motor skills will improve as the children cut and fold the snake.
Use this craft to go with the book “The Greedy Python” by Eric Carle. The story talks about a greedy snake that ate all the animals it saw. As the story progresses, the snake slowly unfolds as it eats an animal.
Trace a long strip from the green cardstock with a rounded head and pointy end to make the snake’s body. Have the child cut this template. For younger children, provide pre-cut pieces.
Demonstrate the folding technique to the children one at a time. Guide them as they make the fold if necessary. Attach the googly eyes and a red ribbon for its tongue on the head part of the puppet. Let this dry.
Flip the puppet over and use the tape to secure the straws on each end.
For this activity, you will need:
- Green cardstock
- Glue
- Googly eyes
- Scissors
- Red ribbon
- Masking tape
- Two drinking straws
For more information about this activity, go to Kiwico.com.
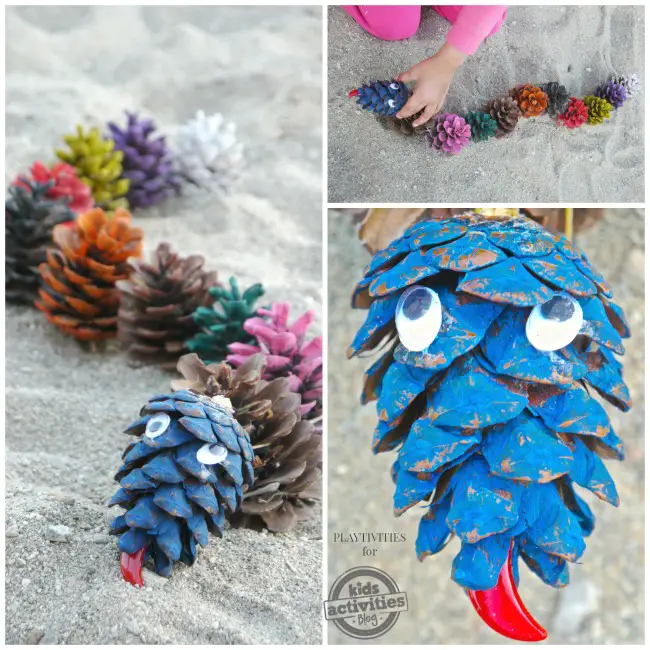
This series of colorful pinecones turned into a snake is a sight to behold. This craft is great to display on dinner tables and mantels or to use in centers and sensory bins.
Choose pinecones that are intact and have no rotting parts. Remember to clean these well by soaking and in water and vinegar solution to remove dirt, bugs, sap, and mold.
Start by painting the pinecones with different colors and let them dry. Tie these together with a rope. Take the string and tie each one on the bottom part of the pinecone’s scale. Repeat this process until no pinecones are left.
Position all the pinecones on their base while the last one has its tip pointing forward. This part will be the head of the snake. Cut a red ribbon for the tongue. Attach the tongue and googly eyes using craft glue to complete the snake.
Use this craft on a sandbox for children to play. If possible, show children a picture of a spiky snake for them to compare its unique features with their pinecone crafts.
For this activity, you will need:
- Eleven pinecones
- Paint
- Paintbrush
- String
- Red ribbon
- Scissors
- Craft glue
For more information about this activity, go to KidsActivitiesBlog.com.
Conclusion
The snake crafts in this list are simple and can be done by children with varying skills. Let children explore the wonderful world of reptiles through these activities. Use books, games, and these crafts to have fun while learning.
By doing this, children are less likely to be scared because they are more informed about the animals. Thank you for reading!
Other preschool activities you might be interested in:


