Children are always interested in topics relating to space. This includes planets that children are eager to learn. Let children look closer at these astonishing celestial bodies and help them gain interest and understanding while having fun.
Check out these ten crafts that will surely excite budding space scientists and be eager to explore.
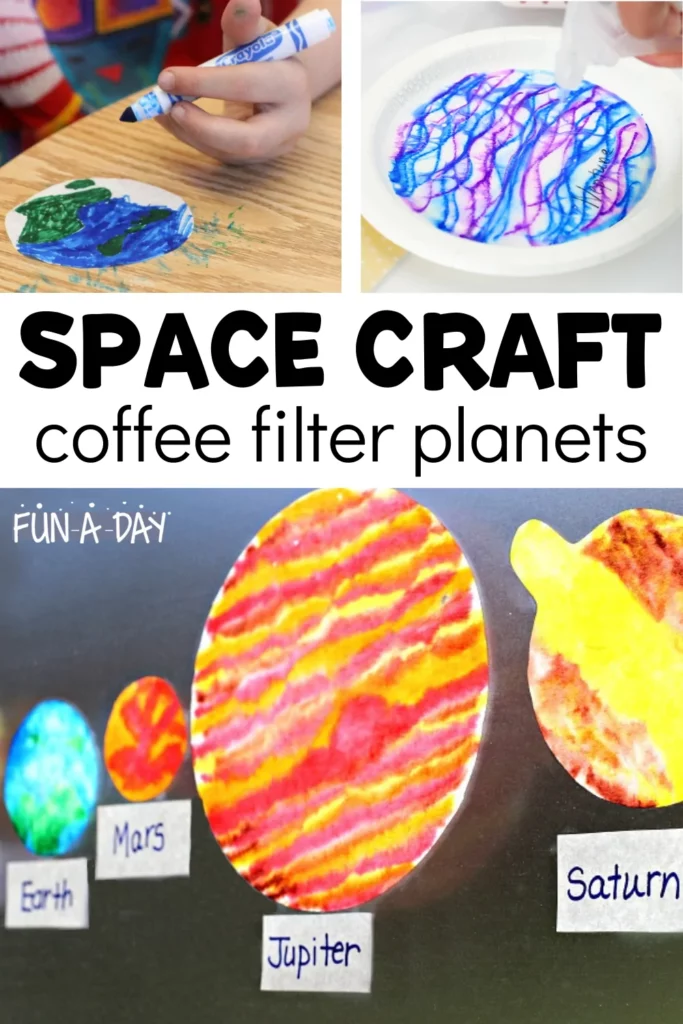
These planet crafts can double as artwork with their colorful abstract design and the varying swirls that mimics the planets’ appearance from afar. Children can learn the name of the planets and increase their vocabulary with this craft.
They can learn color mixing and improve their color recognition and fine motor skills as they complete this craft. It is also an excellent Science experiment showing how color spreads when sprayed with water.
Have the children cut off the ribbed edges of the coffee filters. Doing this step will leave them with flat circles. Let them place each circle on a paper plate.
Have them use the water-based markers to add lines or squiggles. The goal is to ultimately add color to the paper.
Next, have them use a spray bottle and lightly spritz their work with water. The colors will bleed on the paper and will create an interesting texture on the paper.
For this activity, you will need:
- Coffee filters
- Scissors
- Paper plates
- Markers
- Contact paper
- Spray bottle
For more information on this activity, go to Fun-A-Day.com.
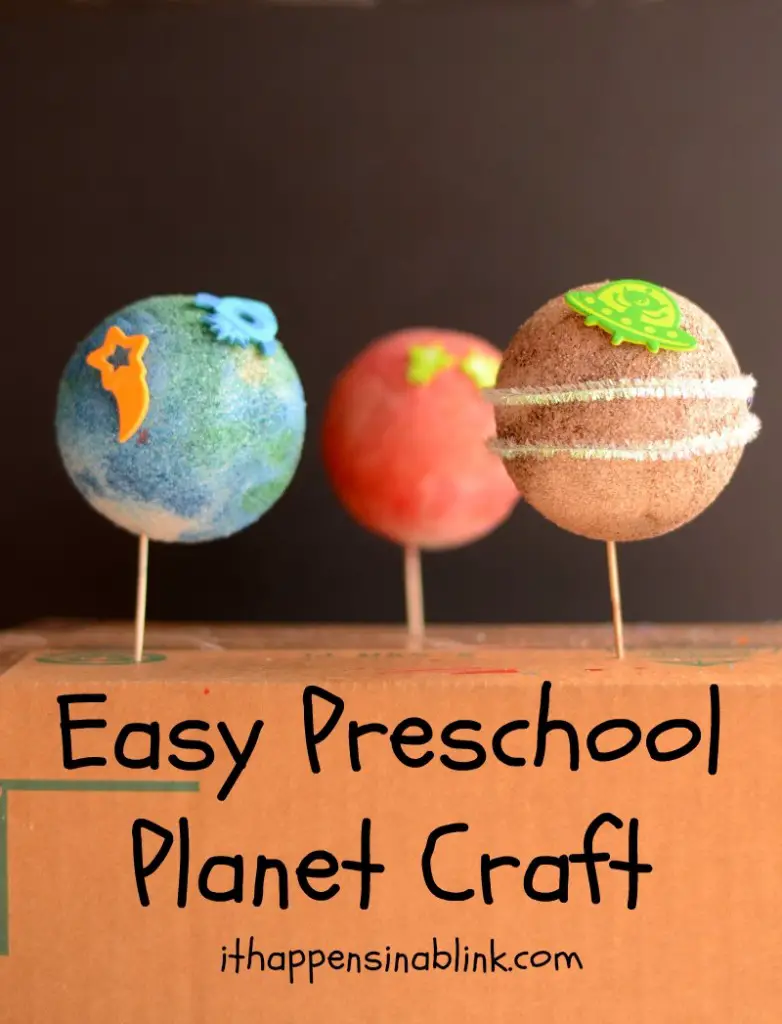
This planet craft provides a 3D version of the eight planets we have in our solar system. Painting the Styrofoam balls will help children improve their fine motor skills and coordination.
This is a perfect craft to explain that planets are not a circle but spherical. Extend this activity by having the children make all the planets and arrange them in the correct order. This will help children better understand what these planets look like in outer space.
Have the children insert a toothpick into the Styrofoam balls. Let them choose a planet and paint the ball until fully covered. The site suggests using pictures or books as a reference for colors.
Stick the toothpick on a cardboard box while drying. Next, have the children use the space-themed sticker to decorate their planets. Let them use pipe cleaners for planets that have rings on them. Have them wrap the pipe cleaner around the ball.
For this activity, you will need:
- Styrofoam balls
- Paint
- Paintbrushes
- Space-themed foam stickers
- Pipe cleaners
- Toothpicks
- Cardboard box
For more information on this activity, go to ItHappensInABlink.com.
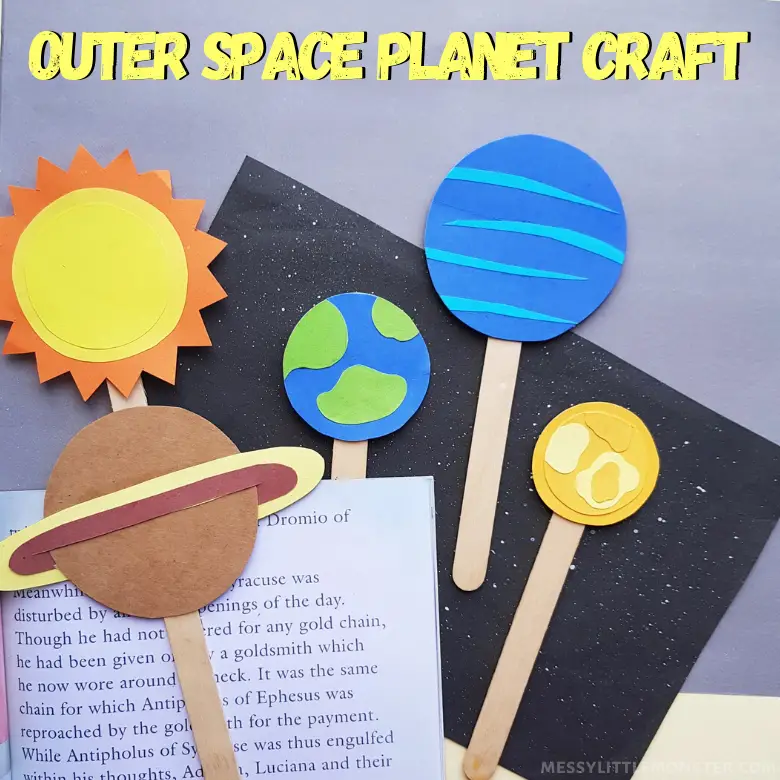
These bookmarks serve a double purpose. These can teach planet names to help increase children’s vocabulary. These are perfect for science centers where children can arrange them in order or use them when reading books about outer space.
This craft will help improve their fine motor skills and learn about colors and shapes. Use books and videos to introduce children to different facts.
Let the children choose an appropriate colored paper based on the planet that they will make. For example, Earth should be blue and green to represent the bodies of water and landforms. Use pictures and videos as visual aids for this step.
Let them trace a round object on the blue paper and cut this out. Next, have them cut out shapes that resemble the land from the green paper. Let them stick these on the blue circle. Finally, attach the craft stick to the back of the planet. Do this with all the planets for a set you can use in different ways.
For this activity, you will need:
- Colored craft paper
- Craft sticks
- Glue
- Pencil
- Scissors
For more information on this activity, go to MessyLittleMonster.com.
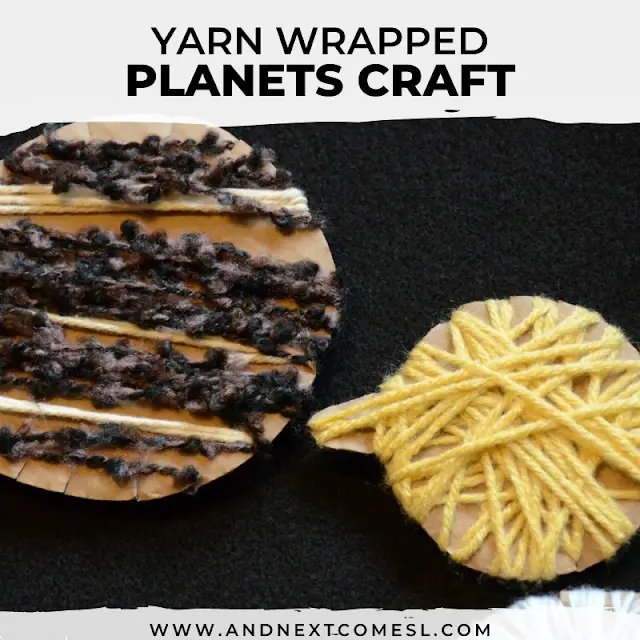
Wrapping yarn on cardboard may sound too simple, but it will help strengthen children’s hand muscles and improve their fine motor control and bilateral coordination.
This activity also provides a wonderful sensory experience for children and helps improve their focus.
Start this activity by tracing round objects on cardboard. There are no exact measurements for the planets. Use books and pictures to estimate their size.
Let the children cut these out. Next, let them cut several slits on the edge of the circle. This will tuck the yarn in and keep it in place.
Let the children wrap the yarn around the cardboard. The site recommends using the right colors for each planet and chanting “wrap, pull” to cue the movement. Demonstrate the movement for children to copy.
Assist children if necessary. Do the procedure step-by-step for children to fully grasp the idea. Have them occasionally insert the yarn on the slits to ensure it will not unravel.
For this activity, you will need:
- Cardboard
- Yarn
- Scissors
For more information on this activity, go to AndNextComesL.com.
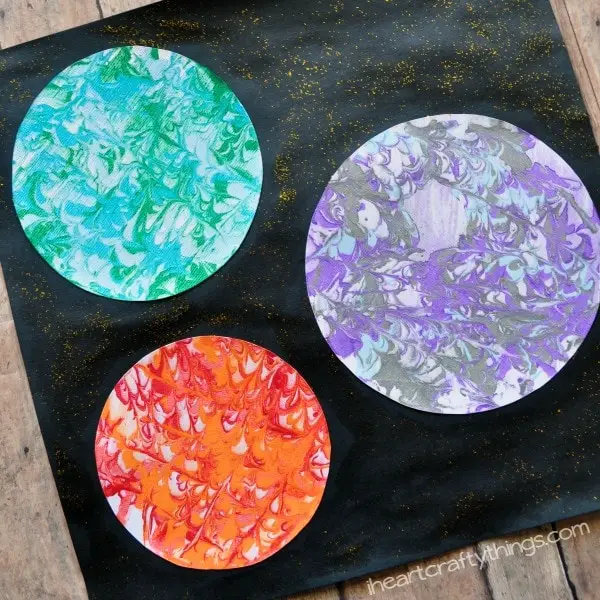
Create a marbled effect on paper using paints and shaving cream. Using shaving cream in this process art provides a wonderful sensory experience for children.
With this activity, children can learn about colors and color mixing. It will also help with fine motor skills and coordination.
Have the children trace different sizes of round objects on white cardstock. Let them cut these out. Next, have them squeeze ample shaving cream on a foil container and squirt paint on it.
Let them use the toothpick to spread the paint on the cream by moving it up and down or side to side to create the marbled finish.
Next, have the children press their circles on the shaving cream and carefully lift them out. Assist them as they use the squeegee to scrape off the excess cream and paint on the paper.
Have them sprinkle some gold glitter and glue the planets on black cardstock.
For this activity, you will need:
- Cardstock
- Paint
- Shaving cream
- Foil container
- Rubber spatula
- Toothpicks
- Squeegee
- Gold glitter glue
- Paint sponge
- Glue
For more information on this activity, go to IHeartCraftyThings.com.
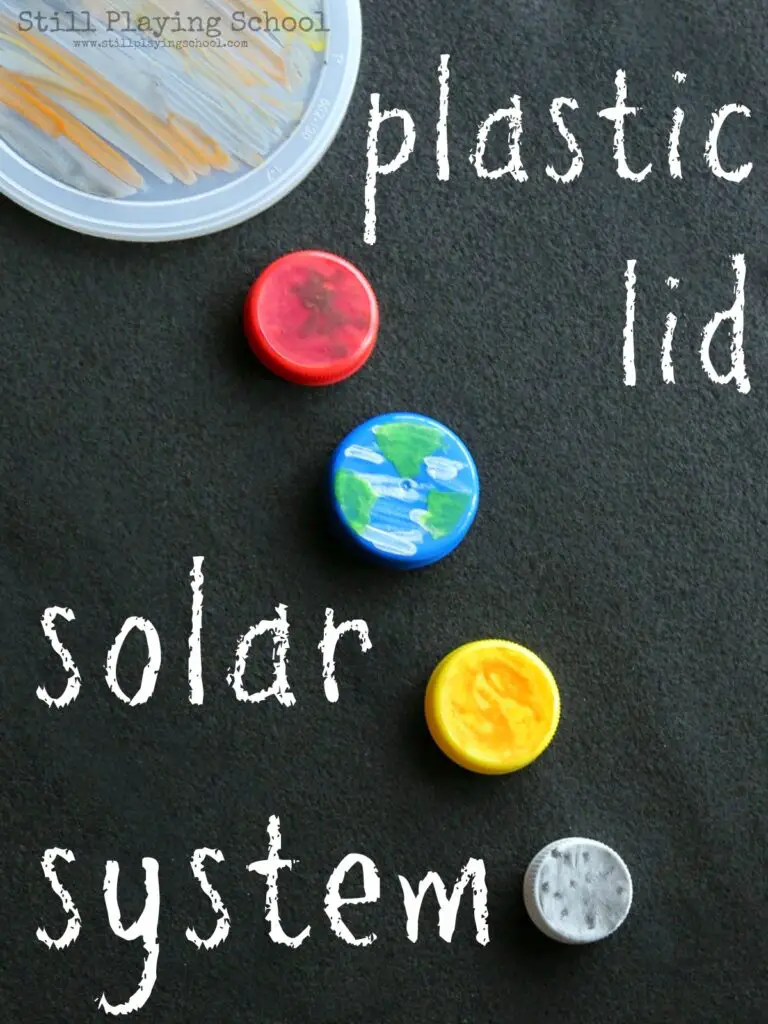
Recycle bottle caps and plastic lids with this activity that teaches children about the solar system. This recycled craft is perfect for sensory bins, busy bags, and for centers.
The site suggests using these for water play as bath time toys and singing songs to help children remember the planets’ names.
Children may also arrange the planets in order or sort the caps and lids according to color or size. They can match similar-looking bottle caps or stack them up to help with fine motor coordination and control.
Preparing this craft will require the use of a heat gun. Ensure that preventive measures are taken for this step.
Use clean bottle caps and lids. Heat them with a heat gun so the crayon would stick to the warm plastic. Next, have the children use their crayons to create lines or stripes.
For the planet Saturn, lightly melt the bottle cap and attach the rubber band for its rings.
For this activity, you will need:
- Bottle caps
- Plastic lids
- Embossing heat gun
- Crayons
- Rubber bands
For more information on this activity, go to StillPlayingSchool.com.
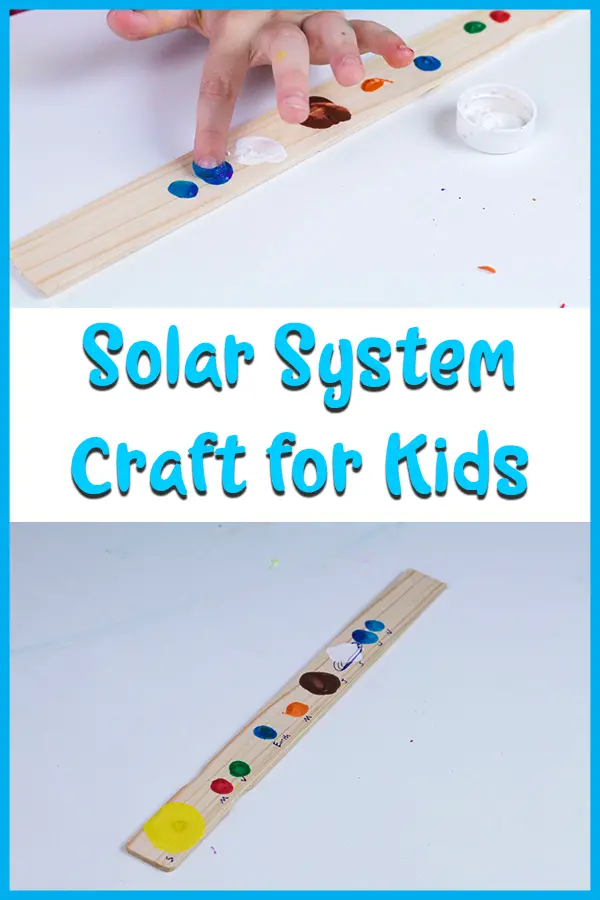
Finger painting is good sensory activity to help develop children’s fine motor skills, coordination, and control. This activity is excellent for learning about colors, planets’ names, and their order.
Prepare the paint stick by sanding it smooth. Ensure that there are no splinters or cracks on the stick. Next, use a damp cleaning cloth to wipe off the dust.
Squeeze paints on a palette or in small containers. Have the children dip their fingers and press them on the paint stick.
Use a solar system diagram to guide children on the order of planets.
Let them start with yellow for the sun, followed by red for Mercury, green for Venus, blue and green for Earth, orange for Mars, brown for Jupiter, white for Saturn, blue for Uranus, and blue for Neptune.
Remind children to make the sun big and Jupiter larger than the other planets. Let the paint dry, and add the rings on Saturn and Uranus.
For this activity, you will need:
- Paint stick
- Washable paint
- Marker
- Sandpaper
- Cleaning cloth
- Palette
For more information on this activity, go to DarcyAndBrian.com.
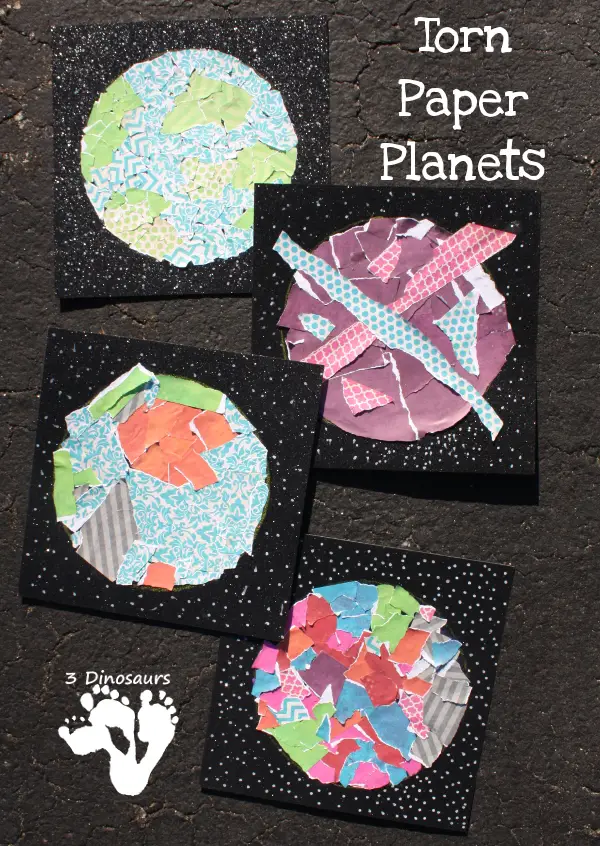
Encourage children to think creatively with this torn paper planet. Introduce children to the collage art technique with this craft. These collage planets are inspired by the book “Mousetronaut Goes to Mars” by Mark Kelly.
Reading the book lets children think of a unique planet they want to visit. Let children name their planets and describe them. These tasks will help improve children’s oral language skills.
Tearing the paper will help strengthen their hand muscles and improve fine motor coordination and control.
Let the children trace the paper plate on the black glitter paper using a yellow crayon to make the outline visible. Next, have them choose the scrapbooking paper that they want to use and let them tear these in different ways.
Let them glue the torn papers until the circle is fully covered with different patterns and designs. Have them use a white marker to draw the stars around the planet.
For this activity, you will need:
- Black glitter paper
- Paper plate
- Crayon
- Scrapbooking papers
- Glue
- Marker
For more information on this activity, go to 3Dinosaurs.com.
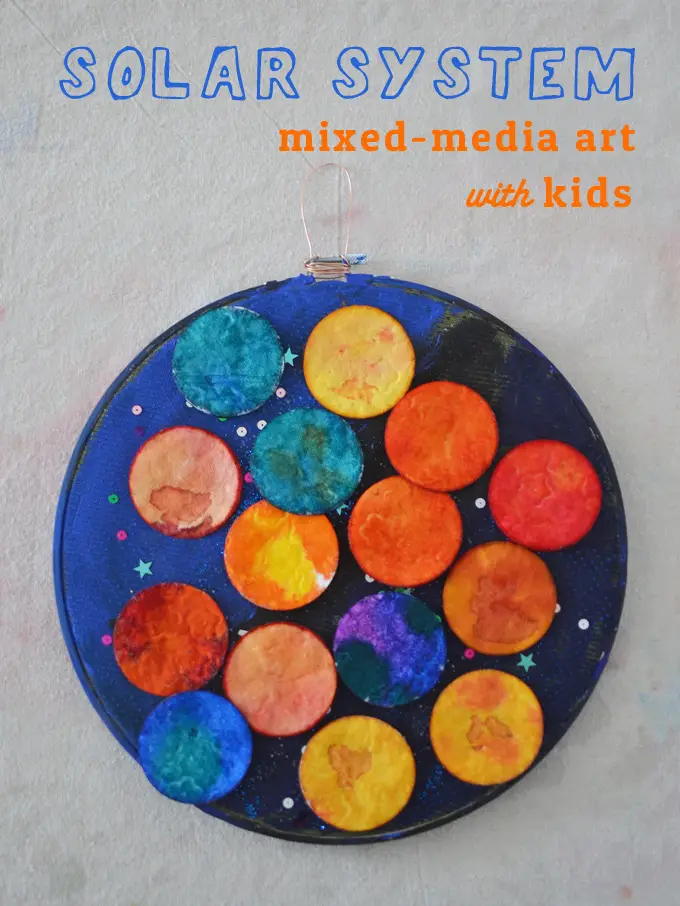
Mixed-media art employs different techniques and uses various materials that are great for children to be exposed to. It encourages children to be creative and broaden their choices in using materials to create artwork.
Children can learn about different colors and color mixing. Using pipettes to add colors will help improve their hand-eye coordination and fine motor skills.
Lay the cotton rounds in a craft tray. Prepare the liquid watercolors and pipettes for children to use. Fill the small jars with warm water and add drops of liquid watercolor. Mix thoroughly to combine.
Have the children use the pipettes to add colors to the cotton rounds. Let these dry overnight. Next, place the scrap fabric in the embroidery hoop, pull until tight, and secure it with a hot glue gun.
Let the children paint these and sprinkle glitter and sequins before drying them. Finally, have them glue the cotton rounds on the hoop.
For this activity, you will need:
- Cotton rounds
- Pipettes
- Liquid watercolors
- Embroidery hoop
- Fabric scrap
- Scissors
- Hot glue gun
- Paint
- Paintbrush
- Glue
- Glitter
- Sequins
- Craft wire
- Craft tray
- Small jars
For more information on this activity, go to ArtBarBlog.com.
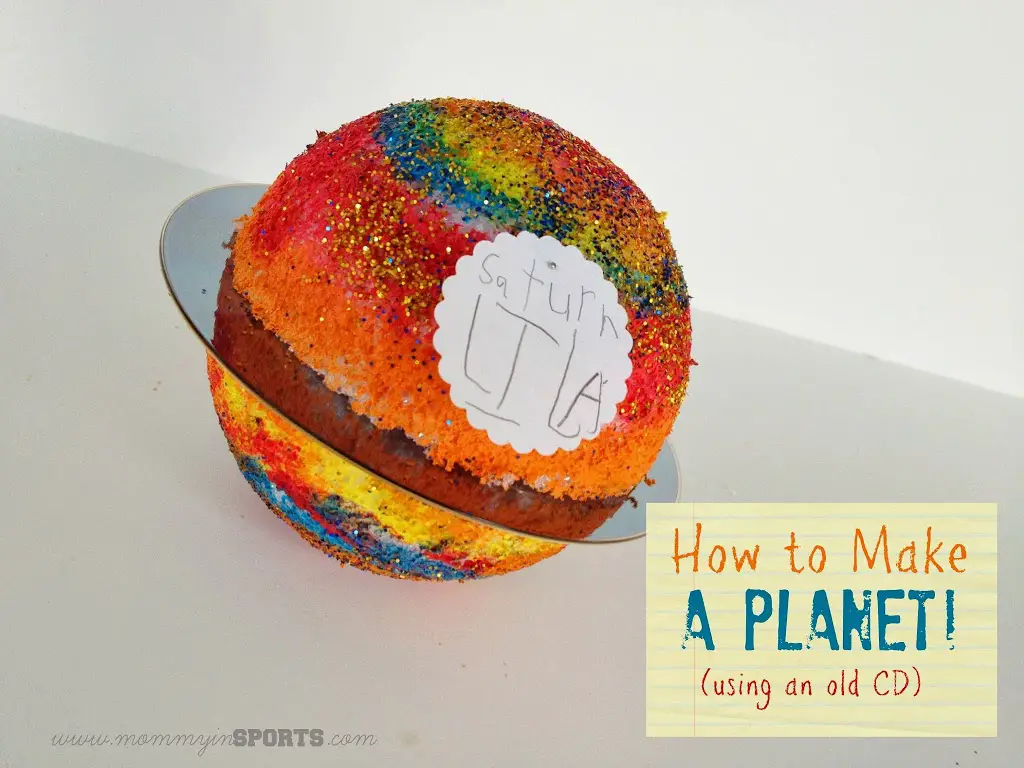
Children will make their personalized planets with this craft. This is a great activity to help children differentiate the circle and sphere shapes. They can learn colors and color mixing with this craft.
Let them describe their planets and their features to help encourage creativity and improve their oral language skills.
Use a craft knife to cut the Styrofoam ball in half. Squeeze some paint in the palette and let the children paint both halves. Encourage them to make their planets colorful by layering the colors.
Allow children to sprinkle some glitter if they prefer. Let this dry.
Next, use hot glue to attach a half ball to a CD. Insert a toothpick in the middle and add hot glue to secure it. Push the other half ball on the toothpick to complete the sphere.
Extend the activity with a discussion about the rings on some planets. Use videos or show pictures for this part.
For this activity, you will need:
- Old CD
- Styrofoam ball
- Paint
- Paintbrush
- Toothpick
- Craft knife
- Palette
- Hot glue gun
- Glitter
For more information on this activity, go to KristenHewitt.me.
Conclusion
These planet crafts are a delight to make and even more exciting to look at. These crafts are adaptable to fit different children’s abilities and interests. Support children’s creative thinking as they learn more about Space Science.
Thank you for reading. Come back and check out our other craft articles soon.
Other resources you might find helpful:


