Our world is filled with different colors. These affect one’s visual perception. Children can describe an object, animal, or food based on color. They can associate colors with certain things.
Children can also understand that colors may vary not just in name but also in their hue.
These ten color mixing activities will help children understand the concept of mixing colors to create a new one.
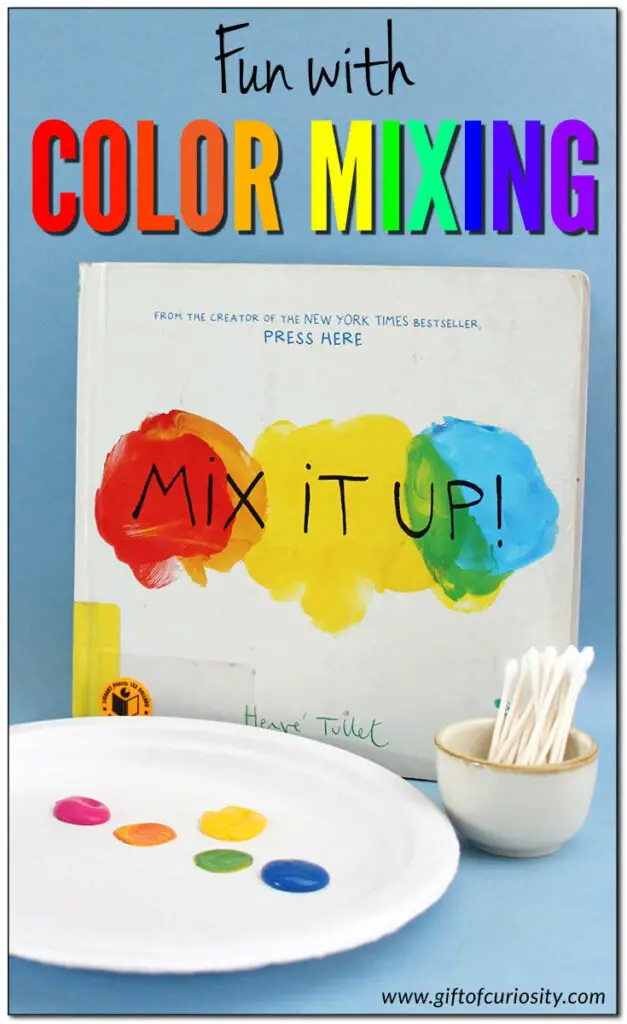
Inspired by the book “Mix It Up” by Hervé Tullet, this color-mixing activity allows children to relive the story by turning each page into an interactive task. Children will learn about the primary, secondary, and tertiary groups of colors.
The book encourages children to use their fingers to mix the paint. This step will provide a sensory experience for them. However, the site suggested using cotton swabs to mix the colors for children who do not want to touch the paint.
Using the swab will help improve their three-finger grasp and coordination once they start manipulating it to combine the paint. Instead of using the words red, yellow, and blue for the primary colors, the site suggests using magenta, yellow, and cyan.
Take a paper plate and squeeze a small amount of the paint. Ensure that there is a space between the colors and they are lined up. Doing this will make it easier to find the secondary and tertiary colors.
Next, have each child take a cotton swab to take some blue and yellow paint. Place these across the primary colors. Mix them and let children discover the new color.
Do the same with blue and red. Follow the instructions in the book to form the new colors.
For this activity, you will need:
- Paper plate
- Tempera paints in red, yellow, and blue
- Cotton swabs
For more information, go to GiftOfCuriosity.com.
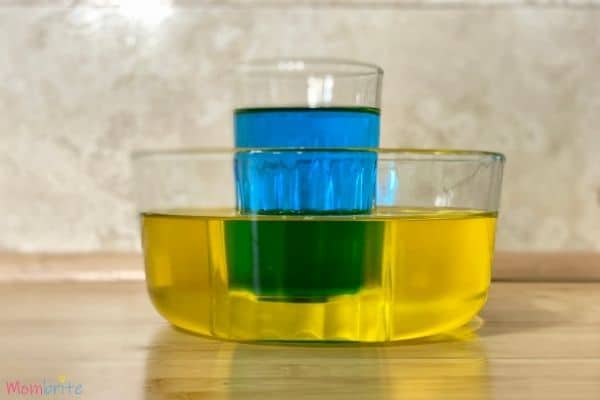
Like magic, this water and color experiment will delight kids of all ages. It is simple and can be done even by young children. Provide assistance and caution for the young ones when using fragile materials.
Children will learn that mixing primary colors will result in a secondary color through this Science activity.
Pouring water in bowls and drinking glasses will help strengthen their hand and arm muscles and enhance their control and coordination skills.
Download and print the free color worksheet from the site. The worksheet asks, “What happens when primary colors mix?” Children will answer the question by using markers or crayons to color the circles.
Start the experiment by pouring enough water to fill half of the bowl. Add a drop or two of yellow food coloring and stir with a spoon.
Next, pour water into the drinking glass until almost full. Add a drop or two of blue food coloring and stir.
Teach inferencing skills by letting the children think about what would likely happen to the colors if the glass is placed in the bowl. They can answer the worksheet with their hypothesis.
Place the glass in the bowl and look through the bowl to see the new color. Repeat the process with blue and red and with red and yellow.
For this activity, you will need:
- Liquid food coloring
- Clear glass bowl
- Clear drinking glass
- Water
- Printed color worksheet
- Spoon
For more information, go to MomBrite.com.
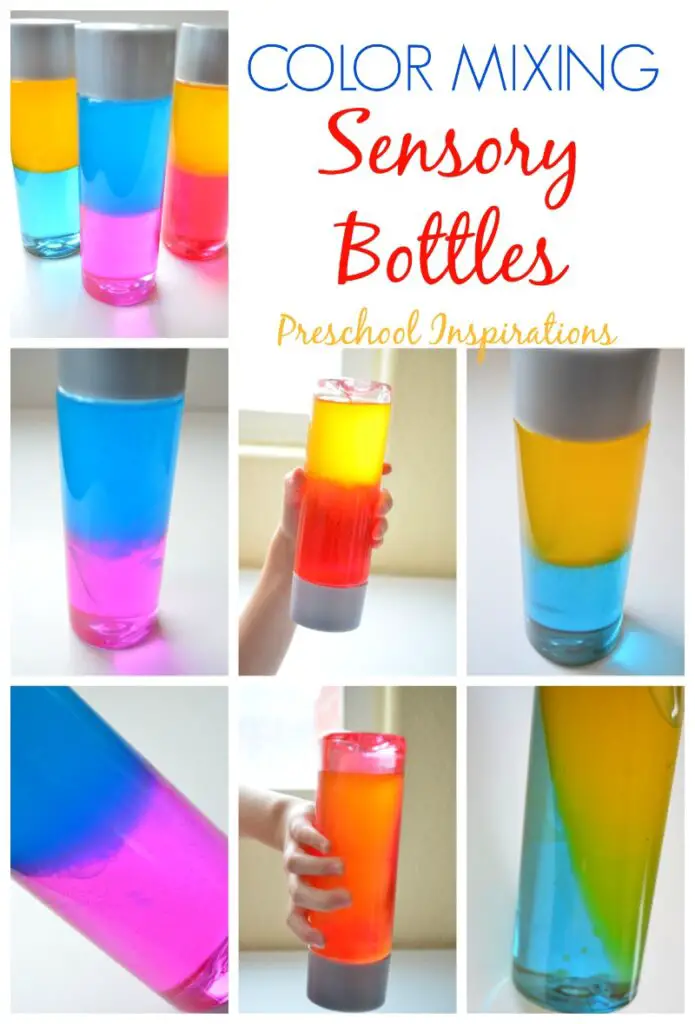
These sensory bottles provide a learning experience that will help children understand the concept of color mixing. It also provides a visually stimulating activity for children that are perfect for centers and discovery areas.
They can also be used in calming areas to provide a brain break for highly stimulated children. Looking at the liquid flow and mix may provide a calming effect on children.
Pouring liquid in bottles will help their fine motor skills, control, coordination, and focus. Ensure that the bottles are cleaned and sanitized before use.
Pour about half a cup of corn syrup into a measuring cup and add three to five drops of liquid blue watercolor. Stir well with a spatula to blend the color well. Transfer in the bottle using a funnel. Repeat the process with magenta and red watercolors.
Next, place a half cup of mineral oil in a clean measuring cup and use the spatula to dab on the yellow candy dye. Mix well to add color. Transfer the oil to the bottle. Note that the bottles should not have the same color.
Seal the bottles with a hot glue gun or a strong adhesive.
For this activity, you will need:
- Liquid watercolors in magenta, red, and blue
- Candy dye color set
- Mineral oil
- Corn syrup
- Clear water bottles
- Mixing bowl with spout or measuring cup
- Two funnels
- Spatula
- Hot glue gun
For more information, go to PreschoolInspirations.com.
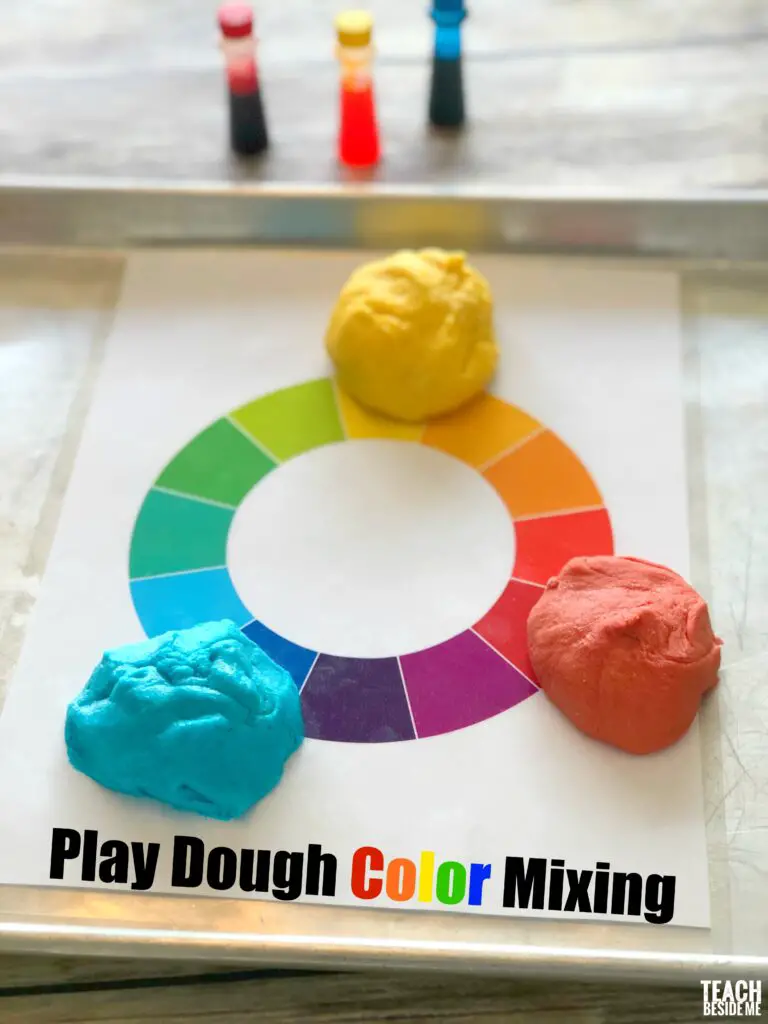
Making the play dough from scratch is a fun activity that provides a wonderful sensory experience for children. This activity will help strengthen their hand muscles and fine motor skills.
This activity requires children to mix the playdough in primary colors to form secondary colors. Allow children to work on this task independently. Use verbal instructions to help enhance their listening skills and follow directions.
Using tools such as cups and tablespoons will help children learn measuring skills, which is an important Math skill.
Start by downloading and printing the free color wheel from the site. Laminate this for durability.
Ensure that the bowl is clean and dry. Let children measure five cups of flour. Place the flour in the bowl. Add two cups of salt and mix well. Next, take two tablespoons of oil and two cups of cold water.
Carefully mix everything well until the dough is formed. Divide the dough into three parts and place each one into a Ziploc bag. Add a few drops of food coloring.
Ensure that the bags are well-sealed before having children mix the color in the playdough to prevent the mixture from seeping out. Once the doughs have the right color, open the bags and take a small chunk of the blue and yellow to mix.
Mix the dough and find out what new color it will become. Use the color wheel to find its identical color.
For this activity, you will need:
- Five cups of flour
- Two cups of salt
- Large bowl
- Two tablespoons of oil
- Two cups of cold water
- Food coloring in red, blue, and yellow
- Printed and laminated color wheel
- Ziploc bags
For more information, go to TeachBesideMe.com.
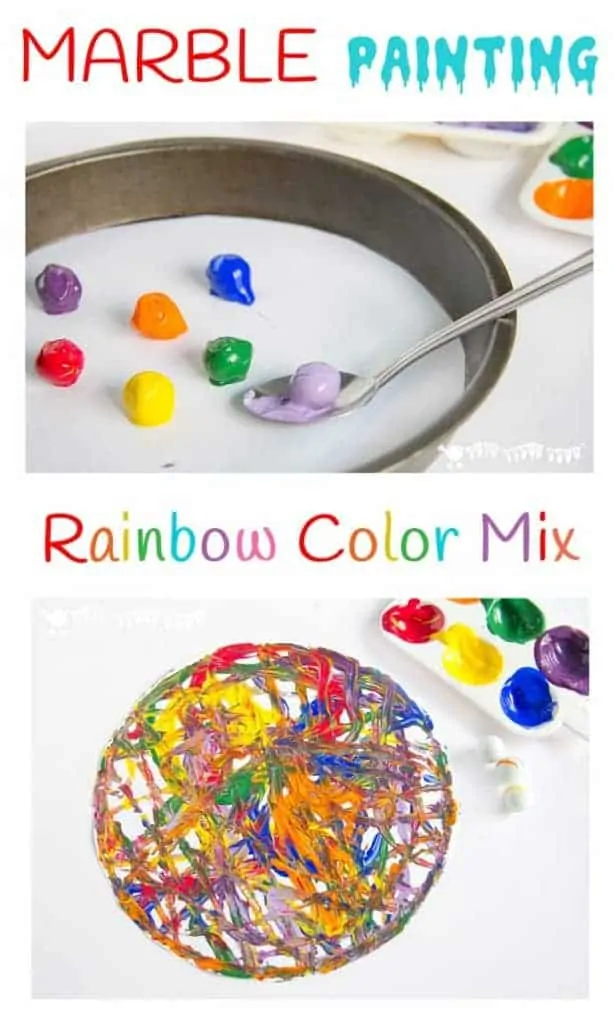
Marble painting is a process art that teaches children the concept of mixing colors while creating artwork. Their hand control and coordination are enhanced as they move the baking tray. This is also a wonderful sensory experience for children.
Coating the marbles with paint and scooping them will help children improve their fine motor skills. Let the children have fun watching where the marble will go as they move the tray.
Take a piece of white paper and cut it to the size of the inside part of the baking tray. Place the paper in the tray and set it aside.
Next, squeeze a good amount of paint on the palette, just enough to cover the marbles. Place a marble in each color and a spoon to coat them fully. Remember to use one spoon for every color.
Next, scoop out the marbles and place them in the tray. Let the children hold the tray and move it around to transfer the paint onto the paper. The site suggests using primary colors first for children to determine what colors can come from them.
Let the paint dry before hanging the artwork for everyone to see.
For this activity, you will need:
- Marbles
- Acrylic paints
- Palette
- Plastic spoons
- Paper
- Scissors
- Baking tray
For more information, go to KidsCraftRoom.com.
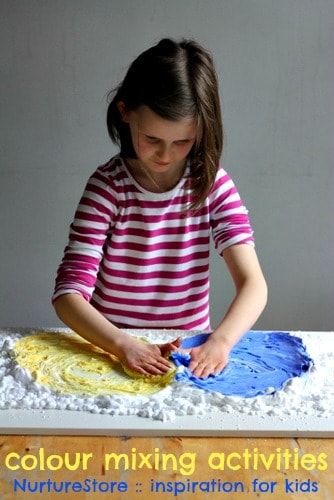
Playing with shaving foam provides a sensory experience for children. The creamy and fluffy texture makes this activity fun and exciting for the young ones.
Their hand coordination and fine motor control will improve as they mix the color with the shaving foam. By modeling, this activity can teach directional movement, such as clockwise and counterclockwise.
Children can use the shaving foam to practice writing letters, numbers, or even their names. They can also draw shapes and simple illustrations using their fingers.
Start by choosing where to squeeze the shaving foam. Ensure that it is clean and dry. Squeeze the can of shaving foam and let the children spread it well. Next, divide the area and squeeze some paint on the foam.
Place some blue on the left part of the tray and yellow on the right. Let children use their hands to mix the color with the foam. Let them flatten their hands as they do a circular movement.
Once the colors are mixed, let the children combine the yellow and blue foam to make it green. Repeat the process using other color combinations.
For this activity, you will need:
- A can of shaving foam
- Tempera paints in red, yellow, and blue
- A large tray or any washable flat surface
For more information, go to NurtureStore.co.uk.
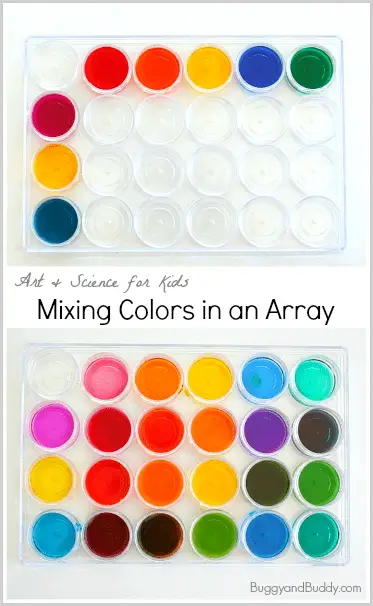
This activity will answer the question, “How many new colors can be made by combining the available colors?” This wonderful Science experiment will help children formulate hypotheses and think critically.
Aside from learning about colors and color mixing, children will improve their fine motor skills, control, and coordination as they transfer the fluids from one container to another using pipettes.
Ensure that the color container is lined up to show the arrays. If ice cube trays are unavailable, use small containers arranged straightly.
Place red, orange, yellow, blue, and green on the horizontal row in each compartment. While on the vertical row, place magenta, yellow, and turquoise.
Guide children by modeling how combining colors should be done. Have the children take the pipette and transfer some red from the horizontal row. Fill the rest of the compartments lined vertically with red.
Next, combine the red with the adjacent color on the vertical row. For example, red and magenta, red and yellow, and red and turquoise.
Let children observe how the color changes once they are mixed. The site suggests naming the new colors and testing what they look like once applied on paper or a different material.
For this activity, you will need:
- Liquid watercolors
- Pipettes
- Ice cube trays
For more information, go to BuggyAndBuddy.com.
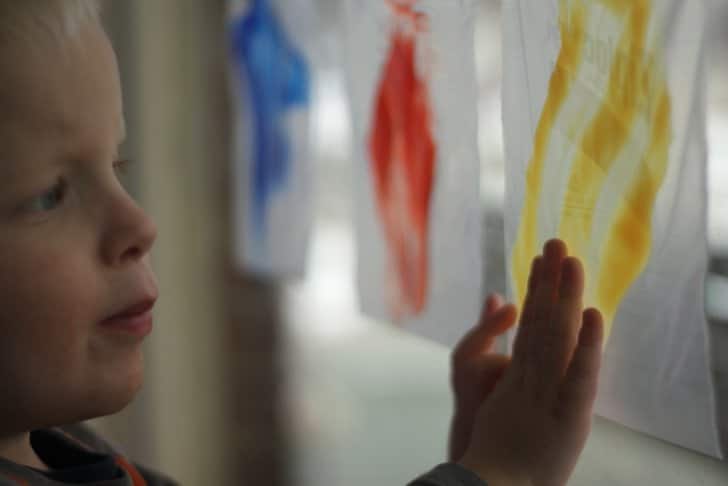
This color-mixing activity is perfect for young children who dislike touching wet materials like paint. It is simple to prepare, and children will enjoy mixing the colors without the mess.
The children’s finger muscles will strengthen as they spread the colors in the bag. Their control, fine motor, and hand-eye coordination skills will improve as they remove each bag and reattach it to combine colors.
Use this activity to go with the color book “Little Blue and Little Yellow” by Leo Lionni. It is a story about the mystery behind the new color formed when blue and yellow hugged each other.
Prepare each bag by squeezing an ample amount of finger paint inside. Use one bag for every color. Seal the bags tightly and use the painter’s tape to attach them to the window, lined up.
Ensure the window has light shining through for the color mixing results to be visible. Let children use their hands and fingers to spread the paint in the bag.
Next, have the children take one of the colors and place it on another. Let them observe the changes. Repeat this step with the other color combination.
For this activity, you will need:
- Finger paints in blue, red, and yellow
- Ziploc bags
- Painter’s tape
For more information, go to HandsOnAsWeGrow.com.
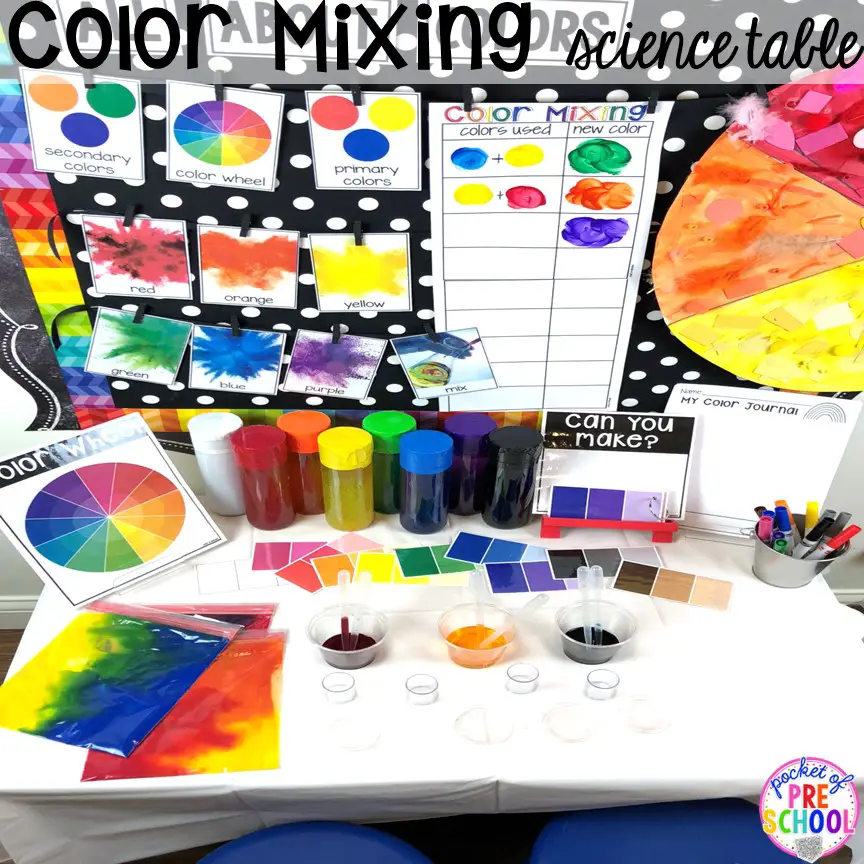
This color chart is a wonderful addition to any color-mixing activity. This helps children explore the different color combinations and provides a visual guide as they use it to record their observations.
Like scientists, they will learn to record their findings based on their experiments. Their fine motor skills will improve as they use their fingers to add colors to the chart.
Making recorded data will help improve children’s concentration, help them think critically, and learn about organizational skills.
Download and print the free color mixing chart from the site. The chart comes in a table with two columns and several rows. The first column is labeled color used. This is where children will put the colors that were combined.
Children may dab some paint on the chart and use a marker to write a plus sign to indicate the other colors used to make the combinations.
The second column is labeled new color. Write or use the resulting color combination to record the children’s findings.
Food coloring, watercolors, and other types of paints can be used for this activity.
For this activity, you will need:
- Printed color mixing chart
- Paints or food coloring
- Marker
For more information, go to PocketOfPreschool.com.
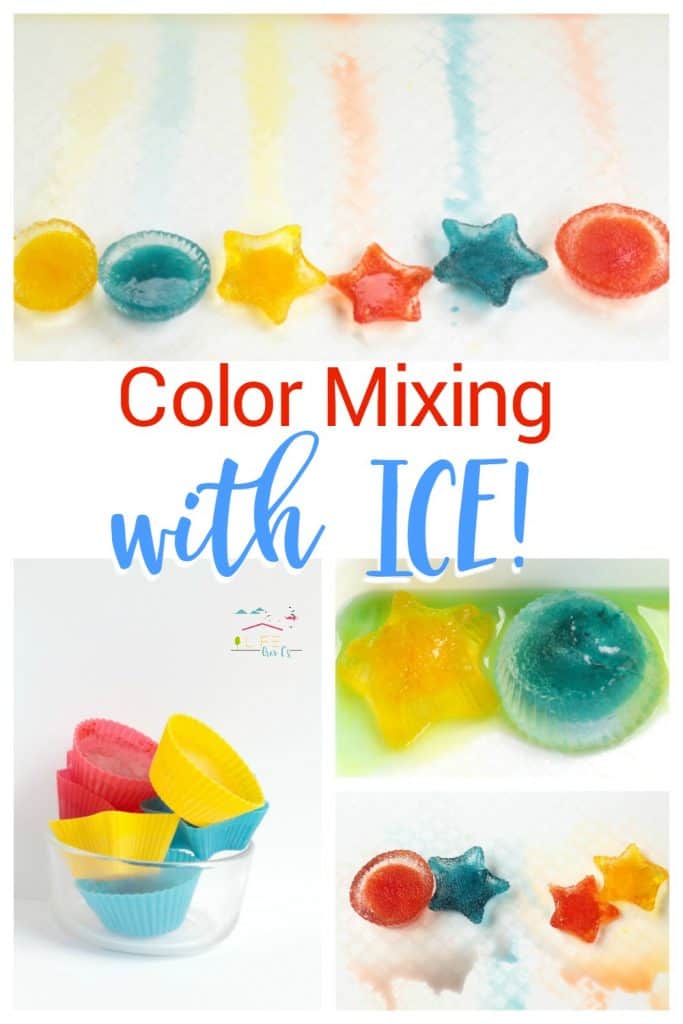
Making colored ice and letting it melt to mix colors is an ingenious way of teaching the theory of color mixing. Children can also learn about the changing states of matter with this activity.
As water hardens, the liquid will turn into a solid form, and once melted, it will return to its original state. This is a wonderful experiment for children to enjoy and learn.
The use of salt to hasten ice melting is another Science experiment the children will find delightful. Connect this activity in real life when salt is used for icy sidewalks to prevent accidents.
Using different silicone molds will also help children with their shape-recognition skills.
This activity requires some preparation ahead of time. Add enough water and several drops of food coloring to a measuring cup. Adjust the amount until the desired color is achieved.
Lay the silicone molds on a tray and carefully pour the colored liquid into them. Repeat the process using different colors. Freeze the molds for several hours or overnight.
Let the children unmold the ice and sprinkle salt to make it melt faster. Watch as the colored liquid mixes with other colors. Let children observe the new colors they will make.
For this activity, you will need:
- Small silicone molds
- Tray
- Water
- Food coloring
- Measuring cup
- Spoon
For more information, go to LifeOverCs.com.
Conclusion
Mixing colors to create new ones is a fun and exciting activity for children. Learning more about colors will help them understand the world that they live in.
With these activities, children will learn to observe, focus, and anticipate different possibilities through experiments. These are also multi-sensory activities that will help children experience learning in another way.
Thank you for reading!
People Also Ask
Color mixing is a visually stimulating activity that children will find enjoyable. They will understand that colors can be combined to create new ones. They will also understand how colors are grouped.
Children need to understand that the common colors they know belong to the primary, secondary, and tertiary groups of colors.
It is important to stimulate children’s inquisitive minds. Pose a question that will be answered as children perform color-mixing tasks. These will help them understand the concept of color theory while testing their hypothesis.
Use different visual aids such as color wheels and charts to help children learn about shades, warmness and coolness of colors, and the other combination.
Children will learn to investigate, search for answers, and discover new ideas when they engage in color-mixing activities.
Other activities you might like:


