It’s crucial for children to learn about triangles and other shapes as it prepares them to recognize numbers and letters and helps them organize visual information. It also hones their skills to identify, classify, and sort — essential skills necessary in math and science.
Instead of merely discussing triangles with your preschoolers, take on the activities below. These triangle-themed activities teach children about the shape in a creative and fun way!
Great Triangle Crafts for Preschool
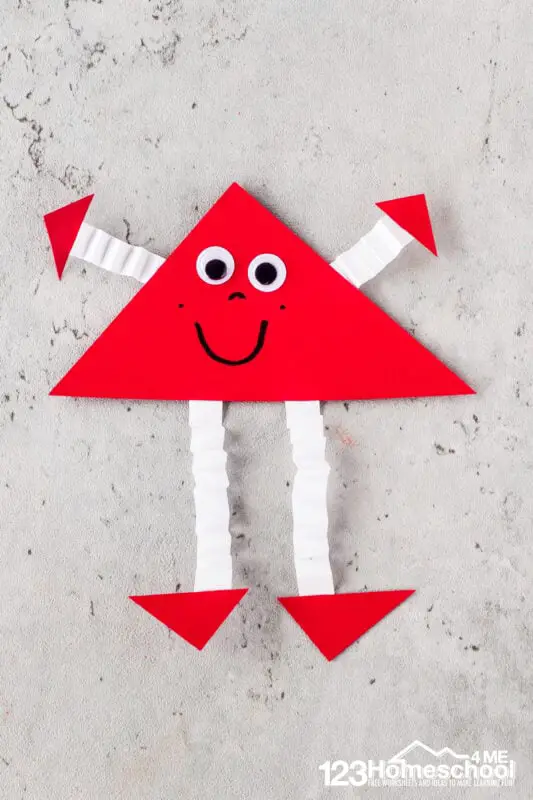
Besides requiring simple supplies, this activity is a fun way of teaching children shapes and colors. It’s sure to tickle their imagination as they can create their own monster, too!
Instruct the children to grab construction paper in a color of their choice. Show them how to cut a large triangle for the monster’s body and four small triangles for the hands and feet. Guide them in cutting strips of white construction paper for the monster’s arms and legs.
Next, let the children glue all of the pieces together to form the monster. Tell them to glue a pair of googly eyes and add other details, such as a nose, mouth, and some freckles.
Supplies:
- Different colors of construction paper
- Glue
- Googly eyes
- Markers
- Scissors
Check out the other monster crafts children can make from this project on 123homeschool4me.com.
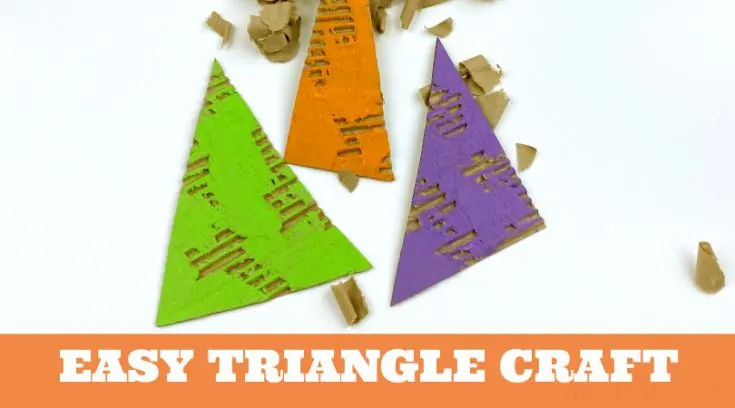
The triangles children make from this craft can be used in various ways: they can hang them in the classroom, on their Christmas trees at home, or glue them to the front of a card.
Using cardboard, cut different triangles and then puncture the cardboard using the back end of a paintbrush. Pinch and peel off the top layer to expose the inner binding of the cardboard. Repeat the same process on three separate cardboard triangles.
Distribute the triangles to the children and instruct them to paint the triangles with secondary colors. Since the cardboard triangles have uneven surfaces after you puncture them, it’ll be challenging for the little ones to coat their triangles with paint evenly.
Supplies:
- Cardboard
- Paint (purple, orange, and green)
- Paintbrushes
- Scissors
Learn more about this craft by heading to twitchetts.com.
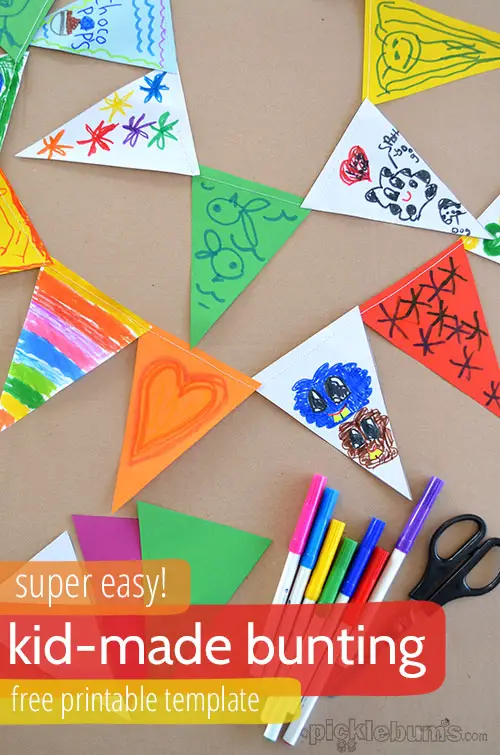
This is a great activity to keep the class busy. It’s best if you group them together, so they can finish their buntings faster!
Download and print the template, and trace it on white-colored construction paper. Cut all the triangles and then provide different coloring materials to the children. Instruct them to design the triangles in whichever way they want and give them a few hours to complete the task.
Once done, sew each group’s buntings and hang them around the classroom. This collaborative work of art will surely make the room more colorful!
Supplies:
- Coloring materials, like crayons and markers
- Construction paper
Visit picklebums.com to download the free template.
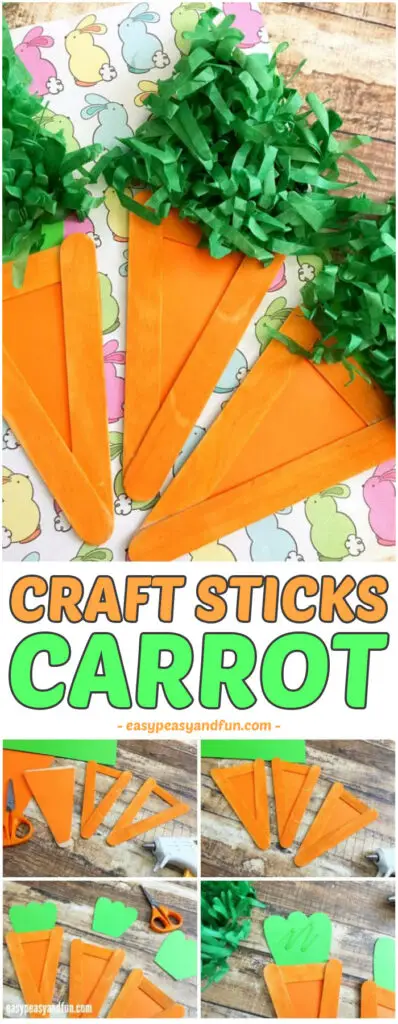
This easy-to-do activity is perfect for Easter. You can collect all of the carrots made by the class and make a garland out of them.
To begin, have the children cut a craft stick in half. Guide them to hot glue two jumbo craft sticks together to form a V and glue the small craft stick to the top to form a carrot shape. Let the children paint their carrots and set them aside to dry.
Tell the children to cut a larger triangle and hot glue it to the back of the carrot shape. Have them cut out a piece of faux grass and glue it to the top of the carrot to complete the project.
Supplies:
- Faux paper grass (green easter grass works great too)
- Hot glue/hot glue gun or regular school glue
- Orange and green paper (construction paper is best)
- Orange craft paint
- Scissors
For other easter-themed projects for preschoolers, check out easypeasyandfun.com.
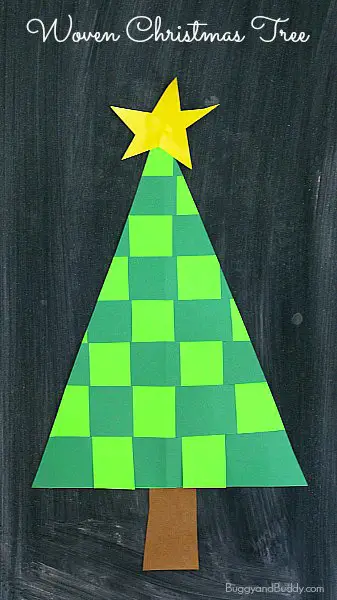
Decorating the classroom will be easier with this craft. You can use the Christmas trees made by the class as decorations and add some festive cheer to your classroom!
Have the children fold one sheet of green construction paper in half vertically. Show them how to cut 1” slits down the folded center without going all the way to the edge. Let them cut 1” strips from contrasting green paper.
Guide the children to weave the strips through the slits in the paper. Tear off strips of masking tape, create a triangular tree shape onto the woven paper, and cut. Flip over to the front and instruct the class to add a star and other embellishments, such as stickers, glitters, and pompoms.
Supplies:
- Construction paper or cardstock in contrasting green colors
- Glue
- Masking tape
- Scissors
- Optional embellishments: sequins, dot stickers, glitter, tissue paper
Head to buggyandbuddy.com for additional tips and tricks about this project.
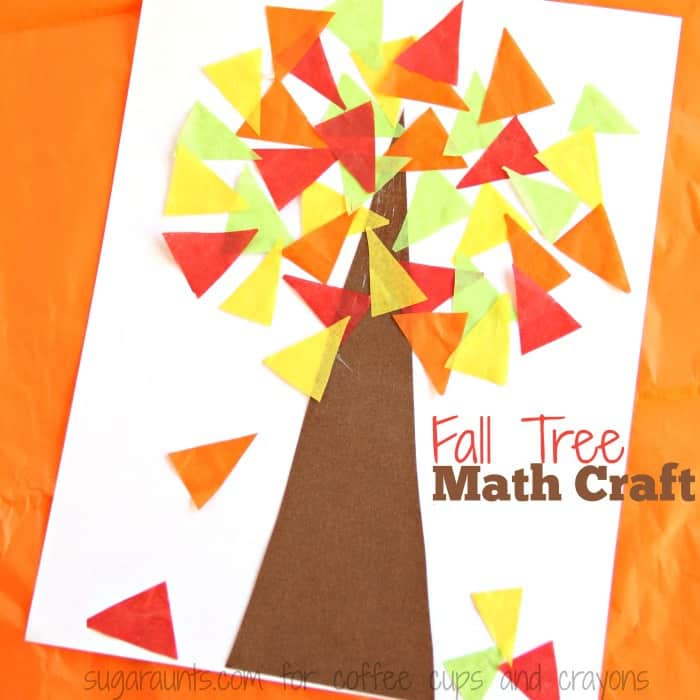
After making this craft, you can extend your class’s learning by letting them count the triangles on the tree or count each color of the leaves. You can make the process more fun by rolling a dice and letting the children glue the number of leaves shown on the dice.
Start by drawing light triangles on strips of colored tissue paper. Have the children cut triangles by following the lines you’ve drawn.
Next, instruct them to cut a large triangle from the brown paper to serve as the trunk of the tree. Glue the trunk to white paper and have them glue the triangle tissue papers above the trunk.
Supplies:
- Brown paper
- Colored tissue paper
- Glue
- Pencil
- Scissors
- White Paper
Coffeecupsandcrayons.com suggests other activities to supplement this craft, so make sure to visit their site today!
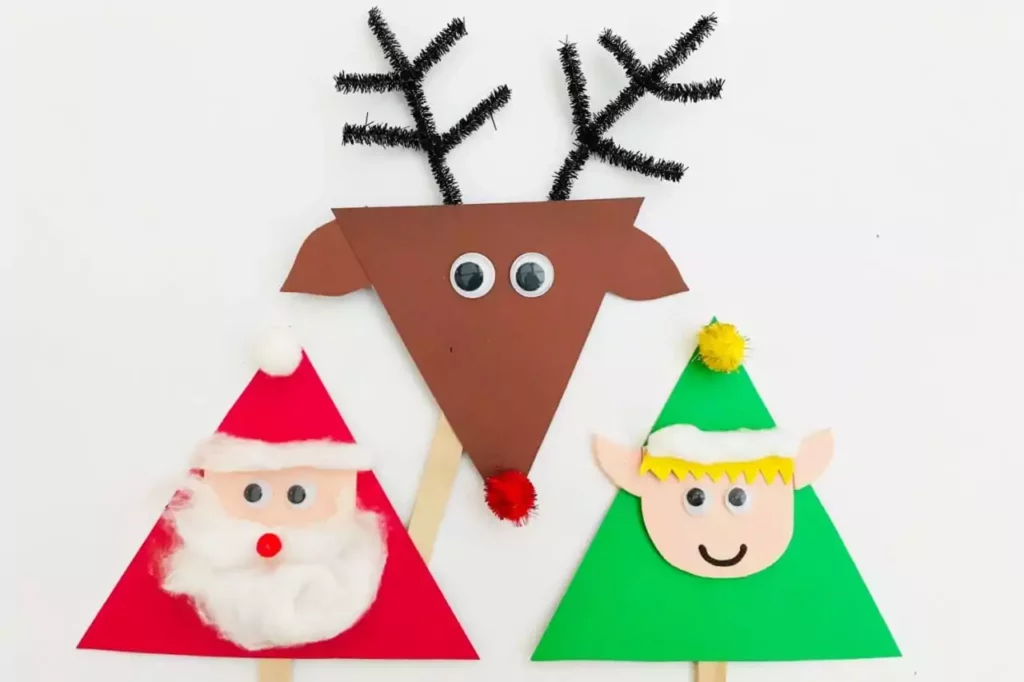
Children will love making these colorful cardboard Christmas crafts. They’re easy to make, encourage creativity, and children can play with them afterward!
Instruct the class to cut triangles from the card and then glue a lolly stick at the back.
Let the children cut different shapes using the card and glue them to their triangles to create different Christmas characters. They can make a Santa, elf, and a reindeer!
Supplies:
- Card
- Cotton wool
- Glue
- Googly eyes
- Lollipop sticks
- Pipe cleaners
- Pom poms
- Scissors
Visit masandpas.com and show the class how their puppets will look after completing this project.

This project can be used to introduce shapes or animals to the class. It uses very few materials and encourages children to mix and match different colors.
To begin, instruct the class to cut triangles in different sizes using different colored papers. Next, have them arrange the triangles to create a fish — a large triangle will be the body, a slightly smaller triangle will be the tail, and another small triangle will be the face. Have the children glue all the parts together and let them finish by adding googly eyes to their fish.
Supplies:
- Colored paper
- Glue
- Googly eyes
- Scissors
Show the class this video to help them complete the project faster.
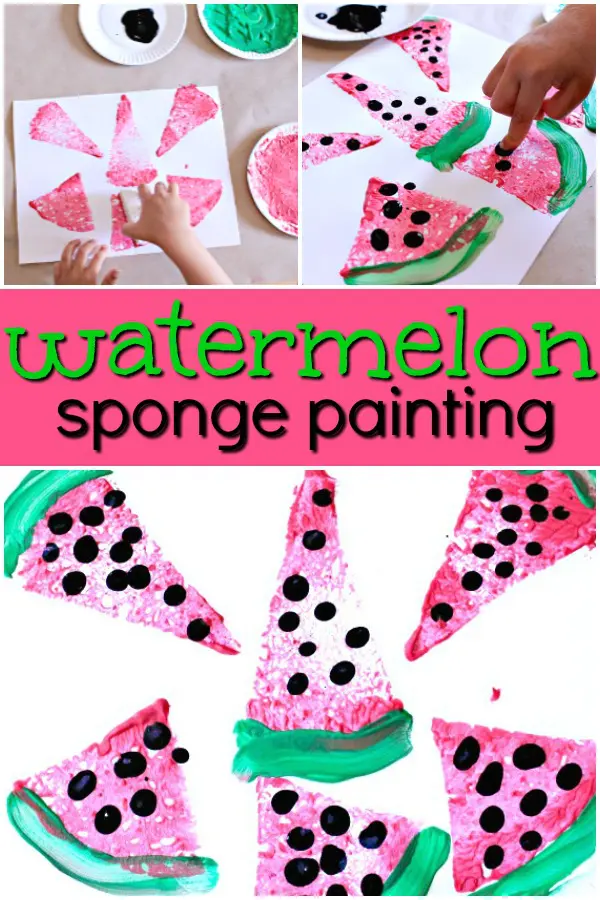
Your search for summer activities for preschoolers ends here. This project lets children create triangular-shaped watermelons using sponges, perfect for the summer season!
Cut several sponges into different triangles, rounding the bottoms to mimic the shape of watermelon rinds. Pour pink, green, and black paint onto small paper plates and prepare a heavy white cardstock for each child.
Instruct the children to create a picture of watermelon slices by covering one side of the triangular sponge with pink paint. Let them stamp the sponge onto the paper. For the rind, ask the children to use a paintbrush to draw it on.
For the seeds, tell the children to dip their finger in black paint and press it over the watermelon.
Supplies:
- Paintbrush
- Small paper plates
- Sponges cut in various sizes of triangles
- Tempera paint
- White Cardstock
Visit fantasticfunandlearning.com to learn other summer-themed activities that are sure to keep your preschoolers busy! Or, if you’re down for a similar activity, check out more watermelon crafts!
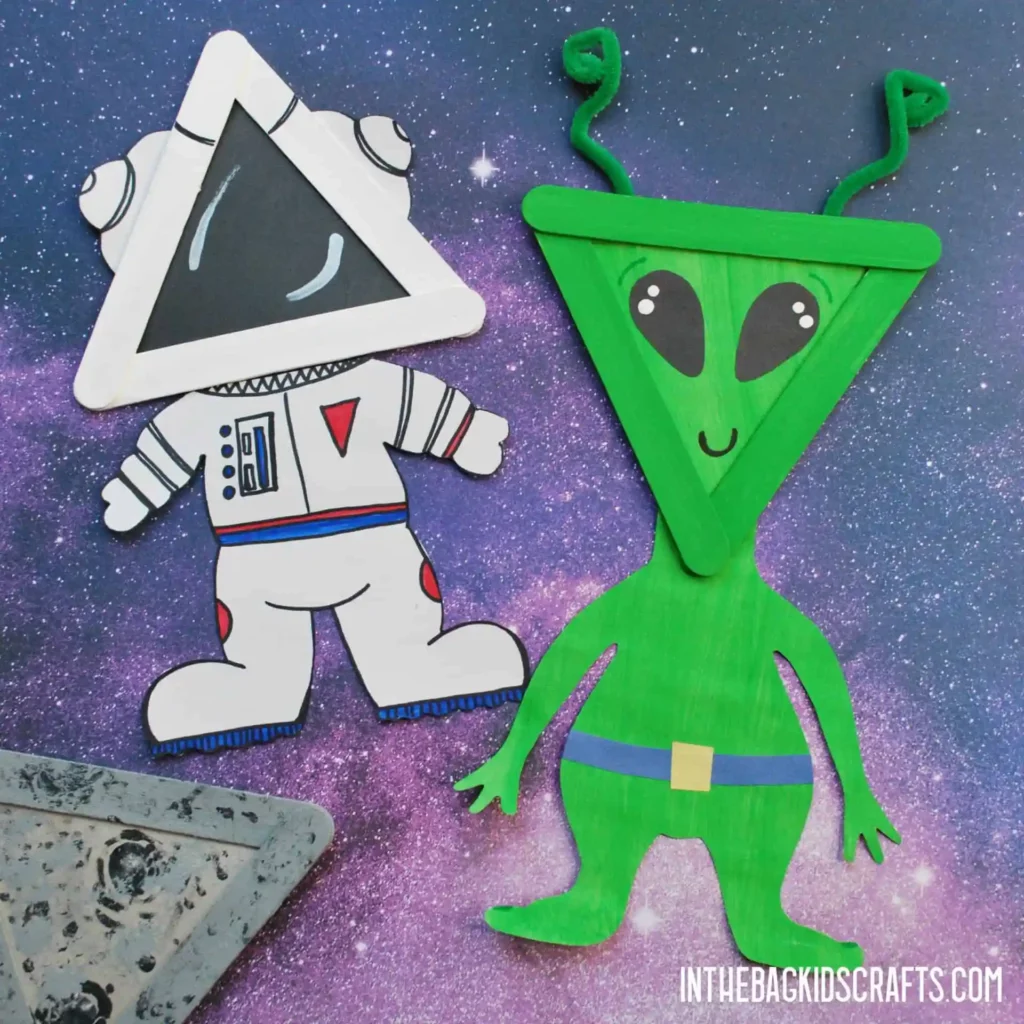
This activity will take the class on a galactic adventure as children will have to make their own space creatures. They can make astronauts and aliens, both with triangular-shaped heads.
To make the head of the astronaut or alien, have the children glue large popsicle sticks to form a triangle. Let them draw a slightly smaller triangle and glue it to the back of the frame.
Encourage them to add any details they want to their space character — whether it may be a large helmet for the astronaut or long ears for the alien.
As for the bodies, prepare a template and have the children trace and cut using construction paper. Tell them that they can design the bodies with their preferred color. Show the class how to glue the head and body together to complete this project.
Supplies:
- 3 Large popsicle sticks
- Black Sharpie Marker
- Clothespin
- Elmer’s glue
- Glue stick
- Green construction paper
- Green paint
- Green pipe cleaner
- Medium pompom
- Newspaper
- Scissors
- Scotch tape
- Scraps of black construction paper
- Templates for the alien and astronaut
Head over to inthebagkidscrafts.com to see how cool these space creatures look!
Related: Space Books and Space Worksheets for Preschoolers
Conclusion
With the activities mentioned here, your class will surely love learning about triangles. These triangle-themed activities are easy and fun to make and require minimal materials. Your class won’t even notice that you’re actually “teaching” them something!
To learn other preschool activities focused on different themes, visit our site regularly!
People Also Ask
We’ve added this section to make your life easier as a teacher. Here, we’ll answer some of the most common questions about teaching triangles to preschoolers. Use the information as your guide so you can implement your lesson plan on triangles as smoothly as possible.
One of the easiest ways to introduce a triangle to preschoolers is by showing them a triangle. Hold up a cardboard cut-out of a triangle and discuss its properties, like the number of sides it has. Don’t forget to cite things that are triangular shaped, so children can quickly identify the shape.


