Kids love balloons and even more, a balloon that can carry people! Hot air balloons are exciting and fascinating to people of all ages. If you are working on a science unit, you live near some balloon races, or you just want a fun, colorful craft for your preschooler, these hot air balloon crafts are just what you need.
We’ve collected some of the best hot air balloon crafts available from fingerprint balloons to spinning balloons and even crafts made from recycled materials! Choose from the variety of options we’ve provided for a fun, engaging craft for your little one(s).
Hands-on Hot Air Balloon Crafts for Preschoolers
The crafts below help kids develop important skills like fine motor, creativity, and direction following. You can also incorporate color identification and counting into some of these. Look through these great crafts to find the right one(s) for your child. Be sure to check out the linked websites for more pictures and information.
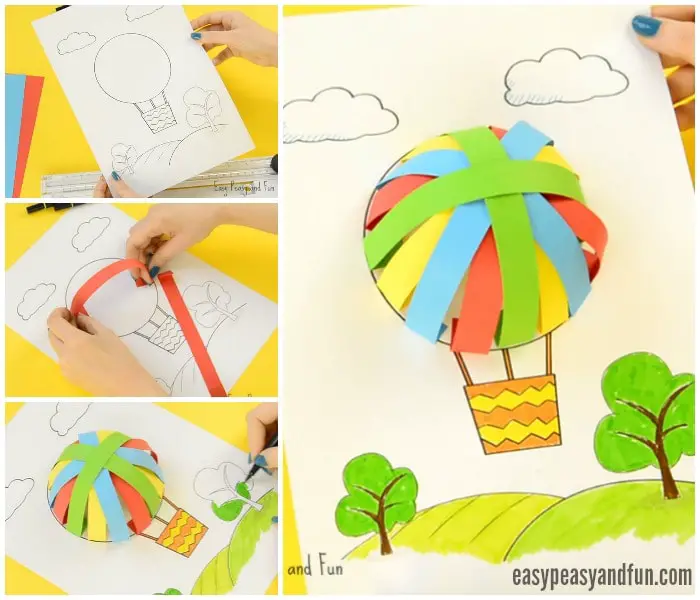
Up, up, and away! This 3D hot air balloon is fun to make and will stand out in any room. You can use the template provided or unleash your child’s creativity by having them draw a hot air balloon and background on their own (or with your help). Once the background is ready and colored, if desired, cut 8 strips of brightly colored paper and bend them at the ends (this is shown in the example at EasyPeasyAndFun, so check it out there.) You can use whatever colors you like but we recommend choosing 4 colors and using 2 strips per color.
One at a time, take the bent ends of the strips and glue the short end to the paper, leaving the rest of the strip arched out for the 3D effect. Use a strip of the same color at a 90-degree angle to the first. Then offset the next color slightly and repeat this step until all strips are glued into place. Each strip should overlap the previous ones to create a dome-like shape.
What a fun way to create a hot air balloon with simple materials you likely have on hand. Kids will love creating this and you can discuss the difference between 2D and 3D shapes and practice color identification, as well.
Materials:
- Balloon template or draw your own
- 4 bright colors of construction paper
- Scissors
- Glue
- Crayons, colored pencils, or markers
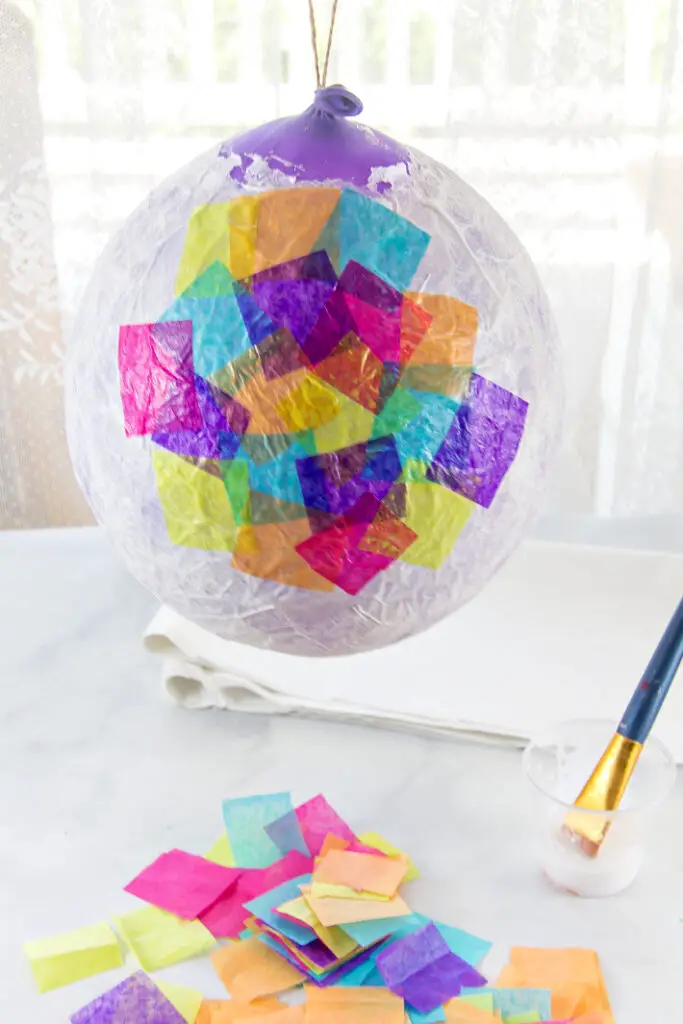
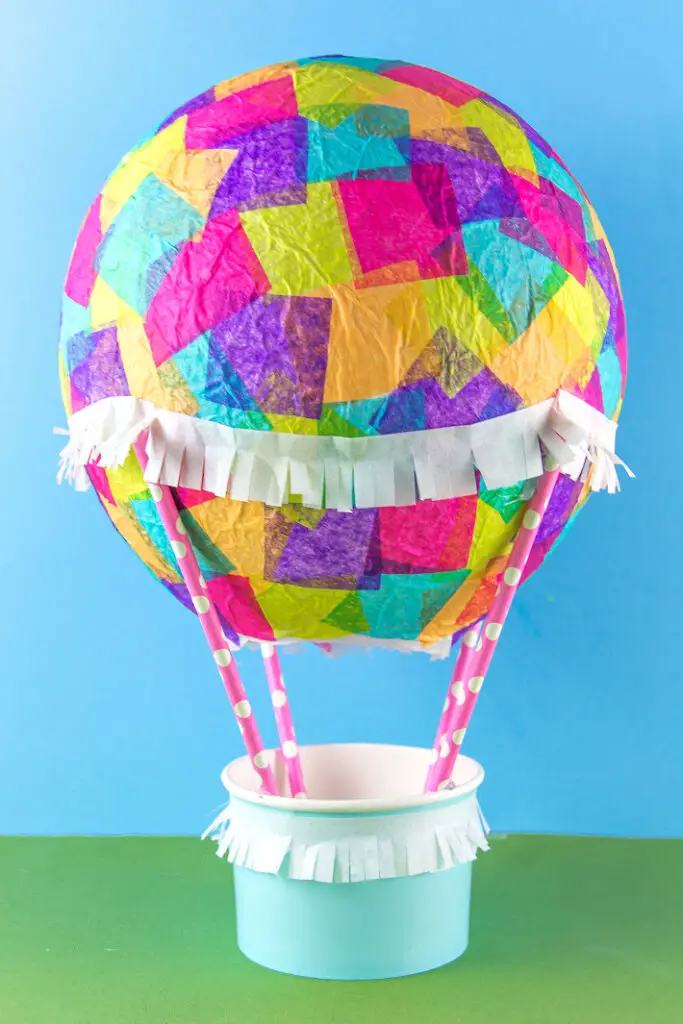
Although this craft takes time to dry, the end result is well worth it. Since you’ll be working with paper mache, this needs several layers with dry time between each. Just a fair warning so you allot enough time.
If you have tissue paper laying around from opened gift bags or leftovers from bags you made, you can use these to save money and help recycle materials. If not, its cheap and easy to find at most stores. Cut several colors of brightly colored tissue paper and some white tissue paper into small 1.5-inch squares. Some kids can do this task but young kids may need help from an adult.
You will use 5-6 layers of tissue paper, so keep cutting. Now, grab your paper cup and glue 4 straws inside at an outward angle from the cup. This will be what supports the finished balloon, so make sure they are angled and evenly spaced. A glue gun is recommended for this step.
Next, you need to blow up your balloon Be sure it is big enough to sit inside your straw supports without sinking down too low. Mix half a cup of water with half a cup of glue and paint this onto small sections of the balloon adding white tissue paper as you go. Once you place tissue paper, brush a layer of the glue mixture over the top. Overlap the paper as you go, ensuring you cover the entire surface of the balloon. Repeat this 2-3 times and then allow to sit overnight to dry.
After 24 hours, add 2 more layers of white tissue paper using the same method. Finally, add a layer of colored tissue to the top to finish the masterpiece off. Once the craft is completely dry (after another 24 hours), you can carefully pop the balloon and pull it out, leaving the paper balloon intact. Set this inside your straw supports and glue it into place. For more tips and detailed images, visit KidsActivitiesBlog.
Materials:
- White tissue paper
- Multiple bright colors of tissue paper
- Lots of school glue
- Glue gun
- Water
- Paintbrush
- Balloon
- Paper cup
- 4 straws
- Scissors
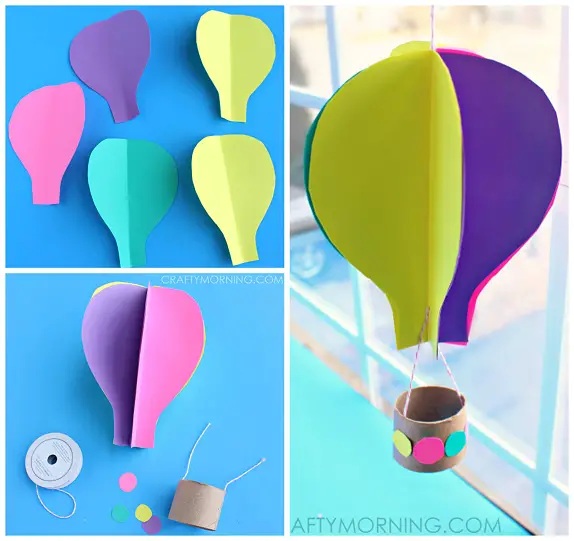
This spinning hot air balloon is a fun decoration for any room or even to hang on a tree outside to watch it spin. Kids will love seeing the way the wind causes the balloon to move. It also couldn’t be easier to make.
Start by cutting out 5 colored balloon shapes. Make these as close to the same size as possible. This step can be done by an adult or if your child has good scissor skills, they can do it themselves. Fold each balloon in half and glue one half of one to half of the other. See this step in action at CraftyMorning.
Cut a toilet paper roll into your desired basket size ⅓-½ of the roll is a good size. Tape some string or twine to the inside of the roll and decorate your basket with various colors, shapes, or designs. Then tape the other end of the string to the 3D balloon. Add some string to the top for hanging and your decoration is ready! This is a great activity for any time of the year and can be incorporated into a movement or science lesson, too!
Materials:
- 5 colors of construction paper
- String or twine
- Toilet paper roll
- Tape
- Glue
- Printed template (optional)
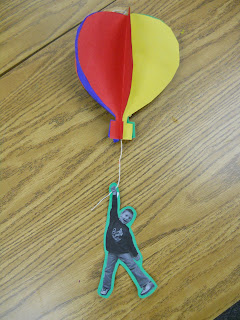
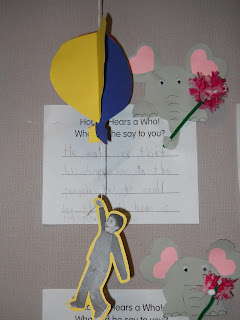
Oh, the places you’ll go! If you are reading or have read the book by Dr. Seuss, this is a fun way to place your child in the story. Start off with balloons cut from 5 different colors of construction paper. Fold each in half and glue the halves together until you have a 3D balloon.
Have your child pose as if they are holding onto the string of a balloon and snap a pic. Print this out and glue it to a colored background. Carefully cut around the edges of the picture, leaving a bit of color to help the picture stand out and remain sturdy. Attach the picture to the balloon and add a string to the top for hanging. Children can also decorate the balloons with patterns or stickers if desired.
This is a great craft for a class or just for you to do at home with your child. It is especially great if you tie it back to Oh, The Places You’ll Go by Dr. Seuss and it becomes a keepsake for you and your child. You can even bring it out at high school graduation to remind them of the endless possibilities in life too. Check out MrsTsFirstGradeClass for pictures to help you out.
Materials:
- 5 sheets of colored construction paper
- Glue
- Picture of your child pretending to hold a balloon string
- Scissors
- String
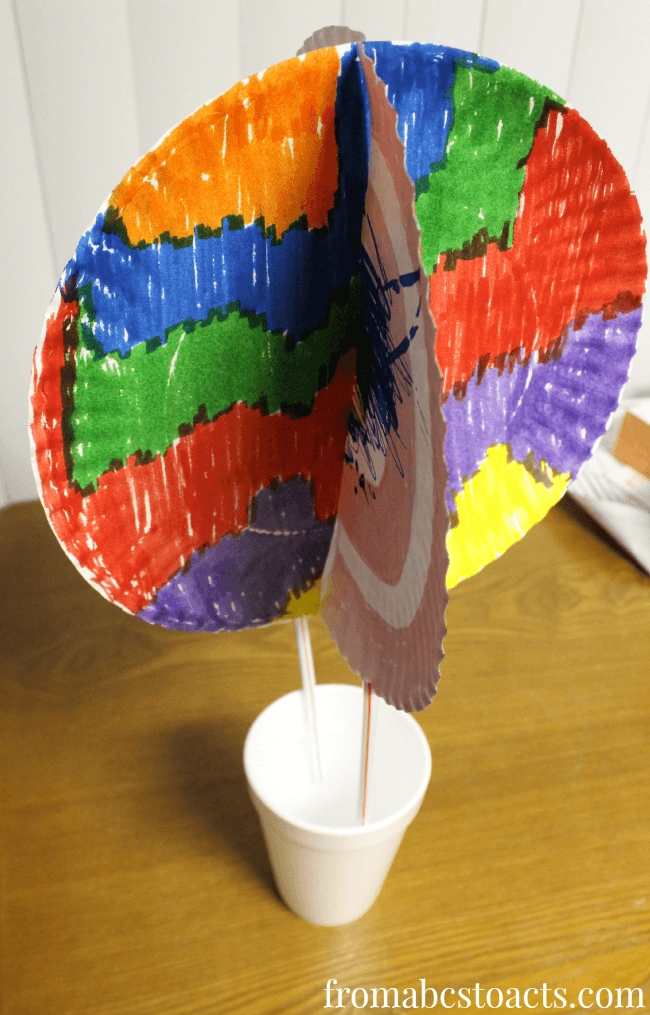
Looking for a quick craft that doesn’t require any special supplies? You’ve got it here. This foam cup craft uses materials that you likely have on hand, so you can set it up with little lead time. Tape 2 straws to the inside of a foam cup. These should create a “V” shape angled out from the cup. Cut a slit into the outer end of each straw (this will need to be done by an adult.)
Here’s where creativity comes into play. Turn your child loose on decorating 2 white paper plates. They can use crayons, markers, stickers, glitter, paint, or other crafting materials to make the balloon as unique and beautiful as they are. The sky’s the limit here. Be sure to decorate both sides of the plates since this will be a 3D balloon.
Cut a slit from the edge to halfway down each paper plate and slide the slits together to form an “X” shape. Finally, slide the plates into the slits in your straws to secure them into place and you have a beautiful balloon from any angle. For more inspiration, visit FromABCstoActs.
Materials:
- 2 white paper plates
- 1 foam cup
- 2 straws
- Scissors
- Decorating materials (paint, crayons, markers, glitter, sequins, buttons, stickers, etc.)
- Tape
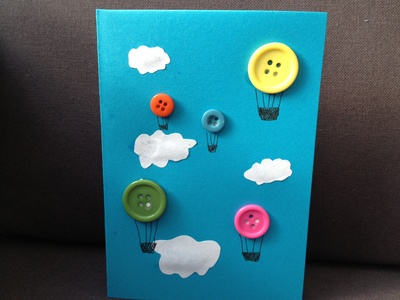
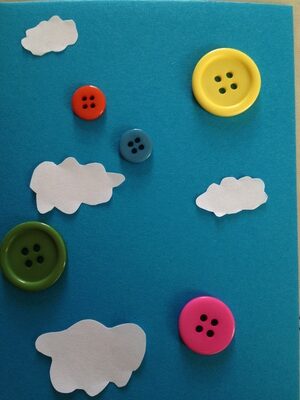
Button, button, who’s got the button? Well, you likely have random buttons in a bag or drawer somewhere. Put those to good use with this easy and fun balloon craft. Grab a variety of buttons (different colors, sizes, and types.) Lay them out in random positions on a piece of blue paper. Be sure to leave room for the baskets below each balloon.
Glue your buttons into their spots. Draw or cut out clouds to add to the background. Now, draw a basket below each with lines to connect to the balloon. Let your child be creative and make this their own by adding any other details they desire. That’s all there is to this simple craft! For more on this craft, visit MyKidCraft.
Materials:
- Blue and white construction paper
- A handful of various types, colors, and sizes of buttons
- Glue
- Markers, crayons, or colored pencils
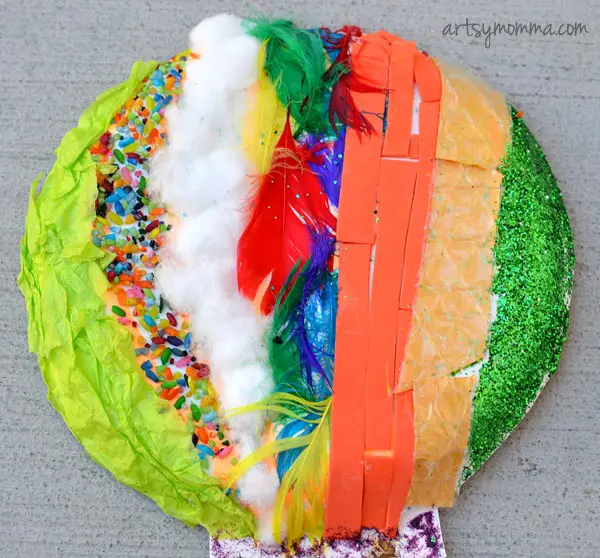
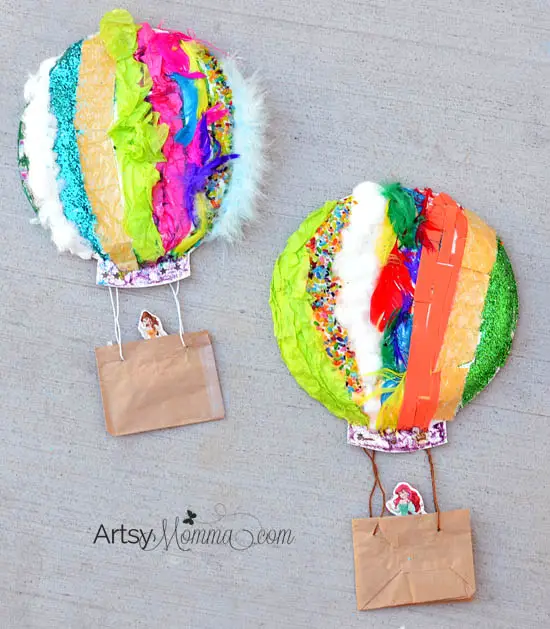
Kids love to use their senses and adding tactile ways for them to create actually helps them learn. This great hot air balloon craft from ArtsyMomma does exactly that. Start with a thicker paper plate. You’ll be adding some weight to it, so you want to make sure it can hold up to everything you’re attaching. Cut the edge off, leaving a small section as the base of the balloon.
Draw lines to section the balloon into 6-7 parts. Cover one section at a time completely with glue and choose a textured item to fill that area. Use beans, rice, feathers, glitter, tissue paper, crepe paper, cotton balls, bubble wrap, ribbon, and any other texture. If you use scented markers, that too incorporates another sense into the mix. Once dry, cut a paper bag to create a basket for your balloon. Punch holes in the base of the balloon and the paper and thread string through each side to secure the basket. Tie the ends together and tuck them into the paper bag “basket” to keep hidden.
You can add your favorite characters or even a picture of your child to the basket to liven it up. This is an excellent decoration for your classroom, living room, or even for a child’s bedroom. Be sure to discuss the properties of the textures and give your child plenty of time to explore each.
Materials:
- Paper plate
- Scissors
- Glue
- Textured items including beans, rice, sandpaper, glitter, cotton balls, feathers, ribbon, bubble wrap, fabric, felt, or any other items you can come up with
- Hole punch
- String
- Lunch bag
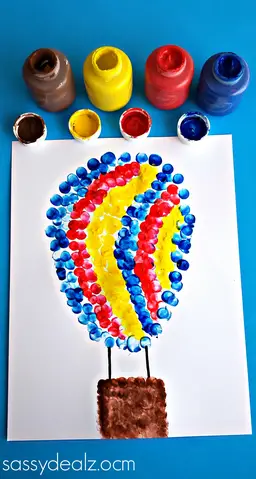
What a cute craft for any day of the week. All you need for this is paint, paper, and some little fingers. Kids love fingerpainting and this craft found on CraftyMorning takes it a step further by using fingerprints instead of just smearing paint with your fingers.
Start by drawing an outline of a balloon to keep everything in place. Then, grab several colors of paint and have your child dip their pointer finger into one color at a time. Allow them to make a pattern, this can be a horizontal, vertical, or haphazard pattern. It’s all up to your child. Clean their fingers between colors and have them add another color and then another until the balloon outline is filled in with their own creation.
Leave a space below the balloon and have your child use brown paint and their fingerprint to fill in a square box as the balloon’s basket. Finally, draw lines to connect the balloon and the basket together. If desired, your child can draw a background or add a passenger to the basket.
Materials:
- White construction paper or cardstock
- Several colors of paint including brown
- Marker(s)
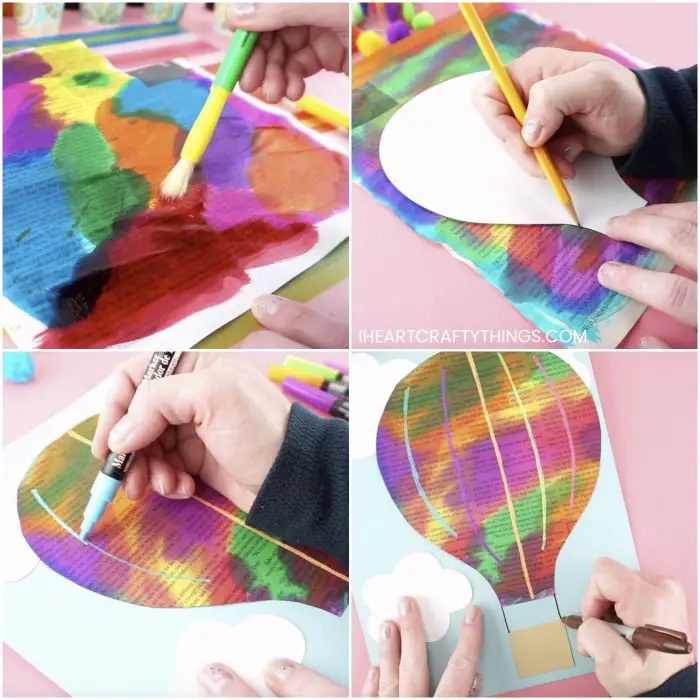
Add fun to your weather unit or just for a crafty day with this newspaper craft by IHeartCraftyThings. Start this craft by painting a piece of newspaper with watercolors. You can paint it one color or make it as colorful as you desire. Download and print the balloon templates from the site. Trace these shapes onto your newspaper and cut them out.
Cut some fluffy clouds out of white cardstock or construction paper and glue them to a piece of blue cardstock. Next, glue your newspaper balloon to the top of the paper, overlapping the clouds. Cut a basket out of brown cardstock and glue it to the bottom of the paper and connect the two with drawn lines.
Lastly, break out chalk markers to decorate and add detail to your balloon. This is a beautiful way to recycle newspapers while creating a stunning piece of art created by your child.
Materials:
- Hot air balloon template
- Newspaper
- Liquid watercolors
- Paintbrush
- Cardstock (blue, white, brown)
- Scissors
- Glue
- Chalk markers
- Marker
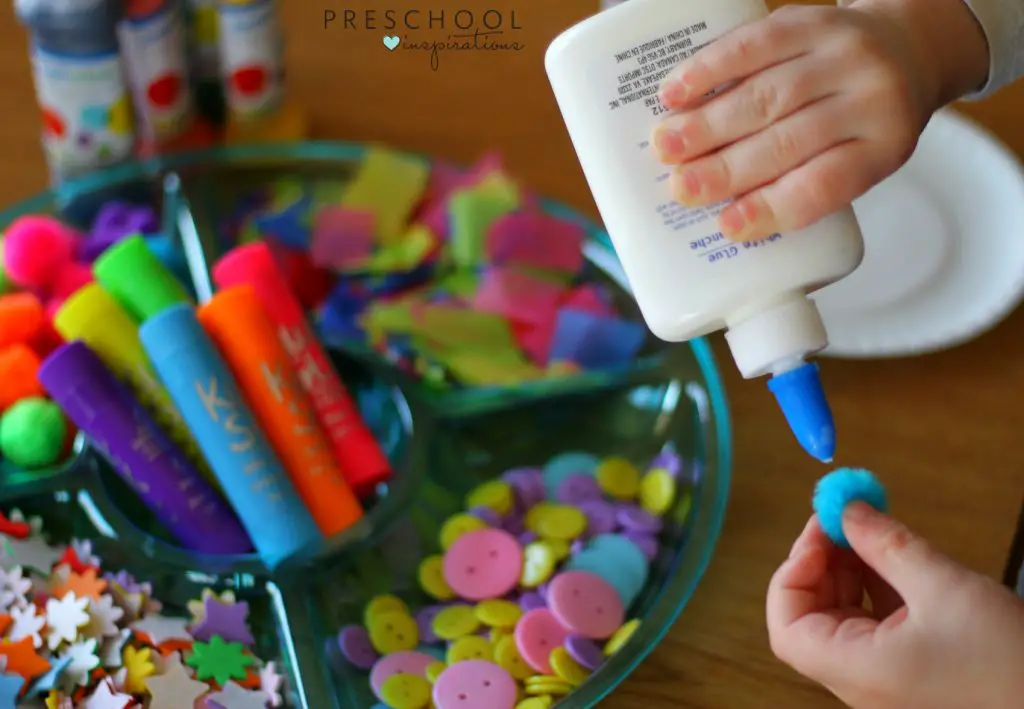
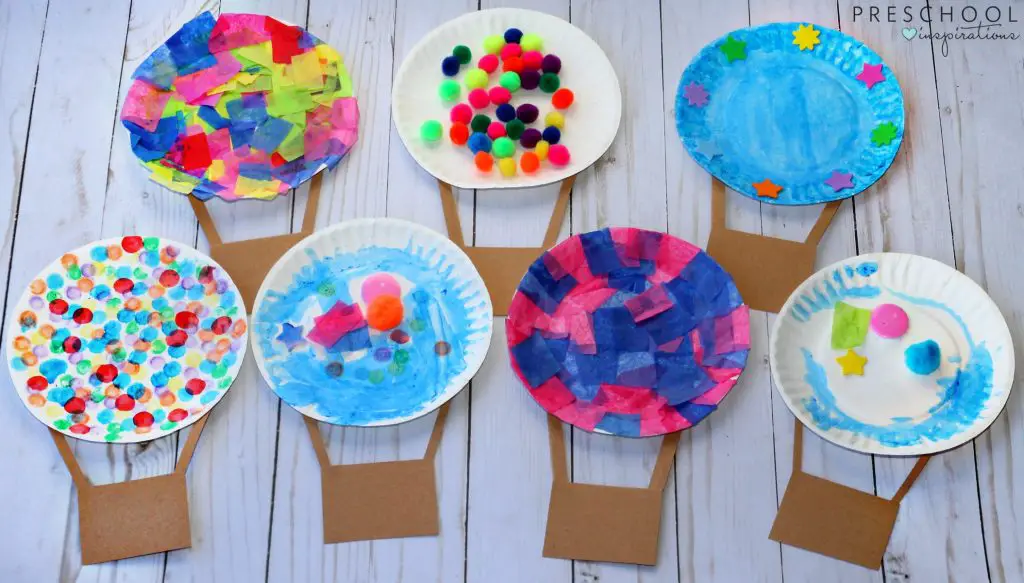
Open your child up to let their full creativity flow with this craft. Gather a variety of supplies including, pom poms, buttons, tissue paper, foam stickers, shapes, beads, washi tape, ribbon, or any other leftover supplies you have laying around. Put these into a divided tray, give your child a paper plate and some glue and let them loose.
Also provide markers, crayons, paint, and other supplies for the ultimate in creativity. When their creation is complete, cut a basket and attachment arms from brown paper and glue it to the back of their plate. This craft idea from PreschoolInspirations will showcase your child’s personality and creativity. Use this in a weather unit, with Dr. Seuss’s Oh the Places You’ll Go, or anytime you need to use up some supplies.
Materials:
- Paper plate
- Brown construction paper
- Scissors
- Glue- lots and lots of glue
- Various crafting materials (buttons, foam stickers, tissue paper, sequins, glitter, pom poms, cotton balls, etc.
- Divided tray
- Markers, paints, crayons, etc.
Conclusion
Hot air balloon crafts can be added to various curriculums, used as a book companion for stories like Oh the Places You’ll Go by Dr. Seuss, or as a stand-alone crafting project. No matter your reason, you’ll find a variety of great options on our list above. Choose the one(s) that fit your needs best and be sure to let us know how it goes. Thanks for floating by!
Other preschool crafts and activities you might also like:


