Fresh, juicy, and sweet apples remind children that the fall season has arrived. These fruits have a distinct shape that is recognizable by young children. It comes in varieties of different colors and sizes.
Check out these ten great activities children will find exciting and fun, perfect for the apple-themed lessons.
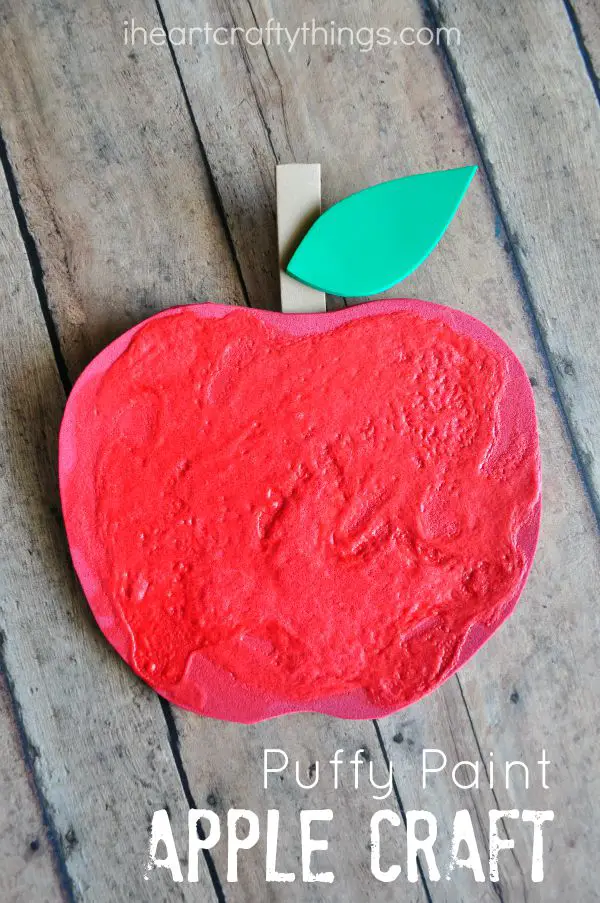
This apple craft provides a wonderful sensory experience for children to enjoy. First, it uses an art technique called stamping to make prints on paper. The making of the puffy paint will provide children with a satisfying experience.
Cutting the template and applying the puffy paint will help improve children’s fine motor skills. Stamping will strengthen the children’s hand muscles. Make the apples in different sizes and colors for children to compare.
Download and print the free apple template from the site. This comes in three designs and two different sizes. Let the children choose and cut out their preferred template.
Dip the round edge of a toilet paper roll in the red paint. Press this on the apple to create a print. Repeat this until the apple is covered with red circles.
Make the puffy paint by adding the same amount of glue, shaving cream, red food coloring, and glitter in a sandwich bag. Seal it well and let the children squish it until it is thoroughly mixed. Repeat the process using green food coloring for the leaves.
Once the puffy paint is ready, make a hole by cutting off a tiny piece in the sandwich bag’s corner. Squeeze this on the apple’s outline. Do the same for the puffy green paint to make the leaves.
Let this dry and glue on a black cardstock to highlight the colors.
For this activity, you will need:
- Printed apple template
- Toilet paper roll
- Paint
- Glitter
- Glue
- Shaving cream
- Food coloring
- Sandwich bag
- Scissors
- Black cardstock
For more information on this activity, go to 123Homeschool4Me.com.
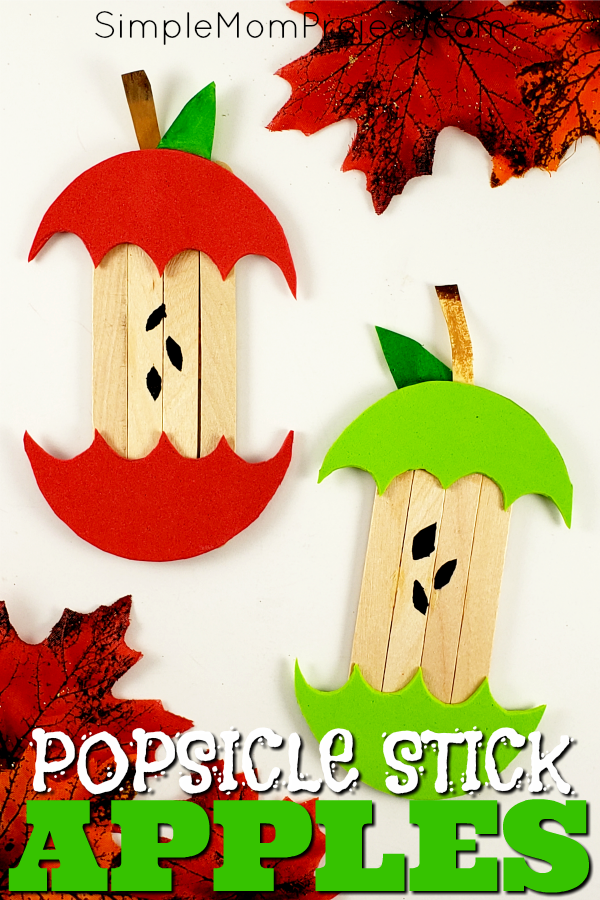
These partially eaten apples are an excellent craft for decoration during the fall season. They are lovely props to retell stories that mention apples, such as Snow White and the Seven Dwarfs.
Children’s fine motor skills will improve as they cut the craft foam and assemble the apples. Cutting the scallop edges of the apple may be challenging for young children. Use pre-cut pieces or draw scallop lines as a guide when cutting.
Make several of these in different colors to teach color recognition skills. Vary the number of apple seeds for children to practice their counting skills.
To make the apple’s core, line up four craft sticks together and glue a fifth stick diagonally as support. Allow the glue to dry.
Next, cut a circle from the red craft foam. Divide the circle into two and trim the straight edge. Carefully cut scallop lines for it to appear eaten.
Then, glue these at each end of the sticks, making the scallop edges face each other.
Cut out the leaf and stem from cardstock and attach them to the craft sticks. Finally, use the black marker to draw the seeds.
For this activity, you will need:
- Craft sticks
- Craft foam
- Scissors
- Glue
- Black marker
- Cardstock
For more information on this activity, go to SimpleMomProject.com.
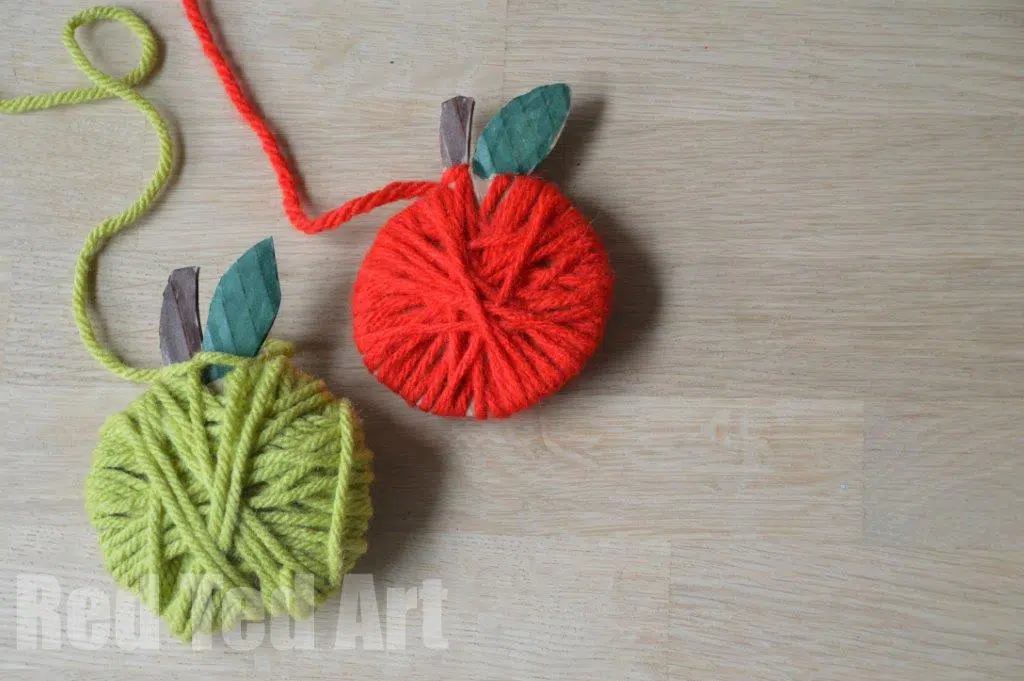
This apple craft is simple to make and requires readily available materials to make. Make several of these and tie them with a string to make a garland.
Children will improve their fine motor skills and coordination by making these apples. Have them make these into different colors to teach color recognition skills. Hang them in a specific order to introduce patterns.
Make the apple by outlining the shape on cardboard. Remember to add the stem and leaf. Cut these out and have the children use a green marker to color the leaf. Snip a small part between the leaf and the apple. This will hold the end part of the yarn.
Begin wrapping the apple cardboard until fully covered. The site recommends that children turn the apple each time to prevent a bulge in the middle.
Also, if making a bigger size, snip the edges of the cardboard for the yarn to stick in. This will prevent it from unraveling.
For this activity, you will need:
- Cardboard
- Yarn
- Scissors
- Marker
For more information on this activity, go to RedTedArt.com.
4. Pipe Cleaner and Straw Apples
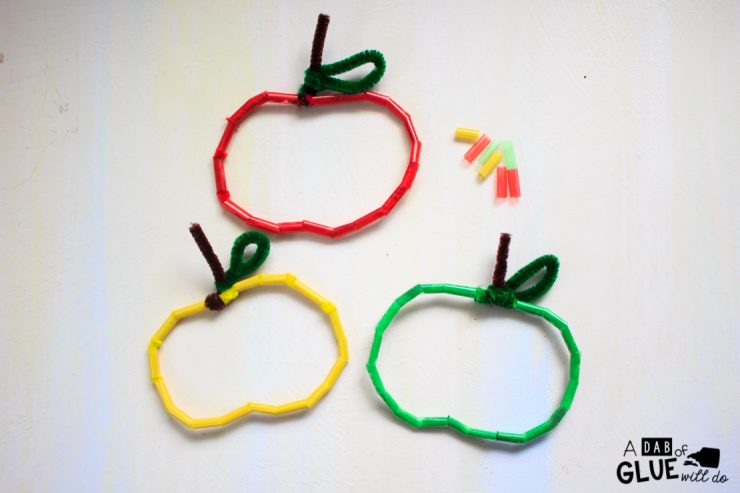
Lacing crafts will challenge children’s eye-hand coordination skills. This apple craft will help children work on their fine motor skills and coordination while making colorful apples that can be used as decorations.
If children struggle with the small straws, use the large variety designed for milk teas. Make these apples in different colors to teach color recognition skills.
Use these apples as Math mats to practice one-to-one correspondence. Provide a number card and use colored buttons that match the apple’s color or pompoms as counters. Place these inside the apples when counting.
Start by letting the children cut the straw into small pieces. The site suggests allotting one straw for every pipe cleaner. Twist one of the ends of the pipe cleaner to prevent the straws from sliding off.
Remember to use the same color of materials. Insert the pipe cleaner through each straw piece until complete. Twist the ends to seal. Cut a small piece of green and brown pipe cleaner. Twist them to make the stem and leaf.
For this activity, you will need:
- Pipe cleaners
- Drinking straws
- Scissors
For more information on this activity, go to ADabOfGlueWillDo.com.
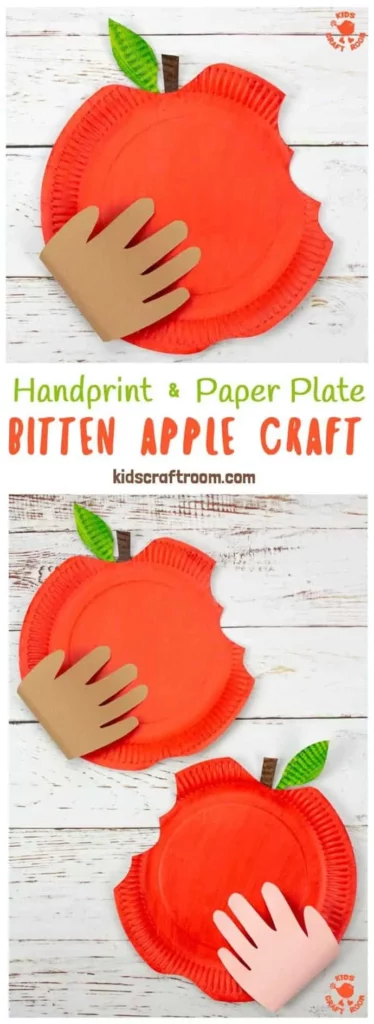
This apple craft is simple and easy to make. Children will love this handprint craft customized based on their skin color. Their fine motor skills will improve as they trace their hands, paint, and cut the pieces to complete this craft.
Use this craft to go with the book “Autumn is for Apples” by Michelle Knudsen. The story is about a family that went to an orchard to pick apples. It ends with the line, “Autumn is for apples, and apples are for me.”
Children may pretend to take a bite of their apples like the girl in the story. Their oral language skills, comprehension, and memory will improve as they retell the story.
To make the apple, draw curved lines on a paper plate resembling bites. Let children cut these out. Use these scraps to cut out a leaf and a stem. Paint the apple red, the stem brown, and the leaf green.
Allow these to dry, and glue them together. Next, trace and cut out the child’s hand on construction paper with the same skin tone as the child. Glue this to the back of the paper plate.
Take the fingertips of the handprint and glue them on the front part of the apple.
For this activity, you will need:
- Paper plate
- Paint
- Paintbrush
- Skin tone shades of construction paper
- Scissors
- Glue
For more information on this activity, go to KidsCraftRoom.com.
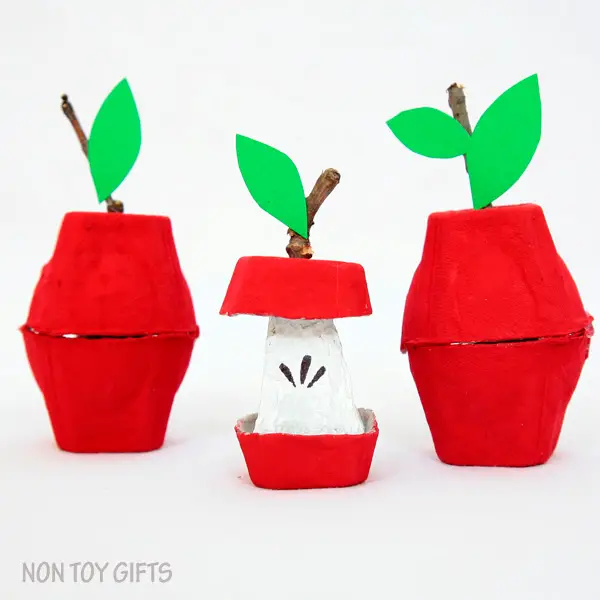
This cute apple craft is made from egg cartons and can be used to teach children one of the ways to practice recycling. Use this as a mini mystery box during circle time to hide the color or shape of the day.
Since the apple comes in two pieces, use this to teach children letter recognition skills by writing the uppercase letter on the top part and its lowercase counterpart on the bottom.
Make sets of apples with identical leaves. Children may match the apples based on the number of leaves. This is good counting practice for children and will improve their matching skills.
To make the apples, cut out two egg carton cups and paint them red. Once dry, poke a hole in one of the cups and insert a stick. Use the glue to keep it in place. Next, glue the two egg carton cups.
Cut out leaves from the green cardstock and attach these to the stick.
For this activity, you will need:
- Egg carton
- Paint
- Paintbrush
- Stick
- Green cardstock
- Scissors
- Glue
For more information on this activity, go to NonToyGifts.com.
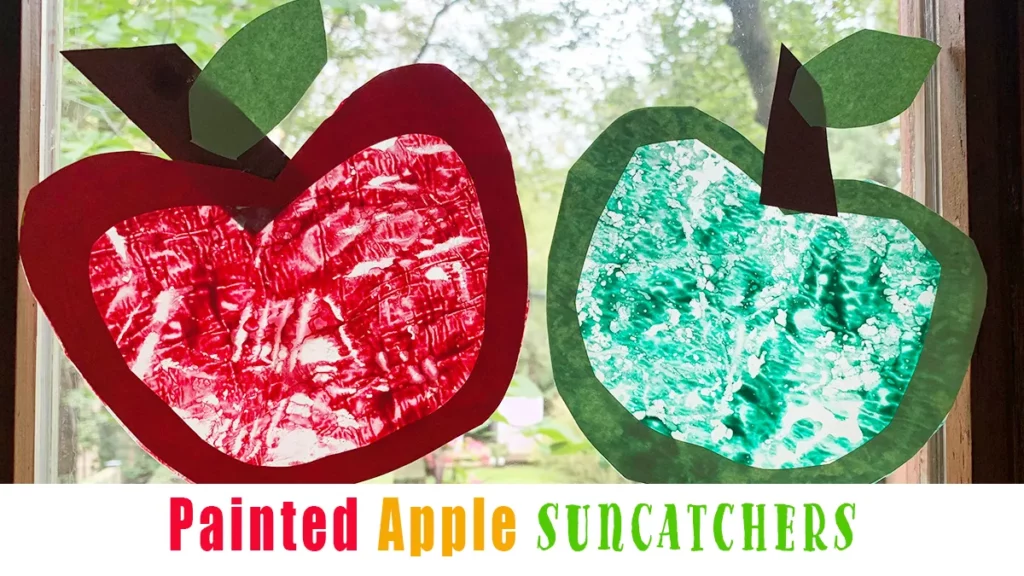
Suncatchers are a fantastic way to decorate windows where sunlight shines through. These apple suncatchers are perfect for the fall season. Make this craft to help children improve their paper-cutting skills.
Using a potato masher to add color is a great art lesson on stamping techniques. If round potato mashers are unavailable, use other utensils, such as a strainer or a fork, to create interesting patterns.
Make the apples in different colors to teach color recognition skills. These apples in various sizes are good tools to teach children comparison.
Start by laying out the wax paper and attach sticky tape on each side to keep it from curling. Next, make the prints. Squeeze some red paint on a paper plate. Dip a potato masher in it and tap the excess paint. Press it on wax paper.
Place another wax paper on top of the prints to seal them. Set this aside. Take the red construction paper and cut out an outline of an apple. Glue this on the wax paper and cut it out. The red paper will become the border for the apple.
Cut out leaves from green paper and stem from brown. Attach these to the apple. Use sticky tape to attach the apples to the windows.
For this activity, you will need:
- Wax paper
- Paint
- Scissors
- Paper plate
- Glue
- Sticky tape
- Construction paper
- Potato masher
For more information on this activity, go to HappyToddlerPlaytime.com.
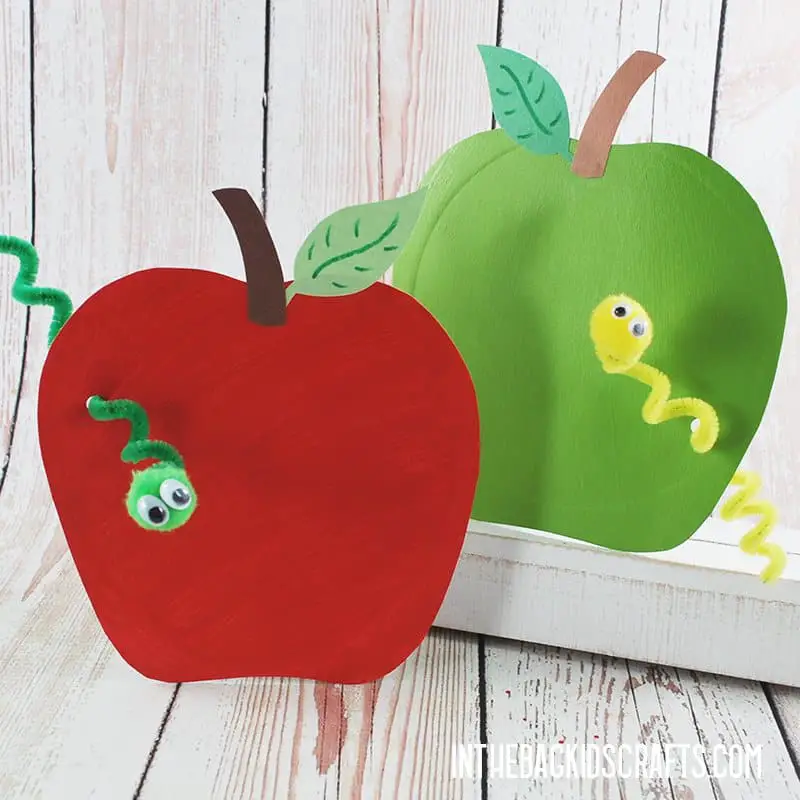
This apple craft is perfect to go with the book “5 Little Apples” by Yosuke Yonezu. It is a lift-the-flap book with a hidden picture. Each page shows the apples getting eaten by an animal. A caterpillar ate the last apple before turning into a butterfly.
Children will improve their fine motor skills as they paint the apple, cut the leaves and stem and twist the pipe cleaner. Use a different color of apples and worms for children to match. This will teach them color recognition.
Use the apples to write their names or letters of the alphabet. This will help improve their letter recognition skills and recognize their printed names.
To make the apples, paint a paper plate red and let this dry. Download and print out the free apple template from the site. Cut this out and trace it onto the paper plate. Cut out the red apple and use construction paper to make the stem and leaf.
Attach the leaf and stem to the apple. Use the hole puncher to make a small hole on one side of the apple.
To make the worm, take a pipe cleaner and twist it around a pencil to curl it. Attach the pompom on the end. Glue the eyes on the pompom. Insert the worm in the hole.
For this activity, you will need:
- Printed apple template
- Paint
- Paper plate
- Pipe cleaner
- Pencil
- Pompom
- Googly eyes
- Marker
- Hole puncher
- Construction papers
For more information on this activity, go to InTheBagKidsCrafts.com.
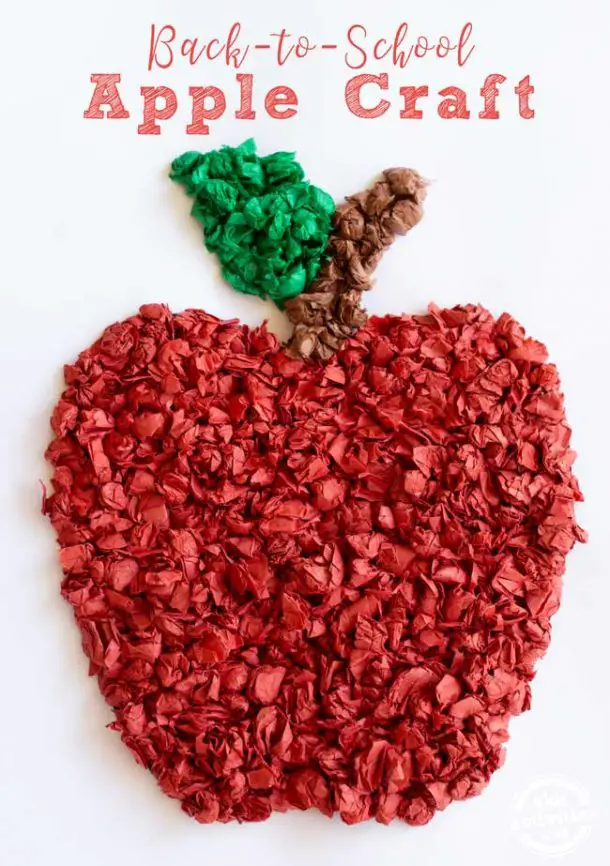
This excellent apple craft can double as a work of art. This tissue paper apple can be framed to display the children’s labor of love. When children make this craft, they improve their fine motor skills and strengthen their finger muscles.
This craft will provide a sensory experience for children while teaching them patience. Make this craft in different colors and explain through a Science lesson that apples come in different varieties with other attributes.
Use pictures and videos for this activity. If possible, show children real apples so they can see their differences and similarities.
Start by downloading and printing the apple template on white cardstock. Cut out the tissue paper into small pieces. Spread glue in a small portion of the apple. Crumple each piece of tissue paper and attach it to the apple.
Continue working until no space is left on the apple. Repeat the process using green tissue paper for the leaf and brown for the stem.
For this activity, you will need:
- Printed apple template
- Cardstock
- Tissue paper
- Glue
- Scissors
For more information on this activity, go to KidsActivitiesBlog.com.
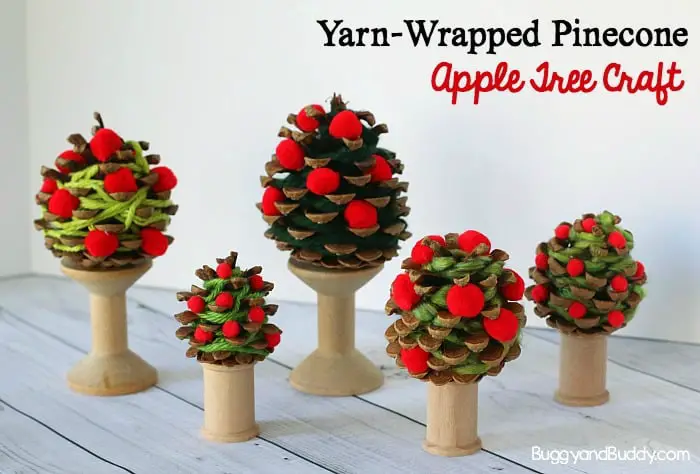
This unique apple craft does not only focus on just the fruit but the tree as well. This is perfect as decorations for the fall or this season’s holidays. This craft will show children that apples, like most fruits, come from trees.
Make several of these with various numbers of pompoms for children to practice their counting skills. Using different sizes of pinecones will allow children to compare their sizes and even arrange them in order.
Use different colors of pompoms for children to learn color recognition, which can be used to teach patterns.
Ensure that the pinecones are clean and sanitized. Take a long piece of green yarn and wrap this around the pine cone several times. Glue the ends to secure. This will become the leaves on the tree.
Attach the red pompoms to the pinecone with glue. These will be the apples on the tree. Finally, glue the tree on a wooden spool. This part is the apple tree’s trunk.
For this activity, you will need:
- Pinecones
- Yarn
- Pompoms
- Scissors
- Glue
- Wooden spool
For more information on this activity, go to BuggyAndBuddy.com.
Conclusion
Apples are one of the most common fruits children are familiar with. These apple crafts will allow children to explore and learn more about this fruit. Working on these will improve their different skills.
Consider using these and modify them whenever necessary to accommodate all types of learners.
Thank you for reading!


